
The Ultimate Guide to Deep Cleaning Your Toaster Oven: Restore Shine and Boost Performance
When was the last time you gave your trusted toaster oven a thorough cleaning? If the answer is “I can’t remember,” then now is the perfect moment to tackle this essential kitchen chore! Toaster ovens are workhorses in many kitchens, making quick meals and snacks a breeze. However, their frequent use often leads to a significant buildup of food debris, stubborn grease, and baked-on grime, not just inside but even on the exterior surfaces. Ignoring this buildup can lead to unpleasant odors, decreased efficiency, and even a potential fire hazard. Attempting to clean it without the right products and techniques can be frustrating and might even damage your appliance.
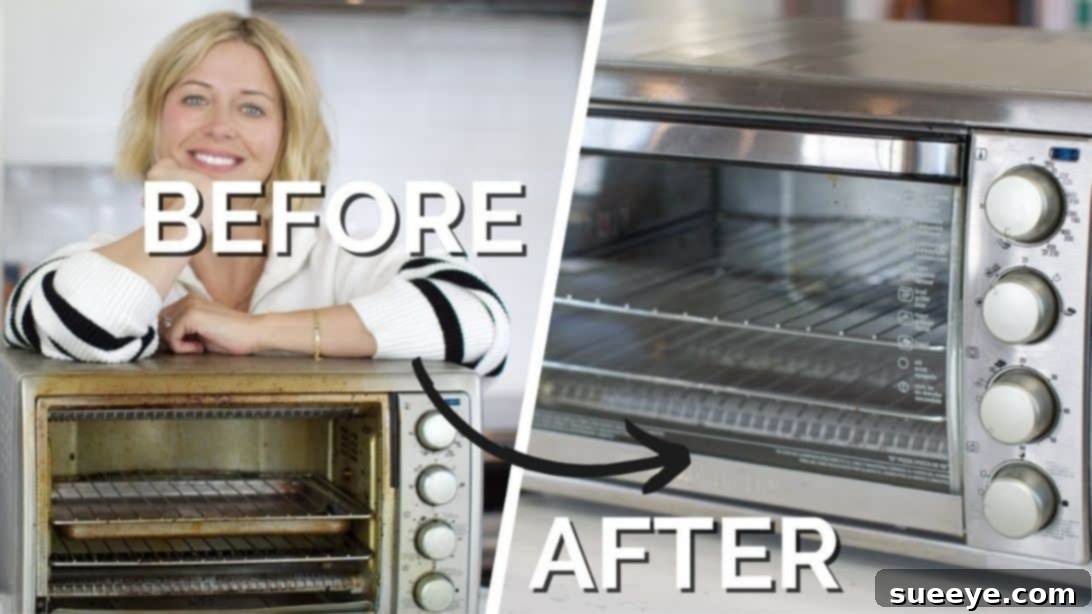
But there’s no need to worry! This comprehensive guide, inspired by expert cleaning methods like those from GoCleanCo, will walk you through the most effective way to deep clean your toaster oven. We’ll show you how to cut through tough grease and eliminate stubborn burnt food, making your appliance look and perform like new again. Proper maintenance is the secret to extending the life of your kitchen appliances, and your toaster oven is no exception. Even if your toaster oven has seen better days, this technique can dramatically improve its appearance and functionality. I’ve personally tried this method on an older, heavily soiled toaster oven, and the results were surprisingly impressive – it truly makes a significant difference!
RELATED: Here’s How to Clean Oven Buildup Like a Pro
Why Regular Toaster Oven Cleaning Is Crucial
Beyond just aesthetics, a clean toaster oven offers a multitude of benefits for your kitchen and your health:
- Enhanced Hygiene and Safety: Food particles and grease can harbor bacteria and emit unpleasant odors. Regular cleaning eliminates these contaminants, ensuring your food is cooked in a hygienic environment and reducing the risk of foodborne illnesses. Accumulated grease is also a significant fire hazard, making cleaning a critical safety measure.
- Optimized Performance and Efficiency: A layer of grime on heating elements and interior surfaces can hinder heat distribution, making your toaster oven less efficient. This means longer cooking times, unevenly cooked food, and increased energy consumption. A clean interior allows for proper airflow and even heating, ensuring your meals are cooked perfectly every time.
- Extended Appliance Lifespan: Just like any other appliance, proper care and maintenance can significantly extend the life of your toaster oven. Buildup can cause components to work harder, leading to premature wear and tear. By keeping it clean, you’re protecting your investment and delaying the need for a costly replacement.
- Improved Food Flavor: Old, burnt food residue can impart stale or burnt flavors to new dishes, especially when the oven heats up. A clean toaster oven ensures that only the intended flavors make it to your plate.
- A More Inviting Kitchen: A sparkling clean appliance contributes to a tidy and inviting kitchen space, reflecting your commitment to a well-maintained home.
Preparation and Essential Tools for a Sparkling Toaster Oven
Before you begin the cleaning process, ensure your toaster oven is completely cool and unplugged from the power outlet. Safety is paramount when dealing with electrical appliances and cleaning agents. Gather all your supplies in one place to make the process smooth and efficient. While specific brands are recommended for their effectiveness, the key is using powerful degreasing agents and abrasive scrubbing tools.
Things You Need to Clean a Toaster Oven
- Dishwasher Pods (3): These concentrated detergent packets are surprisingly effective at breaking down baked-on grease and food on racks and trays when dissolved in hot water.
- Dawn Powerwash Dish Spray: Renowned for its grease-cutting power, this spray directly tackles stubborn grime on interior surfaces, making scrubbing much easier.
- SOS Pad (or similar steel wool soap pad): The abrasive nature of an SOS pad is ideal for scrubbing away tough, caked-on residue from metal components without excessive effort.
- Mr. Clean Freak Mist (or another multi-purpose cleaner/degreaser): Excellent for a second pass on persistent stains, exterior cleaning, and general degreasing, ensuring a spotless finish.
- Weiman Stainless Steel Cleaner & Polish Spray: Perfect for restoring the shine to stainless steel exteriors, removing fingerprints, and protecting against future smudges.
- Rubber Gloves: Essential for protecting your hands from harsh cleaning chemicals and hot water.
- Warm Damped Cloths/Microfiber Towels: For wiping down surfaces and rinsing off cleaning products.
- Sink or Large Basin: For soaking removable parts.
How to Deep Clean Your Toaster Oven: Step-by-Step Guide
Follow these detailed steps to thoroughly clean every part of your toaster oven, ensuring a complete and lasting sparkle.
Step 1: Disassemble and Soak the Removable Parts
Begin by unplugging your toaster oven and allowing it to cool completely. Carefully remove all internal components: the wire racks, baking tray, and any metal pan. Place these items into a sink or a large basin filled with very hot water. Drop in three dishwasher pods. The hot water will activate the powerful cleaning agents in the pods, creating a concentrated solution that will begin to dissolve even the most stubborn baked-on grease and food particles. Let these components soak for at least 30 minutes, or longer for heavily soiled items, to give the solution ample time to work its magic.
Step 2: Tackle the Interior with Dawn Powerwash
While the removable parts are soaking, turn your attention to the main body of the toaster oven. Generously coat the entire inside surface with Dawn Powerwash Dish Spray, including the glass door, the walls, and the ceiling. Ensure you get into all the nooks and crannies where grease and food tend to accumulate. This powerful degreaser is designed to cling to surfaces and penetrate tough grime. Allow the Dawn Powerwash to sit for several minutes (5-10 minutes is usually sufficient) to break down the grease and loosen the baked-on food particles. For very heavy buildup, you might let it sit for a bit longer.
Step 3: Scrub and Initial Wipe Down
Once the Dawn Powerwash has had time to work, begin scrubbing the interior surfaces. Use an SOS pad or a durable scrubbing sponge for the most stubborn areas. Gently but firmly scrub all interior walls, the floor, and the inside of the door. You’ll notice the grime starting to lift away with relative ease. After scrubbing, take a clean, warm, damp cloth and thoroughly wipe down the entire interior to remove the loosened grime and the cleaning solution. Rinse your cloth frequently and continue wiping until the surfaces appear clean and free of residue.
Step 4: Deep Clean with Mr. Clean Freak and Exterior Detail
If you find that some grime or streaks still remain after the initial scrub and wipe, it’s time for a second pass. Repeat steps 2 and 3, but this time use Mr. Clean Freak Mist. This powerful multi-surface cleaner is excellent for dissolving any remaining residue and providing a deeper clean. As you work, remember to extend your cleaning efforts to the entire outside of the toaster oven. Spray the exterior with Mr. Clean Freak and wipe it down with a clean cloth, paying attention to control panels, handles, and sides. Once you’re satisfied with the cleanliness, use a warm, thoroughly damped cloth to wipe all surfaces (interior and exterior) again. This final rinse ensures all product residue is removed, preventing streaks and chemical buildup.
Step 5: Clean and Dry Removable Components
By now, your racks, metal pan, and tray should have had a good long soak. Don your rubber gloves and retrieve them from the sink. Using the SOS pad, vigorously scrub each item until all the softened grease and food buildup are completely removed. The dishwasher pod solution should have significantly loosened everything, making this step much easier. If you encounter any particularly stubborn, hard-baked food, consider letting those specific items soak overnight in a fresh solution of hot water and a dishwasher pod. Once thoroughly scrubbed, rinse all components under running water until they are free of soap and residue. Dry them completely with a clean towel before reassembling.
Step 6: Polish and Reassemble for a Pristine Finish
With the interior clean and the removable parts dry, it’s time for the final touch. For stainless steel toaster ovens, coat the exterior surfaces with Weiman Stainless Steel Cleaner & Polish Spray. Apply it according to the product instructions, typically by spraying onto a microfiber cloth and wiping with the grain of the stainless steel. This step will not only make your toaster oven shiny and new-looking but also help repel fingerprints and smudges, keeping it cleaner for longer. Once polished, carefully place the clean and dry racks, pan, and tray back into your toaster oven. Your appliance is now sparkling clean and ready for its next use!
Advanced Tips and Maintenance for a Long-Lasting Clean
To maintain your toaster oven’s pristine condition and prevent heavy buildup in the future, consider these additional tips:
- Regular Wipes: After each use, especially when cooking greasy foods, give the interior a quick wipe with a damp cloth once it has cooled down. This prevents fresh spills from baking on and becoming harder to remove.
- Crumb Tray Care: Empty and wipe the crumb tray regularly. This is often overlooked but can accumulate a surprising amount of debris.
- Protective Liners: For very messy foods like casseroles or cheesy dishes, consider using toaster oven-safe foil liners or silicone mats on your baking tray to catch drips and spills. Be cautious not to block vents or heating elements.
- Baking Soda Paste for Extra Tough Spots: For extremely stubborn baked-on carbon or burnt sugar that resists even the above method, a paste made of baking soda and a little water can be applied, left to sit for a few hours, then scrubbed. Always test on an inconspicuous area first.
- Frequency of Deep Cleaning: Depending on your usage, aim for a deep clean every 1-3 months. If you use it daily for greasy foods, monthly might be more appropriate.
Enjoy Your Sparkling Clean Toaster Oven!
Following this detailed guide will not only transform the appearance of your toaster oven but also enhance its performance and extend its life. You’ll enjoy a more hygienic cooking environment and the satisfaction of a truly clean kitchen appliance. Say goodbye to baked-on grime and hello to a shining, efficient toaster oven! Embrace these effective cleaning techniques, and your toaster oven will thank you by serving up delicious meals for years to come.