
DIY Cross Stitch Mini Pincushion Pillows: Crafting Joy for Every Seamstress
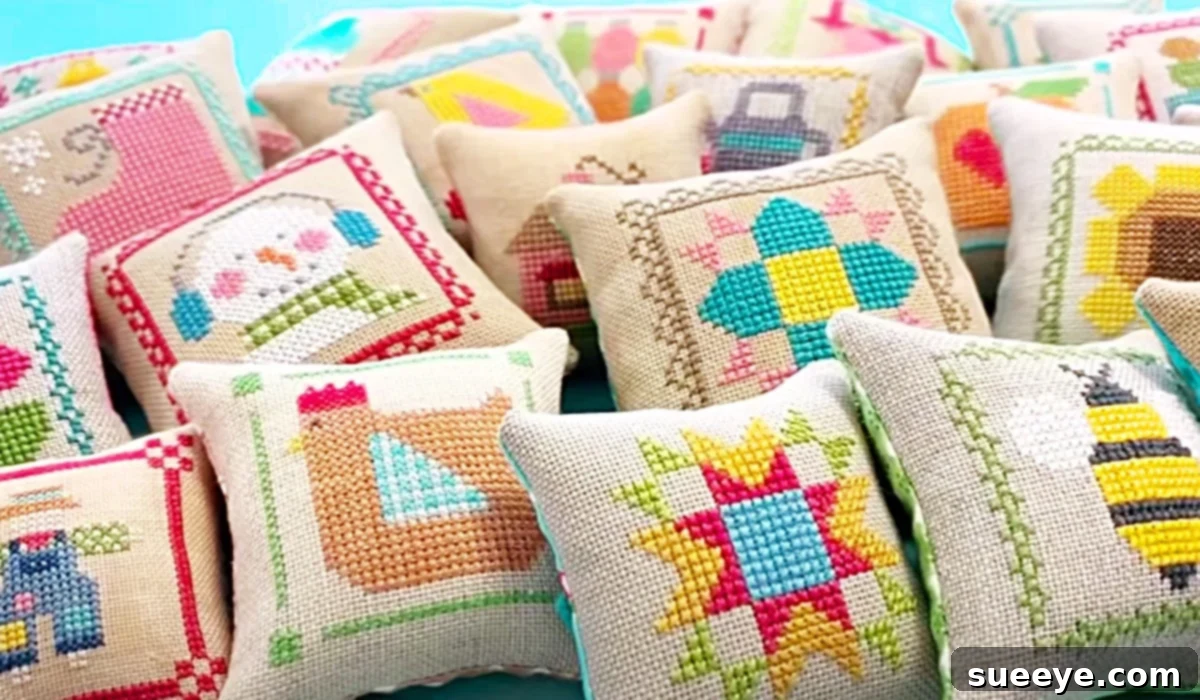
There’s a special joy in creating something beautiful with your own hands, especially when it’s destined for a loved one. As Christmas approached, my mind turned to a unique, handmade gift for my mother, a fellow sewing enthusiast. I knew it had to be something both beautiful and practical for her sewing room. My search led me down a delightful path on YouTube, where I stumbled upon an enchanting video tutorial by the acclaimed Lori Holt: her guide to crafting exquisite cross stitch mini pincushion pillows. It was love at first sight! These miniature cushions, brimming with vintage charm, immediately struck me as the perfect project.
Any seasoned seamstress can attest to the sheer volume and variety of pins we accumulate. From delicate glass headpins to sturdy plastic round heads, the collection grows endlessly. This abundance makes a diverse array of pincushions not just a luxury, but a necessity! The particular cross stitch mini pincushion design I discovered through Lori Holt’s tutorial was simply gorgeous. I envisioned it bringing a touch of antique elegance to my mother’s workspace, and I knew she would adore it.
Serendipitously, I already had the perfect components waiting in my craft stash. A piece of vintage cross-stitching, salvaged from an old project, seemed destined for this purpose. Complementing it were a few exquisite antique buttons, treasures I had found during a memorable visit to an antique fair in Fredericksburg, Texas. These elements promised to add a unique, personal touch to the pincushions, making them truly one-of-a-kind. With my heart set on this project, I eagerly gathered my materials, ready to embark on this creative journey.
Why Every Sewing Enthusiast Needs Mini Pincushions
Pincushions are more than just a decorative item in a sewing room; they are an indispensable tool for any crafter working with fabric and thread. They provide a safe, accessible place to store pins, keeping them sharp, organized, and within easy reach. The beauty of mini pincushions, in particular, lies in their versatility and charm. Unlike larger, stationary pincushions, mini versions can be placed exactly where you need them – next to your sewing machine, by your hand-stitching project, or tucked into a travel kit. Their compact size makes them ideal for categorizing different types of pins, such as those for delicate fabrics, quilting, or general sewing, preventing mix-ups and streamlining your work.
Beyond their practical utility, mini pincushions offer a wonderful opportunity for creative expression. A cross-stitched design, like the one featured in this project, adds a layer of artisanal beauty, turning a simple tool into a small work of art. They can reflect your personal style, complement your existing decor, or even serve as a delightful memento. Furthermore, crafting these mini pincushions provides a fantastic way to utilize small fabric scraps or cherished pieces of embroidery that might otherwise go unused. It’s a sustainable and satisfying approach to crafting that breathes new life into forgotten textiles.
Essential Materials For Crafting Your Cross Stitch Mini Pincushion Pillows:
Before diving into the creative process, ensure you have all the necessary supplies on hand. The beauty of this project is its relative simplicity and the ability to use scraps and beloved vintage finds. Here’s what you’ll need:
- Fabric: A small piece of fabric for the backing (such as cotton or linen) and, crucially, your chosen cross-stitch piece for the front. This could be a vintage find, a new design you’ve stitched, or even a beautiful piece of patterned fabric.
- Pattern Download/Design Resources: While the core design is often based on your cross-stitch piece, a pattern can provide specific dimensions or additional embellishment ideas.
- Buttons: Antique or decorative buttons add a charming, finished touch. Choose buttons that complement your fabric and cross-stitch design.
- Cotton Thread: For sewing the pincushion together. Opt for a color that blends with your fabric or provides a subtle contrast.
- Thread Snips: Essential for precise and clean cuts when trimming threads.
- Fabric Scissors: Sharp scissors specifically for fabric will ensure clean edges and prevent fraying.
- Polyester Stuffing: A handful is usually sufficient for a mini pincushion. This provides the soft, plump shape.
- Fabric Pins: A few pins are invaluable for holding fabric pieces together before sewing.
- A Chopstick (or Corner Stick): Perfect for pushing out corners and achieving crisp, well-defined edges after turning the pincushion right-side out.
- Sewing Machine (Optional but Recommended): While this project can be hand-sewn, a sewing machine will make the process quicker and result in more consistent seams.
- Iron and Ironing Board: For pressing seams and ensuring a neat, professional finish.
Step-by-Step Directions: Crafting Your Beautiful Mini Pincushions
The beauty of these cross stitch mini pincushions truly comes to life through a careful, step-by-step approach. While I highly recommend watching the comprehensive video tutorial by Lori Holt on YouTube for precise visual guidance and her expert tips, here’s a detailed overview of the process based on standard pincushion construction. This will help you prepare and understand the journey from fabric to a finished, adorable pincushion.
1. Prepare Your Cross Stitch Piece and Backing Fabric
Begin by carefully trimming your finished cross-stitch piece to your desired size and shape for the front of the pincushion. A square or rectangle is common for mini pincushions. Ensure your stitching is centered and even. Next, cut a piece of backing fabric to match the exact dimensions of your trimmed cross-stitch piece. If using a patterned fabric for the backing, consider its orientation. Press both pieces of fabric with an iron to remove any wrinkles and ensure they are perfectly flat. This crucial step sets the foundation for neat seams.
2. Sew the Front and Back Together
Place your cross-stitch front piece and your backing fabric right sides together. Align all edges carefully. Using your fabric pins, secure the two pieces together, placing pins perpendicular to the raw edges to avoid shifting while sewing. You will now sew around the perimeter of these two pieces, leaving a small opening (approximately 1.5 to 2 inches) along one side. This opening is essential for turning the pincushion right-side out and for stuffing. Use a consistent seam allowance, typically 1/4 inch, for all sides. Remember to backstitch at the beginning and end of your stitching, especially at the edges of the opening, to reinforce the seams and prevent them from coming apart when turned.
3. Clip Corners and Turn Right-Side Out
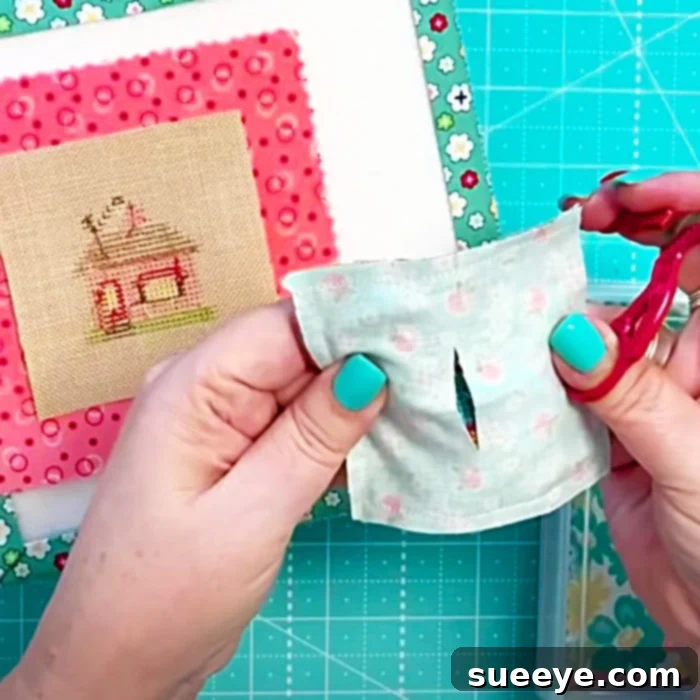
Once sewn, carefully clip the corners of your pincushion. To do this, trim the fabric diagonally across each corner, getting close to the stitching line but being careful not to cut through it. This reduces bulk in the corners, allowing them to turn out crisply. Next, reach through the opening you left and gently pull the entire pincushion right-side out. Take your time with this step, especially with the corners. This is where your chopstick or corner stick becomes invaluable: use it to carefully push out each corner from the inside, creating sharp, defined points. Be gentle to avoid pushing through the fabric.
4. Stuff the Pincushion
Now comes the satisfying part: stuffing! Begin to fill your pincushion with polyester stuffing through the opening. Distribute the stuffing evenly, pushing it into all corners and edges to create a firm, well-shaped cushion. The goal is a plump, yet not overly hard, pincushion that can securely hold pins. Avoid under-stuffing, as a flat pincushion won’t be as effective or attractive. Continue adding stuffing gradually until you achieve your desired fullness. A good test is to gently squeeze it; it should feel substantial and hold its shape.
5. Close the Opening
With the pincushion fully stuffed, it’s time to close the opening. Carefully fold under the raw edges of the opening, aligning them with the sewn seam. You can use a few pins to hold these edges in place. Using a needle and matching cotton thread, hand-stitch the opening closed. A ladder stitch (also known as an invisible stitch or blind stitch) is ideal for this, as it creates a neat, nearly invisible seam that blends seamlessly with the machine-stitched edges. Take small, even stitches to ensure a secure and tidy closure.
6. Add Embellishments (Buttons)
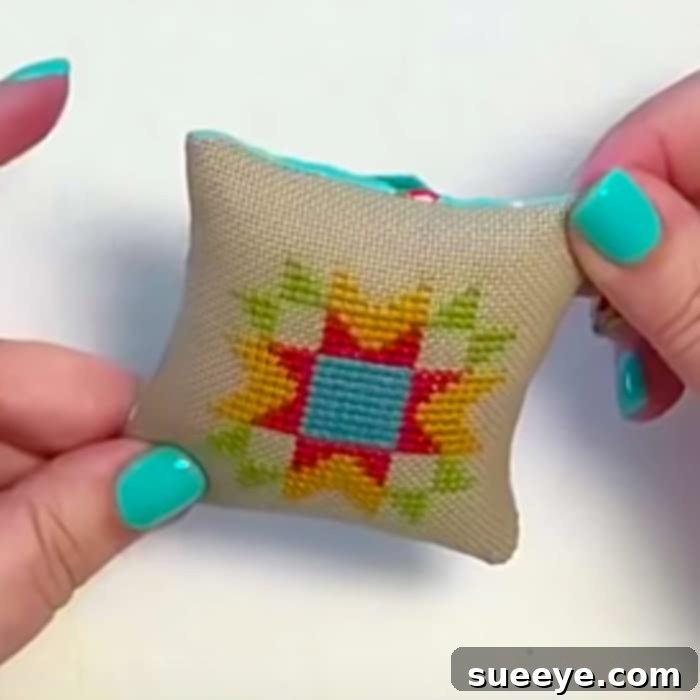
The final touch is often the most charming: adding decorative buttons. Position your chosen antique or decorative button(s) on the front of the pincushion. You might place one in the center, or several smaller ones at various points, depending on your design. Hand-sew the button(s) securely onto the pincushion. For added durability and a classic “tufted” look, you can thread your needle through the entire pincushion, coming out the back, and then back through to the front, pulling taut before securing the button. This creates a slight indentation, giving the pincushion a lovely, finished dimension. And just like that, your beautiful cross stitch mini pincushion pillow is complete!
Tips for Success and Perfect Pincushions
- Pressing is Key: Don’t skip ironing your fabric pieces before cutting and after sewing seams. This creates crisp edges and a professional finish.
- Sharp Tools: Use sharp fabric scissors and a new needle in your sewing machine. Dull tools can snag fabric and lead to uneven stitches.
- Even Seam Allowance: A consistent seam allowance is vital for square corners and a neat overall shape. Practice on scraps if you’re new to machine sewing.
- Don’t Overstuff: While you want a firm pincushion, overstuffing can distort the shape and make it difficult to sew the opening closed neatly.
- Embrace Hand Stitching: For the final closing stitch and button attachment, hand stitching provides control and a beautiful finish that’s hard to achieve with a machine.
- Experiment with Fillers: While polyester stuffing is common, you can also use crushed walnut shells or fine sand for added weight and pin-sharpening properties. Just be sure the fabric is tightly woven to prevent leakage.
Creative Variations and Heartfelt Gifting Ideas
The beauty of this DIY project lies in its adaptability. Once you master the basic technique, you can easily personalize these mini pincushions to suit any style or occasion. Instead of cross-stitch, consider using small pieces of intricate embroidery, appliqué, or even fussy-cut fabric from a favorite print. Experiment with different shapes – a small hexagon, a circle, or a heart could be equally charming. Play with textures by incorporating lace, ribbon, or tiny pompoms around the edges before sewing. The possibilities are endless, allowing each pincushion to become a unique expression of your creativity.
These handmade cross stitch mini pincushions make truly thoughtful gifts. Imagine presenting a set to a fellow sewing friend, each customized with their favorite colors or a special initial. They are perfect for birthdays, Mother’s Day, or as a “just because” gesture to show appreciation. Teachers, craft club members, or even beginners just starting their sewing journey would cherish such a personalized and practical present. For Christmas, a collection of these in festive colors, perhaps adorned with tiny bells or seasonal embroidery, would make a delightful stocking stuffer or a charming addition to a gift basket for anyone who loves to create. I can’t wait to share my creations with my own friends and family!
Conclusion: The Enduring Charm of Handmade Pincushions
Crafting these DIY cross stitch mini pincushion pillows is more than just a sewing project; it’s an act of love, creativity, and thoughtful utility. Inspired by the expert guidance of creators like Lori Holt, you can transform simple materials into charming, functional pieces that enhance any sewing space. Whether you’re making them for yourself to organize your growing collection of pins, or gifting them to friends and family, the joy of a handmade item is truly unparalleled. Each stitch, each carefully chosen button, tells a story and adds a touch of personal warmth that mass-produced items simply cannot replicate. So gather your fabrics, embrace your inner crafter, and start creating these delightful mini pincushion treasures today!