
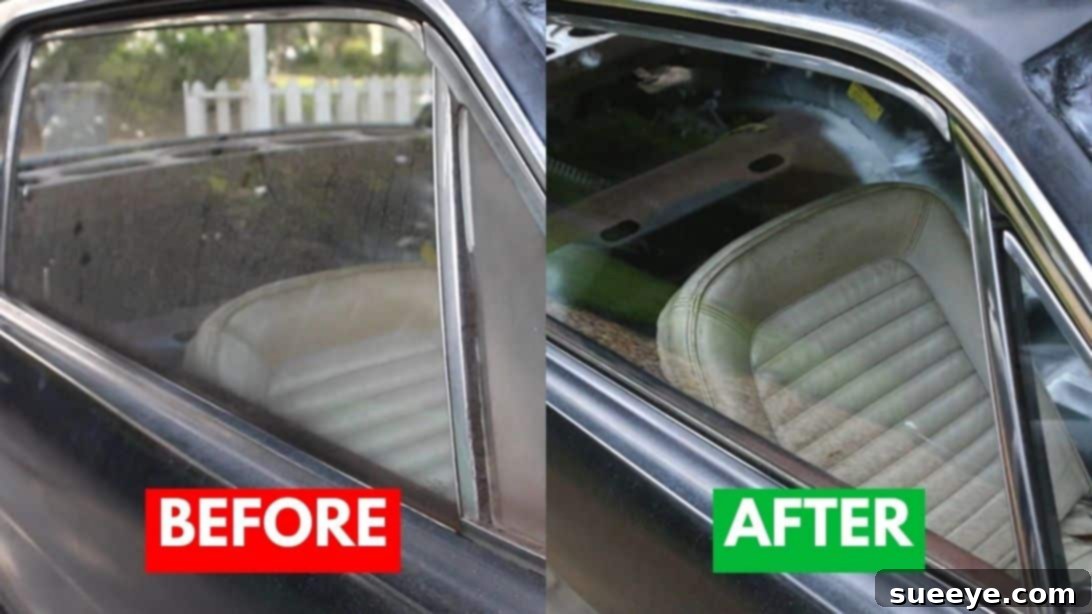
Daily driving subjects your car to a relentless assault of dust, dirt, grime, and environmental contaminants. Over time, these particles accumulate on your car’s windows, forming a stubborn film that can harden and become incredibly difficult to remove. This build-up not only detracts from your vehicle’s appearance but, more importantly, severely impairs visibility, posing a significant safety hazard on the road. While regular car washes are a good preventative measure, life often gets in the way, and these essential tasks are sometimes overlooked.
If your car windows have reached a state where they resemble the ‘before’ photos often seen in detailing guides, don’t despair! Achieving crystal-clear, streak-free glass is far simpler and more affordable than you might think. You don’t need expensive professional services or an arsenal of specialized tools. Renowned DIY expert Jonah Deich shares a brilliant, budget-friendly method to restore your car windows to their original sparkling condition. This guide will walk you through an effective technique that requires only a few common household items and some dedicated effort.
This comprehensive cleaning method goes beyond a simple wipe-down. It’s designed to meticulously remove all layers of embedded dirt, road film, water spots, and even the toughest grime that conventional cleaning struggles with. You’ll likely be astonished by the sheer amount of unseen contaminants this process extracts from your seemingly ‘clean’ windows. A standard cloth alone is simply not enough to tackle years of accumulated build-up. By adding a few strategic steps to your usual car cleaning routine, you can achieve professional-level results, making your car look and feel significantly cleaner, and more importantly, ensuring maximum visibility for safer driving.
RELATED: 8 Secret Car Functions You Should Know
Beyond just cleanliness, maintaining spotless car windows contributes significantly to your overall driving experience and the longevity of your vehicle’s glass. Regular, thorough cleaning prevents etching from hard water spots and reduces the risk of scratches when wiping away abrasive dirt. This method empowers you to take control of your car’s maintenance, saving you money on professional detailing while giving you the satisfaction of a job well done. For even more insightful car care advice, explore these additional resources: 8 Easy And Cheap Car Cleaning Tricks.
Essential Tools and Materials for Crystal-Clear Car Windows
Achieving a streak-free shine on your car windows doesn’t require a trip to a specialty auto store. The beauty of this method lies in its simplicity and the use of readily available items. Here’s a detailed look at what you’ll need and why each item is crucial for success:
- Dish Soap: Ordinary dish soap is an excellent degreaser, making it perfect for breaking down the oily film, road grime, and stubborn dirt that clings to car windows. Its gentle yet effective formula helps lift contaminants without harsh chemicals, making it safe for your vehicle’s surfaces when diluted properly.
- 3M Finishing Pads (or fine-grade abrasive pads): These specialized pads provide a gentle abrasive action, essential for dislodging deeply embedded dirt, water spots, and environmental fallout that regular washing might miss. They are designed to be non-scratching on glass, ensuring they scrub away grime without damaging your windows. Look for pads that are fine-grade to avoid any micro-scratches.
- Big and Small Towels (preferably microfiber): You’ll need multiple towels for different stages of the cleaning process.
- Small Wet Rag: Ideal for the initial wipe-down to remove loose dirt and apply the soap solution.
- Large Dry Towels: Crucial for drying the windows after scrubbing and rinsing, preventing water spots and streaks. Microfiber towels are highly recommended due to their superior absorbency and soft, lint-free nature, which helps achieve a truly streak-free finish.
- Razor Blades (single-edge): This might seem daunting, but a single-edge razor blade, used correctly, is a game-changer for removing bonded contaminants like tree sap, overspray, paint, old window film adhesive, and mineral deposits that are impossible to remove with just soap and scrubbing. The key is to use it at a shallow angle and with light pressure on glass surfaces only, ensuring it glides over the surface without scratching.
Step-by-Step Guide to Cleaning Car Glass Windows (Cheap and Easy)
Follow these detailed steps to transform your dirty car windows into sparkling, clear panes, significantly enhancing your driving visibility and your car’s overall appeal. Remember to work in a shaded area and avoid direct sunlight, as this can cause cleaning solutions to dry too quickly and leave streaks.
Step 1: Initial Loosening of Surface Dirt and Grime
Begin by preparing your windows for a deeper clean. The goal here is to remove any loose dust, dirt, and the uppermost layer of grime. Take a small, clean wet rag – ideally a microfiber cloth for its gentle yet effective cleaning properties. Apply a small amount of dish soap directly to the wet rag, or dilute a few drops of dish soap in a bucket of water and dip your rag in it. The soap acts as a lubricant and a degreaser, helping to lift surface contaminants. Thoroughly clean both the inside and outside surfaces of each window. Use overlapping strokes, working from top to bottom, to ensure you cover every inch. Don’t be afraid to apply a little pressure to dislodge visible dirt. This initial pass will remove the majority of the easy-to-reach particles, making the subsequent steps more effective and preventing larger grit from potentially scratching the glass later on. Rinse your rag frequently to avoid spreading dirt.
Step 2: Deep Scrubbing for Embedded Contaminants
Once the surface dirt is removed, it’s time to tackle the more stubborn, embedded grime. Retrieve your 3M finishing pads. Wet a pad with water and add another small amount of dish soap to it. This combination of a gentle abrasive pad and the degreasing power of soap is key to breaking down road film, hard water spots, bug splatters, and other tenacious contaminants that bond to the glass. Systematically scrub the entire window surface, applying steady, even pressure. You can use circular motions or straight, overlapping strokes – whichever feels more effective for you. Pay close attention to the edges and corners where dirt tends to accumulate. As you scrub, you’ll feel the surface become smoother, indicating that the bonded contaminants are being lifted. After scrubbing, immediately wipe down the area with a clean, dry towel (preferably microfiber) to remove the soapy residue and lifted dirt. This prevents the dirt from redepositing as the solution dries. Ensure no visible soap residue remains on the glass.
Step 3: Precision Scraping for Bonded Film and Deposits
This step is where the magic truly happens for achieving truly spotless windows. Take a fresh, sharp single-edge razor blade. The key to using a razor blade safely and effectively on glass is to maintain a very shallow angle – ideally between 30 to 45 degrees relative to the glass surface. Hold the blade firmly and carefully scrape the window with light, consistent pressure. The blade should glide smoothly across the glass, lifting off any bonded contaminants like old tint adhesive residue, paint overspray, stubborn tree sap, hardened bug guts, or mineral deposits that even scrubbing couldn’t remove. Always scrape in one direction, lifting the blade before starting a new stroke, and avoid scraping back and forth over the same spot with a dirty blade. Keep the glass slightly damp while scraping to aid in lubrication and prevent potential micro-scratches. It’s crucial to scrape the corners and edges thoroughly, as these areas often harbor the most stubborn build-up. Always exercise extreme caution when handling razor blades to prevent injury and avoid contact with window seals or plastic trims, which can be easily damaged.
Step 4: Final Wipe and Streak-Free Polish
After scraping, your windows should be free of all major contaminants. The final step is to ensure a perfectly clear, streak-free finish. Get a fresh, clean, and damp rag – again, a high-quality microfiber cloth is highly recommended for its ability to absorb residual moisture and buff without leaving lint. Wipe down the entire window surface once more, removing any remaining soap residue, loosened particles from scraping, or water spots. For an absolute streak-free shine, you can follow this with a second, completely dry microfiber towel, buffing the glass until it squeaks. This final buffing action will remove any last traces of moisture and leave your windows gleaming. Stand back and inspect your work from different angles, and even use a flashlight if possible, to check for any missed spots or faint streaks. If you notice any, simply repeat the final wiping and buffing process with a clean, dry cloth.
Repeat the steps if needed. For heavily soiled windows or those with extremely stubborn hard water spots, you might find it beneficial to repeat the scrubbing and scraping steps in particular. Patience and thoroughness are key to achieving truly professional results. With each repetition, you’ll notice a marked improvement in clarity.
Additional Tips for Impeccable Car Window Cleaning:
- Work in Sections: Instead of tackling the entire car at once, clean one window at a time. This prevents cleaning solutions from drying prematurely, which can lead to streaks.
- Clean Tools are Essential: Always use clean rags and pads. A dirty tool will only redeposit grime onto your freshly cleaned glass. Wash your microfiber towels regularly.
- Avoid Direct Sunlight: As mentioned, working in the shade or on a cloudy day will give you more time to work with the cleaning solutions before they evaporate and leave streaks.
- Inside and Out: Don’t forget the interior of your windows! Interior glass can accumulate a hazy film from outgassing plastics, smoke, and dust. The same steps (minus perhaps the razor blade, unless dealing with old sticker residue) can be applied. Be especially careful around tinted windows on the inside; some commercial window cleaners can damage tint. Dish soap and water are generally safe.
- Prevention is Key: Once your windows are sparkling, maintain their clarity with regular, lighter cleanings. A quick wipe with a microfiber cloth and a dedicated glass cleaner (or even just water) can prevent heavy build-up.
- Safety First: Always wear gloves to protect your hands from soap and grime. Be extremely careful when handling razor blades. Dispose of used blades safely.
Achieving Unmatched Clarity: Your Guide to Perfectly Clean Car Windows
Transforming dull, grimy car windows into crystal-clear panes is not just about aesthetics; it’s a vital aspect of vehicle safety and maintenance. The method detailed above, championed by experts like Jonah Deich, proves that you don’t need a professional detailer or expensive specialized products to achieve outstanding results. By leveraging the simple yet powerful combination of dish soap, a gentle abrasive pad, and the precision of a razor blade, you can effectively eliminate years of accumulated dirt, stubborn water spots, and embedded grime that traditional cleaning methods often leave behind.
This budget-friendly approach empowers you to take control of your car’s cleanliness, providing a sense of accomplishment and significant savings. Beyond the immediate visual improvement, maintaining spotlessly clean windows ensures optimal visibility, dramatically enhancing your safety and confidence on the road, especially during challenging driving conditions. Remember to follow each step carefully, prioritize safety, and don’t hesitate to repeat the process for particularly stubborn areas. With a little effort and the right technique, your car windows will not only look brand new but will also offer you a clearer view of the road ahead, making every drive a more enjoyable and secure experience.