
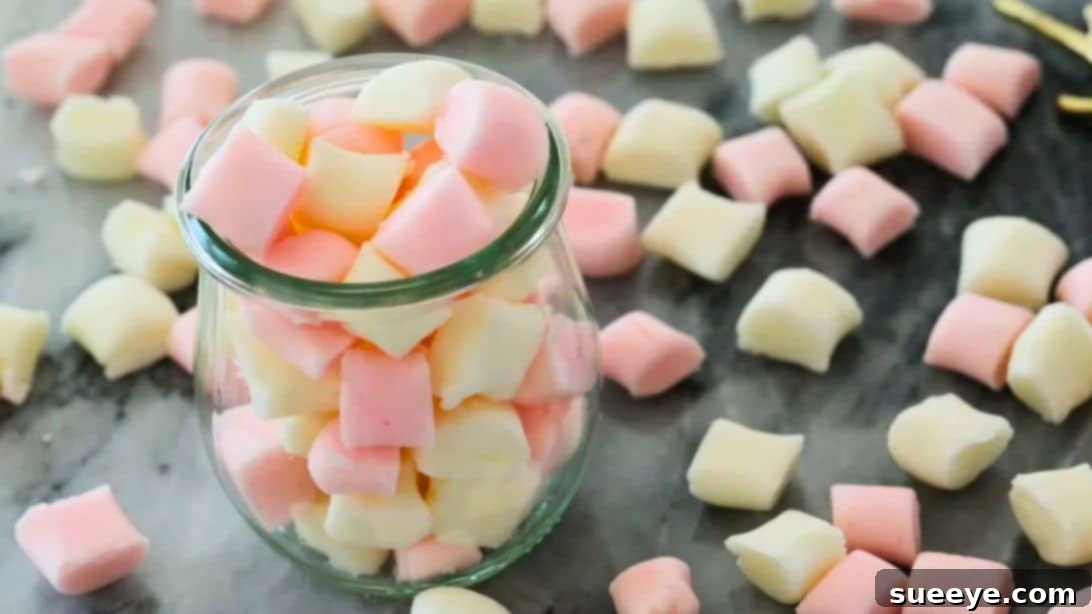
Homemade Butter Mints: The Ultimate Guide to Soft, Creamy & Melt-in-Your-Mouth Classic Candy
There’s something undeniably nostalgic and utterly irresistible about homemade butter mints. These iconic, melt-in-your-mouth candies have charmed generations with their delicate balance of sweet, buttery richness and refreshing mint flavor. Perfect for any occasion, from elegant parties and special gatherings to thoughtful homemade gifts or simply a delightful treat for yourself, these silky-smooth confections are surprisingly easy to make right in your own kitchen. Forget store-bought versions; once you experience the superior texture and vibrant flavor of freshly made butter mints, you’ll never look back. This comprehensive guide will walk you through every step of creating these classic candies, ensuring a perfect batch every time. Get ready to impress your friends and family with a timeless treat that truly dissolves on the tongue!
This fantastic recipe, inspired by the talented creators at Sugar Spun Run, focuses on simplicity and achieving that beloved soft, creamy texture that makes butter mints so unique. You’ll only need a handful of common ingredients to bring these delectable treats to life. Whether you’re a seasoned candy maker or a beginner looking for a rewarding project, this recipe is designed for success.
Why You’ll Love Making Your Own Butter Mints
Beyond the sheer joy of biting into a perfectly soft butter mint, there are many compelling reasons to embrace making these classic candies at home:
- Unmatched Freshness and Flavor: Homemade treats always taste superior. You control the quality of ingredients, ensuring a fresh and vibrant mint flavor that store-bought varieties often lack. The difference in taste is truly remarkable.
- Melt-in-Your-Mouth Texture: The distinct soft, creamy consistency of these mints is hard to replicate commercially. Our recipe guarantees that coveted texture that literally dissolves on your tongue, leaving a clean, refreshing finish.
- Customization Options: From varying the intensity of the mint flavor to adding different extracts or vibrant food colorings, you have complete control to personalize your candies for any theme, holiday, or preference.
- Perfect for Gifting: Beautifully packaged homemade butter mints make incredibly thoughtful and impressive gifts for holidays, birthdays, party favors, or as hostess presents. They feel luxurious and show you care.
- Budget-Friendly: Making candy at home is often more economical than purchasing gourmet confections. This recipe allows you to produce a large batch for a fraction of the cost, making it ideal for large gatherings.
- Fun & Rewarding Activity: The process of creating these candies is enjoyable and therapeutic, resulting in a delicious reward that brings immense satisfaction. It’s a fantastic project for adults and older children alike.
For those who adore mint-flavored delights, be sure to also explore other homemade options like this homemade peppermint patties recipe or even a decadent peppermint whoopie pie recipe for more minty inspiration!
Essential Ingredients for Perfect Homemade Butter Mints
You’ll be delighted to find that crafting these old-fashioned butter mints requires just a few basic ingredients, most of which you likely already have in your pantry. The quality of these components, particularly the butter and extracts, will significantly influence the final taste and texture of your candies.
- 1/2 cup of unsalted butter (softened): Using unsalted butter allows you to control the salt content precisely. Softened butter is crucial for achieving a smooth, creamy base without lumps. Make sure it’s at room temperature for easy creaming.
- 4 cups of powdered sugar: Also known as confectioners’ sugar, this finely milled sugar is essential for the smooth, melt-in-your-mouth texture of the mints. Granulated sugar will not work, as it won’t dissolve properly.
- 1/4 teaspoon of peppermint extract: This is the star flavor! Adjust to your preference, but start with the recommended amount. Ensure you’re using extract, not essence, for the most authentic and potent peppermint flavor.
- 1/8 teaspoon of vanilla extract: A touch of pure vanilla extract complements the peppermint beautifully, adding depth and a hint of warmth to the overall flavor profile, preventing it from being solely minty.
- 1/8 teaspoon of salt: A small amount of salt balances the sweetness and enhances all the other flavors, preventing the mints from tasting overly sugary or one-dimensional.
- 1 1/2 tablespoons of heavy cream: Heavy cream provides richness and helps bind the mixture, contributing significantly to the signature creamy, luxurious texture that makes these mints so special.
- Food coloring (optional): For festive or themed mints, high-quality gel or liquid food coloring can be added to create vibrant hues without altering the texture.
Step-by-Step Guide: How to Make Homemade Butter Mints
Follow these detailed steps to create your own batch of delightful butter mints. Precision and patience are key to achieving that perfect soft, non-sticky consistency and the melt-in-your-mouth experience everyone loves.
Step 1: Cream the Softened Butter
Begin by adding the softened unsalted butter to the bowl of a stand mixer fitted with a paddle attachment. If you don’t have a stand mixer, a large mixing bowl and an electric hand mixer will work just as well. Beat the butter on medium speed until it is light, fluffy, and just creamy. This usually takes about 1 to 2 minutes. Ensure there are no hard butter chunks remaining, as this will affect the final texture and smoothness of your mints.
Step 2: Incorporate First Half of Powdered Sugar and Flavors
Reduce the mixer speed to low. Gradually add 2 cups of the powdered sugar, one cup at a time, mixing until fully combined and no dry streaks remain. It’s important to add it slowly to prevent a cloud of sugar from enveloping your kitchen! Once the sugar is mostly incorporated, mix in the peppermint extract, vanilla extract, and salt. Continue mixing on low speed until these ingredients are evenly distributed throughout the butter-sugar mixture. Periodically scrape down the sides and bottom of the bowl to ensure everything is well combined and evenly flavored.
Step 3: Add the Heavy Cream
With the mixer still on low speed, pour in the 1 1/2 tablespoons of heavy cream. Once the cream is mostly incorporated into the mixture, gradually increase the mixer speed to medium. Continue mixing until the mixture becomes smooth, thoroughly blended, and achieves a consistent, creamy texture. This step adds crucial richness and moisture, contributing significantly to the mints’ signature creamy and tender consistency.
Step 4: Incorporate Remaining Powdered Sugar
Return the mixer speed to low. Gradually add the remaining 2 cups of powdered sugar, adding it slowly to allow it to fully integrate into the mixture. Mix until the sugar is completely combined and the dough starts to come together. During this process, it’s crucial to frequently pause the mixer and scrape down the sides and bottom of the bowl. This ensures all ingredients are uniformly mixed and prevents any dry pockets of sugar from remaining in your dough. Continue mixing until a soft, pliable, and well-formed dough develops.
Step 5: Achieve Perfect Consistency and Add Food Coloring (Optional)
After all the powdered sugar has been added, carefully evaluate the consistency of your butter mint dough. It should be soft, pliable, and resemble playdough – easy to handle but notably not sticky to the touch. If the dough still feels excessively sticky, add additional powdered sugar, one tablespoon at a time, mixing thoroughly after each addition, until the desired non-sticky, workable consistency is achieved. Be careful not to add too much, as this can make the mints dry and crumbly. Now is the ideal time to add food coloring if you wish to create colorful mints. Add a few drops of gel food coloring (gel colors are recommended for vibrancy without adding excess liquid) and mix until the color is evenly distributed. For multiple colors, divide the dough into separate portions before adding coloring to each.
Step 6: Shape Your Melt-in-Your-Mouth Mints
Take about 1 to 2 tablespoons of the prepared butter mint dough. Roll this portion between your palms into a log approximately half an inch thick. The exact thickness can vary based on your preference for larger or smaller mints. Place the formed log onto a cookie sheet that has been generously lined with parchment paper. Using a sharp knife or a pastry cutter, cut the log into individual pieces, ranging from 1/4 inch to 1/2 inch long. Repeat this process with the remaining dough until all your butter mints are shaped and neatly arranged on the parchment-lined baking sheets, leaving a little space between each mint.
Step 7: Dry and Store Your Delicious Butter Mints
Once all the mints are shaped, leave them uncovered at room temperature for several hours, or even overnight, allowing them to dry out slightly. This crucial drying process is essential for developing the characteristic subtle, delicate crust on the outside while maintaining a wonderfully soft, creamy interior. It also prevents them from sticking together when stored. The mints will become slightly firmer to the touch once properly dried. Once thoroughly dry, transfer them to an airtight container. To prevent them from sticking, arrange the mints in a single layer, placing a sheet of wax paper or parchment paper between each layer. This careful storage will help preserve their perfect texture and delightful freshness.
Tips for Crafting the Best Butter Mints
While this recipe is wonderfully straightforward, a few expert tips can elevate your butter mints from simply good to absolutely perfect every single time:
- Butter Temperature is Key: Ensure your unsalted butter is genuinely softened, but not melted. It should yield easily when pressed but still hold its shape. Cold butter will result in a lumpy, difficult-to-mix mixture, while melted butter will make the dough too soft, greasy, and hard to work with.
- Mixer Speed Matters: Always start on low speed when adding powdered sugar to avoid a messy sugar cloud. Gradually increase the speed only when the ingredients are well combined and there’s no risk of splatter.
- Scrape the Bowl Often: Powdered sugar has a tendency to stick to the bottom and sides of the mixing bowl. Frequent scraping during the mixing process ensures all ingredients are thoroughly incorporated, leading to a uniform, smooth, and perfectly consistent dough.
- Adjust Powdered Sugar for Consistency: The exact amount of powdered sugar required might vary slightly depending on factors like humidity in your kitchen and how soft your butter is. The “playdough-like” consistency is your ultimate goal: the dough should be soft and pliable, but notably not sticky. Don’t be afraid to add a little more (a tablespoon at a time) if needed, until you reach this ideal texture.
- For Vibrant Colors: If you’re adding food coloring, use high-quality gel food coloring for the best results. It’s much more concentrated than liquid food coloring and won’t thin out your dough or dilute the flavor. Add it during Step 5.
- Experiment with Shapes: Beyond simple logs, you can press the dough into a thin sheet and use small, decorative cookie cutters for festive shapes. You can also roll them into small balls and flatten slightly with a fork for a classic look.
- Patience During Drying: Do not rush the drying process. Letting the mints sit uncovered helps them develop a slight “crust” or firm outer layer. This not only contributes to their classic texture but also prevents them from becoming overly sticky when stored.
Flavor & Color Variations for Your Homemade Mints
One of the most enjoyable aspects of making butter mints at home is the incredible ability to customize them. Here are a few creative ideas to get you started:
- Different Extracts: While classic peppermint is undeniably popular, consider substituting or adding other extracts for unique flavor profiles. Try vanilla bean paste for an intense vanilla flavor, almond extract for a nutty twist, lemon extract for a bright citrus note, or even spearmint for a milder mint profile.
- Holiday Hues: Tailor your mints to any season or celebration. For Christmas, use vibrant red and green food coloring. For Easter, lovely pastel shades of pink, blue, yellow, and green are perfect. Mix blue and white for baby showers, or school colors for graduation parties. The possibilities are truly endless!
- Layered or Marbled Colors: Divide your dough into separate portions and color each one differently. Then, gently twist two or three colors together before rolling out logs for a beautiful marbled effect that’s sure to impress.
- Sparkling Finish: For an extra special touch, before the mints dry completely, you can gently roll them in sanding sugar or edible glitter. This adds a beautiful shimmer and a slight textural crunch.
- Chocolate Swirl: For chocolate-mint lovers, melt a small amount of good quality chocolate and drizzle it over the logs before cutting, or swirl a bit into a portion of the dough for a delightful chocolate-mint variation.
How to Store Your Delicious Butter Mints
Proper storage is absolutely essential to maintain the optimal freshness and delightful melt-in-your-mouth texture of your homemade butter mints for as long as possible:
- Room Temperature: Once fully dried and a slight crust has formed, butter mints can be stored in an airtight container at cool room temperature for up to two weeks. Ensure they are arranged in a single layer with wax paper or parchment paper placed between layers to prevent any sticking.
- Refrigeration: For even longer storage, place them in an airtight container in the refrigerator. They will last beautifully for up to one month. For the best texture, allow them to come to room temperature for a few minutes before serving.
- Freezing: Butter mints are surprisingly freezer-friendly and can be frozen for up to three months. Place them in an airtight, freezer-safe container, again using wax paper between layers to prevent them from freezing into a solid block. Thaw them at room temperature before serving.
- Avoid Humidity: Humidity is the primary enemy of butter mints, as it can make them sticky and compromise their texture. Always store them in a cool, dry place away from direct sunlight or moisture.
Frequently Asked Questions About Homemade Butter Mints
- Q: Why are my butter mints sticky?
- A: Stickiness is usually due to one of two common reasons: either not enough powdered sugar was incorporated into the dough, or the mints haven’t had sufficient time to dry out properly. To fix this, you can try adding more powdered sugar (a tablespoon at a time) to the dough until it’s no longer sticky, and ensure they are left uncovered at room temperature for several hours (or overnight) to develop that crucial slight crust.
- Q: Can I use salted butter instead of unsalted?
- A: While unsalted butter is recommended for precise control over the saltiness, you can use salted butter in a pinch. However, if you do, it’s crucial to omit the 1/8 teaspoon of added salt in the recipe to avoid overly salty mints. Be aware that the flavor profile might be slightly different due to the varying salt content in different butter brands.
- Q: How can I make my butter mints firmer?
- A: To achieve a firmer mint, you can try two main adjustments: first, ensure you’ve added enough powdered sugar to reach a very firm, playdough-like consistency during mixing. Second, extend the drying time. If left uncovered for 24-48 hours in a dry environment, they will firm up considerably, developing more of a traditional candy-like shell.
- Q: Can I use a different type of cream, like milk?
- A: Heavy cream is absolutely essential for the rich flavor and signature creamy texture of these butter mints. Lighter creams or milk may not provide the same fat content or binding properties, which could lead to a less rich flavor and an altered, potentially undesirable, consistency. It’s highly recommended to stick with heavy cream for optimal results.
- Q: How far in advance can I make these butter mints?
- A: Butter mints are excellent make-ahead treats! They can be made up to two weeks in advance and stored at cool room temperature in an airtight container. If refrigerated, they will last up to a month. For even longer planning, they freeze exceptionally well for up to three months. Just remember to thaw them at room temperature before serving.
Making homemade butter mints is a truly delightful and rewarding experience that yields a truly exceptional candy. With their sweet, buttery, and refreshing notes, these melt-in-your-mouth treats are guaranteed to be a hit at any gathering, a cherished homemade gift, or a simple pleasure on a quiet afternoon. Embrace the simplicity of this recipe and enjoy the satisfying process of creating a classic confection that brings joy with every single bite. Happy candy making!