
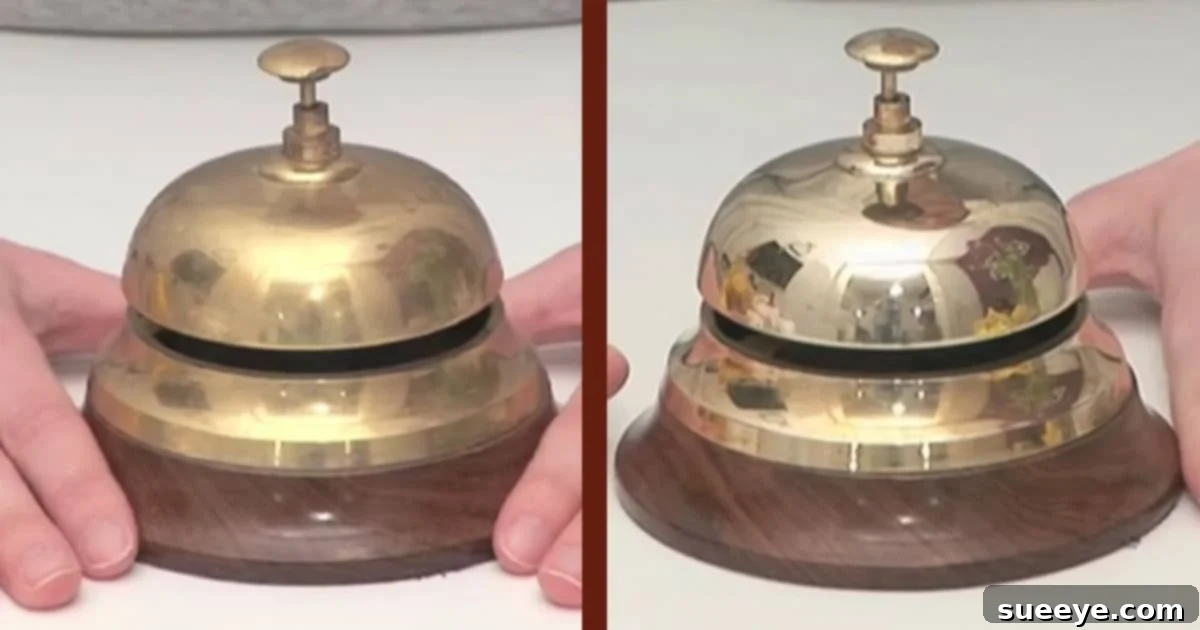
The Ultimate Guide to Cleaning Brass Like a Professional: Restore Shine & Remove Tarnish
Have you ever looked at a beautiful brass item, perhaps a treasured family heirloom or a charming flea market find, only to be disheartened by its dull, tarnished appearance? Many of us have experienced the frustration of trying to clean brass with standard off-the-shelf cleaners, only to find they do very little to restore that coveted brilliant gleam. The truth is, bringing brass back to life requires more than just a quick wipe; it demands a dedicated approach, a few common household items, and the right technique. Forget the myth that heavily tarnished brass is beyond repair – with the proper knowledge, you can transform even the dingiest pieces into sparkling showstoppers.
Learning how to clean brass effectively isn’t just about aesthetics; it’s about preserving the beauty and value of these timeless pieces. From antique candlesticks to ornate door knockers, brass items add a touch of classic elegance to any home. However, exposure to air, moisture, and various environmental factors causes brass to oxidize, leading to that unsightly greenish-black film known as tarnish. This comprehensive guide will walk you through a professional-level brass cleaning method, ensuring your brass items not only look new again but stay protected for years to come.
Why Does Brass Tarnish, and How Can You Prevent It?
Tarnishing is a natural chemical reaction that occurs when brass (an alloy primarily made of copper and zinc) comes into contact with sulfur compounds in the air, moisture, and even oils from our skin. This oxidation process creates a layer of copper sulfide on the surface, which is what we perceive as tarnish. The rate of tarnishing depends on the environment; high humidity, pollution, and frequent handling can accelerate the process.
Understanding this process is the first step in effective brass care. While you can’t stop oxidation entirely, you can significantly slow it down through proper cleaning and protection. Many brass items, especially newer ones, come with a clear lacquer coating designed to prevent tarnish. However, over time, this lacquer can wear off, chip, or scratch, exposing the brass underneath and allowing tarnish to begin its work. For vintage pieces, the lacquer may have long since disappeared, leaving them vulnerable.
Is It Really Brass? The Essential Magnet Test
Before you begin any cleaning process, it’s crucial to confirm whether your item is solid brass or merely brass-plated. Many decorative items, particularly older ones, can be steel or iron with a thin layer of brass plating. Cleaning plated items with abrasive methods intended for solid brass can damage the plating, revealing the underlying metal and permanently ruining the piece.
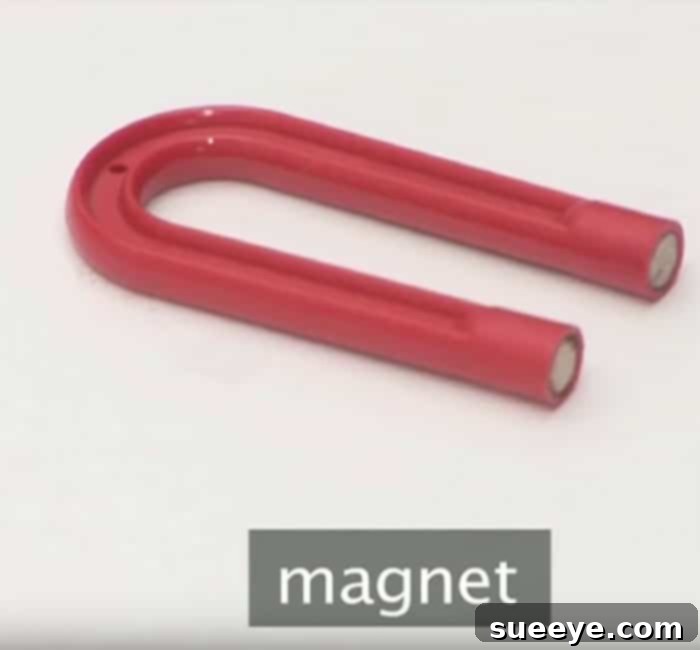
The simplest and most effective way to test is with a magnet. Grab a small, strong magnet and hold it up to the item. If the magnet sticks firmly, your item is likely brass-plated (usually over steel or iron). If the magnet does not stick, or only very weakly sticks, then you have solid brass! This distinction is vital for choosing the correct cleaning approach, as solid brass can withstand more vigorous cleaning than delicate plating.
I once stumbled upon an old mailbox at a garage sale. It was incredibly dingy, covered in layers of grime and dark tarnish, and the sellers were practically giving it away. I suspected it was solid brass, and a quick magnet test confirmed my hunch. The transformation it underwent using this very method was truly remarkable. It now gleams at my front entry, a testament to the hidden beauty that lies beneath neglected surfaces. The previous owners would undoubtedly be shocked to see the stunning piece they let go!
Essential Supplies for Professional Brass Cleaning at Home
Gathering the right tools before you start will make the brass cleaning process smoother and more effective. Many of these items are likely already in your home, making this a truly accessible DIY project.
- Toothbrush: A soft-bristled toothbrush is indispensable for reaching into intricate details, crevices, and embossed patterns without scratching the brass.
- Rubber Gloves: Essential for protecting your hands from cleaning solutions and varnish remover, especially if you have sensitive skin.
- Varnish Remover (optional): If your brass item has an old, failing lacquer coating, a chemical varnish remover will be necessary to strip it away before cleaning. Always use in a well-ventilated area.
- Dish Soap: A mild dish soap mixed with warm water is perfect for an initial wash to remove loose dirt and grease.
- Brass Polish: A high-quality commercial brass polish is key for dissolving tarnish and restoring shine. Choose a brand known for its effectiveness and non-abrasive formula.
- Clear Lacquer (optional but recommended): A clear spray lacquer specifically designed for metal will protect your newly cleaned brass from future tarnishing, significantly extending its brilliant finish.
- Newspapers or Drop Cloths: To protect your work surface from spills and drips during the cleaning process.
- Soft Cleaning Cloths: You’ll need several soft, lint-free cloths for applying polish, buffing, and drying. Old cotton t-shirts or microfiber cloths work wonderfully.
- Cotton Swabs: Excellent for applying polish or varnish remover to very tiny, detailed areas.
- Small Bowl or Bucket: For mixing a warm soapy water solution.
- Warm Water: For rinsing and general cleaning.
Step-by-Step Guide: How to Clean Brass Effectively
Follow these detailed steps to achieve sparkling, professional-looking results on your brass items.
Step 1: Prepare Your Workspace and Assess Your Brass Item
Lay down newspapers or a drop cloth in a well-ventilated area. This protects your surfaces from chemicals and spills. Conduct the magnet test mentioned earlier to confirm your item is solid brass. If it’s brass-plated, proceed with extreme caution, opting for very mild cleaners and avoiding abrasive scrubbing. Examine your item for any existing lacquer coating; if it’s peeling or dull, it will need to be removed first.
Step 2: Remove Old Varnish or Lacquer (If Applicable)
If your brass piece has a clear coating that is chipped, discolored, or flaking, it must be removed. Apply a small amount of varnish remover to a cotton swab or a corner of a cloth and test it on an inconspicuous area. If it softens the lacquer, proceed by applying the remover evenly over the lacquered surfaces. Allow it to sit for the time recommended by the product manufacturer, then gently scrape off the softened lacquer using a plastic scraper or a dull knife. A toothbrush can help with intricate areas. Rinse thoroughly with warm, soapy water to remove all traces of the remover and old lacquer. Ensure the item is completely dry before moving to the next step.
Step 3: Initial Cleaning and Degreasing
Even if there’s no lacquer to remove, a good initial wash is crucial. Fill a small bowl or basin with warm water and add a few drops of mild dish soap. Submerge smaller brass items or wipe down larger ones with a soft cloth dipped in the soapy water. Use the toothbrush to gently scrub away loose dirt, dust, and any superficial grime from all surfaces, paying extra attention to decorative carvings and tight spots. Rinse the item thoroughly under running warm water and dry it completely with a clean, soft cloth. Any residual moisture can cause new tarnish to form.
Step 4: Apply the Brass Polish
Now it’s time for the magic! Shake your chosen brass polish well. Apply a small amount of polish onto a clean, soft cloth. Work the polish into the brass surface in small sections, using a circular motion. You’ll often see the cloth turn dark, which is a good sign – it means the polish is reacting with and removing the tarnish. For stubborn spots or intricate designs, apply a dab of polish directly onto your toothbrush and gently scrub. Be patient, especially with heavily tarnished areas; it may require several applications and some elbow grease. Ensure you cover the entire surface, aiming for an even application and thorough tarnish removal.
Step 5: Buff to a Brilliant Shine
Once you’ve applied the polish to all areas and the tarnish appears to be lifted, grab a fresh, clean, and dry soft cloth. Begin buffing the brass in firm, circular motions. As you buff, the hazy residue from the polish will disappear, revealing the shining brass beneath. Continue buffing until the desired luster is achieved. For an extra brilliant gleam, use a separate, very clean microfiber cloth for the final buffing pass. Check your work under good light to ensure no polish residue remains, as this can dull the shine over time.
Step 6: Protecting Your Newly Cleaned Brass with Lacquer (Optional but Highly Recommended)
If you want your brass to retain its sparkle for an extended period without re-tarnishing, applying a clear lacquer is the best solution. Ensure your brass item is perfectly clean, dry, and free of any polish residue. Work in a well-ventilated area, preferably outdoors or in a garage. Hold the spray lacquer can about 8-10 inches away from the item and apply a very light, even coat. Avoid applying too much at once, as this can lead to drips or an uneven finish. Allow the first coat to dry completely according to the manufacturer’s instructions, then apply a second thin coat if desired. This protective barrier will seal the brass from air and moisture, significantly slowing down the re-tarnishing process.
Common Mistakes to Avoid When Cleaning Brass
While cleaning brass is straightforward, certain missteps can harm your items. Be mindful of these common errors:
- Using Abrasive Materials: Never use steel wool, abrasive scouring pads, or harsh scrubbing brushes. These can permanently scratch the brass surface, making it more prone to future tarnishing.
- Ignoring Safety Precautions: Always wear rubber gloves when handling cleaning chemicals and ensure good ventilation, especially when using varnish remover or spray lacquer.
- Not Identifying Plated Brass: Cleaning brass-plated items with methods suitable for solid brass can strip the plating, causing irreversible damage. Always do the magnet test.
- Skipping the Protective Layer: While optional, neglecting to re-lacquer solid brass means you’ll be cleaning it much more frequently.
- Leaving Polish Residue: Any polish left on the brass can attract dirt and dull the shine over time. Buff thoroughly until no residue remains.
- Using Harsh Acids on Lacquered Brass: Strong acids can damage the lacquer without effectively cleaning the brass underneath. Always remove the lacquer first if necessary.
Maintaining the Luster: Tips for Long-Term Brass Care
Once your brass items are clean and gleaming, a little ongoing care will keep them looking their best:
- Regular Dusting: Simply dusting your brass items with a soft, dry cloth can prevent dust and grime from building up and potentially causing new tarnish.
- Avoid Harsh Environments: Try to keep unlacquered brass items away from areas with high humidity, direct sunlight, or frequent exposure to cooking fumes, which can accelerate tarnishing.
- Handle with Care: Oils from your skin can leave fingerprints that contribute to tarnish. Handle unlacquered brass as little as possible, or wear cotton gloves when moving or cleaning it.
- Occasional Gentle Wiping: For lacquered brass, a simple wipe with a damp cloth followed by a dry buff is usually sufficient to remove fingerprints and light dust.
- Re-lacquer as Needed: If you notice your lacquered brass starting to dull or tarnish in spots, it might be time to remove the old lacquer and reapply a fresh coat following the steps above.
The Transformative Power of Clean Brass
Cleaning brass may seem like a daunting task, but with the right supplies and a systematic approach, it’s a rewarding experience. The satisfaction of watching a dull, forgotten piece transform into a vibrant, reflective object is immense. Not only does it enhance the aesthetic appeal of your home, but it also helps preserve the history and craftsmanship of these beautiful items. Whether it’s a small trinket or a grand architectural detail, restoring brass to its former glory is a simple yet powerful way to elevate your living space.
Don’t let tarnish deter you from enjoying the timeless elegance of brass. Embrace these professional cleaning techniques and bring out the brilliant shine that’s been waiting underneath. Your brass decor will thank you, sparkling with renewed life and adding a touch of sophisticated charm to your surroundings.