
DIY Dollar Tree Easter Bunny Mason Jar Craft: Adorable & Budget-Friendly Gifts for Spring!
As the days grow longer and the scent of spring fills the air, there’s a tangible excitement building for Easter celebrations. It’s a season of renewal, joy, and the perfect excuse for some delightful DIY projects. If you’re looking for an incredibly charming yet simple craft that won’t break the bank, you’ve landed in the right place! We’ve stumbled upon a super cute and wonderfully easy Easter craft that transforms ordinary Dollar Tree finds into extraordinary springtime treasures: adorable Easter Bunny Mason Jar Treat Jars.
Imagine these sweet jars gracing your Easter table as a festive centerpiece, delighting guests with their whimsical charm. Or perhaps you envision them as heartfelt gifts for teachers, neighbors, or as a special surprise for the little ones in your life. The beauty of this project lies in its simplicity and versatility. It’s not about intricate techniques or expensive materials; it’s about adding a touch of personal flair and spreading a little bit of happiness, all while staying wonderfully budget-friendly.
Why These Easter Bunny Treat Jars Are a Must-Make for Your Spring Celebrations!
There’s something inherently delightful about a craft that combines practicality with undeniable cuteness. These Easter bunny jars are exactly that. After spotting some absolutely adorable jars and ceramic shapes during a recent Dollar Tree visit, it felt like a delightful mission to share this ingenious idea. These aren’t just any treat jars; they are miniature vessels of springtime cheer, designed to bring a smile to anyone’s face.
Beyond their aesthetic appeal, these bunny mason jars offer a sweet and thoughtful way to deliver a personalized touch to your loved ones. While they are perfect for filling with a variety of delicious candies, their potential extends far beyond sugary treats. Consider filling them with a beautifully scented DIY candle, a luxurious homemade sugar scrub for a pampering gift, or even a small collection of seeds for a budding gardener. The possibilities are truly endless, making them a quick, easy, and universally pleasing gift idea that’s sure to be cherished.
Gather Your Supplies: What You’ll Need for This Dollar Tree Easter Craft
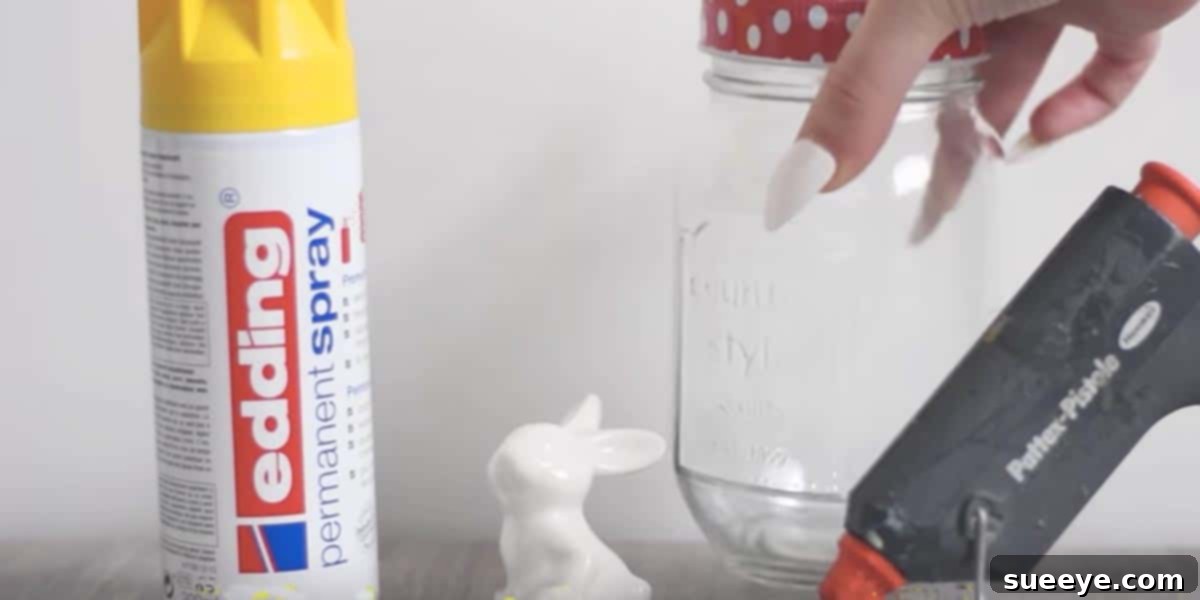
One of the most appealing aspects of this project is its affordability. Most, if not all, of the essential items can be found at your local Dollar Tree, making this an ideal craft for anyone looking to create something special on a minimal budget. Here’s a detailed list of what you’ll need to bring these charming bunny jars to life:
- Mason Jars: You can typically find these for around $1 each at Dollar Tree. If you plan on making several, consider checking larger retailers like Walmart or craft stores, where you might find multi-packs at a reduced price per jar. Any size will work, from small jelly jars to larger canning jars, depending on your intended use and what you plan to fill them with. Clean, clear glass jars are ideal for spray painting.
- Small Ceramic or Plastic Easter Shapes: The key to the “bunny” in these bunny jars! Dollar Tree often carries a wonderful selection of seasonal ornaments, figures, or small decorative items. Look for little bunnies, chicks, eggs, or other springtime motifs. Ceramic ornaments are fantastic as they provide a bit of weight and a smooth surface for painting. If ceramic isn’t available, small plastic figurines work just as well. Don’t worry if the shapes are unpainted; we’ll be adding our own splash of color! (If your shapes come with extra paint, as mine did, don’t let it go to waste – it’s perfect for kids’ spontaneous art projects!)
- Spray Paint: Choose a color that complements your Easter decor or the recipient’s preferences. Pastel shades like mint green, baby blue, soft pink, or lavender are classic choices for spring. White or cream also provide a lovely, clean base. Ensure you select a spray paint suitable for glass and ceramic, which often means a multi-surface or all-purpose paint. A matte or satin finish can give a sophisticated look, while gloss will offer a vibrant sheen.
- Glue Gun and Glue Sticks: An essential tool for securely attaching the Easter shapes to your jar lids. A hot glue gun provides a strong, quick bond that is perfect for this type of project. Always use caution when operating a glue gun, as the tip and glue can get very hot.
- Fillers for the Jars: While “candy for the jars” is listed as a primary idea, this is where your creativity can truly shine! Think about the recipient and what they might enjoy. We’ll delve deeper into creative filling ideas shortly, but for now, consider your initial choice to help guide your jar size selection.
Step-by-Step Tutorial: Crafting Your Adorable Easter Bunny Mason Jars
Now that you have all your supplies ready, it’s time to dive into the fun part: making these charming Easter bunny jars! This process is designed to be simple and enjoyable, perfect for crafters of all skill levels. Follow these easy steps to create your own delightful springtime gifts and decorations.
Step 1: Prepare Your Mason Jars and Easter Shapes
Before you begin any painting or gluing, ensure all your surfaces are clean and dry. Wash your mason jars thoroughly with soap and water, then allow them to air dry completely or wipe them down with a lint-free cloth. This removes any dust, fingerprints, or residues that could interfere with the spray paint adhesion. Similarly, if your ceramic or plastic Easter shapes have any dust or debris, give them a quick wipe.
Step 2: A Touch of Color: Spray Painting Your Jars and Shapes
This step requires good ventilation and a protected workspace. Lay down newspaper or a drop cloth in a well-ventilated area, preferably outdoors or in a garage with open doors.
- For the Jars: Place your mason jars upside down on your protected surface. Holding the spray paint can about 6-8 inches away, apply a light, even coat of paint using a sweeping motion. Avoid holding the can in one spot for too long to prevent drips. Apply several thin coats rather than one thick one, allowing each coat to dry to the touch (usually 10-15 minutes) before applying the next. This ensures a smooth, professional finish. You can choose to paint the entire jar or just the bottom half for a dipped look.
- For the Easter Shapes: Place your ceramic or plastic shapes on a separate protected surface. Apply spray paint in the same manner as the jars, using light, even coats. If you want the shapes to be a different color than the jars, now is the time to do it! For example, white jars with pastel pink bunnies. Let them dry completely, which might take several hours, or even overnight, for the paint to fully cure and harden.
Safety Tip: Always wear a face mask and gloves when spray painting to protect yourself from fumes and paint particles.
Step 3: Attaching Your Easter Bunny Shapes to the Lids
Once both your jars and shapes are thoroughly dry and cured, it’s time to assemble your bunny jars.
- Prepare the Lids: You’ll be attaching the shapes to the flat disc part of the mason jar lid. Ensure this part is clean.
- Heat Your Glue Gun: Plug in your glue gun and allow it to heat up completely.
- Position Your Shape: Determine the best placement for your Easter bunny or other shape on the center of the lid.
- Apply Glue: Apply a generous dab of hot glue to the bottom of your Easter shape.
- Attach and Hold: Quickly and carefully press the shape firmly onto the center of the mason jar lid. Hold it in place for 10-15 seconds until the glue sets and the shape feels secure.
Pro Tip: If your shapes are particularly light, you might consider painting the jar lids as well, or at least the top surface of the flat disc, to match the jar’s color for a cohesive look.
Step 4: Time to Fill: Creative Ideas for Your Treat Jars
With your adorable Easter bunny jars assembled, the final step is perhaps the most fun: filling them! This is your chance to personalize each gift for its intended recipient. Don’t limit yourself to just candy; think outside the box for unique and thoughtful fillers.
More Than Just Candy: Creative Filling Ideas for Every Occasion
While a jar full of colorful Easter candies is always a hit, especially for kids, these versatile bunny jars can hold a multitude of delightful surprises. Here are some expanded ideas to spark your imagination and help you tailor each jar perfectly:
Edible Treats:
- Assorted Candies: Classic jelly beans, chocolate eggs, pastel M&Ms, or small gummy bunnies are always welcome.
- Homemade Cookies or Brownie Bites: Individually wrapped treats maintain freshness.
- Hot Cocoa Mix: Layer cocoa powder, mini marshmallows, and chocolate chips for a cozy treat.
- Baking Mixes: Layer dry ingredients for cookies, muffins, or even pancakes, with a tag attached for wet ingredients and baking instructions.
- Gourmet Tea Bags or Coffee Beans: For the tea or coffee lover.
- Trail Mix or Granola: A healthier, yet still delicious, option.
Pampering & Self-Care Gifts:
- DIY Sugar Scrub or Bath Salts: Create a spa-like experience.
- Small Hand Lotions or Soaps: Travel-sized toiletries are perfect.
- Nail Polish and Mini Manicure Tools: A lovely “spa day in a jar.”
- Homemade Candles: Pour your own scented candles directly into the jar (ensure the jar is heat-safe if doing this).
Kid-Friendly Surprises:
- Small Toys or Figurines: Miniature cars, animal figures, or bouncy balls.
- Craft Supplies: Glitter, mini pom-poms, stickers, or small packs of crayons.
- Bubbles: A classic spring outdoor activity.
- Play-Doh or Slime: A fun sensory gift.
- Seeds for Planting: Encourage gardening with flower or easy-to-grow vegetable seeds.
Practical & Thoughtful Gifts:
- Gift Card Holder: Place a rolled-up gift card inside with some shredded paper or tissue for padding.
- Office Supplies: Colorful paper clips, decorative pushpins, or mini notebooks.
- Recipe Cards: Fill with favorite family recipes.
- Homemade Potpourri: Dried flowers and essential oils for a pleasant scent.
Gifting & Decorating Ideas: Spreading Easter Cheer Beyond the Treat!
Once your Easter Bunny Mason Jars are filled and complete, their potential for bringing joy truly blossoms. They are incredibly versatile and can be incorporated into your Easter festivities in numerous ways:
- Teacher Appreciation: A handmade gift filled with treats or a small gift card is a wonderful way to thank educators.
- Neighborly Gestures: Brighten a neighbor’s day with a thoughtful homemade surprise.
- Hostess Gift: If you’re attending an Easter gathering, these jars make a charming and personal hostess gift.
- Easter Table Centerpiece: Arrange a collection of filled jars in the center of your dining table, perhaps on a bed of faux grass or nestled amongst fresh spring flowers.
- Place Settings: Use smaller jars as individual place settings, with each guest’s name on a tag tied with a ribbon.
- Party Favors: Perfect for an Easter brunch or children’s party, offering guests a delightful take-home memory.
- Kids’ Easter Basket Fillers: A special, non-candy addition to an Easter basket.
- Bedroom or Mantel Decor: Simply display them empty or filled with decorative items like fairy lights or dried flowers to add a festive touch to any room.
For an extra touch, tie a pretty ribbon or twine around the neck of the jar, and attach a small handwritten tag. This adds another layer of personalization and makes the gift feel even more special.
Tips for Success and Personalization
To ensure your Easter Bunny Mason Jars turn out perfectly and safely, keep these tips in mind:
- Safety First: Always work in a well-ventilated area when spray painting. If involving children, supervise them closely, especially with the glue gun. Consider using craft glue for kids for attaching shapes, allowing more drying time.
- Patience is Key: Allow adequate drying time between spray paint coats and for the glue to fully set. Rushing the process can lead to smudges or insecure bonds.
- Embrace Imperfection: Handmade items have character. Don’t stress over minor imperfections; they add to the charm and uniqueness of your craft.
- Get Creative with Shapes: If you can’t find bunnies, think about other spring-themed items like flowers, butterflies, or even small letters spelling out “EGG.”
- Personalize: Beyond the fillers, consider adding details like glitter to the bunny shapes, stenciling patterns on the jars, or using different colored ribbons and tags.
- Involve the Family: This is a fantastic craft to do with children. They can help choose colors, fill the jars (with appropriate supervision), and decorate with ribbons, making it a fun family activity.
Start Crafting Your Easter Surprises Today!
Creating these delightful Dollar Tree Easter Bunny Mason Jars is more than just a craft; it’s an opportunity to infuse your spring celebrations with personal warmth and creativity. They’re proof that beautiful, heartfelt gifts and decorations don’t require a hefty budget or complex skills. With just a few affordable supplies and a sprinkle of imagination, you can craft truly memorable pieces that spread cheer and embody the spirit of Easter.
So, gather your materials, clear your crafting space, and get ready to create some joy. Whether you’re making them for cherished loved ones, to adorn your home, or simply for the pure enjoyment of crafting, these adorable bunny jars are sure to be a highlight of your Easter season. Happy crafting, and may your Easter be filled with sweetness and smiles!