
Transform Your Old Chairs: A DIY Bench Project for Sustainable Home Decor
There’s an undeniable joy that comes with giving new life to forgotten treasures. As an enthusiast of all things DIY, I particularly adore projects that involve repurposing old furniture. Not only do these transformations breathe unique character into our living spaces, but they also champion sustainability, reducing waste and celebrating the inherent beauty of pre-loved items. The most satisfying part? Often, these incredible makeovers are surprisingly simple to achieve, proving that you don’t need expert carpentry skills to create something truly special and impactful for your home. It’s about seeing potential where others might only see discards.
The Unexpected Discovery: Saving History from the Heap
A few weeks ago, my usual weekend ritual of scouring local yard sales led me to an extraordinary find. Tucked away in a forgotten corner of a sprawling sale, almost destined for the landfill, was a collection of old chairs. Dozens of them, in varying states of disrepair – some broken, others mangled, many just set out to rot. Their condition was undeniably rough, reflecting years of use and neglect, but even beneath layers of grime and broken parts, I could sense their inherent charm. They possessed that unmistakable vintage appeal, a silent story waiting to be told, a glimpse into a bygone era of craftsmanship and design. I felt an immediate, strong urge to rescue them, to pull them back from the brink of oblivion. I envisioned saving a couple from their grim fate, but alas, the practicalities of a small van meant I could only manage a select few, each carefully chosen for its unique form and potential. It was a mission of salvage, driven by a deep-seated belief that every piece of furniture, no matter how decrepit, holds potential for a glorious second act, a chance to become something magnificent once more.
From Decaying Relics to Rustic Elegance: A Vision Unfolds
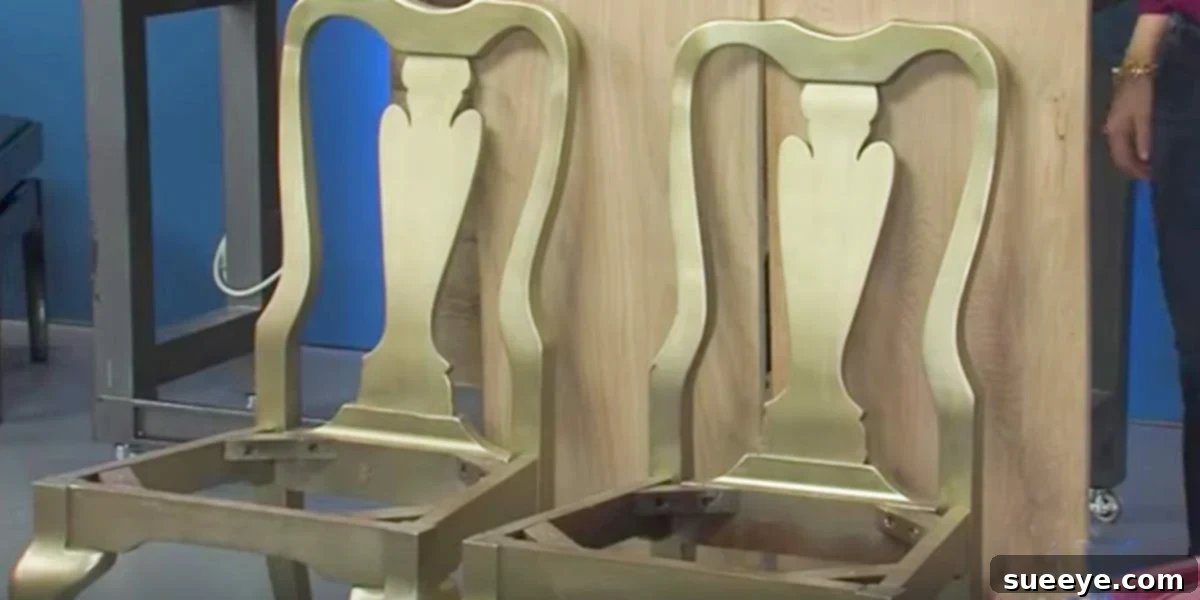
The chairs I managed to retrieve were indeed in dire straits. Most were missing their original seats entirely, leaving gaping holes where comfort once resided. Their wooden frames, while sturdy in their core, were coated in years of accumulated dirt, dust, and what looked like generations of forgotten spills. The first step, naturally, was a thorough and meticulous cleaning. As I diligently washed away the grime with soap and water, something beautiful began to emerge from beneath the muck. Hidden beneath the surface were gorgeous, intricate metal brackets adorning the corners of the chair frames. These weren’t just functional reinforcements designed to hold the structure together; they were delicate, decorative elements that spoke volumes about the craftsmanship of a bygone era, adding a touch of sophisticated detail. Their antique design immediately sparked an idea – these chairs weren’t just old; they embodied a distinct “country chic” aesthetic just waiting to be unveiled and highlighted.
This rustic yet elegant aesthetic immediately reminded me of a brilliant DIY project I’d stumbled upon on Pinterest years ago: transforming old, discarded chairs into a charming and highly functional bench. The memory of that ingenious upcycling idea clicked into place with perfect clarity. Instead of merely fixing them as individual chairs, which would still require new seats and extensive restoration to match, combining them into a single, cohesive unit felt like a far more creative, impactful, and sustainable solution. A bench would not only provide a unique, personalized seating option but also elegantly highlight the individual beauty and vintage character of each chair’s frame in a unified, harmonious display, making a bold statement in any room.
Crafting Your Own Masterpiece: The Bench Transformation Process
While the initial vision was clear and inspiring, the execution of such a project requires a blend of creativity, careful planning, and a little bit of good old-fashioned elbow grease. For anyone inspired to undertake a similar transformation and turn forgotten chairs into a cherished bench, the process typically involves several key stages. These steps guide you in turning disparate chair frames into a harmonious, sturdy, and beautiful piece of furniture that reflects your unique style and commitment to upcycling.
1. Assessment and Preparation: Laying the Foundation for Success
Begin your transformation journey by thoroughly inspecting your chosen chairs. Identify any structural weaknesses, loose joints, wobbles, or areas requiring repair. For my salvaged chairs, the primary challenge was their missing seats and general grubbiness. A meticulous cleaning process is absolutely crucial – scrub away layers of dirt, remove old, peeling paint flakes, and address any rust on metal components using a wire brush or rust remover. Once clean, sanding down rough surfaces prepares the wood for a new finish, revealing its natural texture and providing a better surface for paint or stain adhesion. This preparatory phase is not just about cleaning; it’s about understanding the raw materials you’re working with, diagnosing any underlying issues, and setting a solid, stable foundation for the beautiful transformation to come.
2. Conceptualization and Design: Uniting the Elements with Vision
Once your chairs are prepped, it’s time to decide on the number of chairs you want to combine and their precise arrangement. For a functional bench, typically two or three sturdy chair frames work best, providing a comfortable and aesthetically pleasing length. The most common method involves carefully removing the inner legs and seat rails of adjacent chairs while preserving the outer structures. You then securely join their frames, often by cutting and splicing the top rails and front stretchers to create a continuous, integrated structure. Measuring carefully is paramount to ensure the new bench will be level, symmetrical, and structurally sound. This stage also allows for extensive personalization – will your bench have armrests (utilizing the outer chair arms) or a more open, streamlined design? Consider the overall dimensions that will fit best in your intended space, whether it’s a dining room, entryway, or mudroom.
3. Structural Integration: Building a Robust Bench Frame
This is where the magic of consolidation truly happens. Carefully dismantle the unnecessary inner chair components while meticulously preserving the integrity and strength of the outer frames. Using strong wood glue, screws, and possibly additional reinforcing plates or dowels, join the remaining chair frames together with precision. Accuracy in cutting and joining is essential to ensure a seamless, professional look and a robust structure that can withstand regular use. Clamps are invaluable during the curing process, holding everything firmly in place until the glue has completely set. The ultimate goal is to create a single, incredibly stable framework that can confidently support a new seat and provide years of reliable service.
4. Crafting the New Seat: Where Comfort Meets Custom Style
With the bench frame securely assembled and cured, the next step is to create the bench’s new seat. This offers a fantastic opportunity for creative expression and personalizing your piece. Options range from a simple, solid piece of reclaimed wood cut to size, providing a rustic and durable surface that highlights the chairs’ vintage appeal, to a more elaborate upholstered cushion for added comfort and a touch of elegance. Alternatively, you could install evenly spaced wooden slats, creating a charming slatted bench effect perfect for an entryway. Ensure the chosen material is strong enough to support weight and is well-supported by the underlying chair frames. Secure the new seat firmly to the newly formed bench frame using appropriate fasteners, countersinking screws for a smooth, unblemished finish that looks professionally done.
5. Finishing Touches: Bringing the Vision to Life with Flair
The final stage is where your bench truly comes to life, transitioning from a functional structure to a polished piece of art. Sand all surfaces smooth, removing any rough spots or imperfections and preparing the wood perfectly for the chosen finish. For a “country chic” look, options abound: a distressed paint finish can enhance its vintage character and tell a story, a rich wood stain can bring out the natural grain and warmth of the timber, or a combination of both for a unique, layered effect. Seal the finish with a protective topcoat – clear varnish, polyurethane, or wax – to ensure durability, protect against wear and tear, and ensure longevity. Pay attention to details like the metal brackets; a light polish or a touch of sealant can make them gleam subtly. This meticulous finishing process transforms raw materials into a polished, unique piece of furniture that proudly reflects your personal style and creative effort.
A New Lease on Life: Functional Beauty in the Dining Room
And now, this lovingly transformed bench sits proudly under the windows in my dining room. It’s no longer a collection of broken chairs destined for the scrap heap; it’s a statement piece, a conversation starter, and most importantly, incredibly functional. It provides invaluable extra guest seating, seamlessly blending vintage charm with practical utility. The metal brackets, once hidden beneath layers of grime, now gleam subtly, complementing the overall “country chic” aesthetic I had envisioned and adding an authentic touch of antique elegance. Every time I look at it, I’m reminded of the incredible potential hidden within discarded items, and the satisfaction of having rescued and reimagined them into something beautiful and useful.
This project serves as a powerful reminder: just because something is old or appears to be beyond repair, it does not mean it is useless. On the contrary, these items often hold the most character and offer the most rewarding DIY opportunities. It’s about seeing beyond the immediate state of disrepair and envisioning the boundless possibilities. It’s about a commitment to sustainability, recognizing that extending the life of an item reduces waste, conserves valuable resources, and adds a unique, personal touch to our homes that cannot be replicated by mass-produced furniture.
Unlock Your Creativity: Your Next Upcycling Adventure Awaits
Feeling inspired? The world of upcycling is vast and full of exciting challenges, just waiting for your creative touch. There are countless ways to transform forgotten items into functional art and treasured possessions. Whether it’s turning an old ladder into a rustic bookshelf, vintage suitcases into eclectic side tables, or indeed, combining old chairs into a stylish and comfortable bench, the satisfaction of creating something beautiful and useful with your own hands is truly unparalleled. Don’t be afraid to experiment, to get a little dirty, and to let your creativity guide you. The beauty of DIY lies in the freedom to make something truly your own.
If you’re eager to see a visual step-by-step guide for this particular transformation, I highly recommend checking out tutorials from talented DIYers who document their processes. For instance, you can find excellent demonstrations, like those often featured on local lifestyle shows such as Kansas City Live, where skilled individuals walk you through each step with clarity and enthusiasm. These visual guides can demystify the steps and empower you to confidently turn your own collection of old chairs into a fabulous, custom-made bench for your home decor, adding a touch of personalized charm and a story that store-bought furniture simply can’t replicate. Embrace the journey of transformation. Look around your home, or your next yard sale, with new eyes and an open mind. What hidden gems are waiting for their second chance? With a little imagination and effort, you too can create stunning, sustainable pieces that tell a unique story and enhance your living space in meaningful ways.