
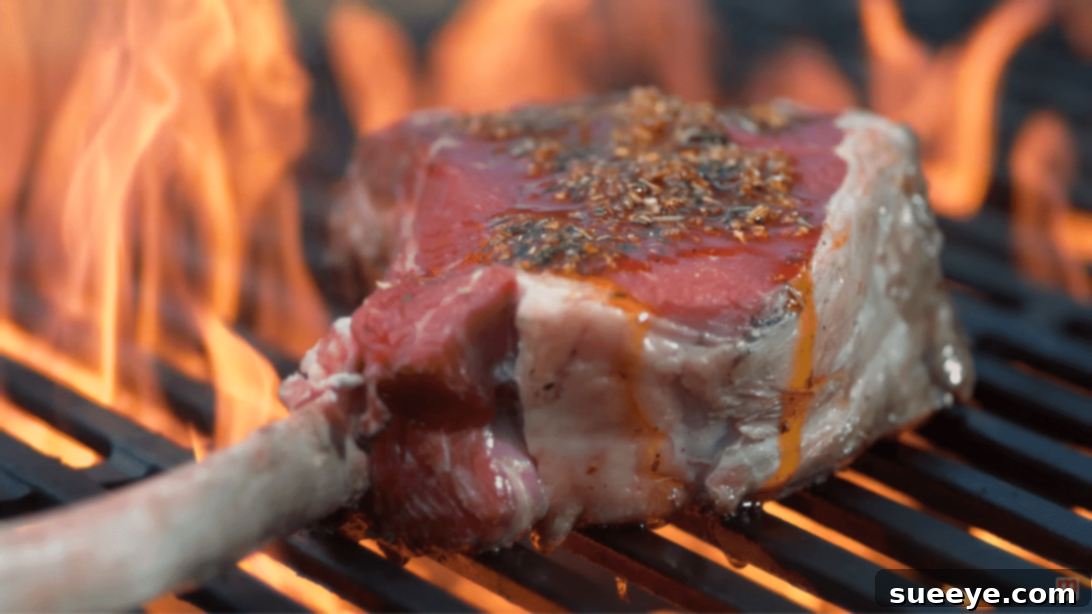
Mastering the Perfect Steak: Steakhouse Secrets You Can Use at Home
Do you dream of cooking a steak that rivals your favorite steakhouse experience, whether you prefer it medium-rare, medium, or perfectly well-done? Achieving that ultimate juicy, tender, and incredibly flavorful steak at home is not a secret reserved for professional chefs. With the right techniques and a bit of culinary knowledge, you can elevate your home cooking and impress anyone at your dinner table. Forget bland, tough steaks; it’s time to unlock the expert tips and tricks used by professionals to transform your meal into a culinary masterpiece. Imagine pairing your flawlessly cooked steak with the creamiest, most buttery mashed potatoes and a fine glass of wine—the perfect ending to any day. This comprehensive guide, inspired by insights from culinary experts, reveals the essential do’s and don’ts for achieving steak perfection every single time.
Here are the 10 indispensable steakhouse secrets you need to know to cook an unforgettable steak:
1. Forge a Relationship with Your Butcher
Building a good rapport with your local butcher is perhaps one of the most undervalued steps in achieving a perfect steak. Grocery store meat selections can often be limited, but a dedicated butcher shop typically offers superior quality and a wider variety of cuts that are simply not available elsewhere. More than just a supplier, your butcher is a wealth of knowledge. They can guide you through different cuts, offer recommendations based on your preferences and budget, provide invaluable tips on preparation, marinating, and even suggest optimal cooking times for specific cuts. A knowledgeable butcher often knows the origin of their meat, its feed, and how it was processed, ensuring you get the freshest and highest-quality product. Don’t hesitate to ask questions; their expertise can make a significant difference between a prime cut that melts in your mouth and a disappointing piece of meat.
2. Understand Your Steak Cuts
To truly master steak cooking, it’s crucial to have a foundational understanding of the various cuts available and what makes each unique. Different cuts offer distinct flavor profiles, textures, and ideal cooking methods. Popular choices, often lauded by experts like The Gentleman’s Journal, include the sirloin, ribeye, and rump. The **Ribeye** is renowned for its generous marbling, which contributes immense flavor and tenderness, making it incredibly juicy. **Sirloin**, particularly top sirloin, offers a good balance of flavor and tenderness without excessive fat, making it a versatile choice. The **Rump** (or round in the US) is a leaner, more economical cut that benefits from proper preparation and cooking to maximize tenderness. Other excellent options include the luxurious **Filet Mignon** (tenderloin), prized for its exceptional tenderness and mild flavor, though it has less marbling. The **T-Bone** and **Porterhouse** steaks offer a combination of tenderloin and strip steak, providing a diverse eating experience. Knowing these differences empowers you to select the best cut for your desired meal and ensures you cook it to its full potential.
3. Never Cook Cold Meat Directly from the Fridge
This is a fundamental rule in professional kitchens: always allow your steak to come to room temperature before it hits the pan or grill. The science behind this is straightforward and crucial for even cooking. When a cold steak is placed on a hot surface, the extreme temperature differential causes the muscle fibers to contract severely. This contraction can lead to an unevenly cooked steak – the exterior might char quickly, while the interior remains cold and undercooked, resulting in a tough texture. As Rob Levitt of Chicago’s The Butcher & Lander aptly puts it, cooking cold meat often leaves you with an outside that’s charred, an inside that’s mostly gray, and perhaps a small, cold red nugget in the middle. To prevent this, remove your steak from the refrigerator at least 30 minutes to an hour before cooking, depending on its thickness. This allows the internal temperature to rise slightly, promoting more uniform heat penetration and a more tender, consistently cooked steak from edge to center.
4. Master the Art of Seasoning Your Steak
Proper seasoning is paramount to unlocking your steak’s natural flavors and achieving that irresistible crust. Salting is the most critical component of this process. According to Chef Pete Balistreri of Tender Greens, salt plays a dual role: “Salt releases moisture in the muscle [of the meat] and releases the natural flavors of steak.” When applied correctly, salt draws out moisture from the surface of the meat, which then dissolves the salt, creating a natural brine that reabsorbs, intensifying the flavor and tenderizing the muscle fibers. For best results, use coarse sea salt or kosher salt, as their larger granules adhere better and provide a more even distribution. You can salt your steak generously anywhere from 40 minutes to an hour before cooking, or just before it goes into the pan. This allows the salt to work its magic without drying out the meat. Beyond salt, freshly ground black pepper is a classic complement, and you might also consider a light dusting of garlic powder or onion powder for added depth, or a sprig of fresh rosemary or thyme later in the cooking process.
5. Choose the Right Cooking Oil with a High Smoke Point
When searing steak at high temperatures, the type of cooking oil you use is critical. Many chefs caution against using extra virgin olive oil for searing, despite its popularity in other cooking applications. Olive oil has a relatively low smoke point, meaning it will start to burn and produce smoke, developing bitter flavors, before your pan even reaches the ideal searing temperature. According to Home Cook World, the best oils for searing steak are those with high smoke points, such as avocado oil, soybean oil, canola oil, and grapeseed oil. These oils can withstand intense heat without breaking down, allowing you to achieve a beautiful, dark crust without imparting off-flavors. Clarified butter (ghee) is another excellent option, as removing the milk solids raises its smoke point significantly, offering a rich, nutty flavor that complements beef wonderfully. Always ensure your chosen oil can handle the heat for a perfect sear.
6. Always Use a Very Hot Pan for Searing
Achieving that coveted, rich brown crust on your steak relies heavily on using an incredibly hot pan. Cast iron skillets are the absolute best choice for this task. Their superior heat retention and even heat distribution are unmatched, creating a consistent surface temperature that is essential for a perfect sear. As British Chef Kevin B. Thomson advises, for optimal results, “the skillet should be very hot but not smoking.” This is the sweet spot where the Maillard reaction—a complex chemical reaction between amino acids and reducing sugars—occurs, creating hundreds of new flavor compounds and that desirable deep brown crust. Preheat your cast iron skillet over medium-high heat for several minutes until it’s sizzling hot. You can test the temperature by adding a tiny drop of water; if it evaporates instantly, your pan is ready. A screaming hot pan ensures that the steak’s surface quickly caramelizes, locking in juices and developing incredible flavor and texture.
7. Resist the Urge to Flip Your Steak Constantly
When it comes to searing, patience is a virtue. Many home cooks are tempted to flip their steak frequently, but this can hinder the development of a magnificent crust. Samantha Love, Executive Chef at Gordon Ramsay Steak at the Horseshoe Baltimore, advises waiting for the Maillard reaction to fully take place before flipping the steak. This means allowing one side to develop a deep, golden-brown crust before turning it over. Frequent flipping prevents the surface from reaching a high enough temperature consistently to achieve that reaction, leading to a less flavorful, less textured exterior. Aim for one, or at most two, flips during the entire cooking process for thicker cuts. This allows each side ample time to build a robust crust, sealing in the juices and maximizing flavor development. While some techniques advocate for frequent flipping for extremely even cooking (like the “flip every 30 seconds” method), for a deep, satisfying sear and crust, a less-is-more approach generally works best for most home cooks.
8. Enhance Flavor with Butter and Aromatics
Towards the end of the cooking process, butter and aromatics become your best friends. Butter, when added at the right time, doesn’t just increase beef’s flavor profile; it also contributes to a beautiful, glossy finish and can help tenderize the exterior. Michelin-star chef Alain Ducasse recommends adding butter to the skillet only after the steak has already developed a brown crust. This timing is crucial because butter burns easily at very high temperatures. Once the steak is well-seared, reduce the heat slightly, add a generous knob of unsalted butter, along with aromatics like fresh garlic cloves (lightly smashed), rosemary sprigs, and thyme. As the butter melts and browns, tilt the pan and baste the steak repeatedly with the fragrant, melted butter. This infuses the meat with incredible depth of flavor and creates an appealing sheen, making your steak look as good as it tastes. The basting technique also helps to ensure the entire surface of the steak is coated in these rich flavors.
9. Achieve Perfect Doneness with Precision Timing
Cooking steak to your preferred level of doneness is an art, but it’s also a science that relies on precise timing and temperature. Culinary gurus from Hestan Cue often provide charts outlining exact searing times and temperatures for various cuts and doneness levels, from rare to well-done. However, the most reliable tool for achieving perfection is a good quality meat thermometer. Visual cues can be misleading, but an internal temperature reading never lies. For a medium-rare steak, the target internal temperature is around 130-135 degrees Fahrenheit (54-57°C). Crucially, you should remove the steak from the heat when it’s approximately 5 degrees Fahrenheit (about 3°C) lower than your desired final temperature. This accounts for “carryover cooking,” where the steak’s internal temperature continues to rise after it’s taken off the heat. Always insert the thermometer into the thickest part of the steak, avoiding bone, for an accurate reading. Resting the steak for 5-10 minutes after cooking is equally vital, allowing the juices to redistribute for a more tender and moist result.
10. Master the Cut: Slice Against the Grain
After all the effort put into cooking a perfect steak, the final step—how you slice it—can significantly impact its tenderness. If you plan to cut the meat before serving, always cut against the grain, or perpendicular to the direction of the muscle fibers. Meat fibers are long and tough; slicing with the grain means you’re leaving these long fibers intact, making the meat chewy. Cutting against the grain shortens these fibers, making each bite much more tender and easier to chew. Take a moment to observe the steak and identify the direction of the muscle fibers before making your first cut. Additionally, serve your masterpiece on a warm plate. A warm plate helps maintain the steak’s even temperature throughout the meal, ensuring every bite is as delicious as the first. This thoughtful detail prevents the steak from cooling too rapidly, preserving its succulence and making the dining experience truly exceptional.