
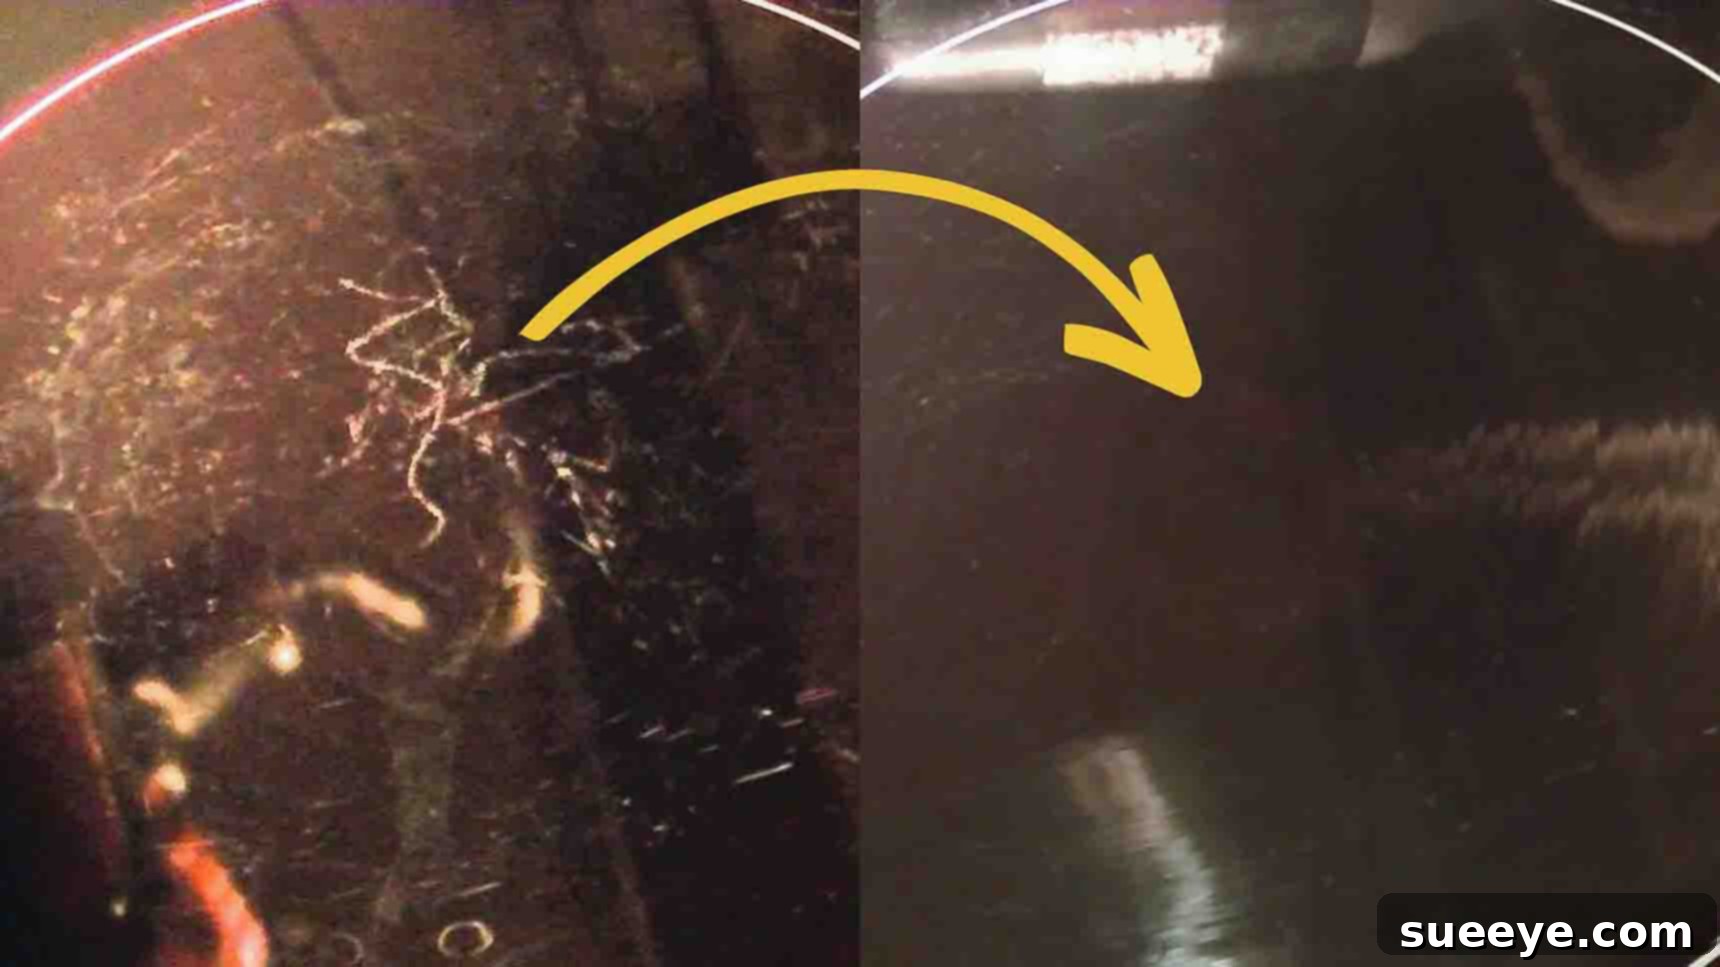
Restore Your Glass Stove Top: The Ultimate Guide to Removing Scratches and Maintaining Shine
Glass stove tops bring a sleek, modern aesthetic to any kitchen, but their beautiful, smooth surfaces are unfortunately prone to unsightly scratches. Daily use, accidental scrapes from cookware, or even improper cleaning can leave your ceramic or induction cooktop looking dull and aged. If you’ve been searching for an effective solution to bring back your stove top’s original luster without costly professional repairs, you’re in the right place. We’re about to unveil a remarkably simple yet powerful method, popularized by YouTube’s Mike Shoesmith, that promises to make those scratches vanish with just a few common household items. Say goodbye to blemishes and hello to a pristine cooktop once again!
Understanding Glass Stove Top Scratches: Causes and Concerns
Before diving into the fix, it’s helpful to understand what causes these frustrating marks on your glass cooktop. Most scratches occur due to friction or impact from various sources:
- Cookware: Dragging heavy pots and pans across the surface is a primary culprit. Cast iron, stoneware, or pots with rough or dirty bottoms can easily etch the glass. Even minor vibrations during cooking can cause subtle abrasions over time.
- Spills and Burnt-On Food: If food particles or sugary spills aren’t cleaned promptly and harden, attempting to scrape them off can inadvertently create scratches. Abrasive cleaners or harsh scrubbing pads used to remove stubborn residue are also highly damaging.
- Dropped Items: Accidental drops of utensils, spice jars, or even small kitchen tools can cause chips or more significant scratches, especially if they have sharp edges.
- Improper Cleaning Tools: Using steel wool, abrasive sponges, or cleaners containing harsh grit can permanently mar the surface. Always opt for soft cloths and cooktop-specific cleaning solutions.
While minor surface scratches are primarily an aesthetic concern, very deep gouges or chips can potentially weaken the glass over time, although this is rare with typical usage. Addressing these issues not only restores your kitchen’s appearance but also helps maintain the longevity and value of your appliance. Fortunately, many common scratches are not as deep as they appear and can be effectively treated with the right technique.
The Mike Shoesmith Method: Materials You’ll Need
One of the most appealing aspects of this scratch removal technique is the minimal number of items required. You likely have some of these lying around, making this a budget-friendly DIY project. Here’s what you’ll need:
- Quality Metal Polish: This is the hero of our operation. Look for a metal polish that is known for its fine abrasive properties and ability to restore shine to surfaces like chrome, stainless steel, or aluminum. The key here is “fine abrasive” – it should be gentle enough not to cause further damage but effective enough to buff out minor imperfections. Brands like Flitz, Mother’s Mag & Aluminum Polish, or even certain automotive polishes designed for clear coats can work wonders. The polish contains microscopic abrasives that, when applied with friction, gently remove a tiny layer of the surrounding glass, effectively leveling out the scratch.
- Buffing Wheel Attached to a Drill: A small, soft buffing wheel (typically made of felt, cotton, or a soft foam material) is crucial for even application and consistent pressure. It attaches to a standard power drill, allowing for controlled rotation. Ensure the buffing wheel is clean and free of any debris that could introduce new scratches. The drill’s variable speed setting will be important for controlled polishing.
- Soft Paper Towel or Microfiber Cloths: Essential for applying the polish and, more importantly, for wiping away residue and checking your progress. Microfiber cloths are particularly effective as they are lint-free and highly absorbent, preventing any streaks or leftover polish.
Before you begin, always prioritize safety. Ensure your glass stove top is completely cool and unplugged from its power source. Wear appropriate personal protective equipment, such as safety glasses, to protect your eyes from any polish splatter, and consider gloves to protect your hands.
Detailed Directions for Scratch Removal
Step 1: Prepare Your Tools and Apply the Polish
The first step involves setting up your equipment and carefully applying the metal polish to the affected area. Begin by securely attaching your buffing wheel to the chuck of your power drill. Make sure it’s tightened properly and spins without wobble – a loose wheel can be dangerous and ineffective. Next, thoroughly shake your chosen metal polish to ensure its abrasive particles are evenly distributed throughout the liquid or paste. Then, carefully dispense a small dab of the polish directly onto the scratched area of your glass stove top. You don’t need a large amount; start with a pea-sized drop for smaller scratches and spread it thinly over the visible marks. The goal is to cover the scratch and a small surrounding area, creating a consistent film for the buffing process. Remember to work on a clean, cool, and unplugged stove top to prevent any mishaps.
Step 2: The Buffing Process
With the polish applied, it’s time to activate the magic. Position the buffing wheel flat against the polished area. Start your drill on a very low speed setting and slowly begin to work the polish into the glass. Maintain light to moderate pressure, moving the drill in small, consistent circular motions or a gentle back-and-forth pattern across the scratched section. The objective is to allow the fine abrasives in the polish to gently abrade and level the surface of the glass. Work on the area for approximately 10-20 seconds at a time, ensuring you cover the entire scratched portion evenly. Avoid staying in one spot for too long, as excessive friction can generate heat. After this initial buffing period, turn off the drill and use a clean, dry paper towel or microfiber cloth to wipe off all the polish residue. This step allows you to inspect your progress and determine if the scratch has diminished.
Step 3: Evaluate and Repeat (If Necessary)
After wiping away the polish, closely examine the treated area. For light surface scratches, you might notice a significant improvement or even complete disappearance after the first pass. However, if the scratch is still visible, don’t be discouraged. This method often requires multiple applications. Reapply a fresh dab of metal polish to the remaining scratch and repeat the buffing process as described in Step 2. Continue to buff, wipe, and inspect until you are satisfied with the results. It’s crucial to be patient and work in short intervals to avoid overheating the glass or applying too much pressure. Always let the glass cool down between repetitions if it feels warm. This gentle, iterative approach helps ensure you achieve the best possible finish without causing new problems.
Why Does This Method Work So Effectively?
The success of this technique lies in the synergistic action of the metal polish and the buffing wheel. Metal polishes designed for fine finishes contain micro-abrasive particles. When these particles are worked into the glass surface by the controlled, high-speed motion of the buffing wheel, they gently abrade the edges of the scratch. This process doesn’t just fill the scratch; it carefully removes a minuscule layer of glass from the surrounding area, effectively leveling the surface and making the scratch less visible, or in many cases, completely disappearing. It’s akin to polishing a rough gem until its surface is smooth and reflective again.
Preventing Future Scratches: Proactive Care for Your Cooktop
While the scratch removal method is effective, prevention is always better than cure. Adopting a few simple habits can significantly extend the flawless appearance of your glass stove top:
- Use Appropriate Cookware: Always use pots and pans with smooth, flat bottoms. Avoid cookware with rough edges, warped bases, or those made of cast iron directly on glass, unless specifically designed with an enamel coating. Lift cookware instead of sliding or dragging it across the surface.
- Clean Spills Immediately: Especially sugary spills, which can harden and bond to the glass, making them difficult and potentially damaging to remove. Use a damp cloth to wipe up spills as soon as the cooktop is cool enough to touch.
- Avoid Abrasive Cleaners and Tools: Never use scouring pads, steel wool, or abrasive cleaning powders. Stick to cooktop-specific cleaning creams, soft sponges, or microfiber cloths.
- Regular Cleaning: Establish a routine for cleaning your cooktop after each use. A quick wipe-down prevents food residue from building up and hardening, which can lead to scratching during removal.
- Use Cooktop Protectors: Consider heat-resistant silicone mats or specially designed cooktop covers when the stove is not in use. These provide a protective barrier against accidental drops or scratches from other kitchen activities.
- Inspect Cookware: Periodically check the bottoms of your pots and pans for any rough spots, burrs, or embedded food particles that could scratch the glass.
General Glass Stove Top Maintenance and Cleaning Tips
Beyond scratch prevention, maintaining the overall cleanliness and hygiene of your glass stove top is crucial. Regular cleaning not only keeps it looking good but also ensures optimal cooking performance:
- Daily Wipe-Down: After each cooking session, once the surface is cool, wipe it down with a damp cloth and a drop of dish soap to remove fresh spills and grease.
- Cooktop-Specific Cleaners: For tougher stains or a deeper clean, use a cream or gel specifically formulated for glass or ceramic cooktops. Apply it with a soft cloth, rub gently, and then buff with a clean, dry microfiber cloth for a streak-free shine.
- Scrapers for Burnt-On Food: For very stubborn, burnt-on food, use a special cooktop scraper (typically a razor blade in a plastic handle) held at a shallow angle. This allows you to lift the residue without scratching the glass, provided you use a new, sharp blade and apply light pressure.
- Vinegar for Streaks: If you notice streaks after cleaning, a light spray of a 1:1 white vinegar and water solution, followed by a buff with a clean microfiber cloth, can restore clarity.
When to Consider Professional Help or Limitations
While the metal polish method is incredibly effective for minor to moderate surface scratches, it’s important to understand its limitations. Very deep gouges, chips, or cracks that penetrate significantly into the glass may not be fully repairable with this DIY method. In such cases, the structural integrity of the cooktop might be compromised, and attempting to buff deeply could worsen the situation or even create an uneven surface. If you have extensive damage, or if you’re unsure about the depth of a scratch, it’s always best to consult with a professional appliance repair technician. They can assess the damage and advise on whether a professional repair or replacement of the glass surface is necessary.
Conclusion: Reclaim Your Pristine Cooktop
Don’t let unsightly scratches detract from the elegance and functionality of your glass stove top any longer. With the simple and ingenious method shared by Mike Shoesmith, you now have the power to restore your appliance to its former glory. By utilizing a common metal polish, a buffing wheel, and a bit of patience, you can effectively diminish or completely remove those frustrating surface imperfections. Remember, proactive care through proper cookware usage and consistent cleaning habits will go a long way in preventing future scratches. So, gather your materials, follow these detailed steps, and prepare to be amazed as your glass stove top gleams like new once more. Your kitchen – and your cooking experience – will thank you!