
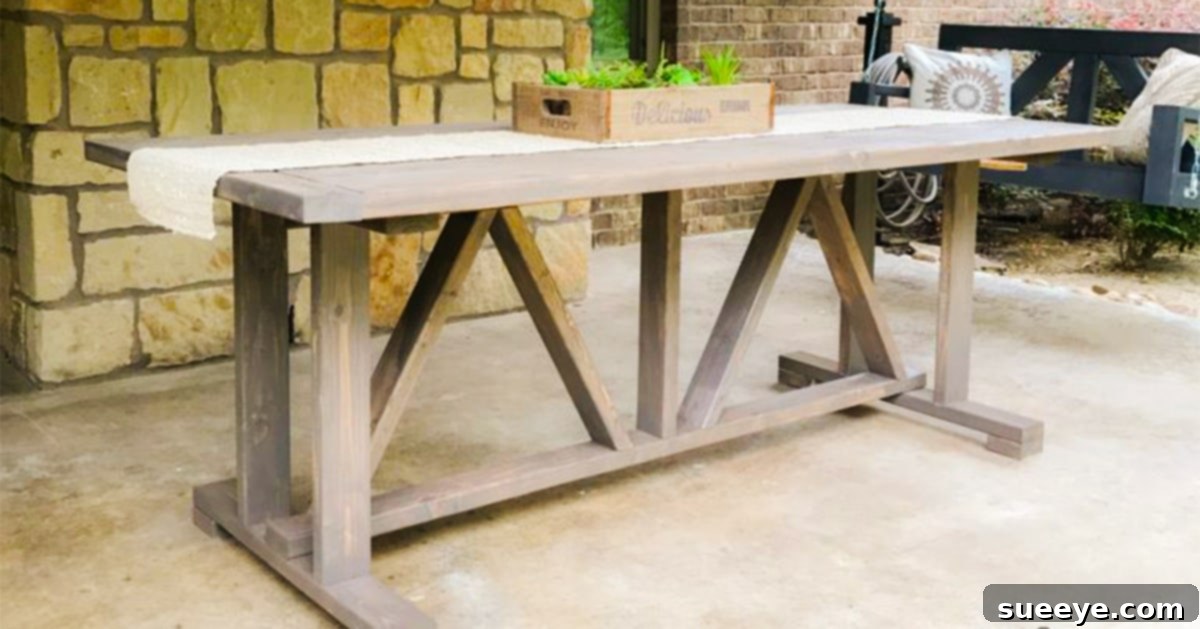
Build Your Dream Outdoor Dining Table for Under $60: The Ultimate DIY Guide
Are you dreaming of a vibrant outdoor space where family and friends can gather for meals, games, and cherished conversations? Imagine transforming a neglected patio or an empty deck into a welcoming haven without breaking the bank. Expensive outdoor furniture often deters many from creating their ideal backyard oasis, but what if you could craft a stunning, durable dining table for an astonishingly low cost? This comprehensive guide introduces you to the incredibly popular DIY outdoor dining table project by Shanty2Chic, a creation that costs only about $60 to build and promises to elevate your outdoor living experience. Complete with a free, downloadable plan, this woodworking endeavor is accessible to DIY enthusiasts of all levels, requiring just a few common tools and a few dedicated hours.
This project is more than just building a table; it’s about reclaiming your outdoor space, fostering connection, and experiencing the immense satisfaction of creating something beautiful with your own hands. The rustic, farmhouse design is not only incredibly charming but also versatile enough to complement various home aesthetics. Whether you envision lively backyard barbecues, serene morning coffees, or a dedicated homework station under the open sky, this DIY outdoor dining table is your ticket to a more functional and inviting exterior.
Why Choose DIY for Your Outdoor Furniture?
The allure of DIY projects extends far beyond mere cost savings. While the $60 price tag for this incredible outdoor dining table is undoubtedly a major draw, the benefits of building your own furniture are numerous:
- Unbeatable Value: Commercial outdoor dining sets can easily cost hundreds, if not thousands, of dollars. This Shanty2Chic design offers a robust and stylish alternative at a fraction of the cost, making it an ideal choice for those on a budget.
- Customization at Your Fingertips: When you build it yourself, you have control over every detail. While this plan provides a solid foundation, you can adapt the dimensions slightly, choose specific wood types, and select the perfect stain or paint to match your existing decor.
- Superior Quality and Durability: Often, budget-friendly store-bought furniture sacrifices quality for price. By hand-picking your materials and meticulously assembling them, you ensure a solid, long-lasting piece that can withstand the elements and years of use.
- A Sense of Accomplishment: There’s unparalleled pride in sitting down to dinner at a table you crafted yourself. This woodworking project offers a tangible reward for your effort, transforming an empty space into a functional and beautiful gathering spot.
- Learning New Skills: For many, DIY is an ongoing journey of learning. This project is an excellent opportunity to hone your woodworking skills, become more familiar with power tools, and gain confidence for future home improvement endeavors.
The Shanty2Chic Outdoor Dining Table: Rustic Charm Meets Practical Design
The genius of Shanty2Chic’s design lies in its elegant simplicity and sturdy construction. Using readily available 2×4 lumber, the table achieves a robust, rustic aesthetic that effortlessly blends with farmhouse, modern, or traditional outdoor settings. The design prioritizes stability and ease of assembly, ensuring that even novice woodworkers can achieve professional-looking results. Its generous size provides ample space for multiple diners, making it perfect for entertaining guests or simply enjoying family meals al fresco. The charm of this table is evident in its clean lines and robust structure, making it a focal point for any patio, deck, or garden area.
Many people shy away from woodworking projects, assuming they require advanced skills or specialized tools. However, this particular design is celebrated for its straightforward steps and minimal tool requirement. The detailed instructions provided in the free plan, combined with the helpful video tutorial, demystify the process, breaking it down into manageable segments. It’s an inviting project for anyone looking to add a personal touch to their backyard without the stress or high cost often associated with home improvement.
Materials You’ll Need for Your DIY Outdoor Table
One of the most appealing aspects of this project is its reliance on standard, easily obtainable materials. Here’s a detailed look at what you’ll need to gather before you start:
- 17 – 2×4 Lumber Pieces: These form the backbone of your table – both the tabletop and the sturdy base. When selecting your lumber, look for straight boards with minimal knots and warps to ensure a flat tabletop and stable structure. Opt for pressure-treated lumber or cedar if available and within budget, as these woods offer superior resistance to rot and insects for outdoor use.
- 2 1/2″ Pocket Hole Screws: These specialized screws are crucial for creating strong, hidden joints in your tabletop. They work in conjunction with a Kreg jig to pull pieces of wood tightly together, resulting in a clean and durable finish.
- 2 1/2″ Spax Screws: Spax screws are versatile and excellent for general construction. Their unique threading and self-drilling tip make them ideal for attaching the structural components of the table base securely and efficiently.
- Wood Glue: Don’t underestimate the power of wood glue! A high-quality, waterproof exterior wood glue is essential for reinforcing all joints, providing a bond stronger than the wood itself. This significantly enhances the table’s overall durability and longevity, especially for outdoor use.
Essential Tools for This Woodworking Craft
While the project is beginner-friendly, having the right tools makes the process smoother and more efficient. Here are the essential tools:
- Drill: An absolute necessity for driving screws and creating pilot holes. A cordless drill offers maximum flexibility and convenience. Ensure you have appropriate driver bits for your screws.
- Miter Saw: This tool is key for making precise, straight, and angled cuts on your 2x4s. Accuracy in cutting directly translates to a square and stable table. If you don’t own one, consider renting one or asking a friend who does.
- Kreg Jig: This ingenious tool is specifically designed to create pocket holes – angled holes that allow screws to connect two pieces of wood invisibly and securely. A Kreg jig simplifies joinery, making this project achievable for those without advanced carpentry skills.
- Measuring Tape & Pencil: For accurate measurements and marking cuts. “Measure twice, cut once” is the golden rule of woodworking!
- Clamps: Essential for holding pieces together while glue dries and screws are driven, ensuring tight, strong joints.
- Safety Gear: Always prioritize safety! Eye protection, hearing protection, and gloves are highly recommended when operating power tools.
Step-by-Step Construction Guide to Your Outdoor Dining Table
Let’s dive into the construction process. While this guide provides a detailed overview, we highly recommend referring to the free printable plans and the Shanty2Chic video tutorial for visual guidance and all specific measurements. These resources will walk you through each cut and assembly step with precision.
1. Building the Tabletop
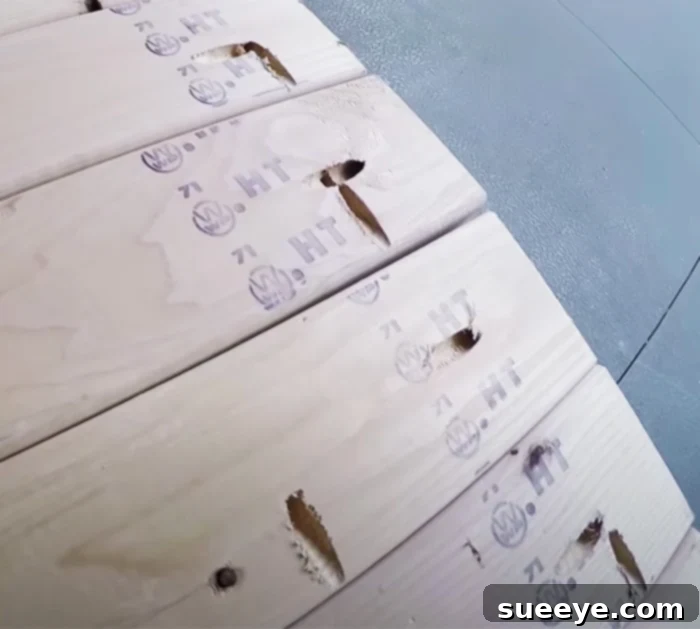
The tabletop is the centerpiece of your creation and where the magic of pocket holes truly shines. You will start by preparing nine of your 2×4 boards for the main surface. Using your Kreg jig, add pocket holes along one long side of each of these nine boards. These holes should be strategically placed on what will be the underside of the tabletop, ensuring they are hidden once assembled. The precise placement and number of pocket holes will be detailed in the Shanty2Chic plans.
Once your pocket holes are drilled, apply a generous bead of waterproof wood glue along the edges of the boards that will join together. Then, using your 2 1/2″ pocket hole screws, fasten the boards together, ensuring a tight, seamless fit. It’s crucial to work on a flat surface and use clamps to hold the boards firmly in place while you drive the screws. This step requires patience and attention to detail to achieve a smooth, level tabletop. Continue this process until all nine boards are securely joined, forming a robust and attractive surface.
2. Constructing the Sturdy Base and Assembly
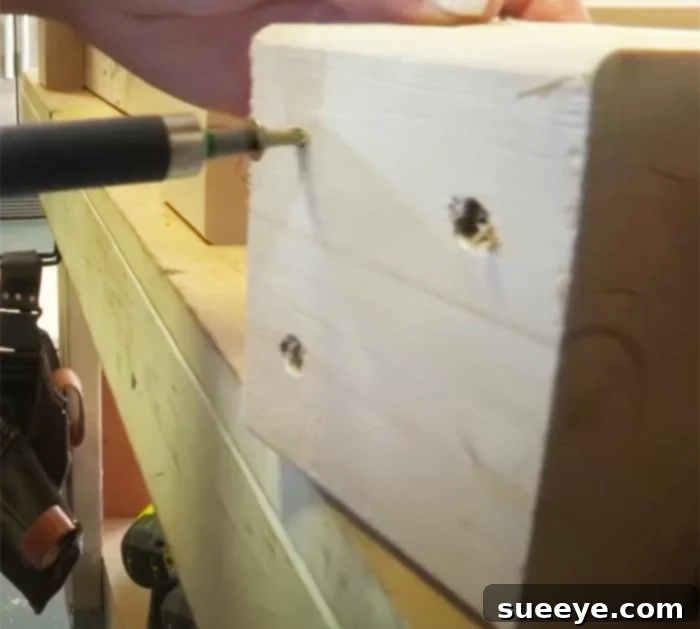
With your tabletop complete, the next phase focuses on building the strong and stable base. This involves using the remaining 2x4s to construct the legs and support structures. According to the plans, you’ll utilize the longer 2x4s for the vertical components of the base, creating a sturdy frame that will support the heavy tabletop.
Employing a combination of wood glue and 2 1/2″ Spax screws, attach the vertical boards to the horizontal supports, carefully ensuring that all connections are square and secure. Precision in cutting and assembly is paramount here to prevent wobbling. Once the base frame is fully assembled and dry, you will then attach the tabletop to this base. This typically involves positioning the tabletop upside down, placing the base on top, and securing it from the inside of the base using screws or additional pocket holes, ensuring that the fasteners are hidden for a clean look.
It’s always a good idea to have an extra pair of hands during this stage, especially when lifting and positioning the tabletop onto the base, as it can be quite heavy.
3. The All-Important Finishing Touches
Once your table is fully assembled, the final steps are crucial for both its aesthetic appeal and its longevity, particularly since it will be exposed to outdoor elements.
- Sanding: Begin by thoroughly sanding all surfaces of the table. Start with a coarser grit sandpaper (e.g., 80 or 100 grit) to smooth out any rough spots or imperfections, then move to a finer grit (e.g., 150 or 220 grit) for a silky-smooth finish. This step is vital for preventing splinters and preparing the wood for staining or sealing.
- Staining or Painting: This is where you personalize your table! Choose an exterior-grade wood stain or paint that complements your outdoor decor. Stains highlight the natural wood grain, while paints offer a solid color. Apply according to the product instructions, usually requiring multiple thin coats for the best result.
- Sealing/Protection: Regardless of whether you stain or paint, applying an exterior-grade sealant or clear coat is essential. This protects the wood from moisture, UV rays, and general wear and tear, significantly extending the life of your table. Look for products with UV inhibitors for maximum sun protection.
Tips for a Smooth DIY Woodworking Project
- Read the Plan Completely: Before making any cuts, thoroughly read through the entire Shanty2Chic plan and watch the video. Understand each step and visualize the process.
- Measure Accurately: Precision is key in woodworking. Double-check all measurements before making a cut.
- Safety First: Always wear appropriate safety gear, especially eye and ear protection, when using power tools.
- Don’t Rush: Take your time with each step, especially during assembly and drying times for glue. Patience pays off with a higher quality finish.
- Enlist Help: While this project can be done alone, having a helping hand, especially when handling the larger pieces or during assembly, can speed up the process and make it safer.
Beyond the Patio: Styling Your New Table and Its Versatility
Once completed, you’ll be amazed at the transformation this budget-friendly project brings. The rustic and farmhouse aesthetic is incredibly versatile, making it a perfect fit for a variety of outdoor (and even indoor) spaces. I personally find the design so appealing that I wouldn’t mind having it inside my house as a charming side entry table or even a console table, showcasing its adaptable style.
To style your new outdoor dining table, consider adding comfortable cushions to your chairs, a vibrant tablecloth or placemats, and a beautiful centerpiece. Mason jar lanterns, fresh flowers, or even a collection of succulents can add character. Outdoor string lights hung above the table can create a magical ambiance for evening gatherings. This table isn’t just a piece of furniture; it’s a foundation for countless memories and a testament to your creativity and skill.
Conclusion: Embrace the Joy of DIY Outdoor Living
Embarking on this DIY outdoor dining table project by Shanty2Chic is more than just a home improvement task; it’s an opportunity to create a beautiful, functional, and deeply personal space right in your backyard. For a mere $60, you can have a sturdy, stylish, and durable dining table that rivals far more expensive commercial options. With detailed free plans, accessible materials, and a commitment to clear instructions, Shanty2Chic has truly made this dream achievable for everyone.
So, why wait? Gather your materials, fire up your tools, and get ready to transform your outdoor living area into the inviting gathering space you’ve always wanted. The satisfaction of building it yourself, combined with the joy of sharing meals and moments around your handcrafted table, is truly priceless. Download the free plan, watch the tutorial, and start building your own stunning outdoor dining table today!