
Master the Art of Sewing: Your Ultimate Guide to a DIY Infinity Scarf for Beginners
Embarking on your first sewing adventure can be an incredibly rewarding experience, especially when you choose a project that combines simplicity with stylish results. If you’re passionate about DIY fashion but are just starting out with a sewing machine, creating your own infinity scarf is the perfect gateway project. This comprehensive tutorial will guide you through every step, ensuring you gain confidence and produce a beautiful, versatile accessory you’ll love to wear or gift.
Infinity scarves are celebrated for their adaptability and timeless appeal, effortlessly enhancing a wide array of outfits, from casual everyday wear to more polished ensembles. Their continuous loop design eliminates the fuss of tying, making them a go-to accessory for comfort and chic styling. Forget about complicated patterns or intricate stitches; this project focuses on fundamental sewing techniques, making it ideal for absolute beginners. With clear, easy-to-follow instructions, you’ll learn essential skills that form the foundation for countless future sewing endeavors.
Why an Infinity Scarf is the Perfect First Sewing Project
Choosing the right beginner project is crucial for building enthusiasm and skill. An infinity scarf stands out for several compelling reasons:
- Simplicity: It primarily involves straight seams, which are excellent for practicing consistent stitching and seam allowances.
- Quick Gratification: You can often complete an infinity scarf in just a few hours, providing a tangible sense of accomplishment that encourages further sewing.
- Versatility: The finished product is a highly functional and fashionable item. It can be worn in multiple ways – draped once, looped twice, or even styled as a hood – making it a staple accessory.
- Customization: You have complete creative control over fabric choice, color, and texture, allowing you to personalize your scarf to match your unique style or a loved one’s preferences.
- Low Investment: It requires minimal fabric and basic sewing tools, making it a cost-effective way to dip your toes into the world of sewing.
- Skill Building: Beyond straight seams, you’ll practice cutting fabric accurately, pinning, pressing, and finishing edges – all fundamental skills in garment construction.
Essential Materials You’ll Need for Your DIY Infinity Scarf
Before you begin, gather all your supplies. Having everything at hand will make the sewing process smooth and enjoyable.
- Fabric: Approximately 1 to 1.5 yards (0.9 to 1.4 meters) of a soft, drapey fabric. We’ll delve into fabric choices in more detail below.
- Matching Thread: Choose a high-quality all-purpose polyester thread that closely matches your fabric color.
- Sewing Machine: Any basic sewing machine capable of a straight stitch will work perfectly.
- Fabric Scissors or Rotary Cutter and Mat: Sharp scissors are essential for clean cuts. A rotary cutter and self-healing mat offer even greater precision, especially for straight lines.
- Measuring Tape or Ruler: For accurate measuring and cutting of your fabric.
- Pins: A good supply of sharp sewing pins to hold your fabric pieces together.
- Iron and Ironing Board: Pressing seams is a critical step that ensures a professional finish.
- Fabric Marker or Chalk (Optional): Useful for marking cutting lines on your fabric.
Choosing the Right Fabric for Your Infinity Scarf
The fabric you select will significantly impact the look, feel, and drape of your finished infinity scarf. For beginners, certain fabrics are easier to work with than others.
- Knit Fabrics (Jersey, Rayon Spandex, ITY Knit): These are excellent choices for infinity scarves because of their beautiful drape, softness, and stretch. They create a cozy, flowing look. However, knits can be a bit more challenging for absolute beginners as they tend to stretch and curl. If you choose a knit, use a ballpoint needle to prevent snags and consider walking foot for easier handling.
- Lightweight Cotton (Voile, Lawn, Flannel): Cotton fabrics are generally stable and easy to sew. Cotton voile or lawn offers a lightweight, airy feel, perfect for warmer weather scarves. Flannel provides warmth and softness, ideal for cooler seasons.
- Chiffon or Georgette: For a more elegant, dressy scarf, these sheer fabrics are beautiful but notoriously slippery and challenging for beginners. If you’re feeling adventurous, proceed with extra pins and a very gentle touch.
- Blends: Many fabric blends (e.g., cotton-rayon, polyester-spandex) offer a good balance of drape, feel, and ease of sewing.
Pro Tip for Beginners: Start with a stable, woven cotton or a less stretchy knit fabric. Avoid very slippery or very thick fabrics for your first project. Always pre-wash and dry your fabric according to its care instructions. This prevents shrinkage after your scarf is made and removes any manufacturing chemicals.
Step-by-Step Tutorial: Crafting Your Beautiful DIY Infinity Scarf
Now, let’s get to the fun part – sewing! Follow these steps carefully, and remember to take your time.
Step 1: Prepare and Cut Your Fabric
- Pre-wash and Press: Wash and dry your chosen fabric as you normally would. Once dry, press it thoroughly with an iron to remove any wrinkles. This ensures accurate cutting and prevents future shrinkage.
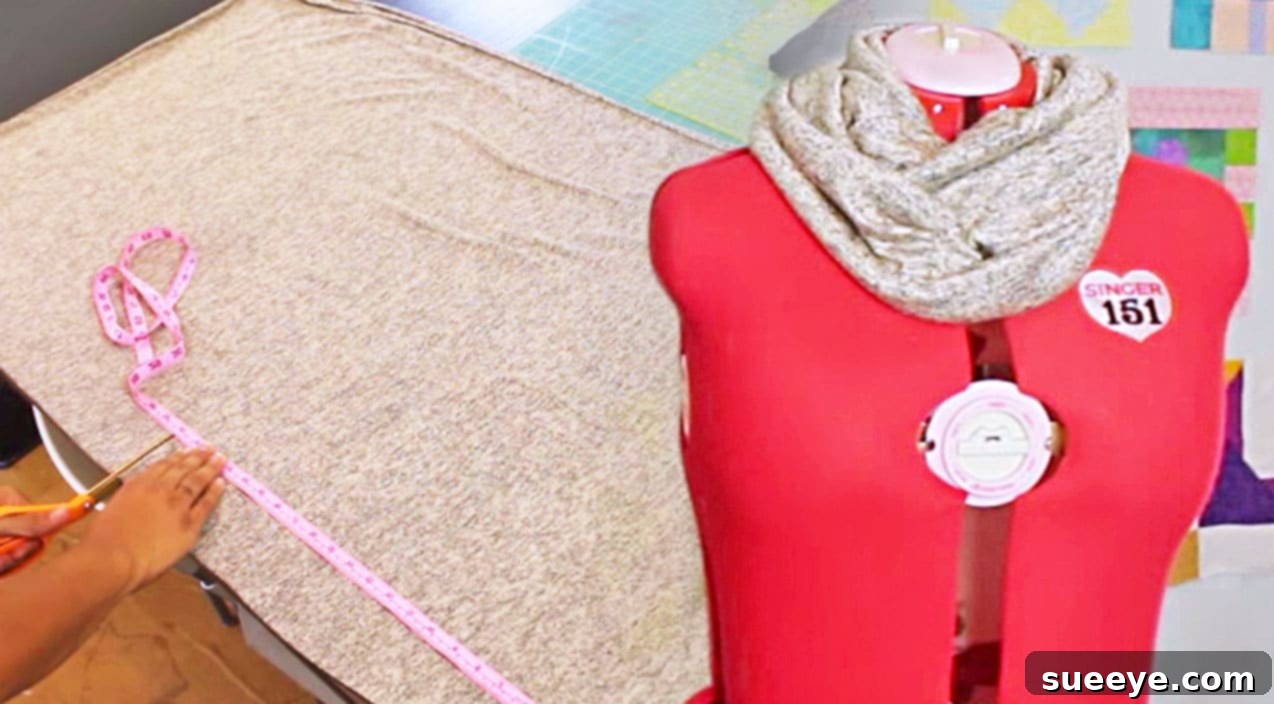
- Measure and Cut: Lay your fabric flat. For a standard adult infinity scarf, you’ll need one piece of fabric measuring approximately 18-22 inches (45-56 cm) wide by 60-70 inches (152-178 cm) long.
- For a wider, fuller scarf, increase the width.
- For a longer scarf that can be looped more times, increase the length.
- Feel free to adjust these dimensions based on your desired look and the amount of fabric you have.
Use your measuring tape and scissors or rotary cutter to cut your fabric piece precisely.
Step 2: Pin the Long Edges Together
- Fold Fabric: Take your cut fabric piece and fold it in half lengthwise, with the “right sides” (the pretty sides) of the fabric facing each other. You should now have a long, narrow strip of fabric folded in half.
- Pin the Raw Edges: Align the two raw long edges precisely. Pin them together every 2-3 inches (5-7.5 cm) along the entire length. Ensure the edges are perfectly even to prevent puckering.
Step 3: Sew the Long Seam
- Set Up Your Machine: Thread your sewing machine with your matching thread. Set it to a straight stitch with a standard stitch length (around 2.5).
- Sew the Seam: Starting at one end, sew a straight seam down the entire pinned long edge, using a 1/2 inch (1.25 cm) seam allowance. Remember to backstitch at the beginning and end of your seam to secure the stitches and prevent them from unraveling.
- Remove Pins and Press: Once sewn, carefully remove all pins. Take your fabric to the ironing board and press the seam open. This step is crucial for a flat, professional finish. You now have a long tube of fabric.
Step 4: Prepare to Connect the Ends – The “Tube” Method
This is the clever part that creates the continuous loop of the infinity scarf.
- Turn Half Inside Out: Keeping the tube inside out, reach one hand inside the tube and grab one of the raw ends.
- Bring Ends Together: While holding one end, pull it through the inside of the tube until it meets the other raw end. The right sides of the fabric should now be facing each other, with the raw edges aligned. You might need to twist one of the ends before bringing them together to create the “infinity” twist in your scarf – this is optional, but many people prefer it. If you want a twist, give one end a single twist before aligning it with the other.
- Align Raw Edges: You should now have the two raw ends of the tube perfectly aligned, creating a circular opening.
Step 5: Pin the Circular Opening
- Pin Carefully: Begin pinning the aligned raw edges together all the way around the circle. Leave a gap of about 3-4 inches (7.5-10 cm) unpinned. This opening is where you will turn your scarf right side out. Ensure your pins are perpendicular to the seam line.
Step 6: Sew the Circular Seam
- Sew Around the Circle: Starting and ending at the edges of your unpinned opening, sew a straight stitch around the entire circular opening, again using a 1/2 inch (1.25 cm) seam allowance. Backstitch at the beginning and end of your seam to secure it. Be careful not to sew the opening shut!
- Trim Seam Allowance (Optional): For bulky fabrics, you can trim the seam allowance down to 1/4 inch (0.6 cm) around the circle (but not across the opening). This helps reduce bulk.
Step 7: Finish the Opening
- Turn Right Side Out: Reach through the unsewn opening and gently pull the entire scarf right side out. Take your time to carefully pull all the fabric through. Once fully turned, the raw edges of your final seam should be hidden inside, and the opening will be visible on the outside.
- Press the Opening: Press the raw edges of the opening inward so they align perfectly with the sewn seam.
- Close the Opening: You have two options for closing this gap:
- Hand Stitch (Invisible Finish): For a nearly invisible finish, use a slip stitch or ladder stitch by hand. This is highly recommended for a professional look.
- Machine Stitch (Quicker Finish): For a quicker method, you can machine stitch the opening closed with a straight stitch very close to the edge. This will be visible but is perfectly acceptable for a casual scarf.
Backstitch at the beginning and end, regardless of the method you choose.
Step 8: The Final Press
- Give it a Final Press: Take your finished infinity scarf back to the ironing board and give it a final press. This will smooth out any wrinkles and give your new accessory a crisp, polished appearance.
Pro Tips for Beginner Sewers
To ensure your first sewing project is a success and to build good habits for future endeavors, keep these tips in mind:
- Practice Your Stitches: Before sewing on your actual project, test your stitch length and tension on a scrap piece of your chosen fabric.
- Use Quality Thread: Good quality thread is less likely to break, tangle, or fray, leading to smoother sewing.
- Pin Generously: Don’t be shy with pins, especially when working with slippery fabrics or curves. They help keep your fabric layers aligned.
- Take Your Time: Rushing leads to mistakes. Sew at a comfortable, steady pace. Remember, sewing is a marathon, not a sprint!
- Pressing is Key: Always press your seams as you go. It makes a huge difference in the professional appearance of your finished project.
- Embrace Mistakes: Everyone makes mistakes, especially when learning. Keep a seam ripper handy, and don’t be afraid to unpick and redo a seam if it’s not quite right. It’s part of the learning process!
- Watch Tutorials: Complement this written guide with video tutorials. Seeing the steps in action can clarify any uncertainties.
- Clean Your Machine: A well-maintained sewing machine runs smoother. Periodically clean out lint and dust.
Exploring Variations and Personalization for Your Infinity Scarf
Once you’ve mastered the basic infinity scarf, you can experiment with various modifications to create unique pieces:
- Two-Tone Scarf: Use two different coordinating fabrics for the length of the scarf. Cut two pieces (each half the final desired length), sew them right sides together along one short edge, then proceed with the tutorial.
- Different Widths and Lengths: Experiment with a super wide, luxurious scarf or a shorter, tighter one. Adjust your initial fabric cut accordingly.
- Adding Embellishments: Consider sewing on lace trim, fringe, or decorative buttons before the final loop is closed for an extra touch of flair.
- Raw Edge Finish: For certain knit fabrics that don’t fray, you could leave the edges raw for a more bohemian, deconstructed look.
Caring for Your Handmade Infinity Scarf
To ensure your beautiful handmade scarf lasts, proper care is essential. Always follow the care instructions for the fabric you used:
- Machine Wash: For most cottons and stable knits, machine wash on a gentle cycle with cold water.
- Hand Wash: For delicate fabrics like rayon or chiffon, hand washing is often the safest option.
- Drying: Air dry flat or hang to dry to prevent shrinkage and maintain shape. Avoid high heat in a dryer, especially for knits.
- Ironing: If necessary, iron on a low to medium setting, appropriate for your fabric type.
Your Sewing Journey Starts Here!
Congratulations! You’ve successfully learned how to sew a stylish and versatile infinity scarf, transforming a simple piece of fabric into a fashionable accessory. This project is more than just making a scarf; it’s about gaining confidence, developing new skills, and discovering the immense satisfaction of creating something beautiful with your own hands. This DIY infinity scarf tutorial is just the beginning of your exciting journey into the world of sewing. Don’t stop here – keep practicing, keep experimenting, and keep creating. The possibilities are truly endless!