
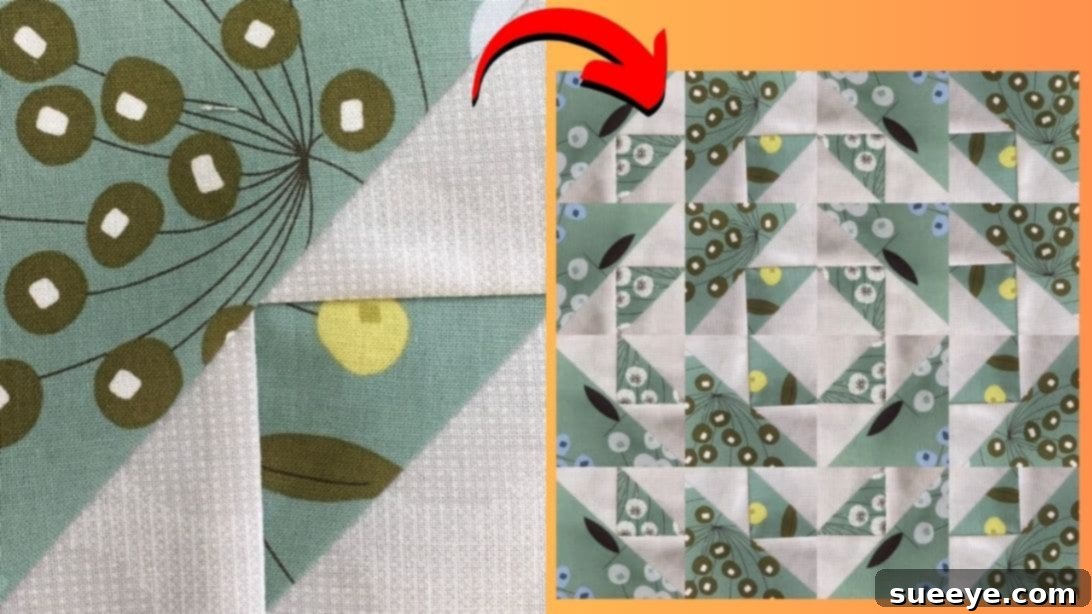
Mastering the Bird in the Air Quilt Block: Your Ultimate Beginner’s Guide
Embark on a delightful quilting journey with the incredibly simple yet stunning Bird in the Air quilt block. Whether you’re a complete novice picking up a needle for the first time or an experienced quilter looking for a quick and satisfying project, this tutorial, inspired by the fantastic work of Teresa DownUnder on YouTube, is designed to guide you every step of the way. Celebrated for its elegant design and straightforward construction, the Bird in the Air block is an ideal entry point into the rewarding world of quilting. Its beauty lies in its simplicity, requiring just two contrasting fabrics to create a dynamic visual effect that mimics a bird in flight.
This comprehensive guide breaks down each stage of creating this classic quilt block, ensuring that you grasp not just the ‘how-to’ but also the fundamental quilting techniques that will serve you well in future projects. We’ll focus on clear, concise instructions, essential tips for accuracy, and practical advice to help you achieve a beautifully pieced block. Prepare to unlock your creative potential and experience the immense satisfaction of crafting something beautiful with your own hands.
Why the Bird in the Air Block is Perfect for Beginners
The Bird in the Air quilt block stands out as a beginner-friendly marvel for several compelling reasons. Firstly, its design primarily relies on simple geometric shapes, mainly squares and rectangles, which are easy to cut and piece accurately. Secondly, it cleverly uses half-square triangles (HSTs), a foundational quilting technique that, once mastered, opens up a world of design possibilities. This block allows you to practice creating HSTs efficiently and precisely, building confidence for more complex patterns.
Moreover, the distinct visual appeal of the Bird in the Air block is achieved with just two fabrics, simplifying fabric selection and coordination. This focus on two fabrics allows new quilters to concentrate on their cutting and sewing accuracy without being overwhelmed by multiple color or print choices. The repetitive nature of its construction also helps beginners develop muscle memory for consistent seam allowances, a crucial skill in quilting. By following Teresa DownUnder’s approachable method, you’ll not only complete a gorgeous block but also lay a strong foundation for your quilting adventures.
Essential Materials for Your Quilt Block
Before diving into the sewing, gathering your materials is key. Precision in cutting is paramount in quilting, so ensure your tools are sharp and reliable. For this project, you’ll need two distinct fabrics – let’s call them Fabric A (often a lighter background) and Fabric B (a darker or contrasting print) – along with your standard sewing notions. Having everything laid out and ready will make your crafting process smooth and enjoyable.
- Fabric A:
- 2 squares @ 2⅜” x 2⅜” (for half-square triangles)
- 2 rectangles @ 2½” x 3½” (for side units)
- Fabric B:
- 2 squares @ 2⅜” x 2⅜” (for half-square triangles)
- 1 rectangle @ 4½” x 5½” (for the large background piece)
- Marking Tool: A marking pen, pencil, or chalk specifically designed for fabric. This will be used to draw precise lines on your fabric, which are essential guides for sewing and cutting.
- Needle and Thread: High-quality sewing thread (polyester or cotton) in a neutral color that blends with both fabrics. Ensure your sewing machine needle is sharp and appropriate for quilting.
- Ruler: A clear acrylic quilting ruler (preferably 6″ x 12″ or larger) with ¼-inch markings is invaluable for accurate measuring and trimming.
- Cutting Tools: Sharp scissors or, for maximum precision, a rotary cutter and a self-healing cutting mat. A rotary cutter significantly speeds up cutting and improves accuracy, especially for repetitive shapes.
- Sewing Machine: A reliable sewing machine with a ¼-inch presser foot, if available. This specialized foot helps maintain consistent seam allowances, which is critical for quilt block accuracy.
- Iron and Ironing Board: Essential for pressing seams. Proper pressing is as important as accurate sewing for a flat, crisp finished block.
Step-by-Step Instructions: Crafting Your Bird in the Air Quilt Block
Follow these detailed steps to construct your beautiful Bird in the Air quilt block. Take your time with each stage, paying close attention to measurements and pressing techniques for the best results.
Step 1: Creating the Half-Square Triangles and Side Units
The first part of our block involves creating the foundational components: two half-square triangles (HSTs) and two side units. These units will form the distinct “wings” of our bird.
- Prepare Your Squares for HSTs: Take one of the 2⅜” x 2⅜” squares from Fabric B (your darker fabric). On the wrong side of this square, use your marking pen, pencil, or chalk to draw a diagonal line from one corner to the opposite corner. This line will serve as a guide.
- Pair and Pin: Lay this marked Fabric B square on top of one of the 2⅜” x 2⅜” squares from Fabric A (your background fabric). Ensure their right sides are facing together, aligning all edges perfectly. Pin them together securely to prevent any shifting while sewing.
- Sewing for Two HSTs: Using your sewing machine, sew a seam ¼ inch on each side of the diagonal line you just drew. This technique is a fantastic shortcut for making two perfect half-square triangles from a single set of squares.
- Cut and Press: Carefully cut the square unit along the diagonal line you drew. You will now have two triangular units. Open each unit, pressing the seams open or, for a flatter block, press the seams towards the darker fabric (Fabric B). Pressing towards the darker fabric helps to reduce bulk and prevents the seam allowance from showing through lighter fabric later. Ensure your HSTs are crisp and flat.
- Trim for Accuracy: Using your quilting ruler and rotary cutter, trim each of these half-square triangles down to 2½ inches square. This step is crucial for achieving precise piecing in subsequent stages. Square up your HSTs carefully, ensuring clean 90-degree corners.
- Assemble Side Units: Now, take one trimmed HST. Position it with the darker triangle pointing upwards. Lay a 2½” x 3½” rectangle from Fabric A on one of its longer sides, ensuring right sides are facing. Pin and sew them together with a ¼-inch seam allowance. Repeat this process for the other HST and the remaining Fabric A rectangle. You should now have two identical “side units,” each consisting of an HST sewn to a rectangle.
- Press Side Units: Press the seams of these newly formed side units open, or towards the rectangle, depending on your preference for reducing bulk.
Step 2: Assembling the Block and Final Touches
With your side units prepared, the next step brings the entire Bird in the Air block together, revealing its iconic shape.
- Join the Side Units: Take your two completed side units. Align them with right sides together, making sure the seams and edges match perfectly. Pin them carefully and sew them together along the connecting edge with a ¼-inch seam allowance. This forms the central portion of your block.
- Prepare for the “Air” Cut: Press the seam of the newly joined unit open to reduce bulk. Now, on the center seam of this unit, make a small mark at 2¾ inches from one end. Carefully make a cut almost to the stitching line at this mark. This strategic cut allows for the fabric to lay flat when pressed, creating a smooth center. Press this area nicely, ensuring it lays flat.
- Marking for the Final Diagonal: This is where the “Bird in the Air” truly takes shape. Align one corner of the joined unit with the seam intersection in the middle. Using your marking tool, draw a diagonal line from this corner, through the seam intersection, to the opposite edge. Repeat this on the other side, creating two precise diagonal lines that will guide your final sewing. These lines are critical for the block’s distinctive “air” effect.
- Attaching the Large Background Piece: Take the larger 4½” x 5½” rectangle from Fabric B. Place it on top of your pieced unit, ensuring their right sides are facing each other. Align all edges carefully and pin securely along the two diagonal lines you just drew.
- Sew and Trim: Stitch precisely along each of the drawn diagonal lines. After sewing, carefully cut the excess fabric ¼ inch away from the stitching line, on the outside of the sewn lines. This will create your final block shape and incorporate the larger background fabric seamlessly.
- Final Press and Trim: Press the newly sewn seams open. Give your entire block a thorough final press to ensure it is perfectly flat and crisp. Finally, trim your completed Bird in the Air quilt block to its finished size (which should be approximately 4½” x 4½” if all prior trimming was accurate, but always measure to confirm). Trim off any remaining excess fabric to square up your block beautifully.
Congratulations on Your First Bird in the Air Quilt Block!
You’ve successfully completed the Super Simple Bird in the Air Quilt Block! This project is a fantastic introduction to fundamental quilting techniques and showcases how simple shapes can combine to create a visually dynamic design. The satisfaction of seeing your fabric pieces transform into this elegant “bird” is truly rewarding.
Now that you’ve mastered this block, consider making several more to assemble into a beautiful quilt top, a charming cushion cover, or even a unique wall hanging. Experiment with different fabric combinations – try a vibrant print for Fabric B against a solid neutral for Fabric A, or switch to contrasting solids for a modern minimalist look. The possibilities are endless, and each block you create will further refine your skills and boost your confidence.
Remember, practice makes perfect in quilting. Don’t be discouraged by initial imperfections; every stitch is a step in your learning journey. For a visual demonstration of these steps and additional tips, we highly recommend visiting Teresa DownUnder’s original YouTube tutorial. Her clear instructions and visual guidance are an excellent complement to this written guide.
Happy quilting, and we look forward to seeing what beautiful creations you’ll make next!
*All images for this tutorial are credited to Teresa DownUnder via YouTube. We encourage you to visit her channel and subscribe for more inspiring quilting content!