
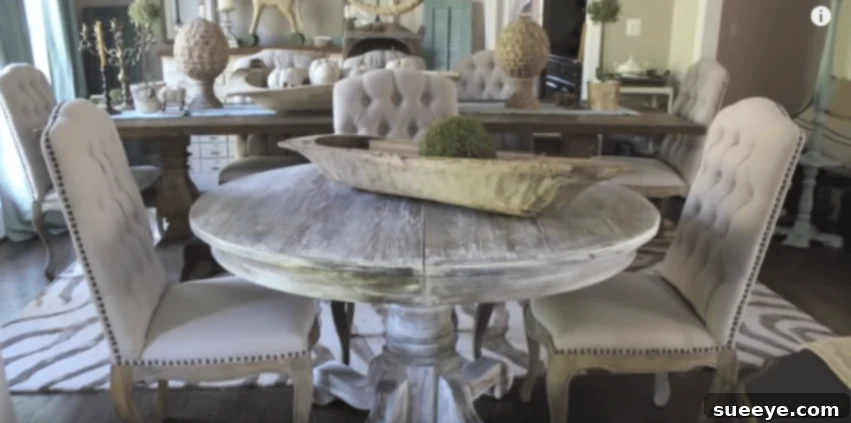
Transform Your Home: Achieve the Restoration Hardware Look with Chalk Paint
Embark on an exciting journey to revitalize your furniture and elevate your home decor with the incredible versatility of chalk paint. What once seemed like an exclusive, high-end aesthetic found only in boutiques like Restoration Hardware is now completely within your reach, thanks to this revolutionary painting technique. Forget the daunting hours of sanding and priming; chalk paint simplifies the furniture refinishing process, making it accessible and enjoyable for DIY enthusiasts of all skill levels. If you’ve been dreaming of elegant, refined pieces with a timeless, aged appeal, prepare to be inspired to transform every surface in your home.
The allure of a beautifully distressed, elegantly aged piece of furniture is undeniable. It tells a story, adds character, and brings a sophisticated warmth to any space. Many aspire to the distinct style popularized by luxury brands, yet the price tag can often be prohibitive. This is where chalk paint shines as a game-changer, offering a budget-friendly path to creating that coveted high-end look. Watching inspiring tutorials can spark immense excitement, revealing just how simple and gratifying it can be to achieve these stunning results yourself. The key message is to embrace creativity and “play, play, play” with the paint, allowing for individual expression rather than strict adherence to rigid rules.
The Magic Behind Chalk Paint: A DIY Revolution
Chalk paint has rapidly become a favorite among decorators and crafters worldwide, and for good reason. Its unique formulation provides a matte, velvety finish that is both durable and beautiful. Unlike traditional paints, chalk paint is renowned for its exceptional adhesion to almost any surface – wood, metal, laminate, concrete, and even fabric – often without the need for time-consuming preparation like sanding or priming. This characteristic alone saves immense effort and makes furniture makeovers much less intimidating. It dries quickly, allowing for multiple coats and quicker project completion, which is a significant advantage for those eager to see their vision come to life.
The beauty of chalk paint lies not only in its ease of use but also in its ability to create a wide range of finishes, from smooth contemporary looks to heavily distressed, antique styles. This adaptability is crucial for achieving that authentic, lived-in feel that characterizes the Restoration Hardware aesthetic. Its forgiving nature means that “mistakes” can often be easily incorporated into the distressed look, making the entire process less stressful and more focused on creative exploration. It truly empowers you to experiment with colors, layers, and distressing techniques, ultimately crafting a piece that is uniquely yours and brimming with personality.
Unlocking the Coveted Restoration Hardware Aesthetic
The Restoration Hardware style is synonymous with timeless elegance, vintage charm, and an understated luxury. It often features reclaimed wood, aged metals, muted color palettes, and pieces that appear to have a rich history. This aesthetic champions furniture with character, subtle imperfections, and a sense of enduring quality. Recreating this look can often seem daunting, but chalk paint provides the perfect medium to imbue new or old furniture with that distinct, aged patina. By strategically applying and distressing chalk paint, you can mimic the wear and tear of time, transforming ordinary items into extraordinary focal points.
Achieving this sophisticated style involves more than just a coat of paint; it’s about technique and understanding how to create depth and texture. The matte finish of chalk paint serves as an ideal base for distressing, allowing underlying colors or the original wood to peek through, mimicking natural aging. When sealed with clear or dark wax, the finish develops a soft sheen and added durability, further enhancing the vintage appeal and giving it that authentic, high-end feel. The satisfaction of creating a piece that looks like it stepped out of a luxury catalog, for a fraction of the cost, is incredibly rewarding.
Essential Tools and Materials for Your Chalk Paint Project
Before you dive into your first chalk paint project, gathering the right tools and materials is crucial. While chalk paint is known for its simplicity, having the appropriate supplies will ensure a smoother process and a professional-looking finish. Investing in quality tools can make a significant difference in the application and overall outcome of your furniture transformation.
Choosing Your Chalk Paint: The Annie Sloan Standard
When it comes to chalk paint, Annie Sloan Chalk Paint is often considered the benchmark. Pioneered by Annie Sloan herself, this brand offers a rich array of colors and consistent quality that many professionals and hobbyists prefer. Its unique formulation is designed for ease of use and versatility, making it an excellent choice for achieving that authentic distressed or vintage look. While other brands are available, starting with Annie Sloan can provide a reliable and satisfying experience, especially for those new to the technique. Explore her extensive color palette to find the perfect shades that complement your home’s existing decor or inspire a completely new design direction.
The Right Brush Makes All the Difference
The type of brush you use plays a significant role in the finish of your chalk paint project. Many experienced painters, including those in inspiring tutorials, highly recommend an oval brush for chalk paint application. An Annie Sloan oval brush, for instance, is specifically designed to hold a good amount of paint, distribute it evenly, and allow for excellent control. Its shape makes it easier to navigate curves and crevices, and the natural bristles help create the subtle texture often desired with chalk paint, which is essential for developing that authentic Restoration Hardware look. While smaller brushes might seem more precise, an oval brush can actually be easier to control for broad strokes and detailed areas alike, providing superior coverage and a more pleasing finish without the need for excessive water thinning.
Beyond Paint and Brush: Other Must-Haves
- Water: Keep a small container of water handy. It’s useful for thinning paint slightly if needed, and essential for the wet distressing technique.
- Soft Cloths: You’ll need lint-free cloths for various stages, including cleaning, wet distressing, and buffing wax. A true testament to DIY resourcefulness, many find that a soft, old t-shirt – perhaps even one of your husband’s favorite retired ones, as humorously suggested in some tutorials – works perfectly.
- Fine-Grit Sandpaper: For dry distressing, a fine-grit sandpaper (around 120-220 grit) will gently remove paint from edges and raised details, revealing the underlying surface and creating a naturally aged appearance.
- Clear Soft Wax: This is a non-negotiable item. After the paint dries, clear wax is applied to seal and protect the finish, providing durability and a soft, beautiful sheen. It also deepens the color of the paint.
- Wax Brush or Lint-Free Cloth for Wax Application: A dedicated wax brush makes application easier and more even, pushing the wax into the paint for better protection. Alternatively, a lint-free cloth can also be used effectively for application and buffing.
- Drop Cloths or Protective Sheeting: Always protect your work area from paint drips and spills.
- Cleaning Supplies: Degreaser or mild soap and water for pre-painting cleaning.
Step-by-Step Guide to Your Furniture Transformation
With your materials ready, it’s time to bring your vision to life. This step-by-step guide will walk you through the process, ensuring you achieve a beautiful, lasting finish that echoes the elegance of Restoration Hardware.
Step 1: Preparation is Key (Even with Chalk Paint!)
While chalk paint minimizes prep work, a little effort here goes a long way. Begin by thoroughly cleaning your furniture piece. Use a degreaser or mild soap and water to remove any dirt, grime, oil, or dust. Ensure the surface is completely dry before proceeding. If there are any loose veneers or structural issues, address them now. Remove any existing hardware like knobs or pulls, as you’ll want to paint around or replace them later. Lightly scuffing extremely glossy surfaces can sometimes aid adhesion, though it’s often not strictly necessary with chalk paint.
Step 2: The First Coat – Laying the Foundation
Stir your chalk paint thoroughly to ensure an even consistency. Dip your oval brush into the paint, but avoid overloading it. Apply your first coat using long, even strokes. You can opt for traditional smooth strokes or a more textured, cross-hatch pattern, depending on the desired final look. Don’t worry if the first coat appears streaky or if the original surface shows through; chalk paint offers excellent coverage, and the second coat will build upon this foundation. Allow the first coat to dry completely, which typically takes about 30 minutes to an hour, depending on humidity and paint thickness.
Step 3: The Second Coat – Building Depth and Character
Once the first coat is dry, apply a second coat of chalk paint. This coat will deepen the color and provide fuller coverage. Again, apply with your oval brush, ensuring even distribution. For a truly opaque finish, two coats are usually sufficient, but you can add a third if desired. If you’re planning a two-tone distressed look, this is where you might consider applying a contrasting color for your topcoat, knowing that some of the first color will show through after distressing. Allow the second coat to dry completely before moving on to the distressing phase.
Step 4: The Art of Distressing – Creating That Aged Charm
This is where the magic of the Restoration Hardware look truly comes to life. Distressing techniques allow you to create the illusion of age and wear. There are two primary methods:
- Wet Distressing: Shortly after the second coat has dried (within a few hours), take a slightly damp cloth and gently rub away paint from areas that would naturally show wear over time – edges, corners, raised details, and carvings. The dampness helps lift the fresh paint more easily.
- Dry Distressing: If the paint has fully cured for longer, use fine-grit sandpaper to lightly sand these same areas. Apply gentle pressure, letting the sandpaper do the work. The goal is to reveal hints of the underlying surface (wood or previous paint color) without creating deep gouges.
Remember the “play, play, play” philosophy here. There are no rigid rules; experiment with the amount of distressing until you achieve a look you love. Step back frequently to assess your progress and ensure a balanced, authentic appearance.
Step 5: Sealing with Wax – Protection and Patina
Sealing your chalk-painted furniture with wax is a critical step. It not only protects the paint from daily wear and tear but also enhances the depth of color and provides that beautiful, soft patina characteristic of aged pieces. Using a wax brush or a lint-free cloth, apply a thin, even coat of clear soft wax over the entire painted surface. Work in small sections, rubbing the wax into the paint. Immediately after application, use another clean, lint-free cloth to buff off any excess wax, ensuring a smooth, non-tacky finish. You’ll notice the color deepen slightly and a subtle sheen appear.
For an even more antique or aged effect, you can optionally apply a dark wax in crevices and corners after the clear wax has been applied and buffed. This technique creates shadows and highlights, further enhancing the vintage appeal. Allow the wax to cure for several days (up to 30 days for full hardness) before subjecting the furniture to heavy use. During this curing time, handle the piece gently.
Unleash Your Inner Artist: Tips for Creative Freedom
Chalk paint offers boundless opportunities for creative expression. Don’t be afraid to think beyond a single color. Layering different chalk paint colors and then distressing can create incredible depth and a truly unique, multi-dimensional look. Consider using a darker color as a base coat and a lighter one on top, allowing hints of the darker shade to show through the distressing. Experiment with washes, creating translucent effects, or even stenciling for added detail.
One of the most liberating aspects of working with chalk paint is its forgiving nature. If you make a mistake or don’t like a particular area, simply repaint over it! There’s no need to strip or sand. This freedom encourages experimentation and helps build confidence, allowing you to truly “play” with your furniture transformations. Once your masterpiece is complete, don’t forget to consider new hardware. Upgrading knobs, pulls, or hinges can dramatically enhance the overall aesthetic, adding a final touch of sophistication that perfectly complements your newly finished, Restoration Hardware-inspired piece.
Maintaining Your Chalk-Painted Masterpiece
Proper care will ensure your chalk-painted furniture remains beautiful for years to come. Once the wax has fully cured, cleaning is simple. Dust regularly with a soft, dry cloth. For spills or marks, gently wipe with a slightly damp cloth and mild soap if necessary, but avoid harsh chemical cleaners or abrasive scrubbing, as these can strip the wax and damage the finish. Re-waxing might be necessary every few years, especially on high-traffic pieces like dining tables or coffee tables, to maintain protection and refresh the patina. This simple maintenance routine will keep your stunning, hand-painted pieces looking their best, a testament to your DIY prowess.
Beyond the Tutorial: Your Next Furniture Adventure Awaits
Armed with these techniques and the knowledge that achieving that luxurious Restoration Hardware look is entirely within your grasp, there’s no limit to what you can create. Chalk paint truly transforms the daunting task of furniture refinishing into an enjoyable artistic endeavor. From dressers and dining tables to chairs and cabinets, every piece of furniture in your home holds the potential for a stunning makeover. So, gather your supplies, find that perfect piece to transform, and dive into the satisfying world of chalk painting. The elegant, refined home you’ve always envisioned is just a brushstroke away. Share your incredible transformations and inspire others to embrace the magic of chalk paint!