
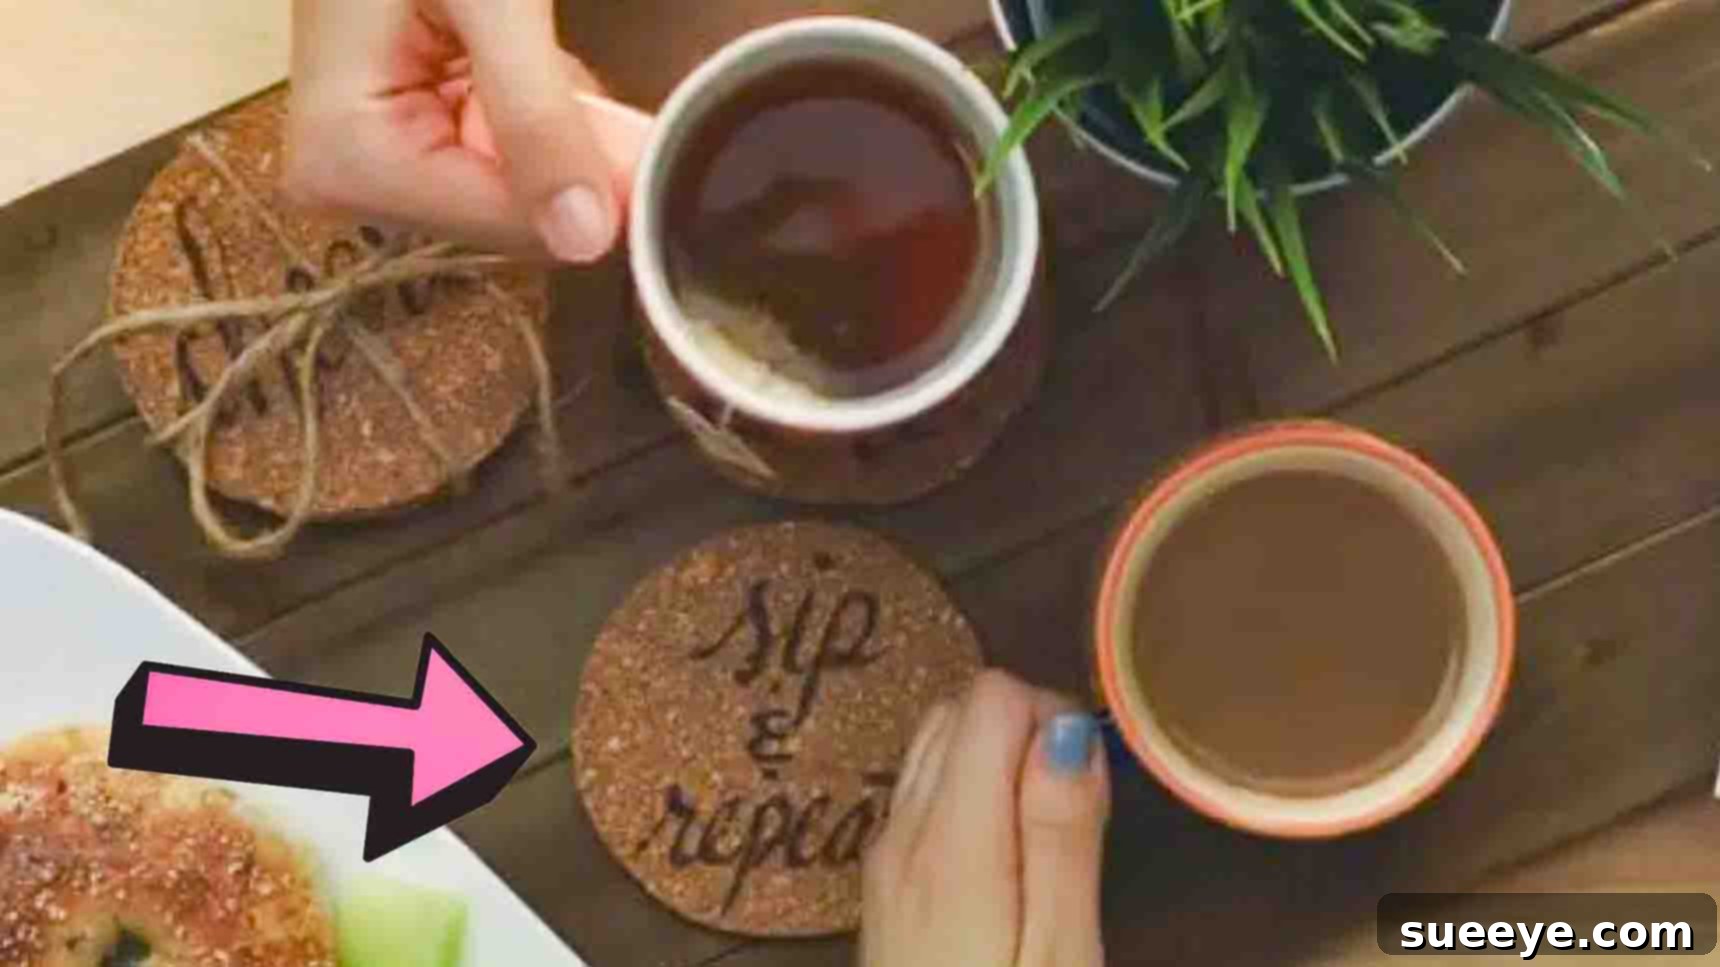
DIY Wood-Burned Cork Coasters: Craft Personalized Gifts with Ease
In a world increasingly filled with mass-produced items, the charm of a handmade gift stands out. It’s a testament to the effort, thought, and love you pour into creating something truly special for your friends, family, or even yourself. If you’re searching for an idea that combines practicality, sustainability, and a personal touch, look no further than DIY wood-burned cork coasters. This project is not only incredibly satisfying to complete but also results in a unique and functional item perfect for any home.
Inspired by the fantastic tutorial from Makeful on Youtube, these adorable and rustic coasters are surprisingly simple to make, requiring just a handful of basic crafting supplies. You can whip up a set in under an hour, making them an ideal last-minute present that still feels deeply thoughtful and customized. Imagine gifting a set of coasters etched with meaningful initials, a special date, a favorite quote, or a charming design – it’s a gift that speaks volumes without breaking the bank or demanding expert crafting skills. Let’s dive into how you can bring these personalized cork coasters to life, adding a touch of warmth and individuality to any coffee table, desk, or bedside table.
Why DIY Cork Coasters Make the Perfect Gift and Home Accent
There are countless reasons why wood-burned cork coasters are a fantastic choice for your next DIY venture, whether for gifting or personal use:
- Uniquely Personalized: Unlike store-bought options, these coasters offer endless possibilities for customization. Engrave names, dates, meaningful quotes, intricate patterns, or even fun inside jokes. The only limit is your imagination, ensuring each coaster is truly one-of-a-kind and resonates deeply with the recipient.
- Eco-Friendly and Sustainable: Cork is a remarkable material harvested from the bark of cork oak trees without harming the tree itself, making it a highly sustainable and renewable resource. It’s biodegradable, lightweight, and adds a natural, earthy feel to your home decor, aligning perfectly with eco-conscious living.
- Highly Functional: Cork is naturally absorbent, heat-resistant, and provides excellent grip, making it an ideal material for protecting your precious furniture surfaces from unsightly condensation rings, heat damage from hot mugs, and accidental spills.
- Cost-Effective Craft: Compared to purchasing custom-made gifts or designer home accessories, crafting these coasters yourself is incredibly budget-friendly. Most materials are inexpensive and readily available at local craft stores, hardware stores, or online marketplaces.
- Quick & Easy Project: Even if you’re a crafting novice or have limited time, this project is straightforward and quick to execute. It’s perfect for a relaxing weekend afternoon or even a speedy evening craft session, proving that beautiful, handmade items don’t always require hours of intricate work.
- Boost Your Creativity: This project offers a wonderful opportunity to explore wood burning (also known as pyrography), a satisfying artistic technique that can be applied to many other crafts. It’s a chance to experiment with design, precision, and artistic expression, enhancing your crafting repertoire.
- Versatile Home Decor: Beyond their functional use, these personalized coasters serve as charming decorative accents, adding character and warmth to any room’s aesthetic. They can complement various decor styles, from rustic and bohemian to minimalist and modern.
Gather Your Crafting Essentials: Materials and Tools
One of the best aspects of this DIY project is its simplicity, requiring only a few readily available and affordable materials. Here’s a detailed list of what you’ll need to get started on your personalized cork coasters:
- Corkboard (or Cork Sheets): This is the fundamental material for your coasters. You can easily find corkboard or cork sheets in various thicknesses at craft stores, office supply stores, or online retailers. A thickness of about 1/8 to 1/4 inch (3-6mm) is generally ideal – it’s sturdy enough to feel substantial but thin enough to cut with relative ease. Opt for larger sheets if you plan to make multiple coaster sets.
- Small Bowl or Template: Essential for tracing perfectly round coaster shapes. A bowl with a diameter of 3.5 to 4 inches (approximately 9-10 cm) is standard for most coasters. Alternatively, you can use a large cookie cutter, a dedicated coaster template, a compass to draw circles, or even print a template online for different shapes like squares, hexagons, or even custom designs.
- Pencil: Any standard pencil will do for marking your cutting lines. Ensure it has a sharp tip for precise outlines, which will lead to cleaner cuts.
- Cutter (Utility Knife or X-Acto Knife): A sharp blade is crucial for achieving clean, smooth cuts through the cork. A utility knife or a craft knife (such as an X-Acto knife) with a fresh, sharp blade will glide through the corkboard much more efficiently than a dull one. Always use a self-healing cutting mat underneath your corkboard to protect your work surface and prolong the life of your blade.
- Soldering Iron (or Wood Burning Tool): This is the specialized tool that allows for the unique personalized touch on your cork coasters. While a basic soldering iron can work, a dedicated wood burning tool often comes with various interchangeable tips (fine point, shading, calligraphy) that offer greater versatility for intricate designs, different line thicknesses, and text. Familiarize yourself thoroughly with its operation and safety guidelines before plugging it in.
- Twine (or Ribbon): Primarily used for tying your finished coaster set together, which makes for a beautiful and rustic presentation when gifting. Natural jute twine offers an authentic, earthy aesthetic, while colorful ribbons can add a pop of elegance or match a specific theme.
- Optional: Fine-Grit Sandpaper: For smoothing out any slightly rough or uneven edges on your cut cork circles. A quick, gentle sanding can give your coasters a more professional and polished finish.
- Optional: Clear Sealant Spray: A matte or glossy clear sealant can be applied to protect your finished coasters from spills, stains, and general wear and tear, thereby extending their lifespan. If you anticipate food contact or frequent use, ensure you select a non-toxic or food-safe sealant.
Step-by-Step Guide: Crafting Your Personalized Cork Coasters
Follow these straightforward steps to transform a plain sheet of cork into a set of charming, custom-made coasters that are ready for gifting or gracing your own home.
Step 1: Prepare Your Coaster Blanks (Trace and Cut the Shapes)
The initial phase of this project involves creating the basic shapes for your coasters. Begin by laying your corkboard flat on a stable and protected surface, ideally on top of a self-healing cutting mat to prevent damage to your table. Take your small bowl (or your chosen template, such as a cookie cutter or printed guide) and position it onto the corkboard. Using your pencil, carefully trace around its outer edge. Apply steady, even pressure to ensure a clear, visible line that will guide your cutter. Repeat this process across the corkboard, leaving a small, efficient gap between each traced circle to maximize your material usage and minimize waste.
Once all your coaster shapes are meticulously traced, it’s time to cut them out. Arm yourself with your utility or X-Acto knife, ensuring it has a fresh, sharp blade. Carefully follow the traced lines, applying consistent pressure. For cleaner and safer cuts, it’s often more effective to make several shallow passes with the knife rather than attempting to cut through the entire thickness of the cork in one go. Rotate the corkboard as you cut, allowing your cutting hand to maintain a comfortable and steady position throughout the process. Always remember to cut away from your body and keep your fingers well clear of the blade’s path to prevent accidents. If you notice any slightly rough or uneven edges after cutting, gently smooth them out with fine-grit sandpaper for a more refined and professional finish. At this point, you should have a collection of perfectly shaped cork coaster blanks, pristine and ready for their personalized touch.
Step 2: Personalize with Wood Burning (Using a Soldering Iron or Pyrography Tool)
This is where the true magic happens and your cork coasters transition from simple blanks to truly personalized treasures. Plug in your soldering iron or dedicated wood burning tool and allow it ample time to heat up fully according to the manufacturer’s instructions. If your tool features adjustable heat settings, it’s wise to start with a medium setting and make minor adjustments as needed to achieve your desired burn effect. Before touching your actual coaster blanks, it is highly recommended to test your heated tool on a scrap piece of cork or wood. This practice run will help you get a crucial feel for the tool’s heat, the necessary pressure, and the speed required to create consistent and beautiful burns.
Now, it’s time to imprint your chosen design. You can confidently freehand your desired words, initials, or simple designs directly onto the cork surface. For more intricate patterns, precise lettering, or complex graphics, consider lightly sketching your design with a pencil first. Alternatively, stencils are an excellent option for achieving perfect shapes and fonts, or you can transfer a printed design onto the cork using carbon paper. With your now heated tool, gently and steadily trace or draw your chosen words or patterns onto the cork surface. Maintain a steady hand and consistent pressure for an even and clear burn. Remember that different tips on a wood burning tool can create varying line thicknesses and shading effects; experiment with fine tips for delicate details, chisel tips for broader strokes, and shading tips for filling in larger areas with a gradient effect. Always work in a well-ventilated area to dissipate any fumes, and crucially, place the hot tool on its heat-resistant stand when not actively in use to prevent burns or damage to your workspace. This step allows for immense creativity – from elegant monograms and full names to inspiring quotes, whimsical illustrations, or intricate geometric designs, make each coaster reflect your personal artistic style or perfectly match the recipient’s interests and personality.
Step 3: Assemble and Present Your Finished Coasters
Once you have meticulously personalized all your cork coaster blanks with your wood-burned designs, ensure they have cooled down completely before proceeding. If you opted for applying a protective sealant, now is the opportune moment to do so. Follow the product instructions carefully, typically applying it in a well-ventilated area with even coats. Allow for adequate drying and curing time as specified by the sealant manufacturer before handling the coasters further.
After your coasters are fully dry and ready, gather them for presentation. A common and undeniably charming way to present them, especially for gifting, is to stack a set neatly together (a set usually consists of 4 or 6 coasters). Take a length of your chosen twine or ribbon and wrap it securely around the stacked coasters a few times, finishing with a simple knot or a decorative bow. For an extra thoughtful touch, you can easily attach a small, handwritten tag with a personal message, the recipient’s name, or even simple care instructions for their new coasters. To further elevate the gift presentation, you might place the bundled coasters in a small decorative box, a rustic fabric pouch, or even a custom-made holder. Your beautiful, handmade wood-burned cork coasters are now officially finished and exquisitely ready to be gifted, bringing a genuine smile to your loved one’s face, or to be proudly displayed and admired in your own home, adding a unique, personal touch to your decor!
Tips for Success and Creative Variations
To make your wood-burned cork coasters truly stand out and ensure a smooth crafting experience, consider these expert tips and ideas for creative variations:
- Practice Makes Perfect: If you’re new to the art of wood burning (pyrography), always practice on scrap pieces of cork or wood before working on your actual coasters. This crucial step will help you gain confidence, get a real feel for the tool’s heat settings, the optimal pressure, and the speed required to achieve your desired burn effect, from light shading to deep dark lines.
- Design Inspiration is Everywhere: Don’t limit your creativity! Look for inspiration in countless places. Pinterest, Etsy, craft blogs, nature, books, and even typography websites are fantastic sources for monogram styles, elegant floral patterns, abstract designs, intricate geometric motifs, or unique holiday themes.
- Stencils for Precision: For intricate designs, complex logos, or achieving perfectly uniform lettering, don’t hesitate to utilize stencils. You can lightly trace around them with a pencil before proceeding with your burning tool, or in some cases, you can even burn directly through certain types of heat-resistant stencils.
- Color Your Coasters First: For an exciting twist, consider adding color to your cork coasters before the wood burning stage. You can paint the cork with acrylic paints for a vibrant pop of color. Ensure the paint is completely dry and cured before you begin burning your designs. The burned patterns will create a striking and beautiful contrast against the colored background.
- Add Felt Pads for Extra Protection: For an enhanced level of protection for delicate surfaces and to prevent your coasters from sliding, consider gluing small felt pads to the bottom of each coaster. This small addition makes them feel more premium and adds functionality.
- Experiment with Alternative Shapes: While classic round coasters are timeless, don’t shy away from experimenting with other shapes. Square, hexagonal, octagonal, or even custom die-cut shapes can offer a modern and unique aesthetic to your coaster sets.
- Create Themed Sets: Elevate your gifting game by creating themed sets of coasters. Ideas include “His & Hers,” “Mr. & Mrs.” for weddings, astrological signs, designs representing favorite hobbies (e.g., coffee, books, travel), or seasonal motifs for holidays like Christmas, Halloween, or Thanksgiving.
- Include Care Instructions: If you’re gifting your coasters, include a small, elegant card with simple care instructions. Advise the recipient to wipe clean with a damp cloth and to avoid submerging the coasters in water to ensure their longevity and maintain their beauty.
Conclusion: Crafting Memories, One Coaster at a Time
Creating DIY wood-burned cork coasters is more than just a simple craft project; it’s a delightful opportunity to craft something beautiful, practical, and deeply personal. Whether you’re meticulously making a thoughtful gift for a cherished loved one or adding a customized, handcrafted touch to your own home decor, the entire process is incredibly enjoyable, and the results are truly rewarding. With just a handful of basic materials, a little patience, and a dash of creativity, you have the power to transform simple cork into cherished, unique pieces that not only protect surfaces but also spark conversations and add character to any space.
So, gather your crafting supplies, ignite your inner artist, and embark on this delightful DIY journey. The immense satisfaction of crafting something with your own hands, especially something so unique, useful, and imbued with personal meaning, is truly unmatched. For those who appreciate visual learning, don’t forget to check out the original Makeful video tutorial; it offers an excellent visual guide to complement these detailed written steps. Happy crafting, and enjoy the creation of your personalized cork coaster masterpieces!