
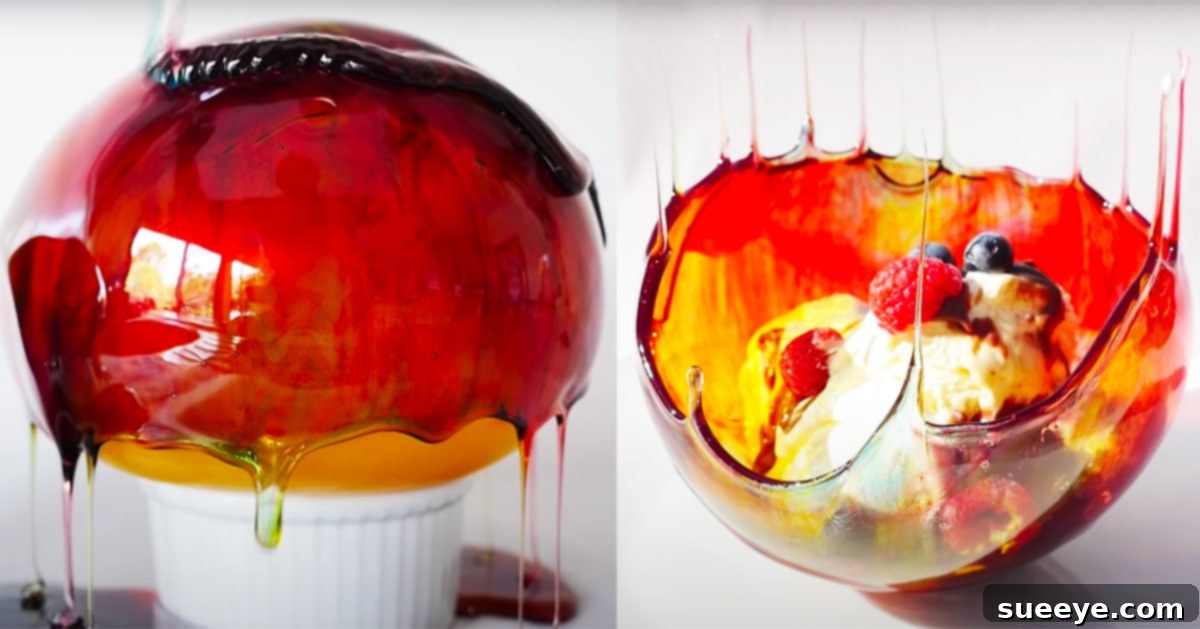
Craft Stunning Edible Candy Sugar Balloon Bowls: A Sweet Guide
Imagine serving your favorite desserts or party snacks in a bowl that’s not only beautiful but entirely edible. Candy sugar balloon bowls are a true marvel of confectionery art, transforming simple ingredients into a dazzling, functional masterpiece. When I first encountered the concept through the ingenious How To Cook That tutorial, I was immediately captivated. The idea of using a balloon to mold molten sugar into a delicate, translucent vessel seemed like something out of a fairy tale. Far from being just a novelty, these exquisite sugar bowls offer a sophisticated and whimsical way to elevate any occasion, whether it’s a sophisticated dinner party, a festive holiday gathering, or simply a creative afternoon project.
The beauty of these sugar bowls lies in their versatility and stunning visual appeal. They can serve as elegant containers for a variety of treats, from vibrant fruit salads and decadent ice cream to creamy mousse or even delicate savory appetizers. Their shimmering, stained-glass-like appearance makes them an instant focal point on any table, doubling as both a serving dish and a breathtaking decoration. While the thought of working with hot sugar and delicate structures might initially sound daunting, leading to fears of accidental cracks or collapses, the process is surprisingly straightforward with careful attention to detail. This guide will walk you through each step, ensuring you can confidently create these impressive edible works of art, transforming your culinary presentations into unforgettable experiences.
Why Make Edible Sugar Bowls?
Beyond their sheer aesthetic appeal, candy sugar bowls offer a plethora of reasons to try your hand at this unique culinary craft:
- Unforgettable Party Centerpieces: Impress your guests with a truly unique serving solution that doubles as a conversation starter. Perfect for special occasions, holidays, or themed parties.
- Versatile Serving Vessels: Ideal for holding everything from individual servings of ice cream, sorbet, and fruit salads to small candies, nuts, or even a delicate floral arrangement (with a protective liner).
- Creative Expression: Experiment with different food colorings and flavorings to match your party theme or personal preference. The possibilities for customization are endless.
- Unique Gift Idea: Fill a handmade sugar bowl with homemade truffles or small confections for a truly personal and memorable gift.
- Fun for All Ages (with Supervision): While working with hot sugar requires adult supervision, the concept is fascinating for children, making it an engaging family project that combines science and art.
Essential Materials for Your Sugar Bowl Masterpiece
Crafting these edible wonders requires a few specific ingredients and tools, each playing a crucial role in the success of your project. Precision is key, especially when dealing with sugar temperatures.
- 1 1/3 cups Granulated Sugar: The foundation of your edible bowl, providing the structure and sweetness.
- 1/2 cup Glucose Syrup: Essential for preventing crystallization and adding flexibility to the hardened sugar, making it less brittle and easier to work with.
- 2.54 fluid ounces of Water: Acts as a solvent for the sugar, allowing it to dissolve and form the syrup.
- Food Flavoring and Coloring (optional): Unleash your creativity! Add a few drops of food-grade coloring to achieve stunning hues or a flavoring extract (like vanilla, mint, or fruit) for an aromatic touch.
- Candy Thermometer: Absolutely critical for success. Achieving the precise “hard crack” stage (around 300-310°F or 149-154°C) is vital for the sugar to set correctly and be structurally sound.
- Balloons (CAUTION: Please read carefully): This is perhaps the most unique tool. It is imperative to use helium-quality balloons. These are designed to withstand more heat than standard party balloons. Even then, it is highly recommended to test an un-inflated balloon first by dipping it into a small amount of hot sugar to ensure it does not melt or pop under the heat. Safety first!
- Additional Tools: A heavy-bottomed saucepan, a heat-resistant bowl or glass for dipping, parchment paper or a silicone mat for drying, and a pastry brush.
Step-by-Step Directions to Create Your Edible Art
The process of making candy sugar balloon bowls is a delightful blend of science and art. Follow these detailed steps carefully for the best results, always prioritizing safety when working with hot sugar.
1. Preparing Your Balloons and Workspace
Begin by setting up your workspace. Lay down parchment paper or a silicone mat on a flat, heat-resistant surface where your sugar bowls will dry. Have all your materials and tools within arm’s reach.
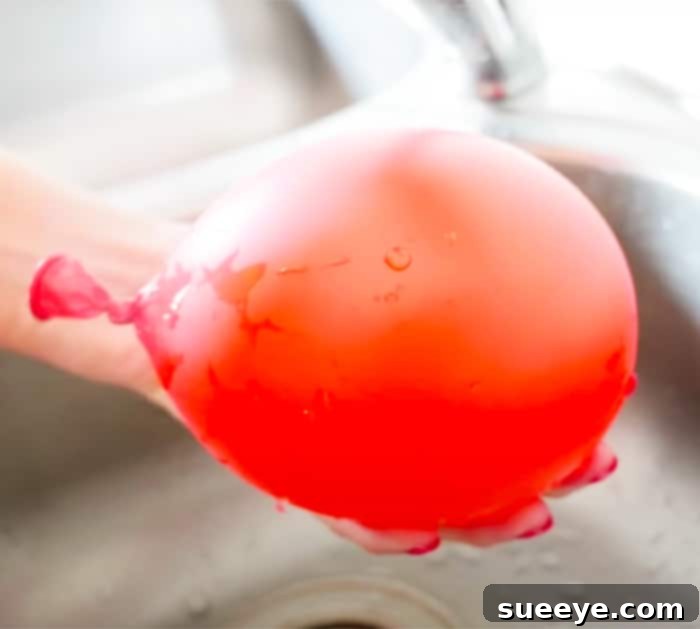
Next, prepare your balloons. As demonstrated in the How To Cook That video, inflate your balloons to the desired size for your bowls. The size of the inflated balloon will dictate the size and shape of your finished sugar bowl. Once inflated, release a small amount of air until the balloon is slightly softened. This makes it easier to handle and allows for a more controlled shape. Carefully dry the exterior of each balloon with a paper towel to remove any moisture. Then, lightly rub the surface of the balloon that will be dipped in sugar with a small amount of flavorless oil (like vegetable oil or canola oil). This thin layer of oil is crucial for preventing the sugar from sticking and ensuring a clean release later.
2. Crafting the Perfect Sugar Mixture
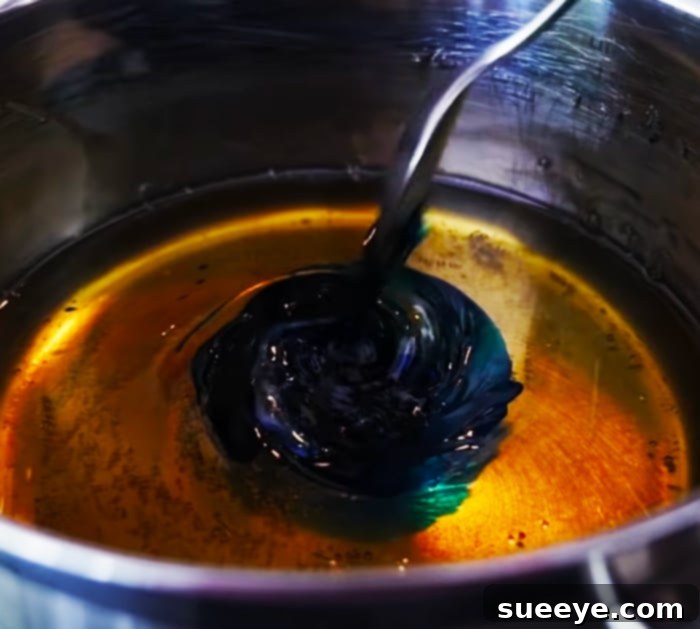
In a heavy-bottomed saucepan, combine the sugar, water, and glucose syrup. Stir the mixture gently over medium heat until all the sugar is completely dissolved. It’s important to ensure no sugar crystals remain on the sides of the pan. You can use a wet pastry brush to wash down any crystals that cling to the pan’s edges, preventing premature crystallization of your candy.
Once the sugar is dissolved, stop stirring. Insert your candy thermometer and bring the mixture to a boil. Allow it to cook, without stirring, until it reaches the “hard crack” stage, which is between 300-310°F (149-154°C). Reaching this precise temperature is essential for the sugar to become hard and brittle when cooled, forming a stable bowl structure. If you plan to add food coloring or flavoring, do so once the sugar has reached its target temperature and has been removed from the heat. Stir gently to incorporate.
3. Dipping, Shaping, and Cooling
Carefully pour the hot sugar mixture into a heat-resistant bowl or glass. Ensure the container is deep enough to allow for easy dipping of your balloons. Wait a moment for the sugar to cool slightly – it should still be liquid but not so hot that it immediately melts the balloon. The ideal temperature for dipping is usually around 280-290°F (138-143°C). Dip the oiled portion of a prepared balloon into the warm sugar mixture, rotating it to create an even coating of the desired height for your bowl. You can dip it once for a thinner bowl or twice for a more robust structure, allowing a brief cooling period between dips.
Once dipped, invert the balloon and place it on your parchment paper or silicone mat, allowing the sugar to drip slightly and form a flat base. This base will provide stability for your finished bowl. Allow the sugar-coated balloons to cool completely at room temperature. This can take anywhere from 30 minutes to an hour, depending on the thickness of your sugar coating and ambient humidity. Do not rush this step; the sugar must be fully hardened before the next stage.
4. Releasing Your Edible Bowl
Once the sugar is completely cool and firm to the touch, it’s time for the magic moment. Gently pull the neck of the balloon away from the sugar bowl. Slowly and carefully, snip a tiny hole in the balloon with scissors. Allow the air to escape gradually. As the balloon deflates, it will gently pull away from the hardened sugar, leaving you with a perfectly formed, beautiful candy sugar bowl. Handle your finished bowls with extreme care, as they are delicate and can crack if dropped or handled roughly.
Tips for Success and Creative Variations
- Humidity is the Enemy: Sugar is highly hygroscopic, meaning it absorbs moisture from the air. High humidity can make your bowls sticky and eventually cause them to melt. Work on a dry day if possible, and store finished bowls in an airtight container with a desiccant packet if needed.
- Safety First: Hot sugar causes severe burns. Always use caution, wear heat-resistant gloves if preferred, and keep children and pets away from the cooking area.
- Achieving Even Coating: For a uniform bowl, ensure your sugar mixture is at a consistent temperature during dipping and rotate the balloon smoothly.
- Decorating Touches: Before the sugar completely hardens, you can sprinkle edible glitter, sprinkles, or even attach small sugar flowers for extra embellishment.
- Themed Bowls: Use red and green coloring for Christmas, pastels for Easter, or vibrant hues for a summer party. Experiment with different flavor extracts like peppermint, lemon, or raspberry to complement your dessert.
- Different Shapes: While round balloons are common, you could experiment with other balloon shapes (e.g., elongated ones for a boat-like serving dish), always remembering the heat caution.
Storing and Serving Your Sweet Creations
Proper storage is crucial for maintaining the beauty and integrity of your candy sugar bowls. Store them individually in airtight containers at room temperature, away from direct sunlight or excessive heat. Avoid refrigeration, as condensation can cause them to become sticky. When stored correctly, these bowls can last for several days, though they are best enjoyed within 24-48 hours for optimal crispness.
When serving, remember that these bowls are delicate. Use them for cold or room-temperature items. Hot liquids or excessively heavy contents can cause them to soften or break. They are perfect for individual portions of desserts that are not too heavy or wet, allowing your guests to enjoy the contents and then marvel at (and perhaps even eat!) the edible vessel itself.
Conclusion: A Touch of Magic for Your Table
Creating candy sugar balloon bowls is more than just a recipe; it’s a delightful journey into the art of confectionery. It reminds me of the wonder of science experiments in school, but with the added bonus of a delicious and visually stunning outcome. Whether you’re a seasoned baker looking for a new challenge or simply someone seeking a unique way to impress at your next gathering, this project is incredibly rewarding.
The transformation of simple sugar into an elegant, translucent bowl is truly magical, blending culinary skill with artistic flair. So, gather your materials, embrace the adventure, and prepare to enchant your guests with these spectacular edible decorations. These edible sugar bowls are a fantastic way to add an element of surprise and sophistication to any event, proving that with a little creativity and care, ordinary ingredients can yield extraordinary results. Give it a try – you might just discover your new favorite party trick!