
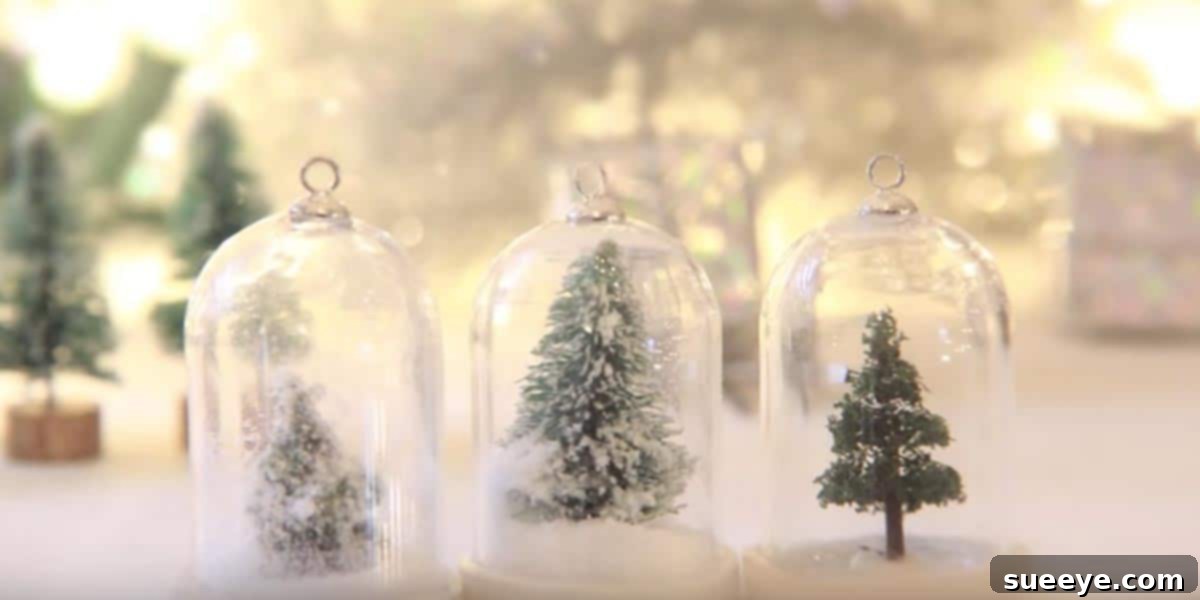
Sparkle Up Your Holidays: The Ultimate Guide to DIY Waterless Snow Globe Ornaments
There’s an undeniable enchantment that snow globes bring to any setting, especially during the festive holiday season. Their miniature worlds, encased in glass and filled with glittering snow, evoke a sense of wonder and nostalgia. But what if you could capture that magic without the fuss of water, leaks, or the potential for breakage? Imagine creating stunning, lightweight snow globes that not only adorn your Christmas tree but also serve as charming, personalized gifts. Today, we’re diving into the delightful world of DIY waterless snow globe ornaments – a craft that’s surprisingly simple, incredibly versatile, and profoundly rewarding.
This ingenious twist on a beloved classic transforms ordinary clear globe ornaments into captivating winter scenes. Unlike their traditional counterparts, these waterless wonders are mess-free, worry-free, and incredibly durable, making them perfect for homes with pets or small children. The brilliant shimmer of faux snow and glitter nestled within these ornaments catches the festive lights of your Christmas tree, creating a dazzling display that will mesmerize all who behold it. Whether you’re a seasoned crafter or just starting, this tutorial will guide you through creating beautiful additions to your holiday decor this year, bringing that special glow to your home.
Why Choose Waterless Snow Globes? A World of Benefits
While traditional snow globes hold a special place in our hearts, the waterless version offers a plethora of advantages that make them an ideal crafting project, particularly for ornaments:
- No Leaks, No Mess: The most obvious benefit is the elimination of water. This means no worries about leakage, evaporation, or accidental spills that could damage furniture or other decorations.
- Durability and Safety: Often made with plastic globes, waterless snow globes are far more robust than glass water-filled versions. This makes them safer for families with young children or inquisitive pets, reducing the risk of breakage and associated hazards.
- Lightweight: Without water, these ornaments are significantly lighter, making them perfect for hanging on delicate tree branches without causing them to sag.
- Longevity: You don’t have to worry about the water becoming cloudy, developing mold, or the contents deteriorating over time. Your scene remains pristine year after year.
- Ease of Creation: The process is much simpler and quicker than traditional water globes, requiring fewer specialized materials and less drying time.
- Versatility: They can be displayed anywhere – on a tree, mantelpiece, shelf, or even as part of a centerpiece – without concern for water damage.
These benefits combine to make waterless snow globes a fantastic choice for a festive DIY project, allowing you to focus purely on the creative fun.
The Magic of Handmade: Crafting Memories and Unique Gifts
There’s something uniquely satisfying about creating something beautiful with your own hands. This DIY project isn’t just about making an ornament; it’s about crafting memories. Gather your family, put on some holiday music, and spend an afternoon creating these charming globes together. It’s an excellent activity for all ages, fostering creativity and providing a wonderful opportunity for bonding during the busy holiday season.
Beyond personal enjoyment, these handmade snow globe ornaments make incredibly thoughtful and personal gifts. Imagine presenting a friend or family member with a unique ornament tailored to their interests, filled with miniature figures that remind you of them or a special memory. These aren’t just gifts; they’re heartfelt expressions of care, destined to become cherished keepsakes that will be brought out year after year, sparking joy and conversation.
What You’ll Need: Gathering Your Crafting Treasures
One of the beauties of this craft is its accessibility. You don’t need a massive array of expensive tools or hard-to-find components. Most materials can be found at your local craft store like Michael’s, or even around your home. Here’s a detailed list to get you started:
- Clear Globe Ornaments: Look for clear plastic or glass globe ornaments that open. Many come in two halves or have a removable top/cap. Various sizes are available, from small 2-inch globes perfect for delicate branches to larger 4-inch ones for more intricate scenes. Plastic is often recommended for durability, especially for ornaments.
- Miniature Figures: This is where the magic truly begins! Think tiny bottle brush trees (the quintessential snow globe element), miniature deer, bunnies, Santa Claus figures, tiny houses, lampposts, or even tiny gifts. Craft stores often have a dedicated “miniatures” section. Consider figures that are relatively flat on the bottom for easier adhesion.
- Faux Snow: A must-have for that authentic snowy look. You can find bags of fine faux snow, coarse snow, or even iridescent varieties. A little goes a long way!
- Glitter: For that essential sparkle. Use fine glitter for a delicate shimmer, chunky glitter for more dramatic flair, or iridescent glitter for a magical glow. White, silver, or gold are classic choices, but don’t shy away from experimenting with other colors.
- Hot Glue Gun and Glue Sticks: Your primary adhesive. A low-temperature glue gun is often safer, especially if crafting with children. Ensure you have plenty of glue sticks.
- Tweezers: Extremely useful for handling small figures and placing them precisely within the globe without leaving fingerprints.
- Ribbon, Twine, or Ornament Hooks: For hanging your finished ornament. Choose colors and textures that complement your design.
- Optional Embellishments: Small sequins, tiny beads, miniature presents, pipe cleaners (for bending into shapes), small battery-operated fairy lights (if using larger globes), cotton balls (for a fluffy snow base).
As Toni Ellison demonstrates in her inspiring tutorials, the possibilities are truly endless when it comes to selecting your miniatures and embellishments. It’s about letting your imagination lead the way!
Step-by-Step Guide: Crafting Your Enchanting Snow Globes
Making these miniature snowy tree snow globes is perhaps the simplest DIY Christmas ornament project you’ll ever undertake. It takes mere minutes once you have your materials ready. Here’s a detailed breakdown of the process:
- Preparation is Key: Begin by laying out all your chosen materials on a clean, flat surface. Open your clear globe ornaments carefully. If they come in two halves, ensure you know how they fit back together. Heat up your hot glue gun.
- Design Your Miniature Scene: Before gluing, gently place your chosen miniature figures inside one half of the globe (or onto the removable base/cap) to visualize your scene. Experiment with different arrangements. Consider what you want to be the focal point and how the figures will fit once the globe is sealed. This step is crucial for ensuring everything fits and looks balanced.
- Secure Your Scene: Once you’re happy with your arrangement, pick up one miniature figure at a time. Apply a small dab of hot glue to the bottom of the figure and carefully press it onto the inside base of the globe or the removable bottom cap. Hold it in place for a few seconds until the glue sets. Repeat for all your figures. For bottle brush trees, you might need to trim the base slightly to help them stand upright. Ensure they are firmly attached and can withstand being shaken.
- Add the Snow and Glitter: This is the fun part! Once your figures are securely glued and the glue has cooled, it’s time to add the “snowfall.” Carefully pour a small amount of faux snow into the globe. A teaspoon or two is usually sufficient for a standard-sized ornament, but adjust based on the globe size and your preference for a heavier or lighter snowfall. Next, add your glitter. A pinch of fine glitter mixed with a touch of chunky or iridescent glitter creates a beautiful, dynamic sparkle. Be mindful not to add too much; you want the figures to still be visible through the snowy veil.
- Seal the Globe: This step requires a steady hand. Align the two halves of your globe or carefully place the top cap onto the base, ensuring not to dislodge your figures or spill the contents. Many plastic globes have a lip or groove that snaps together. Press firmly to ensure a secure seal. If your globe doesn’t snap, you can run a thin bead of hot glue along the seam to permanently seal it, though this isn’t usually necessary for hanging ornaments.
- Finishing Touches: Thread your chosen ribbon, twine, or attach an ornament hook through the loop at the top of the globe. Tie a decorative bow if desired. You can also add a small personalized tag with a name or the year. Give your globe a gentle shake to see your miniature winter wonderland come to life!
And just like that, in about five minutes, you’ve created a charming, unique waterless snow globe ornament that’s ready to dazzle on your tree!
Unleash Your Creativity: Customization Ideas
The beauty of DIY is the ability to personalize everything. These waterless snow globes offer endless possibilities for customization:
Themed Globes
- Winter Wonderland: Classic bottle brush trees, tiny deer, and plenty of white and silver glitter.
- Rustic Charm: Natural twine for hanging, miniature pinecones, tiny twig figures, and faux moss.
- Whimsical & Fun: Brightly colored glitter, miniature gnomes, fantastical creatures, or tiny candy canes.
- Coastal Christmas: Small seashells, miniature starfish, blue glitter, and a tiny sand dollar.
- Memory Lane: For larger globes, you could even try to incorporate a tiny, laminated photo of a loved one or a special place.
Personalized Touches
Beyond themes, consider adding initials with tiny alphabet beads, painting small details onto your figures, or even using a permanent marker to write a date or a small message on the outside of the globe (ensure it won’t rub off easily).
Gifting Joy: Handmade Presents for Loved Ones
These waterless snow globe ornaments are not just for your own tree; they make incredibly thoughtful and unique gifts. As the original inspiration suggests, making several to give away is a fantastic idea. Package them in small decorative boxes, tie them with a festive ribbon, and add a handmade gift tag. They’re perfect as:
- Hostess Gifts: A lovely token of appreciation for holiday party hosts.
- Stocking Stuffers: Small, delightful surprises tucked into stockings.
- Teacher Gifts: A personalized touch to thank educators.
- Neighborly Gestures: A simple, sweet way to spread holiday cheer in your community.
- Party Favors: For a holiday gathering, guests can take home a miniature winter wonderland.
The personal effort and care that goes into each handmade ornament elevate it far beyond a store-bought item, making it truly special.
Tips for Success and Troubleshooting
While this is an easy craft, a few tips can help ensure your projects turn out perfectly:
- Don’t Overfill with Snow/Glitter: A common mistake is adding too much. You want enough to create a magical snowstorm, but not so much that it obscures your carefully arranged scene. Start with a small amount and add more if needed.
- Secure Figures Firmly: Wiggle your glued figures gently after the glue dries to ensure they are well-attached. Nothing is more disappointing than a figure detaching inside the globe.
- Cleanliness: Handle the globes by their edges as much as possible to avoid fingerprints. If you do get smudges, a soft microfiber cloth can clean them.
- Safety First: If crafting with children, always supervise hot glue gun usage. Consider using craft glue for smaller children and helping them with the hot glue steps.
- Experiment with Layers: For a more dynamic look, you can sometimes layer your “snow” by placing a thin layer of cotton or felt at the bottom before gluing down your figures, then adding faux snow and glitter on top.
Why This Craft is a Holiday Must-Do
In a world of mass-produced decorations, crafting your own waterless snow globe ornaments offers a refreshing return to the personal and the heartfelt. It’s an easy, budget-friendly activity that yields beautiful results, perfect for enhancing your holiday decor or creating memorable gifts. The sparkle, the miniature scenes, and the sense of accomplishment make this a truly joyful project.
So, gather your supplies, channel your inner artist, and embark on this wonderful crafting journey. Whether you’re making one for yourself or a dozen for friends and family, these delightful ornaments are sure to bring a touch of magical winter wonderland charm to your holiday season. Inspired by wonderful tutorials like those by Toni Ellison, you’ll discover that the possibilities for these adorable, easy-to-make ornaments are indeed endless. Happy crafting!