
Craft Your Own Hummingbird Haven: The Ultimate DIY Feeder Guide
The enchanting dance of hummingbirds in your garden is a sight to behold. These tiny, iridescent jewels of the avian world bring a burst of life, color, and unparalleled energy to any outdoor space. Many of us dream of attracting these magnificent creatures for those coveted up-close views, but the cost of commercial hummingbird feeders can be a deterrent. While there are certainly cheap options available, they often live up to their price tag, quickly breaking or failing to attract the birds effectively. What if there was a way to create a durable, attractive, and highly effective hummingbird feeder without breaking the bank?
This comprehensive guide empowers you to do just that! By harnessing the power of recycling and a touch of creativity, anyone can add an artisan’s flair to their landscape with this incredibly easy-to-make project. Not only will you save money, but you’ll also gain immense satisfaction from crafting a unique piece that genuinely contributes to your local ecosystem. Get ready to transform everyday recyclables into a charming hummingbird haven and experience the pure joy of watching these fascinating birds feed right in your own backyard!
Why Embrace the DIY Hummingbird Feeder Project?
There’s an undeniable magic in creating something with your own hands, especially when it results in such a vibrant interaction with nature. Opting for a DIY approach to your hummingbird feeder offers a multitude of benefits:
- Cost-Effectiveness: This is arguably the biggest draw. Commercial feeders, particularly those that are aesthetically pleasing and durable, can be surprisingly expensive. Our project focuses on using materials you already have, turning potential waste into a beautiful and functional item. You can literally use what’s in your recycle bin, making this one of the most budget-friendly garden projects you’ll undertake.
- Personalized Aesthetic: Store-bought feeders often lack character. With a handmade feeder, you control the design, the colors, and the overall style. This allows you to create a piece that perfectly complements your garden’s unique aesthetic, infusing it with a truly artisan touch that reflects your personal style.
- Environmental Stewardship: Repurposing glass bottles and aluminum cans reduces waste and gives these items a second life. It’s a small but meaningful step towards sustainable living and mindful consumption.
- Educational Value: For families, this project offers a fantastic opportunity to teach children about recycling, wildlife, and basic engineering principles. The entire process, from creation to observation, is a hands-on learning experience.
- Deepened Connection with Nature: The satisfaction of seeing hummingbirds flock to a feeder you crafted yourself is unparalleled. It fosters a deeper appreciation for nature and the delicate balance of our ecosystems.
Understanding Hummingbirds: What Attracts Them?
To successfully attract hummingbirds, it’s essential to understand their preferences and needs. These tiny birds have incredibly high metabolisms, requiring constant access to energy-rich nectar. They are primarily drawn by two key factors: color and a reliable food source.
The Power of Color
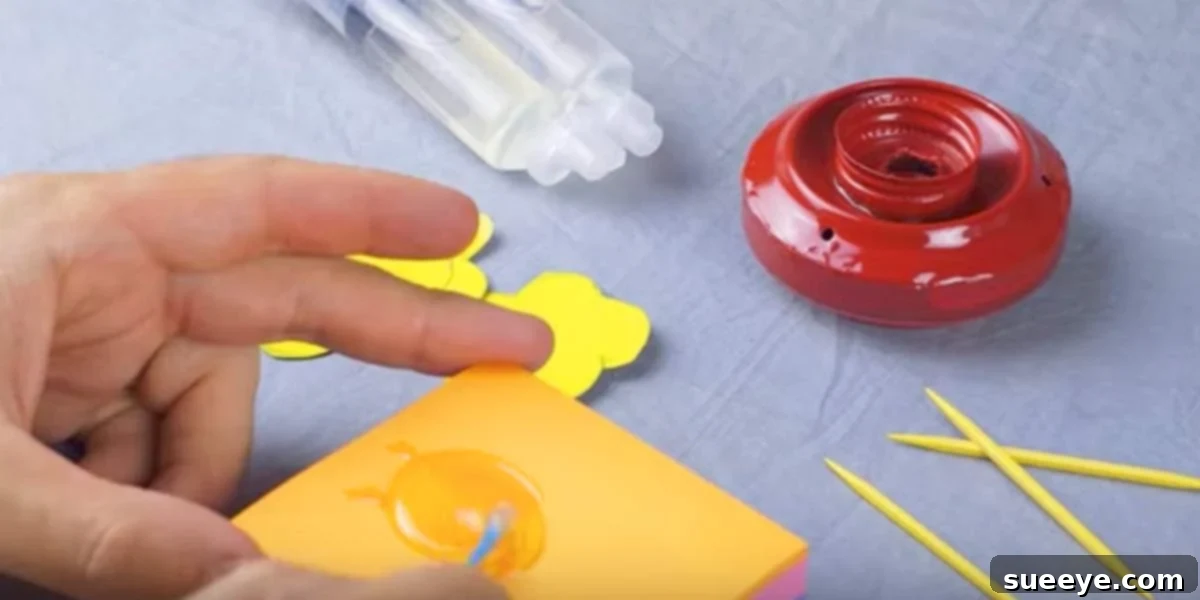
Hummingbirds possess exceptional vision, particularly in the red and orange spectrum. This is why many of their favorite natural food sources – tubular, nectar-rich flowers – are vibrantly colored in shades of red, orange, and even bright pink. When designing your feeder, color is paramount. While I personally love incorporating bright yellow flowers cut from leftover aluminum cans against a striking background, whether it’s the rich red paint or a beautiful royal blue bottle, the key is to always feature red prominently.
Red serves as a primary visual beacon, signaling “food here!” to a passing hummingbird. Don’t be shy about using a nice, bright red paint for elements of your feeder. It’s not just a suggestion; it’s a proven attractant. My plan for a royal blue bottle, which water originally came in, combined with red and yellow accents, demonstrates how complementary bright colors can work together to create an irresistible visual feast for these aerial gourmands.
Gathering Your Treasure: Essential Recycled Materials
The beauty of this project lies in its simplicity and resourcefulness. You won’t need a trip to a specialized craft store for most of your components. Instead, you’ll be giving new life to items that might otherwise be discarded.
Key Materials You’ll Need:
- Glass Bottle: This will serve as your nectar reservoir. Think creatively about what kind of bottle to use. Empty wine bottles, decorative vinegar or olive oil bottles, or even sturdy, interestingly shaped water bottles are excellent choices. As I mentioned, I’m excited to use a royal blue bottle for its unique color. Local restaurants are fantastic resources; ask if they have any empty vintage or artisan bottles. Often, they’re happy to give them away for free! Look for bottles with a relatively narrow neck, as this helps control nectar flow and prevents rapid evaporation.
- Aluminum Cans: These are incredibly versatile for crafting the feeder’s decorative and functional elements, such as feeding ports and those eye-catching “flowers.” Soda cans or beer cans work perfectly due to their malleability. Ensure they are thoroughly rinsed and dried before use.
- Bright, Outdoor-Friendly Paint: As discussed, red is the star here. Acrylic paints designed for outdoor use will withstand the elements. You might also want yellow, orange, or other bright colors for accent details.
- Basic Craft Tools:
- Scissors or Craft Knife: For cutting aluminum cans. Exercise extreme caution, as edges can be sharp.
- Pliers: Useful for shaping aluminum pieces or wire.
- Strong, Waterproof Adhesive: A super glue or outdoor-grade craft glue suitable for glass and metal will ensure your feeder holds together.
- Wire or Sturdy String/Twine: For creating a hanging mechanism.
- Sandpaper or Metal File: Crucial for smoothing any sharp edges on your cut aluminum pieces, ensuring the safety of both you and the hummingbirds.
- Drill with Small Bit (Optional): May be useful for creating hanging holes or refining feeding port openings if your design requires it.
Step-by-Step Construction: Bringing Your Feeder to Life
While the original content suggests watching a tutorial, let’s outline a generalized, detailed process that will guide you in creating your very own artisan hummingbird feeder. This is where your creativity truly shines!
Phase 1: Preparing Your Nectar Reservoir (The Bottle)
- Thorough Cleaning: Wash your chosen glass bottle meticulously with hot, soapy water. Use a bottle brush if necessary to remove any residue. Rinse it multiple times until absolutely no soap smell or residue remains, then allow it to air dry completely.
- Painting (Optional Design): If you wish to paint sections of your bottle (e.g., a red base for extra attraction, or a pattern), do so now. Ensure you use outdoor-grade paint and allow ample drying time according to the product instructions. Remember, while clear glass is fine, adding vibrant colors enhances appeal.
- Crafting the Hanging Mechanism: Securely attach wire or strong string around the bottle’s neck or body to create a sturdy loop for hanging. Ensure it’s balanced so the feeder hangs level when filled. For heavier bottles, consider a wire cage or a macrame holder.
Phase 2: Designing and Crafting Feeding Ports and Decorations
This is where the “artisan’s touch” truly comes in. You’ll be transforming aluminum cans into functional and beautiful elements.
- Cutting Aluminum Shapes: Carefully cut shapes from your clean aluminum cans. Common designs include small “flowers” with petals, simple discs, or rings that will surround the nectar access points. My inspiration suggests bright yellow flowers, which will look stunning. Always cut away from yourself and use sturdy scissors or a craft knife.
- Smoothing Edges: This step cannot be overstated for safety. Use fine-grit sandpaper or a metal file to meticulously smooth all cut edges of your aluminum pieces. Sharp edges are dangerous for both you during assembly and for the delicate beaks and tongues of hummingbirds.
- Painting Your Accents: Paint your aluminum cutouts with the vibrant colors you’ve chosen. The bright yellow flowers are a fantastic idea, especially when paired with red. Allow all paint to dry completely.
- Creating the Nectar Access Port(s): This is the most crucial functional part of your feeder. The goal is to allow hummingbirds easy access to nectar while minimizing drips and preventing larger insects (like bees or wasps) from getting in.
- Method A (Direct Aluminum Funnel): Shape a small piece of aluminum into a narrow funnel or tube. This will insert into the bottle’s neck and extend slightly outward. The opening at the end of the “funnel” needs to be tiny – just wide enough for a hummingbird’s slender beak and tongue, but too small for an insect. Attach your decorative aluminum flowers around this funnel.
- Method B (Stopper with Tube): For a more controlled flow, find a rubber stopper or cork that fits snugly into your bottle’s neck. Drill a small hole through the center of the stopper. Insert a narrow, non-toxic plastic or glass tube (e.g., a cleaned pen casing, a small glass dropper tube, or medical tubing) through this hole. The tube should extend into the bottle to draw nectar and out slightly to serve as the feeding port. Securely attach your painted aluminum flowers around the exposed end of the tube. This method is often more leak-proof.
Phase 3: Final Assembly and Quality Checks
- Adhere Components: Using your strong, waterproof adhesive, securely attach all your decorative aluminum pieces around the feeding port(s). Ensure everything is firmly bonded and won’t detach in wind or rain.
- Leak Test (Important!): Before filling with nectar, conduct a water test. Fill your bottle with plain water, secure the feeding port mechanism, and hang the feeder. Check for any drips or leaks. Adjust or re-seal as necessary.
- Final Safety Check: Run your fingers over the entire feeder one last time, checking for any missed sharp edges or loose parts. Your feeder must be completely safe for its tiny visitors.
The Irresistible Fuel: Homemade Hummingbird Nectar Recipe
Your beautifully crafted feeder now needs its lifeblood – the sweet nectar that will call hummingbirds to your garden. Making your own hummingbird food is not only incredibly simple and economical but also significantly safer than many commercial mixes that might contain unnecessary or harmful dyes and preservatives.
The Simple, Safe Nectar Recipe:
- Ingredients:
- 4 parts water (e.g., 4 cups)
- 1 part granulated white sugar (e.g., 1 cup)
- Instructions:
- Bring the water to a boil in a clean saucepan. This helps sterilize the water and aids in dissolving the sugar.
- Remove from heat and stir in the granulated white sugar until it is completely dissolved.
- Allow the mixture to cool completely to room temperature before filling your feeder. Warm nectar can encourage bacterial growth and might not be appealing to hummingbirds.
- Store any unused nectar in a clean, airtight container in the refrigerator for up to one week.
Critical Nectar Guidelines (Do’s and Don’ts):
- DO NOT use honey: Honey can ferment rapidly and contains bacteria that can cause a fatal fungal infection in hummingbirds.
- DO NOT use red dye: While hummingbirds are attracted to red, adding red food coloring to the nectar itself is entirely unnecessary and potentially harmful to the birds’ health. The red elements on your feeder’s exterior are sufficient for attraction.
- Use ONLY granulated white sugar: Avoid artificial sweeteners, brown sugar, or powdered sugar. These can be difficult for hummingbirds to digest or may contain additives detrimental to their tiny systems.
Placement and Maintenance: Keeping Your Hummingbirds Happy and Healthy
Building a stunning feeder and filling it with fresh nectar are major steps, but strategic placement and diligent maintenance are equally crucial for attracting and safeguarding your hummingbird visitors. I already have a hummingbird feeder, but with so many hummingbirds around, I wanted to add another one – proper placement is key to supporting a larger population.
Optimal Feeder Placement Strategies:
- Visibility is Key: Position your feeder where it’s easily visible to hummingbirds from various angles. Near brightly colored flowers or plants they naturally frequent is an excellent choice.
- Shade, Shade, Shade: Always place your feeder in a shaded spot, especially during the hottest parts of the day. Direct sunlight quickly heats the nectar, causing it to ferment and spoil, which is dangerous for the birds. Shade extends the nectar’s freshness.
- Safety First: Hang your feeder in an area away from potential predators like cats. A sturdy branch or a shepherd’s hook works wonderfully. If you have multiple feeders, space them out, as hummingbirds can be territorial and might chase rivals away from “their” feeder.
- Your Viewing Pleasure: Don’t forget to place it where you can enjoy the show! Near a window, patio, or porch is perfect for those intimate, up-close views you’ve been craving.
Essential Maintenance for Hummingbird Well-being:
Regular cleaning is paramount. A dirty feeder can harbor harmful bacteria and mold, turning your thoughtful gesture into a health hazard.
- Nectar Change Frequency:
- In hot weather (above 80°F / 27°C), change the nectar and clean the feeder every 1-2 days.
- In cooler weather, you might extend this to every 3-4 days.
- Thorough Cleaning Process:
- Empty any old nectar.
- Disassemble the feeder as much as possible.
- Wash all parts meticulously with hot water and a bottle brush or small cleaning brushes.
- For a deeper clean, use a weak solution of white vinegar (1 part vinegar to 4 parts water) or a very small amount of mild, unscented dish soap. The most critical part here is rinsing – rinse all parts thoroughly multiple times to ensure absolutely no residue remains.
- Avoid bleach, as even trace amounts can be highly toxic to hummingbirds.
- Allow all feeder parts to air dry completely before refilling. Moisture encourages mold growth.
- Pest Control:
- Ant Moats: If ants become an issue, install an “ant moat” above your feeder. This is a small cup or reservoir filled with water that creates a barrier ants cannot cross.
- Bee Guards: If bees or wasps are a problem, ensure your feeding ports are designed to be too small for them to access the nectar, while still allowing a hummingbird’s long tongue through.
Beyond the Feeder: Cultivating a Hummingbird Paradise
While your new DIY feeder will be a fantastic attractant, creating a truly hummingbird-friendly garden goes beyond just providing nectar. Consider these additional elements to make your yard an irresistible haven:
- Plant Native Nectar Flowers: Supplement your feeder with real flowers, especially native species with tubular shapes in red, orange, or pink. Examples include Bee Balm (Monarda), various Salvias, Cardinal Flower (Lobelia cardinalis), Trumpet Vine (Campsis radicans), and Fuchsias. These provide natural food sources and attract beneficial insects.
- Provide Water: Hummingbirds enjoy bathing and drinking from shallow water sources. A mister or a very shallow bird bath with a gentle drip can be highly attractive.
- Offer Perching Spots: Provide tall trees, shrubs, or even small branches near your feeder where hummingbirds can rest, survey their territory, and preen.
- Reduce Pesticide Use: Hummingbirds also consume small insects (like gnats and spiders) for protein. Avoiding harmful pesticides ensures a healthy insect population for them to forage.
Conclusion: The Rewarding Spectacle of Your Handiwork
Embarking on this DIY hummingbird feeder project is so much more than a simple craft; it’s an immersive experience that connects you deeply with the natural world. From salvaging recycled materials to painting vibrant accents and ultimately witnessing the energetic buzz of hummingbirds at your handmade creation, every step is filled with satisfaction. There’s a profound joy in knowing that you’ve not only created something beautiful and functional but also provided a vital resource for these incredible creatures.
So, gather your materials, unleash your inner artisan, and prepare to transform an ordinary bottle and aluminum cans into a vibrant, life-affirming beacon. You’ll soon discover that watching hummingbirds is one of nature’s most delightful spectacles, and with your personalized, eco-friendly feeder, you’re offering them more than just a meal – you’re offering them a welcoming home in your garden, and yourself an unforgettable front-row seat to their aerial acrobatics. Happy crafting, and may your garden soon be filled with the joyous flitting of hummingbirds!