
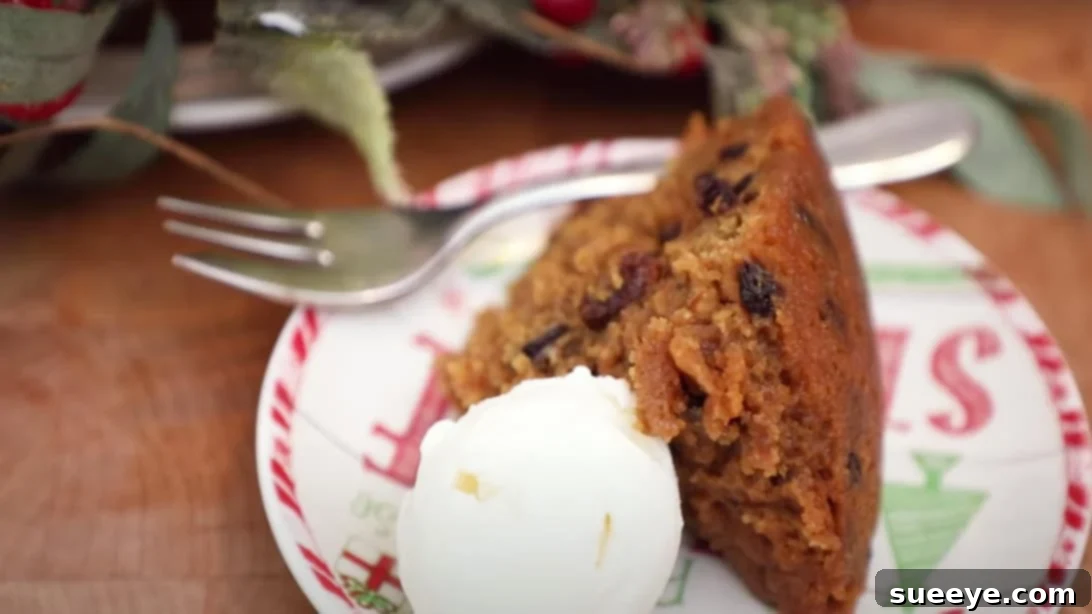
Easy Mincemeat Christmas Pudding Recipe: Simplify Your Holiday Baking
For many, the thought of making a traditional Christmas pudding from scratch conjures images of a daunting culinary challenge. However, crafting this iconic British holiday dessert doesn’t have to be intimidating. Thanks to expert bakers like those from Bigger Bolder Baking on YouTube, you can now master a simplified Christmas pudding recipe that’s both incredibly delicious and surprisingly straightforward. This comprehensive guide will walk you through creating a rich, flavorful mincemeat Christmas pudding, complete with a clever secret ingredient that ensures freshness and adds a delightful depth to your festive feast.
Embark on a delightful culinary journey this holiday season by preparing your very own homemade Christmas pudding. This recipe is meticulously designed to demystify the process, making it accessible even for novice bakers, while still delivering the authentic taste and texture of a cherished holiday classic. Forget store-bought versions; the intoxicating aroma and unparalleled flavor of a freshly steamed pudding, imbued with warming spices and succulent fruits, are truly exceptional. Not only is this an easy Christmas pudding recipe, but it also makes for a fantastic make-ahead dessert, allowing you to focus on other festive preparations closer to Christmas Day without last-minute stress.
Why Choose Homemade Christmas Pudding for Your Holiday Table?
Making your own Christmas pudding is more than just a baking endeavor; it’s a cherished embrace of tradition, a captivating sensory experience, and a heartfelt gesture of love. This rich, dark fruitcake, steamed to absolute perfection, holds a particularly special place at the heart of many holiday celebrations across the globe. Opting for a homemade version provides you with complete control over the quality of ingredients, allows for personal adjustments to sweetness and spice levels, and infuses your pudding with that unmistakable personal touch that factory-made desserts simply cannot replicate. Furthermore, the process itself, from the satisfying act of grating frozen butter to the patient steaming, can be a wonderfully mindful and rewarding activity amidst the joyous but often hectic festive season. This recipe, in particular, showcases how an easy mincemeat pudding can still be profoundly flavorful and deeply steeped in holiday spirit, becoming a new family tradition.
The Enduring Essence of Traditional Christmas Pudding
A classic Christmas pudding is a steamed dessert fundamentally made with a medley of dried fruits, traditionally suet (though we’ll be using butter for a lighter, equally delicious and accessible version), breadcrumbs, flour, eggs, and a generous incorporation of alcohol, most commonly brandy or, in this particular recipe, whiskey. It is distinctively known for being prepared weeks or even months in advance. This foresight allows the intricate flavors to fully mature and deepen, evolving into a more complex and robust profile over time. This specific simplified mincemeat Christmas pudding recipe retains all the traditional charm and depth while significantly streamlining the preparation, powerfully demonstrating that you don’t necessarily need days of soaking fruit to achieve an absolutely incredible result. The “secret ingredient” – whiskey – serves a dual purpose: it not only contributes to the pudding’s rich and warming flavor profile but also acts as a natural preservative, substantially enhancing its longevity and making it an ideal make-ahead holiday dessert that can be savored weeks after its creation.
Gather Your Ingredients for a Truly Festive Feast
The journey to preparing this exceptional traditional holiday dessert commences with the meticulous assembly of the right components. Each individual ingredient plays a pivotal role in creating the perfect balance of nuanced flavors and delightful textures that define a truly magnificent Christmas pudding. Rest assured, this easy Christmas pudding recipe utilizes readily available ingredients that, when combined, produce an unforgettable festive treat:
Ingredients:
- 1 cup (7 oz/300g) mincemeat – The heart of your pudding, providing rich fruit and spice notes.
- ¾ cup (5oz/142g) orange marmalade – Adds a bright, citrusy counterpoint to the richness.
- 1 ¼ cups (7 ½ oz/213g) dark brown sugar (or demerara sugar) – For deep caramel sweetness and moisture.
- ¼ cup (2 ½ oz/71g) molasses (or treacle) – Contributes to the pudding’s characteristic dark color and intense flavor.
- 3 large eggs – Essential for binding the ingredients and adding richness.
- ¼ cup (2floz/57ml) whiskey – Our special secret ingredient for flavor and preservation.
- 1 stick (4oz/115g) frozen unsalted butter – Grated for even distribution and a tender crumb.
- 1 ½ cups (7 ½ oz/213g) all-purpose flour – Provides the necessary structure.
- 1 ½ teaspoons baking powder – For a light lift and tender texture.
- Additional butter, softened, for thoroughly greasing the pudding basin.
Essential Equipment for Achieving Pudding Perfection
Having the correct tools readily at hand will ensure your Christmas pudding preparation process is both smooth and thoroughly enjoyable. You won’t require any overly specialized kitchen gadgets, but these specific items are crucial for the successful execution of this classic dessert:
- Large 1.4-liter Pudding Basin: This is the traditional vessel for shaping your pudding. Alternatively, a medium-sized heatproof glass or plastic bowl with a rim (approximately 6-cup capacity) will serve just as well.
- Spacious Large Mixing Bowl: Indispensable for comfortably combining all your delicious ingredients without spillage.
- Box Grater: An absolute must-have for finely grating the frozen butter, ensuring even distribution.
- Sturdy Spatula or Wooden Spoon: Ideal for thorough mixing and gentle folding of ingredients.
- Parchment Paper & Aluminum Foil: These are essential for creating a perfectly sealed and protective lid during the steaming process.
- Durable Baker’s Twine: Used to securely tie the parchment and foil lid in place, preventing water ingress.
- Steamer Pot: A dedicated multi-tier steamer is ideal, or a large, deep pot with a tight-fitting lid that can comfortably accommodate your pudding basin and has sufficient depth for water.
- Heatproof Plate or Trivet: If you don’t possess a steamer insert, this will effectively elevate your pudding basin from the direct bottom of the cooking pot.
Step-by-Step Directions: Crafting Your Delicious Christmas Pudding
Follow these meticulously detailed steps to create a show-stopping homemade Christmas pudding that is guaranteed to impress your family and friends. This easy-to-follow method ensures a perfect, consistently delicious result every single time you bake it.
1. Prepare Your Pudding Basin Meticulously
Begin by thoroughly buttering the entire interior surface of your large 1.4-liter pudding basin. Pay close attention to ensure you cover both the sides and the bottom generously with softened butter. This crucial initial step is vital for preventing the pudding from sticking during and after cooking, thereby ensuring it releases cleanly and effortlessly when it’s time to serve. If a traditional pudding basin is not available, a medium-sized round heatproof glass or even a suitable plastic bowl (approximately 6-cup capacity) will function perfectly as an alternative. Once thoroughly buttered, set the prepared basin aside.
2. Skillfully Combine the Wet Ingredients
In a spacious large mixing bowl, introduce the 1 cup of rich mincemeat, ¾ cup of zesty orange marmalade, 1 ¼ cups of luscious dark brown sugar (or demerara sugar for an equally deep flavor), and ¼ cup of flavorful molasses (or treacle). Use your spatula or wooden spoon to stir these ingredients together until they are completely integrated and form a wonderfully fragrant, sticky, and cohesive mixture. The combination of molasses and dark sugar will impart a beautiful deep color and an intense, satisfying sweetness, while the orange marmalade thoughtfully adds a bright, citrusy note that elegantly cuts through the richness, balancing the overall flavor profile.
3. Whisk in Eggs and Introduce the Secret Ingredient
Crack each of the three large eggs into the mixture one at a time, whisking vigorously and thoroughly after each individual addition to ensure that it is fully and smoothly incorporated into the batter. This gradual and deliberate addition helps to create a smoother, more emulsified batter, contributing to the pudding’s final texture. Once all the eggs are fully mixed in and the batter appears uniform, it’s time to unveil our secret ingredient: add ½ cup of whiskey to the bowl. Stir it in thoroughly, ensuring it disperses evenly throughout the mixture. The whiskey not only infuses the pudding with a delightful warming flavor and complex aroma but, crucially, its alcoholic content also acts as a natural preservative, allowing your pudding to stay fresh and delicious for significantly longer periods, making it a perfect make-ahead holiday dessert option.
4. Gracefully Incorporate the Frozen Butter
Using a standard box grater, carefully grate the entire stick of frozen unsalted butter directly into the wet mixture in your large mixing bowl. Grating frozen butter is a clever technique that aids in distributing the butter more evenly throughout the batter without melting it prematurely. This even distribution contributes significantly to a more tender, lighter, and delicate texture in the finished pudding, preventing dense spots. Once all the butter is grated into fine shreds, use a sturdy spatula to gently stir and fold it into the mixture until it is just combined. Exercise caution not to overmix at this stage; gentle folding is key to preserving the desired texture.
5. Gently Fold in the Dry Ingredients
Finally, and with a light hand, carefully fold in the 1 ½ cups of all-purpose flour and 1 ½ teaspoons of baking powder into your pudding batter. Mix very gently until the ingredients are just combined. It is paramount to avoid overmixing the flour, as excessive agitation can develop the gluten too much, which will inevitably lead to a tough and undesirable pudding texture. The primary goal at this stage is simply to incorporate the dry ingredients just enough so that no visible streaks or pockets of dry flour remain. The baking powder will play its vital role by helping the pudding to rise beautifully and achieve its characteristic light, yet satisfyingly dense, texture during the steaming process.
6. Meticulously Prepare for Steaming
Carefully pour the prepared pudding batter into your already buttered pudding basin, ensuring you fill it to approximately three-quarters full. This crucial allowance for expansion during the cooking process prevents overflow. Gently smooth the top of the batter with your spatula to create an even surface. Now, it’s time to construct a robust and secure lid for the steaming. Take a piece of parchment paper, approximately 12-14 inches square. Fold a pleat in the very center of this paper; this pleat is essential as it allows for the pudding’s expansion during steaming. Place this pleated parchment paper directly over the top of the basin. Follow this with a piece of aluminum foil, similarly sized and also with a central pleat, ensuring it extends well beyond the rim of the basin. Securely tie both the parchment paper and foil layers in place with baker’s twine, wrapping it tightly and firmly around the rim of the basin. For added convenience, you can create a sturdy handle with the twine by extending it across the top of the foil and tying it securely to the opposite side of the basin. This handle will prove invaluable for safely lifting the hot basin out of the steamer later.
7. The Precise Steaming Process
Carefully place your securely covered pudding basin into a dedicated steamer. If you do not possess a specialized steamer, you can easily create an effective makeshift one: simply place a heatproof plate upside down at the bottom of a large, deep cooking pot. This inverted plate will function as a trivet, effectively elevating the pudding basin from the direct heat of the pot’s bottom. Gently and carefully place the pudding basin on top of this improvised plate/trivet.
Fill the pot with already boiling water, ensuring that the water level comes approximately halfway up the sides of the pudding basin. This optimal water level ensures even heat distribution. Cover the pot tightly and securely with its lid. Cook the Christmas pudding in the steamer (or your makeshift steamer) for approximately 2 to 2½ hours on a consistent medium-low heat. The fundamental key here is to maintain a gentle, steady simmer throughout the entire cooking process. It is absolutely crucial not to let the water come to a vigorous rolling boil, as this can cause the pudding to cook too rapidly or unevenly, potentially compromising its texture.
Important Steaming Note: Maintaining Optimal Water Levels
Throughout the entirety of the steaming process, it is absolutely crucial to periodically check the water level in the pot. The water will inevitably evaporate, and if it runs dry, your pudding could burn, cook improperly, or even crack. To prevent this, always top up the pot with additional boiling water as needed to meticulously maintain the consistent water level around the pudding basin. This diligent attention ensures continuous, even steaming, which is paramount for a perfectly cooked Christmas pudding.
8. Cooling and Essential Resting
After the recommended 2 to 2½ hours of careful steaming, your pudding should feel firm and resilient to the touch, and will have noticeably risen well within its basin. Carefully remove the pudding basin from the steamer, utilizing the twine handle you created if applicable, or sturdy oven mitts to protect your hands from the heat. Gently set it aside on a wire rack to cool completely while still within its basin. This gradual and undisturbed cooling process is critical as it allows the pudding to set properly, firms up its structure, and helps it to retain its precious moisture, resulting in a perfectly dense yet tender consistency. Once the basin is cool enough to handle comfortably, you may remove the pudding from the pot and allow it to cool further at ambient room temperature before serving or storing.
Serving Your Exquisite Christmas Pudding
The exhilarating moment of truth has arrived! Your beautifully crafted mincemeat Christmas pudding is now ready to be enjoyed. You have a couple of delightful options, depending on your festive schedule and preference:
- Serve Immediately for Instant Gratification: For those who cannot wait, you can serve the pudding straight away. Carefully invert it onto a beautiful serving plate. Traditional accompaniments that truly enhance the experience include a generous dollop of creamy brandy butter, a refreshing scoop of vanilla bean ice cream, a rich dollop of clotted cream, or a warm, velvety vanilla custard.
- Store for Later Enjoyment (The Make-Ahead Advantage): One of the most magical and practical qualities of a well-made Christmas pudding is its remarkable ability to be prepared well in advance. If you choose to store it, allow the pudding to cool completely to room temperature. Then, carefully remove the steaming foil and parchment paper, and re-wrap it tightly and meticulously in a fresh piece of clean parchment paper, followed by an additional secure layer of aluminum foil. Store this well-wrapped pudding at room temperature in a cool, dark place for a couple of months, or until you are absolutely ready to enjoy this delightful holiday dessert. The whiskey acts as an excellent natural preservative, allowing the complex flavors to meld, deepen, and truly mature over time, resulting in an even richer, more nuanced, and ultimately more delicious taste.
Expert Tips for Reheating Your Stored Pudding:
To perfectly reheat a stored Christmas pudding, first re-wrap it securely in fresh parchment paper and foil. Place it back into a steamer (or a pot with your trusty trivet) and steam for approximately 1 to 1½ hours. As always, ensure that the water level in the pot is diligently maintained throughout the reheating process. This method will bring your pudding back to a perfect serving temperature and texture, as if freshly made.
The Grand Finale: Flaming Your Pudding (Optional but Spectacular!)
For a truly traditional, dramatic, and unforgettable presentation, consider flaming your Christmas pudding just before serving. Gently warm a small amount of brandy (or more whiskey if you prefer) in a heatproof ladle over a low flame on your stovetop (it is crucial not to boil the alcohol). Carefully and safely ignite the warm alcohol with a long match or a lighter, then slowly and majestically pour the flaming liquid over the pudding. Carry it to the table while it is still beautifully aflame for a breathtaking holiday spectacle that will surely be a highlight of your celebration. Always ensure to perform this away from any flammable materials and politely alert your guests before igniting!
Indispensable Tips for Christmas Pudding Success
Even with a simplified and straightforward recipe, incorporating a few additional expert tips can significantly ensure your mincemeat Christmas pudding turns out absolutely perfectly every single time:
- Never Overmix the Batter: As is the golden rule with most baking endeavors, overmixing the pudding batter can regrettably lead to a tough, undesirable texture. Always mix only until the ingredients are just combined and no streaks of dry flour remain visible.
- Secure Sealing is Absolutely Key: A tightly and meticulously sealed pudding basin is paramount. This ensures that no unwanted water seeps in during the lengthy steaming process, thereby keeping your pudding beautifully moist, tender, and perfectly intact.
- Diligently Maintain Water Level: This critical point cannot be stressed enough. A consistent and adequate water level for steaming is undeniably vital for achieving even cooking throughout the pudding and preventing scorching. Check frequently and replenish with boiling water.
- Prioritize Quality Ingredients: The judicious use of good quality mincemeat, the freshest eggs, and a fine whiskey will profoundly elevate the flavor profile of your finished pudding, making it truly exceptional.
- Embrace the “Make-Ahead” Advantage: While this is indeed an easy Christmas pudding recipe, making it a week or even two in advance allows the complex flavors to truly develop, meld, and deepen, making it exponentially more delicious and nuanced on serving day.
- Consider “Feeding” Your Pudding (Optional but Recommended): For those who particularly adore a boozier and even more flavorful pudding, you can periodically “feed” your stored pudding. Simply poke several small holes into its surface and drizzle a tablespoon or two of additional brandy or whiskey over it. Re-wrap it securely and continue to store it. This process infuses more flavor and moisture over time.
Conclusion: A Merry Pudding Christmas Awaits You!
With this wonderfully simplified mincemeat Christmas pudding recipe, the seemingly complex and often intimidating task of preparing a traditional holiday dessert is transformed into an enjoyable, rewarding, and deeply satisfying experience. From the careful selection of each ingredient to the patient and precise steaming process, every single step contributes to a final product that is exquisitely rich in flavor, delightfully moist in texture, and profoundly steeped in cherished festive tradition. This easy Christmas pudding recipe from Bigger Bolder Baking genuinely brings the unparalleled joy of homemade holiday baking right into the warmth and heart of your kitchen. So, gather your chosen ingredients, meticulously follow these expert steps, and prepare to delight and impress your loved ones with a magnificent, unforgettable Christmas pudding this holiday season. We wish you a truly Merry Pudding Christmas!