
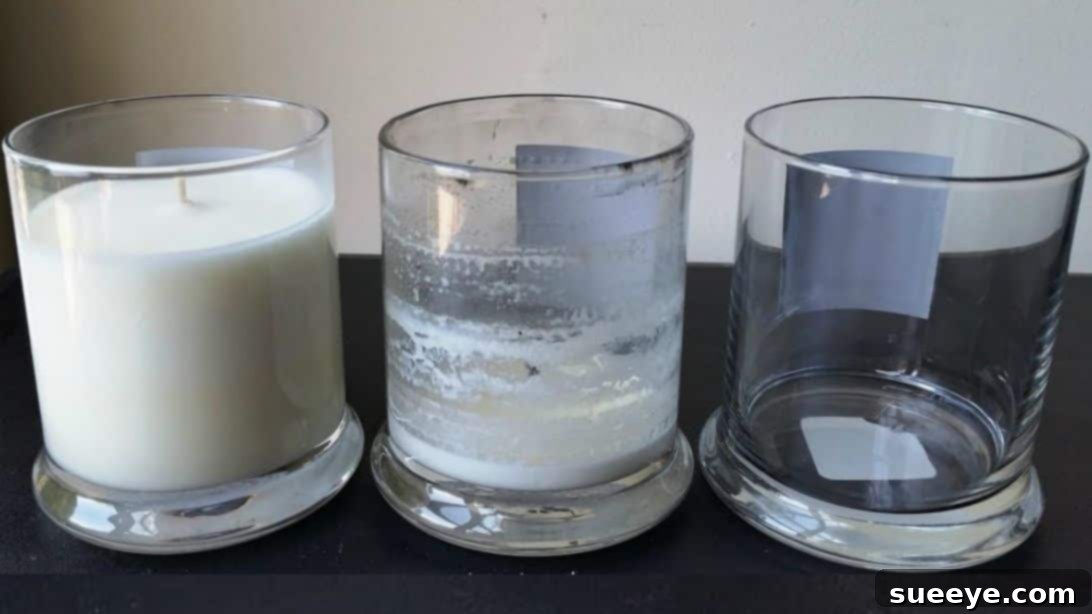
Effortless Ways to Remove Wax from Candle Jars: Clean & Reuse Like a Pro
Candles infuse our homes with enchanting aromas and a comforting glow, transforming any space into a serene sanctuary. However, once the last flicker fades, we’re often left with a beautiful jar, marred by stubborn, leftover wax. Many people simply discard these elegant containers, unaware of their incredible potential for a second life. But what if you could easily transform those seemingly “finished” candle jars into chic storage, decorative accents, or even new craft projects? You absolutely can!
Embracing the art of candle jar reuse is more than just a clever DIY hack; it’s a step towards sustainability, saving money, and unleashing your creative spirit. If you’ve ever wrestled with sticky wax remnants, feeling frustrated by the challenge of getting your jars sparkling clean, then this comprehensive guide is tailored just for you. We’re here to demystify the process, offering three tried-and-true methods to effortlessly remove every last trace of wax, ensuring your jars are pristine and ready for their next purpose. Get ready to clean, repurpose, and fall in love with your beautiful candle jars all over again, with expert insights inspired by diyINYACO on YouTube.
Why Embrace the Sustainable Trend of Candle Jar Reuse?
Beyond the simple act of cleaning, giving your empty candle jars a new lease on life offers a multitude of compelling benefits:
- Environmental Friendliness: One of the most significant advantages is reducing waste. By reusing jars, you prevent them from ending up in landfills, lessening the demand for new glass production and conserving valuable resources. It’s a small but impactful step towards a greener planet.
- Cost Savings: Why invest in new containers for storage, organization, or decoration when you have perfectly good, often exquisitely designed, ones already at your disposal? Repurposing your candle jars is a budget-friendly solution for various household needs.
- Creative Expression: An empty candle jar is a blank canvas awaiting your personal touch. Whether you paint them, adorn them with ribbon, fill them with unique items, or craft them into something entirely new, they offer endless opportunities for personalized decoration.
- Practical Storage Solutions: These jars are ideal for organizing a myriad of small items. Think cotton balls and Q-tips in the bathroom, paperclips and pens on your desk, spices in the kitchen, or beads and buttons in your craft corner. Their sturdy design makes them perfect for everyday use.
- Aesthetic Appeal: Many candle brands craft their jars with stunning aesthetics, often featuring elegant designs, unique shapes, or beautiful colors. Reusing them allows you to continue enjoying their visual appeal as part of your home decor, adding a touch of sophistication wherever they’re placed.
Essential Materials for Effortless Wax Removal
Before you embark on your candle jar cleaning adventure, gather these common household items. Most of these tools are likely already in your kitchen, pantry, or utility closet, making this an incredibly accessible DIY project that requires minimal extra purchases:
- Warm Water & Dish Soap: Indispensable for the final cleaning stage, ensuring your jars are not just wax-free but also sparkling clean and sanitized.
- Paper Plate or Normal Plate: Essential for protecting your countertops and surfaces from any potential spills, drips, or collecting wax pieces during the removal process. A heat-resistant plate is recommended for hot water methods.
- Hot Boiling Water: A key component for one of our primary wax removal methods, utilizing heat to melt and separate the wax.
- Candle or Coffee Warmer: An excellent, gentle, and controlled heat source, particularly useful for slowly melting wax (for Method #2). These can be found in most craft or home goods stores.
- Oven Mitt or Thick Towel: Absolutely crucial for safely handling hot jars and melted wax, preventing burns and providing a secure grip.
- Butter Knife or Sturdy Spoon: A non-abrasive tool perfect for gently scraping, prying, or chipping away solidified wax without scratching or damaging the glass.
- Paper Towels or Old Rags: Useful for wiping away wax residue, protecting surfaces, and for absorbing melted wax prior to disposal.
Three Highly Effective Methods to Remove Leftover Candle Wax
You have options! Choose the method that best suits your comfort level, the amount of wax remaining in the jar, and the materials you have readily available. Each technique is designed to safely and efficiently free your beautiful jars from stubborn wax, setting them up for their next exciting chapter.
Method #1: The Hot Water Bath Technique – Melt and Float
This classic method harnesses the power of heat to melt the wax, causing it to separate from the glass and float to the surface. It’s a popular choice for its straightforward approach, but always exercise an abundance of caution when handling boiling water and hot glass.
- Prepare Your Workspace: Begin by placing your candle jar on a stable, heat-resistant surface. A sturdy paper plate or a normal ceramic plate beneath the jar is crucial. This will catch any accidental spills and protect your countertop from heat damage or wax residue.
- Carefully Pour Hot Water: Heat water to a rolling boil on your stovetop or in a kettle. With extreme care, slowly and steadily pour the hot boiling water into the candle jar. Fill it up to about half an inch away from the rim, ensuring you don’t overfill. The intense heat from the water will gradually begin to melt the wax at the bottom of the jar.
- Allow Wax to Melt and Float: As the hot water works its magic, you’ll observe the melted wax detaching from the glass and rising to the water’s surface. The metal wick tab, often embedded in the wax, might also float upwards. Ensure the jar remains undisturbed during this process.
- Cool Down and Solidify: Let the jar sit completely undisturbed as it cools. This cooling period is vital. Depending on the room temperature and the amount of wax, this could take approximately 2 to 3 hours, or even up to overnight. As the water cools, the melted wax will solidify into a disc or a cohesive chunk at the top of the water.
- Remove the Solidified Wax: Once the wax is fully solid and cool to the touch, you can usually remove it with your fingers. It should pop out as a single, solid piece. If it proves a bit stubborn or clings to the sides, a butter knife can be gently used to pry it away from the glass.
- Final Deep Cleaning: Carefully pour out the water (never down the sink drain, as even small wax particles can solidify and cause plumbing clogs). Immediately wash the jar thoroughly with warm, soapy water. Use a sponge or brush to scrub away any lingering wax residue, soot, or grime. Rinse well under running water and dry with a clean towel for a spotless finish.
Important Safety Note: Always handle hot water and glass with the utmost care. Use oven mitts or a thick towel to protect your hands when handling a hot jar. Dispose of wax in the trash, not down the drain.
Method #2: The Candle or Coffee Warmer Approach – Gentle Heat
For a more controlled, hands-off method that’s particularly convenient for those who own a candle or coffee warmer, this technique is an excellent choice. It allows for slow and even melting of the wax, minimizing mess and direct contact with high-temperature water.
- Position the Jar: Place your candle jar directly onto the surface of a candle or coffee warmer. These specialized warmers are engineered to heat containers gently and evenly, making them perfect for gradually melting wax without extreme temperatures. Such devices are readily available at most craft stores, home goods retailers, or large department stores.
- Heat and Melt Gradually: Turn on the warmer and allow it to heat for approximately 2 to 3 hours. During this period, the residual wax at the bottom of the jar will slowly and safely melt into a liquid state. Monitor the process to ensure even melting and prevent overheating.
- Safe Wax Removal: Once the wax is entirely melted and liquefied, you’ll have a few options for removal. If the jar is not excessively hot to the touch, you might be able to carefully grasp the wick tab with your fingers and lift the entire melted wax disc out in one piece. However, if the jar feels too hot to handle comfortably, always prioritize safety: use an oven mitt or a thick towel to protect your hands.
- Dispose of Melted Wax: Prepare your disposal area by placing a paper plate covered with several layers of paper towels or an old rag nearby. Carefully pour the melted wax onto this absorbent surface. Allow the wax to cool and fully solidify on the paper towel-lined plate before discarding it in the trash. This crucial step prevents liquid wax from entering and clogging your plumbing system.
- Thorough Jar Cleaning: After the wax has been successfully removed and disposed of, wash the jar thoroughly with warm water and dish soap. Pay close attention to any residual wax film or soot marks. Scrub with a sponge, rinse completely, and dry for a beautifully clean and sparkling finish.
Pro Tip: This method is particularly effective for jars with a smaller amount of wax remaining, as it’s less intense than boiling water and offers greater control over the melting process. It’s also safer for jars with delicate designs or materials.
Method #3: The Freezing Technique for Brittle Wax – Chill and Chip
If you prefer to avoid heat altogether, the freezer can become your most valuable ally in the quest for clean candle jars. This ingenious method relies on the scientific principle that wax contracts and becomes incredibly brittle when exposed to freezing temperatures, making it remarkably easy to chip away.
- Freeze the Jar Solid: Place your candle jar directly into the freezer. Ensure it’s upright and stable. Leave it there for about 2 to 3 hours, or until the wax inside is completely frozen solid and hard to the touch. The intense cold will cause the wax to shrink and become extremely brittle, which is the key to its easy removal.
- Prepare for Removal: Once the jar is thoroughly frozen, carefully remove it from the freezer. Immediately place it on a protective surface, such as a sturdy paper plate or a regular ceramic plate. This precaution helps to catch any wax pieces that might break off during the chipping process.
- Chip Away the Brittle Wax: Arm yourself with a butter knife or a sturdy spoon. Gently but firmly start chipping away at the frozen wax. You’ll be pleasantly surprised at how easily and quickly the wax will break up into smaller, manageable pieces due to its brittleness. Don’t worry about damaging the jar; glass is generally very resilient to cold temperatures.
- Collect and Dispose: As you chip, the brittle wax pieces will fall onto your protective plate. Once you’ve removed all the significant chunks and loosened any clinging bits, simply pour the chipped wax directly into the trash.
- Final Polish and Wash: After all the visible wax is gone, give the jar a good wash with soap and warm water. This will remove any tiny wax particles, smudges, or lingering residue, ensuring your jar is perfectly clean, sanitized, and ready for its next life.
Key Benefit: This method completely bypasses the need for heat, significantly reducing the risk of burns. It’s an excellent, safe option, especially for jars that you might be concerned about exposing to boiling water or high temperatures, or for those who simply prefer a cooler approach.
Beyond Wax: Achieving a Perfectly Pristine Jar (Removing Stubborn Labels and Residue)
Even after successfully removing the wax, your journey to a perfectly reusable jar might not be over. You might still contend with lingering sticky labels, adhesive residue, or faint soot marks. Here’s how to achieve that flawlessly pristine finish:
- For Stubborn Labels and Adhesive: Start by soaking the jar in warm, soapy water for 15-30 minutes. Often, this is enough to loosen most labels, allowing them to peel right off. For more persistent adhesive, try rubbing alcohol, white vinegar, a commercial adhesive remover like Goo Gone, or even a homemade paste of baking soda and cooking oil. Apply the chosen solution, let it sit for a few minutes, then vigorously scrub with a cloth or non-abrasive sponge.
- For Soot and Grime: Candle soot can leave unsightly black marks. A simple paste made from baking soda and a little water works wonders. Apply the paste to the sooty areas, let it sit for a few minutes to lift the grime, then scrub gently with a non-abrasive sponge. For tougher spots, a small amount of white vinegar can be added to the baking soda paste for extra cleaning power.
- Polishing for Shine: Once your jar is completely clean and dry, give it a final polish with a microfiber cloth. This will remove any water spots or smudges, leaving you with a sparkling, streak-free shine that truly highlights the jar’s beauty.
Creative & Inspiring Ways to Repurpose Your Clean Candle Jars
Now that your jars are gleaming and ready for their next adventure, the real fun begins! The possibilities for repurposing are virtually limitless. Here are just a few ideas to spark your imagination and help you integrate these beautiful containers into your home:
- Stylish Storage Solutions: Transform them into elegant organizers. Use them in your bathroom for cotton balls, Q-tips, bath salts, or even makeup brushes. In your home office, they can neatly hold paperclips, pens, pencils, or rubber bands. In the kitchen, they’re perfect for storing spices, tea bags, coffee pods, or small, dry snacks.
- Mini Planters for Greenery: Candle jars make charming and unique homes for small plants. They are ideal for succulents, air plants, small herbs, or propagation of cuttings. Remember to add a layer of drainage pebbles at the bottom before adding soil and your plant.
- Decorative Vases: Their often-elegant designs make them perfect for small bouquets of fresh flowers, single statement stems, or dried botanicals. Arrange them individually or in clusters for a charming centerpiece.
- New Candle Holders: Give them a literal new life by placing small tea lights, votive candles, or even floating candles inside. They create a soft, ambient glow, extending their original purpose in a renewed fashion.
- DIY Craft Organizers: Keep your crafting supplies in order. Use jars to store buttons, beads, glitter, sewing notions, or any other small items that tend to get misplaced. Clear jars make it easy to see contents at a glance.
- Desk & Dresser Accessories: Beyond office supplies, they can organize hair ties, hair clips, jewelry, or even act as stylish receptacles for loose change on your nightstand or dresser.
- Personalized Gift Containers: Fill a clean jar with homemade treats (like cookies or layered brownie mix), craft supplies, a small succulent, or a collection of small trinkets. Tie a beautiful ribbon around it, and you’ve created a thoughtful, personalized, and eco-friendly gift.
These amazing images are all credited to diyINYACO via YouTube. Check her other inspiring content and follow for more fantastic DIY projects and home hacks!
Unlock the Full Potential of Your Candle Jars – A Sustainable and Creative Journey
The days of struggling with leftover wax and discarding beautiful candle jars are officially over. Removing stubborn wax might have seemed like a daunting or messy task in the past, but with these three straightforward and highly effective methods – the robust hot water bath, the gentle warmth of a candle or coffee warmer, or the chilling power of the freezer – you can effortlessly restore your jars to their pristine, former glory. Each technique offers a reliable path to a clean slate, ready for repurposing.
By embracing these simple cleaning hacks, you’re not only extending the life of elegant containers but also actively contributing to a more sustainable lifestyle. You’ll reduce waste, save money, and open up a world of creative possibilities for enhancing your home decor, organizing your spaces, and even crafting personalized gifts. So, the next time your favorite candle burns down, remember these invaluable tips. Instead of mindlessly discarding the jar, embrace the immense satisfaction of giving it a new purpose, transforming it from a used item into a cherished, functional, or decorative piece. Happy cleaning, happy repurposing, and enjoy the endless creative journey!