
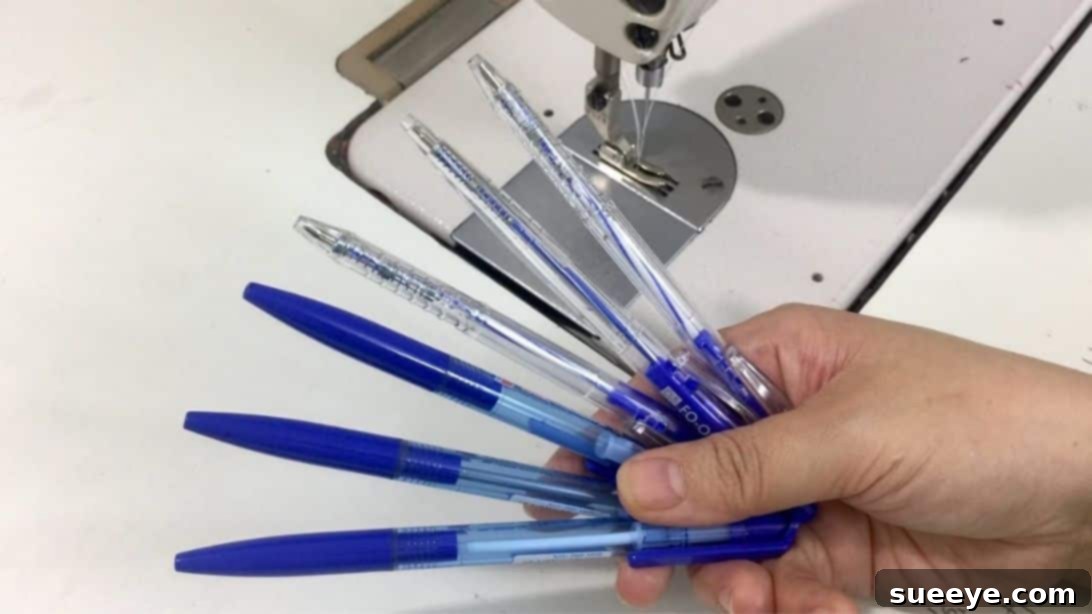
For many of us, the humble ballpoint pen is a staple in our craft arsenals, often used for marking patterns or sketching designs onto fabric. It’s a reliable tool that we’ve come to depend on for its precise lines. However, what if we told you that the utility of a ballpoint pen extends far beyond just its ink? Prepare to be amazed as you uncover a treasure trove of clever sewing hacks that transform this everyday item into an indispensable sewing companion. Even an empty pen, typically destined for the trash, can find a renewed purpose in your sewing room, offering solutions to common crafting dilemmas. These ingenious tips aren’t just theoretical; they are practical, effective, and guaranteed to make your sewing journey smoother and more enjoyable. Get ready to explore a world of creative possibilities and discover how many of these game-changing ideas pique your interest and which ones you’re eager to implement immediately. All these brilliant insights are brought to you by the incredibly creative minds at Trefa Craft on YouTube, a true inspiration for DIY enthusiasts.
Whether you’re a seasoned sewist or just starting your journey into the world of fabric and thread, these budget-friendly hacks will not only simplify complex tasks but also help you make the most of what you already have. Forget expensive gadgets; sometimes, the best tools are already in your desk drawer, waiting to be repurposed. Let’s delve into how a simple ballpoint pen can become your new favorite multi-functional sewing assistant.
What You’ll Need: Essential Supplies for These Pen Hacks
- Ballpoint Pens (new or used, with or without ink)
- Masking Tape (or any strong, removable adhesive tape)
- Sponge (preferably a thick, durable one)
Clever Ballpoint Pen Sewing Hacks: Step-by-Step Guide
Tip #1: The Ballpoint Pen as Your Ultimate Straight Stitch Guide
Achieving perfectly straight seams can be challenging, especially for beginners or when working with tricky fabrics. This hack transforms a simple pen into an effective sewing machine guide, ensuring your stitches remain consistent and professional. To implement this, begin by placing a ballpoint pen on the throat plate of your sewing machine, positioning it precisely along the desired seam allowance line. The gap near the throat plate often provides a natural resting spot. Secure the pen firmly in place using masking tape, ensuring it won’t shift during sewing. Once anchored, you can insert your fabric into the clip of the pen. This ingenious setup serves multiple purposes: the pen acts as a physical barrier, guiding your fabric for perfectly straight seams. Additionally, it helps keep your fabric folded neatly, maintains a consistent width for hems, and prevents materials from veering off course. This simple adjustment is a game-changer for maintaining precision, especially when sewing long seams or handling lightweight, slippery fabrics that tend to wander.
Tip #2: Effortless Fabric Turning with the Pen Clip
Turning small fabric tubes or intricate shapes right side out can be one of the most frustrating aspects of sewing. Fingers often struggle to maneuver tiny corners, and specialized tools can be expensive. Enter the ballpoint pen clip, your new best friend for fabric turning! To use this hack, first, create a small, neat hole on the upper side (or one end) of the fabric you wish to turn. This could be a tiny snip, or a pre-existing opening from where you’re turning a strap or loop. Carefully insert the sturdy clip of the ballpoint pen through this hole. Once the clip has pierced the fabric, gently start pushing the pen through the length of the fabric tube. The pen’s clip acts like a hook, catching the fabric and allowing you to push it through itself, effectively turning it inside out with minimal effort. This method is incredibly useful for narrow straps, fabric loops, or small enclosed shapes where traditional turning methods prove difficult, saving you time and preventing fabric distortion.
Tip #3: The Pen Barrel: A Smooth Operator for Fabric Turning
While the pen clip is excellent for smaller tasks, the pen’s barrel offers another fantastic method for turning fabric, particularly useful for slightly wider tubes or when you need a smoother, less snag-prone turn. This technique leverages the cylindrical shape of the pen body. Start by inserting the sewn fabric tube through the hollow barrel of a disassembled ballpoint pen (or one where the ink cartridge has been removed). Once the fabric is threaded through, carefully flip the very top edge of the fabric over the end of the pen barrel, so it begins to enclose the pen. Now, with a gentle but steady motion, begin scrunching the rest of the fabric up and over the barrel, pushing it along the length of the pen. The smooth surface of the barrel helps the fabric glide easily, preventing snags or tears. Continue this process until the entire length of your fabric tube has been turned right side out. This method is especially effective for turning larger quantities of fabric or for materials that might be delicate, offering a controlled and damage-free turning solution.
Tip #4: An Improvised Pincushion for Embroidery Needles
Misplaced needles are a common hazard in any sewing space, and embroidery needles, with their often smaller eyes and specialized points, are no exception. If you find yourself without a pincushion or need a portable solution to keep your embroidery needles safe and accessible, the ink barrel of a ballpoint pen comes to the rescue. Simply remove the ink cartridge from a used pen, leaving you with a hollow tube. This empty barrel makes an excellent temporary or permanent holder for your embroidery needles. Insert the needle directly into the barrel. The snug fit will keep the needle securely in place, preventing it from getting lost or damaged, and more importantly, protecting you from accidental pokes. It’s a fantastic way to organize your needles by type or size, especially when working on a specific embroidery project that requires multiple needles.
Tip #5: The Pen as a Needle Threader’s Assistant (Setup for Double Threading)
Threading a needle, especially for finer threads or when aiming for a double thread, can be tedious. This clever hack simplifies the process and sets you up perfectly for the next technique. To prepare, first insert your yarn or embroidery thread through the eye of your needle and tie a knot at the end, creating a secure loop or double strand. Now, take this threaded needle and carefully insert it through the lower barrel of a ballpoint pen. The idea here is to create a guided path for the thread, making it easier to maneuver and position for specialized sewing machine tasks. This setup provides leverage and control, which will be instrumental in the subsequent hack for double-thread sewing.
Tip #6: Mastering Double Thread Sewing with Ease
Double threading your sewing machine can significantly enhance the strength of your stitches or allow for unique decorative effects, but threading it properly through all the machine’s guides can be a hassle. Building on Tip #5, this hack makes the process surprisingly simple. Once your double-threaded needle is inserted into the pen barrel (as described in Tip #5), carefully guide the thread through your sewing machine. The key step is to squeeze the pen barrel, with the thread emerging from it, onto the hole or guide in the thread take-up lever area of your machine. The pen acts as an extension, making it much easier to push and pull the thread through this often-hard-to-reach spot. Once it’s through the take-up lever, pull the thread over and down towards the presser foot and then through the needle. This method provides superior control and leverage, transforming a tricky double-threading procedure into a quick and frustration-free task, perfect for projects requiring extra durable seams or decorative topstitching.
Tip #7: Creative Storage for Your Sewing Notions
Keeping small sewing notions organized is a perpetual challenge for sewists. Bobbins, clips, zippers, buttons, and other tiny accessories often get lost in drawers or tangled in craft boxes. This ingenious hack offers a simple, visible, and incredibly effective storage solution using pen ink barrels. Gather several empty ballpoint pen ink barrels (the hollow plastic tubes). Insert these barrels vertically into a thick, large sponge. The sponge provides a stable base, holding the barrels upright. Now, you can insert individual bobbins onto each barrel, or use them to hold small clips, miniature zippers, buttons, beads, or even spools of embroidery floss. This setup allows you to categorize and store your notions in a highly visible and easily accessible manner. No more rummaging! Each item has its designated spot, making your sewing space more organized and your crafting process more efficient. It’s a brilliant way to repurpose materials and create custom storage.
Tip #8: Drawing Perfect Circles and Arcs – Your DIY Compass
Precision in pattern making often requires drawing perfect circles or smooth arcs, but not everyone has a compass readily available. This clever ballpoint pen hack provides an excellent, budget-friendly alternative. Grab two ballpoint pens. Hold them together as you would a pair of chopsticks, ensuring they are parallel and steady in your hand. Adjust the distance between their tips to achieve the desired radius or diameter for your circle or arc. One pen will act as the pivot point, remaining stationary (or moving along a guide), while the other will be the drawing pen. Gently press down with the drawing pen and rotate the “compass” around the pivot point to create a perfect circle. For arcs, simply guide the pivot pen along a straight edge or ruler. This method offers surprisingly accurate results for drafting patterns, designing appliqués, or adding decorative circular elements to your projects without needing specialized drafting tools.
Tip #9: Precision Double Marking for Professional Results
When you need to create consistent parallel lines for seam allowances, pleats, buttonhole markings, or decorative stitching, achieving uniform spacing can be tricky. This hack provides an incredibly simple and effective solution. Take two ballpoint pens and tape them securely together side-by-side using masking tape. Ensure their tips are aligned and that the distance between them is precisely what you need for your double mark. Now, you have a custom double-marking tool. Simply draw with your taped pens as you would with a single pen. This allows you to effortlessly create two perfectly parallel lines simultaneously, ensuring consistency and saving you significant time compared to marking each line individually. It’s ideal for achieving professional-looking hems, precise pleats, or perfectly spaced decorative stitches, elevating the finish of your sewing projects.
The humble ballpoint pen, often overlooked, clearly holds a surprising amount of untapped potential for the savvy sewist. These 9 ingenious hacks demonstrate that creativity in crafting isn’t always about having the most expensive tools, but rather about reimagining the uses for everyday objects. From streamlining fabric manipulation and ensuring stitch precision to organizing your sewing space and even aiding in pattern design, the ballpoint pen proves its worth in countless ways.
We hope these clever sewing tips and tricks, inspired by the amazing Trefa Craft on YouTube, will spark new ideas and make your sewing projects more enjoyable and efficient. Don’t throw away those empty pens; instead, give them a new life in your craft room! Experiment with these hacks, adapt them to your specific needs, and share your own discoveries with fellow crafters. Happy sewing!
*A special thank you to Trefa Craft via YouTube for inspiring all these brilliant ideas and providing the visuals. Be sure to follow and subscribe to their channel for more incredible DIY and craft content.