
Master the Star-Sashed 9-Patch Quilt: A Comprehensive Beginner’s Guide with Jenny Doan
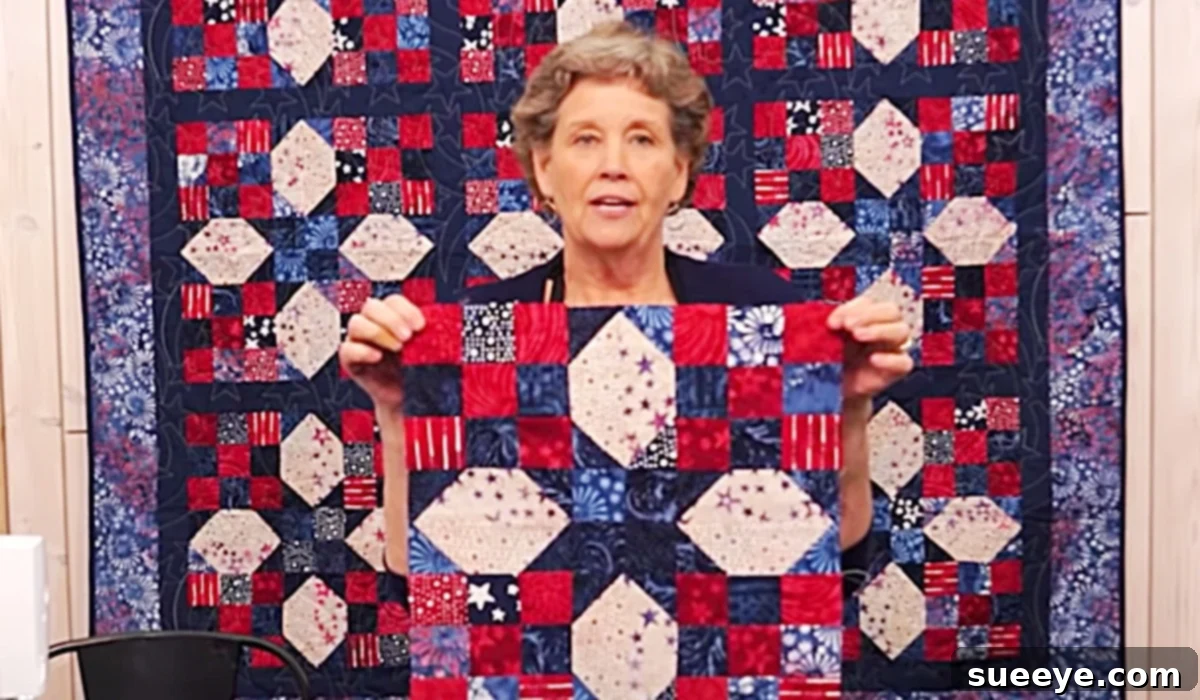
Embark on a truly rewarding quilting adventure with the classic Star-Sashed 9-Patch Quilt, a design celebrated for its timeless charm and accessibility to quilters of all skill levels. Our journey begins with an inspiring and exceptionally detailed video tutorial from The Missouri Star Quilt Company on YouTube, expertly guided by the beloved Jenny Doan. This pattern is not just a project; it’s an opportunity to create a piece of cherished Americana, brimming with character and warmth, perfect for gifting or adorning your own home.
Jenny Doan’s tutorial is a masterclass in making complex quilting techniques approachable. She meticulously covers every foundational skill necessary for success, providing invaluable tips that cater specifically to beginners. You’ll learn the art of precise pinning for seamless joins, the importance of crisp pressing to achieve flat and professional-looking blocks, and the techniques for accurate trimming to ensure all your pieces fit together perfectly. Consistency in your seam allowances is emphasized as a cornerstone for a balanced quilt, and even expert advice on how to gracefully use a seam ripper for those inevitable little adjustments is included. Jenny’s step-by-step instructions demystify the process of measuring and precisely cutting your fabric squares, setting the stage for smooth sewing and effortless assembly. Beyond the technical aspects, the tutorial offers brilliant strategies for color coding and trimming your blocks, guaranteeing they integrate harmoniously into the stunning Star-Sashed design. This name, “Star-Sashed,” resonates deeply with the rich tapestry of American history, reminiscent of the vibrant Rock & Roll era where Kansas City buzzed as a hub for entertainers. It’s a pattern that truly embodies the spirit of traditional craftsmanship, making it a wonderful testament to Jenny Doan’s enduring appeal as an American quilting icon.
Why the Star-Sashed 9-Patch Quilt is Perfect for You
The enduring popularity of the Star-Sashed 9-Patch Quilt among the quilting community stems from its unique blend of simplicity and sophisticated visual appeal. For those new to quilting, the fundamental 9-patch block serves as an excellent entry point, teaching essential piecing techniques and the critical skill of consistent seam allowances. This foundational block, when expertly combined with strategically placed sashing strips, magically reveals a captivating secondary star pattern. This ingenious design allows even novice quilters to achieve a stunning, intricate look without resorting to overly complicated piecing methods, fostering confidence and a sense of accomplishment.
Beyond its clever construction, this quilt pattern offers remarkable versatility in design. It beautifully accommodates an extensive range of fabric styles, from bold, contemporary prints that pop, to subdued, classic tones that evoke timeless elegance. Whether your vision is a whimsical quilt for a child’s room, a patriotic throw honoring tradition, or a refined bedspread that complements modern decor, the Star-Sashed 9-Patch is adaptable to virtually any aesthetic. Jenny Doan’s encouraging and clear instructions provide a supportive framework, ensuring that even if this is your very first quilting endeavor, you will feel empowered and capable throughout each stage of creation. Her emphasis on precision in every cut and stitch is key to achieving a polished, professional finish. More than just a project, this quilt offers a foundational learning experience, equipping you with essential quilting skills that will serve as a springboard for countless future creative endeavors while crafting something truly beautiful and enduring.
Essential Materials for Your Star-Sashed 9-Patch Quilt Project
Before diving into the exciting world of fabric and stitches, ensuring you have the right tools and materials is paramount to the success of your Star-Sashed 9-Patch Quilt. While The Missouri Star Quilt Company tutorial will provide specific measurements and fabric recommendations, this comprehensive list will help you assemble your essential quilting toolkit:
- High-Quality Quilting Fabric: This is the soul of your quilt! You’ll need various coordinating prints and solids for the 9-patch blocks, sashing, borders, backing, and binding. Opt for 100% cotton quilting fabric, renowned for its excellent drape, durability, and minimal shrinkage. Consider pre-washing your fabrics to prevent any potential color bleeding and to account for initial shrinkage, ensuring your finished quilt maintains its shape and vibrancy.
- A Reliable Sewing Machine: A well-maintained sewing machine is your primary workhorse. Ensure it’s in optimal working condition with a fresh needle – a universal or microtex needle, typically size 80/12 or 90/14, is ideal for quilting. For consistent and precise 1/4-inch seam allowances, which are absolutely crucial in quilting, a dedicated 1/4-inch presser foot is a highly recommended investment.
- A Sharp Rotary Cutter: This indispensable tool will revolutionize your fabric cutting process, offering unmatched precision and speed compared to traditional scissors. Rotary cutters come in various sizes; a 45mm blade is a versatile standard for general cutting. Always use a fresh, sharp blade to achieve clean, crisp edges, which contribute significantly to accurate piecing.
- A Self-Healing Cutting Mat: Designed to protect your work surface and prolong the life of your rotary blade, a self-healing cutting mat also features a grid system that aids in precise measurements. Invest in the largest mat your workspace can comfortably accommodate, as it allows for cutting longer strips and larger fabric pieces without constant repositioning.
- Acrylic Quilting Rulers: These clear, durable rulers are indispensable for accurate cutting. A long ruler (e.g., 6″ x 24″) is perfect for cutting strips, while square rulers (e.g., 6.5″ x 6.5″ or 12.5″ x 12.5″) are essential for squaring up your finished quilt blocks to exact dimensions.
- Sharp Fabric Scissors: While your rotary cutter handles the bulk of the fabric, a dedicated pair of sharp fabric scissors remains necessary for intricate cuts, trimming threads, clipping corners, and other small detail work. Always reserve these scissors exclusively for fabric to maintain their keen edge.
- An Iron and Ironing Board: In quilting, pressing is often considered as important as sewing. A good quality iron (steam or dry) and a sturdy ironing board are fundamental for creating flat, crisp seams and perfectly square blocks, which are vital for a professional-looking finish.
- High-Quality Thread: Select a durable, 100% cotton thread that either matches or subtly blends with your fabric colors. Avoid inexpensive threads that are prone to breaking or leaving excessive lint in your machine, as this can disrupt your sewing rhythm and affect quilt longevity.
- Pins or Fabric Clips: Essential for securely holding multiple layers of fabric together before sewing. Long, sharp quilting pins work well, or consider fabric clips (like Wonder Clips) for thicker seams, when working with different fabric types, or when pinning isn’t ideal.
- Quilt Batting: This forms the cozy middle layer of your quilt “sandwich,” providing warmth, loft, and texture. Batting is available in various fibers (cotton, polyester, wool, bamboo, or blends) and different lofts (thicknesses), allowing you to choose the perfect feel for your quilt.
- Backing Fabric: You’ll need a single large piece of fabric, or several pieces carefully sewn together, to form the back of your quilt. It should be slightly larger than your finished quilt top on all sides to allow for comfortable basting and quilting.
- Optional but Recommended Tools: A seam ripper (for those inevitable learning moments), fabric marking tools (like chalk or a washable pen), and thimbles for hand-sewing the binding.
Step-by-Step Guide to Creating Your Star-Sashed 9-Patch Quilt
The journey of creating the Star-Sashed 9-Patch Quilt is a deeply satisfying process, blending meticulous preparation with the pure joy of seeing your fabric transform into a masterpiece. While this guide provides a clear roadmap, we strongly encourage you to follow Jenny Doan’s comprehensive video tutorial from The Missouri Star Quilt Company for invaluable visual instruction and her signature expert tips, especially if you are new to quilting.
1. Fabric Preparation and Precise Cutting
The foundation of any successful quilt lies in its preparation. Begin by ensuring all your fabrics are pressed thoroughly to eliminate every wrinkle, whether you chose to pre-wash them or not. This step is crucial for achieving accurate measurements and cuts. Next, meticulously follow Jenny’s specific instructions for cutting your fabric into the required strips and squares. This pattern typically utilizes strip piecing, requiring long, precise strips for both the 9-patch blocks and the sashing. Always use your rotary cutter, cutting mat, and clear acrylic quilting rulers to achieve perfectly straight, consistent, and accurate cuts. Remember the quilter’s golden rule: “Measure twice, cut once” – precision at this stage will save you considerable time and frustration later on.
2. Assembling the Iconic 9-Patch Blocks
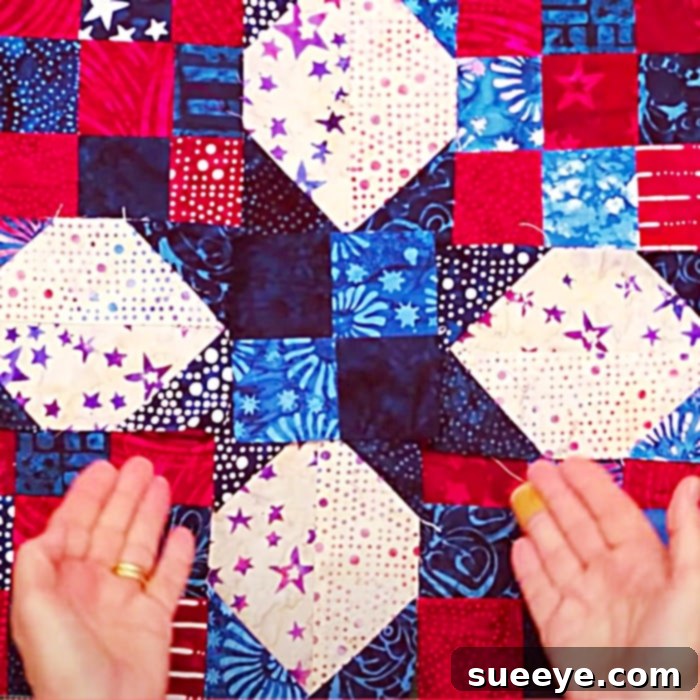
The classic 9-patch block forms the rhythmic heartbeat of this quilt. Jenny Doan’s method often leverages the efficiency of strip piecing: you’ll sew several long fabric strips together into strip sets, then cut these sets into smaller sub-units. These sub-units are then rotated and sewn together to form your distinctive 9-patch blocks. Maintaining a consistent 1/4-inch seam allowance throughout this process is paramount; it ensures your blocks remain square and fit together perfectly. After sewing each seam, take the time to press it carefully. Jenny’s tutorial offers invaluable advice on pressing seams, whether open or to one side, to minimize bulk and achieve a wonderfully flat finish. Finally, squaring up each 9-patch block to its exact required size after assembly is a critical step for a professional and cohesive quilt top.
3. Integrating the Sashing and Revealing the Star
Once your individual 9-patch blocks are immaculately pieced and squared, the next exciting phase involves introducing the sashing. Sashing strips are fabric strips strategically sewn between your quilt blocks, serving a dual purpose: they elegantly separate each block, allowing its unique design to stand out, and, most importantly for this pattern, they cleverly create a striking secondary design element. In the Star-Sashed quilt, these sashing strips are the key to forming the captivating star motif that gives the quilt its name. You will sew sashing strips both horizontally and vertically, first joining your blocks into rows, and then joining those rows together. Accurate measurement and precise sewing of these sashing strips are absolutely essential to maintain the overall symmetry and squareness of your burgeoning quilt top.
4. Framing Your Masterpiece: Attaching the Borders
Borders provide a beautiful frame for your quilt, giving it a polished, finished look and often aiding in squaring up the entire quilt top. To ensure your borders lay flat and your quilt remains square, measure your quilt top accurately through its center, both lengthwise and widthwise, to determine the precise length of your border strips. Avoid simply measuring along the edges, which can sometimes be wavy. Typically, you’ll attach the side borders first, followed by the top and bottom borders. After sewing each border, press the seams flat and neatly. This crucial step not only adds visual appeal but also provides essential stability and a clean edge to your quilt top, preparing it flawlessly for the next stages of the quilting process.
5. Creating the Quilt Sandwich and the Quilting Process
With your magnificent quilt top now complete, it’s time to assemble the “quilt sandwich,” which consists of three distinct layers: your beautifully pieced quilt top, a soft layer of batting, and your chosen backing fabric. Begin by laying your backing fabric right side down on a clean, flat surface, smoothing it out completely to remove any wrinkles. Next, carefully layer the batting evenly on top of the backing, followed by your quilt top, positioned right side up. Ensure all three layers are perfectly flat and free of any creases or puckers. The next critical step is basting, which securely holds these layers together, preventing them from shifting during the actual quilting process. Common basting methods include using safety pins (pin basting), a specialized spray adhesive (spray basting), or even traditional hand basting stitches.
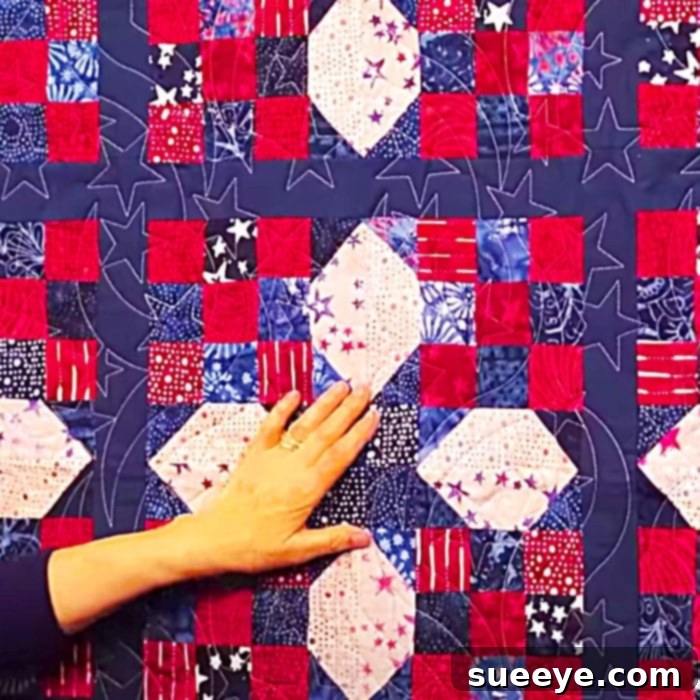
Once your quilt sandwich is securely basted, you are ready for the exciting phase of quilting! This involves stitching through all three layers, not only to hold them permanently together but also to add beautiful texture and dimension to your project. You have a variety of quilting methods to explore: simple straight lines stitched with your walking foot, “stitch-in-the-ditch” which involves quilting along the seams, more elaborate free-motion quilting designs, or even sending your quilt to a professional long-armer. For beginners, straight-line quilting or simple stitch-in-the-ditch around your blocks and sashing offers a fantastic and achievable starting point. Jenny Doan frequently demonstrates straightforward yet highly effective quilting designs that can be easily executed on a standard domestic sewing machine, guiding you to a stunning finish.
6. The Finishing Touch: Attaching the Binding
The final, vital step in completing your Star-Sashed 9-Patch Quilt is the addition of the binding. This essential element neatly encases all the raw edges of your quilt sandwich, providing a clean, durable, and professional finish that truly elevates the entire piece. The process typically involves cutting long strips of fabric, joining them together to create one continuous strip, and then pressing this strip in half lengthwise. You will then usually machine-stitch one side of this folded binding strip to the front edge of your quilt. Once securely attached, the binding is carefully wrapped around to the back of the quilt, where it is then either hand-stitched for an invisible finish or machine-stitched down for added durability. A meticulously executed binding not only enhances the overall aesthetic appeal of your quilt but also protects its edges, ensuring it will be cherished and enjoyed for many years to come. Jenny’s tutorials often provide clear, detailed instructions for various binding techniques, guaranteeing a beautifully polished outcome.
Embracing the Quilting Journey: A Legacy of Creativity
The Star-Sashed 9-Patch Quilt transcends being merely a sewing project; it is an immersive journey into the heart of textile artistry, steeped in tradition and rich with opportunities for personal expression. By diligently following the clear, encouraging, and comprehensive instructions provided by Jenny Doan and The Missouri Star Quilt Company, even the most novice quilters can confidently achieve results that are not only stunning but also deeply satisfying. Jenny’s unwavering emphasis on precision in cutting, maintaining consistent seam allowances, and the art of careful pressing transforms what might initially appear to be a daunting craft into an incredibly enjoyable and profoundly rewarding experience. The quilt’s timeless “Americana” appeal, evoking a sense of cherished memories and classic design, makes it an ideal addition to any home – whether as a comforting throw on a chilly evening, a vibrant bedspread, or a thoughtful, handmade gift that speaks volumes of care. So, delve into your fabric stash, power up your sewing machine, and prepare to be utterly inspired by the transformative magic of quilting. Through this creative process, you will not only craft a beautiful, enduring quilt but also cultivate invaluable skills and an undeniable confidence that will empower you in countless future projects. Happy quilting, and may your stitches be straight and your seams be true!