
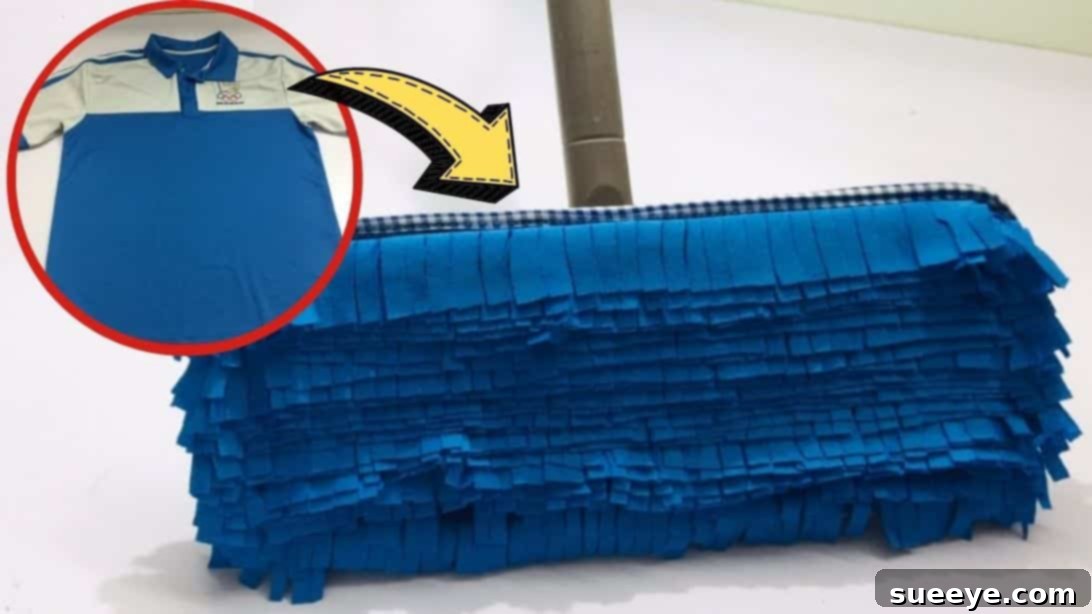
Eco-Friendly Cleaning: Transform Old Clothes into a DIY Floor Mop – A Sustainable Guide
Are you looking for innovative ways to reduce household waste and embrace a more sustainable lifestyle? Before you discard those worn-out t-shirts and old fabrics, consider giving them a new life! This comprehensive guide will show you how to repurpose your old clothes into a functional, eco-friendly DIY floor mop. Not only will you save money on store-bought replacements, but you’ll also contribute to a greener planet by extending the lifecycle of textiles. This simple sewing project, inspired by the creative insights of DIY Trefa on YouTube, is perfect for beginners and seasoned crafters alike. Get ready to transform your cleaning routine with a touch of DIY magic!
Why Choose a DIY Floor Mop?
Opting for a homemade floor mop offers a multitude of benefits that extend beyond just saving a few dollars. It’s a conscious choice for a more sustainable and economical household:
- Environmental Sustainability: The fashion industry is a significant contributor to global waste. By repurposing old clothes, you divert textiles from landfills, reducing your carbon footprint and promoting circular economy principles.
- Cost-Effectiveness: Regular purchases of disposable mop pads or replacement heads can add up. With a DIY mop, your primary “material” is something you already own – old clothes – making it an incredibly budget-friendly solution for ongoing cleaning needs.
- Customization and Personalization: Unlike generic store-bought options, a DIY mop allows you to choose your fabrics and colors, creating a cleaning tool that perfectly suits your aesthetic preferences. You can even experiment with different fabric types for specific cleaning tasks.
- Reduced Chemical Exposure: Many store-bought mop pads contain synthetic materials and sometimes even chemical treatments. A DIY mop made from natural fabrics like cotton can be a healthier alternative for your home and family, especially when paired with natural cleaning solutions.
- Empowerment and Satisfaction: There’s immense satisfaction in creating something useful with your own hands. This project is a rewarding way to engage in a practical craft that directly benefits your home.
Materials You’ll Need:
Gathering your materials is the first step towards your new, sustainable cleaning companion. Most items are likely already in your home or easily accessible.
- Dust Mop Handle: You’ll need an existing dust mop handle to attach your new mop head. Ensure it’s in good condition. If you don’t have one, consider purchasing an inexpensive handle that can accommodate a reusable head.
- Bias Tape (approx. 1-inch wide): This fabric strip, usually pre-folded, is crucial for neatly finishing the edges of your mop base, preventing fraying, and providing a professional look. Choose a color that complements your fabric or a contrasting one for a design flair.
- A Thick Fabric (e.g., canvas, denim, heavy cotton twill): This will form the sturdy base of your mop head. It needs to be durable enough to withstand repeated use and washing. An old pair of jeans, a canvas tote bag, or upholstery scraps work perfectly.
- Old Shirts or Fabric Scraps (preferably cotton): These will be cut into strips to form the absorbent strands of your mop. Cotton t-shirts, towels, or other highly absorbent fabrics are ideal for picking up dust and spills effectively. The more you have, the fuller your mop head will be.
- Elastic (approx. 0.5 to 1-inch wide): This is vital for creating the secure loops that will hold your mop head onto the dust mop handle. Look for sturdy elastic that retains its stretch.
- Scissors: A good pair of fabric scissors will make cutting through multiple layers and various fabrics much easier and more precise.
- Chalk or Marking Pen: Essential for accurately tracing shapes and marking lines on your fabric, ensuring precise cuts and measurements.
- Sewing Machine (or Needle and Thread): While a sewing machine will make this project much faster and more durable, it can certainly be accomplished by hand with a sturdy needle and strong thread if you prefer.
Step-by-Step Guide to Crafting Your DIY Floor Mop:
Step 1: Preparing the Mop Base and Fabric Strips
The foundation of your DIY mop begins with creating a robust base and preparing your cleaning strands.
Begin by selecting your thick fabric, which will serve as the robust base for your mop head. Lay this fabric flat and fold it neatly in half. The size of this folded fabric should be generous enough to fully encompass the existing dust mop frame you intend to use. Carefully place your dust mop handle’s head directly onto the folded fabric, aligning it near one of the folded edges. Using your chalk or fabric marking pen, meticulously trace the exact shape of the mop head onto the folded fabric. This tracing will define the perimeter of your new mop base.
Once traced, carefully cut out the shape, resulting in a perfectly sized base when unfolded. Now, take your bias tape. Unfold one edge of the bias tape and align it with the raw edges of your thick fabric base. Stitch the bias tape around all edges with a consistent quarter-inch seam allowance. After the initial stitch, fold the bias tape over to the opposite side of the fabric, enclosing the raw edge neatly. Then, fold it in again to create a clean, finished border, tucking it nicely to conceal all raw edges. Secure this folded tape in place by sewing all the way around, creating a durable and attractive hem.
Next, it’s time to prepare the cleaning strands. Take an old shirt and lay it horizontally on a flat surface. Position your newly cut fabric base on the lower body area of the shirt, ensuring you leave ample space below for cutting the strips. Using the side of your fabric base as a guide, cut across the shirt, creating a long strip of fabric. Be sure to exclude the bottom hem of the shirt, as it’s often thicker and less absorbent, and should be trimmed off. Repeat this process with several old shirts or fabric scraps until you have a good quantity of fabric to create a dense mop head. The aim is to create long, uniform strips that will form the cleaning surface of your mop.
Step 2: Assembling the Mop Strands and Finishing Touches
This stage brings your mop head to life by attaching the cleaning strands and adding the securing elastic loops.
With your fabric strips ready, lay them flat and use your chalk or marking pen to divide their width into consistent 4cm (approximately 1.6 inches) thick strips. Precision here ensures a uniform and effective mop head. Once marked, carefully cut along these lines to create numerous individual strips. Gather all these strips. Now, take your main fabric base. Starting from one end, begin sewing the fabric strips one by one onto the long side of the base fabric. Position each strip closely beside the previous one, ensuring there are no significant gaps. Continue sewing them in parallel rows until you have covered the entire length of the base fabric, creating a dense, shaggy cleaning surface. The closer the strips are, the more effective your mop will be at trapping dust and dirt.
After all the strips are securely sewn in place, flip the entire mop head over to the reverse side. Cut two lengths of elastic, each long enough to create a loop that can comfortably stretch over the ends of your dust mop handle. Sew one piece of elastic securely onto each short side of the fabric base, creating two robust loops. Ensure these are sewn firmly to withstand the tension of attaching and detaching the mop. Lastly, for enhanced cleaning efficiency and a more traditional mop look, take your scissors and cut the bottom ends of all the fabric strips into smaller, fringed pieces. This encourages better dirt collection and allows the mop to glide more smoothly across floors. To attach your newly crafted mop head, simply slide the loops of elastic over the ends of your dust mop handle, securing it firmly in place. Your eco-friendly, homemade floor mop is now ready for action!
Tips for Success in Your DIY Mop Project
To ensure your DIY floor mop is as effective and durable as possible, keep these pointers in mind:
- Fabric Choices: Prioritize highly absorbent fabrics for your strips, such as old cotton t-shirts, towels, or even microfiber cloths if you have them. For the base, denim, canvas, or other heavy-duty materials offer the best longevity.
- Measurements Matter: Always measure your dust mop handle’s head precisely before cutting your base fabric. A snug fit will ensure the mop stays securely attached during cleaning.
- Sewing Machine Settings: If using a sewing machine, use a strong thread and a sturdy needle suitable for the fabric thickness (e.g., a denim needle for the base). A zigzag stitch can add flexibility and durability, especially when attaching the elastic.
- Density of Strips: Don’t skimp on the fabric strips! A denser collection of strips will result in a more effective mop that picks up more dust and dirt with each swipe.
- Reinforce Stress Points: Pay extra attention to reinforcing the areas where the elastic is attached to the base. A few passes of stitching or a box-and-cross stitch will prevent tears.
- Safety First: Always exercise caution when using scissors and a sewing machine. If hand-sewing, consider using a thimble to protect your fingers.
Care and Maintenance of Your DIY Mop
One of the best features of your new DIY mop head is its reusability. To keep it performing at its best, follow these simple care instructions:
- Regular Washing: After each significant cleaning session, remove the mop head from the handle and machine wash it. You can wash it with your regular laundry, but avoid fabric softener as it can reduce absorbency.
- Air Drying: Tumble dry on a low setting or, even better, air dry it to extend its life and save energy. Ensure it’s completely dry before storing to prevent mildew.
- Inspect for Wear: Periodically check the fabric strips and elastic for signs of wear and tear. If strips become too frayed or the elastic loses its stretch, it’s easy to replace individual components or make a new mop head.
- Deep Cleaning: For tough stains or odors, a pre-soak in warm water with a bit of vinegar or baking soda can work wonders before washing.
Why Choose DIY Mops Over Store-Bought Alternatives?
While convenience often drives us to purchase ready-made items, the long-term benefits of a DIY approach to cleaning tools are compelling. Beyond the initial satisfaction of creation, a homemade mop head promotes a cycle of mindful consumption and sustainable living. You’re not just cleaning your floors; you’re actively participating in reducing waste, conserving resources, and fostering a healthier home environment. This project underscores the power of upcycling and proves that practical solutions can also be environmentally responsible and economically smart. Embrace the DIY spirit and enjoy a cleaner home and a greener conscience!
Embrace Sustainable Cleaning with Your Homemade Mop!
Creating your own floor mop from old clothes is more than just a craft project; it’s a step towards a more sustainable and mindful way of living. This simple, yet incredibly effective, DIY solution allows you to divert textiles from landfills, save money, and enjoy a customizable, eco-friendly cleaning tool. With just a few basic materials and some easy sewing steps, you can transform your old t-shirts into a powerful cleaning ally.
We hope this detailed tutorial empowers you to embark on this rewarding project. Special thanks to DIY Trefa via YouTube for the inspiring original concept and images. We encourage you to visit her channel for more creative DIY ideas!
Happy cleaning and happy crafting!