
Transform Your Car’s Interior: The Ultimate Guide to Deep Cleaning Stained Car Seats with Oxi Clean
Are your car seats looking tired, dull, and marred by unsightly stains? Whether it’s spilled coffee, muddy paw prints, or everyday grime, keeping your vehicle’s interior pristine can feel like a constant battle. But what if there was an incredibly effective, yet remarkably inexpensive, solution right at your fingertips? This comprehensive guide, inspired by expert tips from creators like iDV Create, will walk you through the simple, DIY process of rejuvenating your car seats using the power of Oxi Clean. Say goodbye to expensive detailing services and hello to a fresh, clean interior that feels brand new.
Over time, car seats, especially cloth ones, are magnets for dirt, dust, and accidental spills. These blemishes don’t just detract from your car’s aesthetic appeal; they can also trap odors and bacteria, affecting the overall comfort and hygiene of your driving experience. Many assume that severe stains require professional intervention, but with the right approach and a few readily available materials, you can achieve professional-level results at a fraction of the cost. Oxi Clean, a household staple known for its remarkable stain-fighting capabilities, is not just for laundry; its versatile formula is also highly effective on various car seat materials, including fabric, carpet, leather, and vinyl. This makes it an ideal, multi-purpose solution for tackling almost any mess your car’s interior can throw at it.
The beauty of this cleaning hack lies in its simplicity and affordability. For just a few dollars, you can acquire the essential product needed to transform your car’s interior. Beyond the cost savings, the satisfaction of restoring your car seats yourself is incredibly rewarding. Prepare to impress your passengers and enjoy a cleaner, more inviting cabin every time you get behind the wheel. Let’s dive into the materials you’ll need and the step-by-step process to bring your car seats back to life.
Essential Materials for Car Seat Rejuvenation:
- Oxi Clean Total Interior Cleaner (or Oxi Clean Versatile Stain Remover mixed with water): This is your primary weapon against stains. If using the versatile powder, ensure it’s thoroughly dissolved according to package directions for fabric cleaning.
- Vacuum Cleaner (preferably with a wet/dry function or powerful suction): Crucial for removing loose debris before cleaning and extracting the cleaning solution afterwards.
- Soft-bristled Scrub Brush: Essential for agitating the cleaner into the fabric and lifting stains. Opt for brushes designed for upholstery or delicate surfaces to avoid damage.
- Microfiber Cloths: Several clean, absorbent microfiber cloths for wiping and drying.
- Bucket of Water: For rinsing cloths and, if not using a wet/dry vac, for dampening cloths to wipe away residue.
- Optional: A spray bottle (if using powdered Oxi Clean mix), gloves for protection, and a fan or car windows open for ventilation.
Step-by-Step Guide to Spotless Car Seats:
Step 1: Preparation – The Foundation for Effective Cleaning
Before you begin applying any cleaning solution, thorough preparation is key. Start by removing all loose items from your car seats and the surrounding floor. Use your vacuum cleaner to meticulously remove any dirt, crumbs, pet hair, and other debris from the seat surfaces, crevices, and seams. Pay extra attention to areas where dirt tends to accumulate. This initial vacuuming prevents you from turning dry dirt into muddy paste when the cleaner is applied, ensuring a more effective and less messy cleaning process.
Next, it’s always wise to perform a patch test. Apply a small amount of your Oxi Clean solution to an inconspicuous area of your car seat, such as under the seat or a hidden corner. Allow it to sit for a few minutes, then blot dry. Check for any discoloration or adverse reactions. While Oxi Clean is generally safe for many surfaces, this step ensures compatibility with your specific car seat material, especially if you have sensitive fabric or older upholstery.
Step 2: Generous Application of Oxi Clean
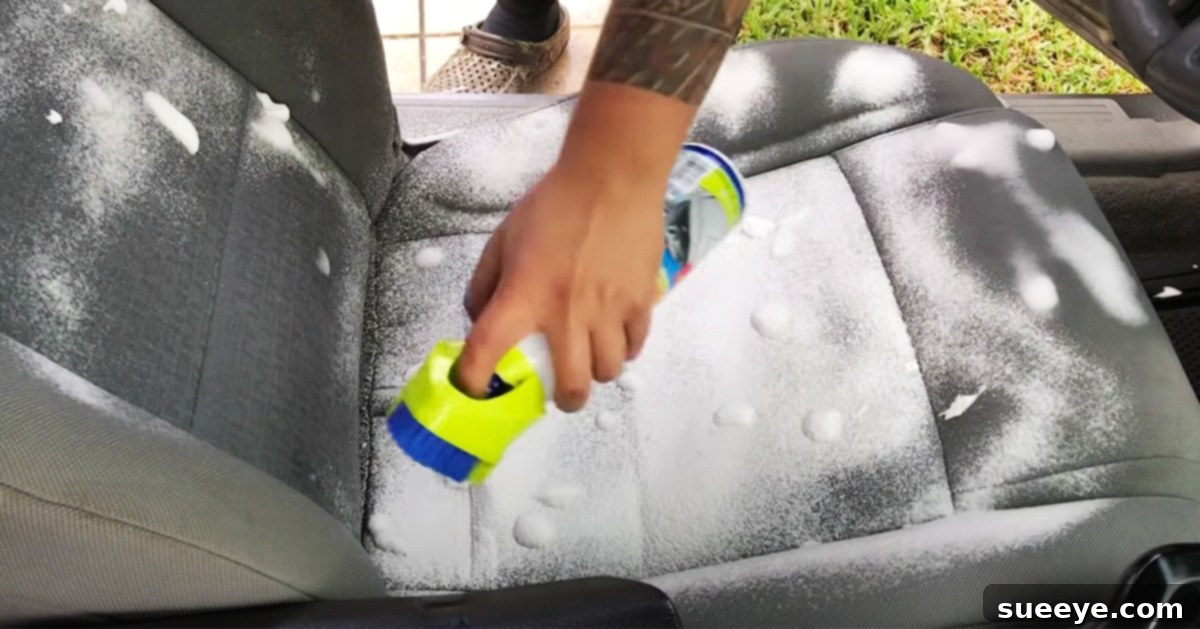
Once you’ve prepared the area and confirmed material compatibility, it’s time to apply the Oxi Clean. Generously spray the entire stained section of the car seat with the cleaner. For larger areas or heavily soiled seats, it’s often more effective to clean an entire panel or section rather than just spot-treating. This helps to achieve an even clean and prevents water rings or uneven drying patterns. Ensure the cleaner thoroughly saturates the fabric without oversaturating it to the point of soaking the foam underneath.
After application, allow the product to dwell for approximately 30-50 seconds. This crucial waiting period allows the Oxi Clean’s powerful oxygenating agents to break down and lift the dirt and grime from the fabric fibers. It’s important not to let the product sit for too long (e.g., several minutes) as this could allow it to soak too deeply into the seat’s foam, making extraction more difficult and potentially prolonging drying time.
Step 3: The Scrubbing Action
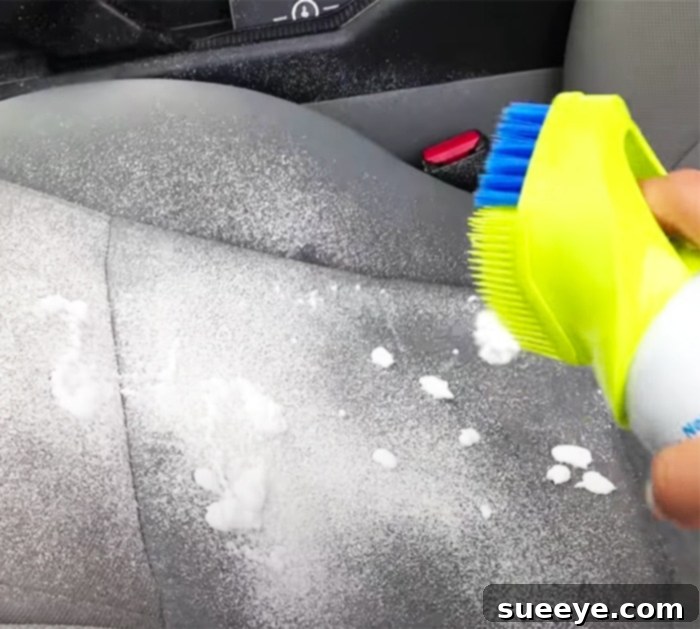
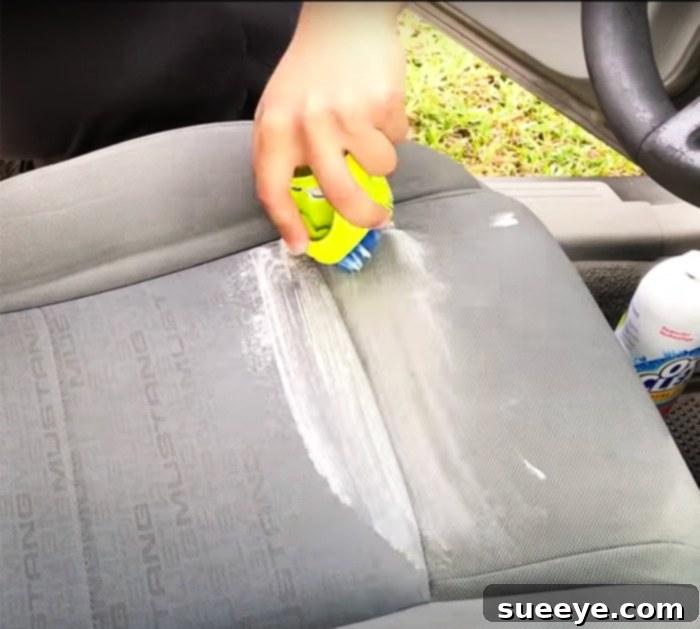
Immediately after the dwell time, take your soft-bristled scrub brush and begin to gently yet firmly scrub the treated area. Use circular motions, working the cleaner into the fabric. The scrubbing action physically dislodges the loosened dirt and helps the Oxi Clean penetrate deeper into the fibers. For stubborn stains, you might need to apply a little more pressure, but always be mindful of your car seat material. For delicate fabrics, a lighter touch is recommended. Continue scrubbing until you see the stain begin to lift and disappear.
Step 4: Extracting the Cleaner and Dirt
Once you’ve scrubbed the area thoroughly, it’s vital to extract the cleaner and the suspended dirt from the seats. If you have a wet/dry vacuum, this is the ideal tool for the job. Use the vacuum to suck out as much of the moisture and cleaning solution as possible. Go over the treated area multiple times until no more liquid is being extracted. This step is critical because it removes the dirty solution, preventing it from drying back into the fabric and leaving behind residues or new stains. Proper extraction also significantly speeds up drying time and prevents mildew or unpleasant odors.
If you don’t have a wet/dry vacuum, you can use a bucket of clean water and several clean, absorbent microfiber cloths. Dampen a cloth with clean water (make sure it’s not dripping wet) and firmly wipe down the treated area to rinse out the cleaner. Follow immediately with a dry microfiber cloth to blot up as much moisture as possible. You’ll need to rinse and wring out your cloths frequently, or switch to fresh ones, as they will quickly become dirty with the extracted grime. Repeat this rinsing and blotting process several times to ensure all product residue is removed.
Step 5: Repeat and Refine
For particularly stubborn stains or deeply ingrained dirt, a single application might not be enough. Don’t hesitate to repeat the process of respraying the product, allowing it to dwell, scrubbing, and then extracting. Sometimes, multiple lighter applications and extractions are more effective than one heavy saturation. Continue until you are satisfied with the cleanliness of your car seats.
Step 6: Drying and Final Inspection
Once the cleaning is complete, proper drying is crucial to prevent mold, mildew, and unpleasant odors. If possible, leave your car windows open, or use a fan to circulate air through the interior. Avoid closing up the car immediately after cleaning, especially in humid conditions, as this can trap moisture. Allow the seats to air dry completely, which might take several hours, or even overnight, depending on humidity and how wet the seats got. Once dry, give the seats a final vacuum to fluff up the fibers and remove any dried residue, revealing a fresh, clean finish.
Pro Tips for Optimal Car Seat Cleaning:
- Brush Selection is Key: Pay close attention to the type of brush you use. While some cleaning products come with integrated brushes, ensure the bristles are soft enough for upholstery. Hard bristles, often green or darker colors on some products, can damage delicate car seat fabric or even scuff leather surfaces. Opt for softer bristles, typically white or light blue, or use a separate, dedicated upholstery brush to avoid causing irreversible damage.
- Avoid Oversaturation: While a generous application is needed, avoid completely drenching your seats. Excess moisture can lead to longer drying times, potential for mildew growth deep within the seat foam, and can sometimes even damage seat electronics (if present).
- Ventilation is Important: Work in a well-ventilated area. Open your car doors and windows to allow fresh air to circulate, which helps with drying and dissipates any cleaning product fumes.
- Consider All Materials: While this guide focuses on Oxi Clean’s versatility, remember that different car seat materials (cloth, leather, vinyl, Alcantara) may have specific care requirements. Always confirm Oxi Clean’s suitability for your specific material or perform a patch test. For genuine leather, consider following up with a leather conditioner to rehydrate and protect the material after cleaning.
- Maintain Regularly: To keep your car seats looking their best, incorporate regular maintenance into your routine. This includes weekly vacuuming, wiping down spills immediately, and considering seat covers for high-traffic areas or if you frequently transport pets or children.
Reclaim Your Car’s Interior Today!
Cleaning stained car seats doesn’t have to be a daunting or expensive task. With the powerful stain-fighting action of Oxi Clean and a bit of elbow grease, you can restore your vehicle’s interior to a condition you’ll be proud of. This DIY method is not only cost-effective but also empowers you to take control of your car’s cleanliness. Say goodbye to unsightly stains and lingering odors, and hello to a fresh, inviting, and hygienic driving environment. So, grab your Oxi Clean, a brush, and your vacuum, and get ready to transform your car’s interior today!
For a visual demonstration of this technique, check out the original tutorial by iDV Create on YouTube.