
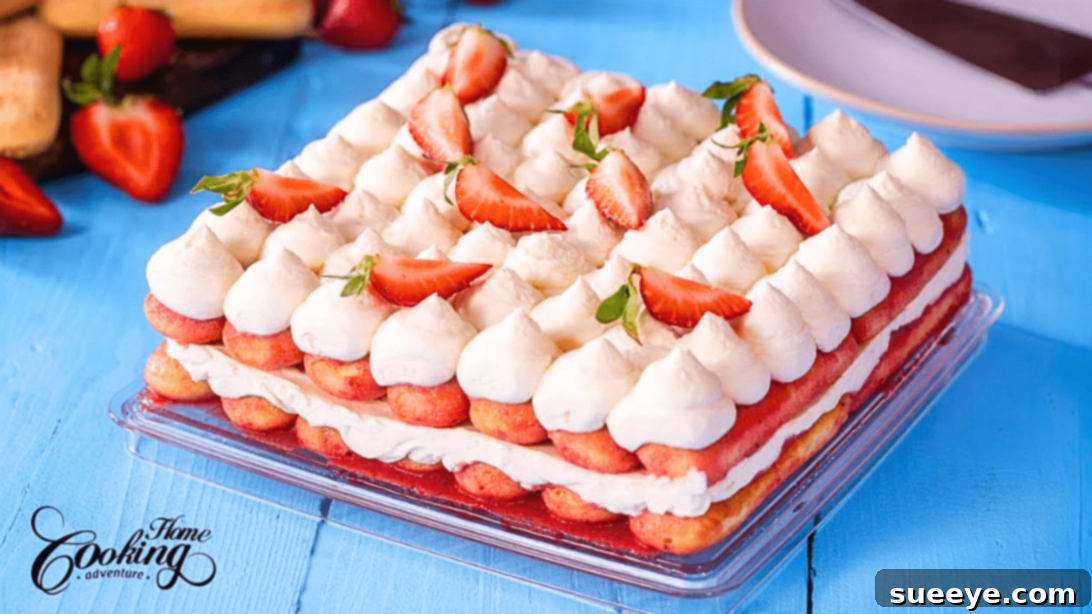
Easy No-Bake Strawberry Tiramisu: Your Perfect Summer Dessert
Strawberries, with their vibrant color and irresistible sweetness, are truly nature’s candy, making them the ultimate star for any dessert. While classic tiramisu holds a special place in our hearts, this no-bake strawberry version elevates it to a whole new level of seasonal delight. This recipe, inspired by the wonderful Home Cooking Adventure on YouTube, is a testament to how simple ingredients can create an extraordinary dessert that’s both refreshing and deeply satisfying.
Imagine layers of delicate ladyfingers, soaked in a bright, homemade strawberry sauce, nestled between clouds of rich, velvety mascarpone cream. It’s a symphony of flavors and textures – sweet, tangy, and incredibly creamy – designed to disappear in moments. Whether you’re hosting a summer gathering or simply craving a delectable treat, this easy no-bake strawberry tiramisu is guaranteed to impress with minimal effort. Say goodbye to oven baking and hello to your new favorite warm-weather indulgence.
RELATED: Grandma’s Southern Sweet Strawberry Pizza Recipe – Another Fruity Favorite!
Why Choose a No-Bake Strawberry Tiramisu?
There are countless reasons why this particular dessert stands out, especially during the warmer months. Firstly, the “no-bake” aspect is a huge advantage. You won’t need to turn on your oven, keeping your kitchen cool and making it perfect for summer entertaining. Secondly, the use of fresh strawberries adds a refreshing, juicy element that transforms the traditional coffee-infused tiramisu into a light, fruity masterpiece. The natural sweetness and subtle tartness of strawberries perfectly balance the richness of the mascarpone, creating a harmonious flavor profile.
Moreover, this recipe is surprisingly straightforward, requiring basic cooking skills and readily available ingredients. The assembly process is enjoyable, and the result is a stunning dessert that looks as good as it tastes. It’s an ideal make-ahead option, as it requires several hours of chilling, allowing the flavors to meld beautifully and the dessert to set perfectly. This means less stress on the day of serving and more time to enjoy with your guests.
Essential Ingredients for Your Strawberry Tiramisu:
Creating this magnificent dessert begins with selecting the right ingredients. Quality truly makes a difference, especially when it comes to fresh fruit and dairy.
- 28 ladyfingers: These delicate, sponge-like biscuits are crucial for absorbing the strawberry sauce and providing the classic tiramisu structure.
For the Irresistible Strawberry Sauce:
This homemade sauce is the heart of our strawberry tiramisu, infusing every layer with vibrant flavor.
- 400g or 14oz of fresh strawberries, hulled and cut into smaller pieces: Opt for ripe, juicy strawberries for the best flavor.
- 1/3 cup of sugar: Adjust to your preference based on the sweetness of your strawberries.
- 2 tbsp of lemon juice: This brightens the strawberry flavor and adds a wonderful tangy note.
- ¼ cup of water: Helps to create a sauce consistency.
For the Velvety Mascarpone Filling:
The creamy, luxurious mascarpone layer is what makes tiramisu so decadent.
- 1 pound of mascarpone cheese, at room temperature: Allowing it to soften ensures a smooth, lump-free filling.
- 2/3 cup of powdered sugar: For a silky-smooth sweetness that dissolves easily.
- 2 tsp of vanilla extract: Enhances the overall sweet profile.
- 1½ cups of whipping cream, 35% fat, chilled: High-fat cream is essential for achieving stiff peaks and a stable, airy cream.
For Decoration:
- Fresh strawberries: A few extra for a beautiful and delicious garnish.
How to Craft Your Perfect No-Bake Strawberry Tiramisu:
Follow these detailed steps to create a show-stopping strawberry tiramisu that will delight everyone.
Step 1: Preparing Your Pan and Strawberry Sauce Base
Begin by lining the sides of an 8-inch square springform pan with acetate sheets. This non-stick lining will make it incredibly easy to remove the tiramisu cleanly once set, ensuring perfectly smooth sides. Set the prepared pan aside. Next, embark on creating your vibrant strawberry sauce. In a medium saucepan, combine the hulled and chopped fresh strawberries, sugar, lemon juice, and water. Place the saucepan on your stove over medium to medium-high heat and bring the mixture to a gentle boil. Stir occasionally to prevent sticking and ensure the sugar dissolves completely.
Step 2: Simmering and Perfecting the Strawberry Sauce
Once the mixture reaches a boil, reduce the heat to medium-low or low, allowing it to simmer gently for approximately 5 to 7 minutes. This simmering process softens the strawberries and allows the flavors to meld beautifully. After simmering, remove the saucepan from the heat and use a stick blender (or carefully transfer to a regular blender) to process the strawberry sauce until it reaches a smooth consistency. For an even more refined sauce, free of any seeds, sieve the puréed sauce over a clean bowl. This extra step ensures a silky-smooth texture, crucial for a luxurious tiramisu. Set the sieved sauce aside and allow it to cool completely to room temperature. It’s vital that the sauce is cool before assembling to prevent melting the mascarpone filling.
Step 3: Crafting the Luxurious Mascarpone Filling
In a large, separate mixing bowl, beat the softened mascarpone cheese until it becomes creamy and smooth. This takes just a minute or two with an electric mixer. Then, gradually add the powdered sugar and vanilla extract to the mascarpone, continuing to beat until all ingredients are well combined and the mixture is light and airy. In a separate, chilled bowl (using a cold bowl helps achieve better whipped cream), pour the cold whipping cream. Beat the whipping cream until stiff peaks form. Stiff peaks mean that when you lift the beaters, the cream stands up firmly without collapsing. Gently fold this whipped cream into the mascarpone mixture until just combined, being careful not to overmix, which can deflate the air. The result should be a light, stable, and incredibly creamy filling.
Step 4: Layering the First Strawberry and Ladyfinger Base
Now, it’s time to begin assembling your masterpiece! Take about one-third of your cooled strawberry sauce and spread it evenly across the bottom of your prepared springform pan. This layer will provide a delicious base for the ladyfingers. Next, one by one, lightly dip the ladyfingers into the remaining strawberry sauce, ensuring they are fully coated but not overly saturated – you want them moist, not soggy. Arrange these strawberry-soaked ladyfingers in a single, neat layer over the sauce at the bottom of the pan. Break them if necessary to fit snugly, minimizing gaps.
Step 5: Adding Mascarpone and the Second Ladyfinger Layer
Carefully spread approximately half of your luscious mascarpone filling evenly over the first layer of strawberry-soaked ladyfingers. Use an offset spatula or the back of a spoon to create a smooth, consistent layer. Repeat the process from Step 4: dip more ladyfingers into the remaining strawberry sauce and arrange them in another single layer over the mascarpone filling. Once the second ladyfinger layer is in place, transfer the remaining mascarpone filling into a piping bag fitted with your desired decorative tip (or simply snip off the end for a rustic look). This will make the final decoration much easier and more elegant.
Step 6: Decorating, Chilling, and Serving Your Tiramisu
Using the piping bag, pipe and decorate the final layer of ladyfingers with the remaining mascarpone filling. You can create rosettes, swirls, or a simple even layer – let your creativity shine! Once decorated, gently cover the tiramisu with plastic wrap or aluminum foil, making sure it doesn’t touch the piped cream. Transfer the covered tiramisu to the refrigerator and allow it to chill for a minimum of 4 hours, or ideally, overnight. This crucial chilling time allows the ladyfingers to fully absorb the strawberry sauce, the mascarpone filling to set firmly, and all the incredible flavors to meld together into a cohesive, irresistible dessert. Before serving, carefully remove the springform pan sides and acetate sheets. Decorate the top with fresh strawberry slices or whole strawberries for a beautiful presentation. Slice, serve, and savor every refreshing bite! Enjoy this delightful homemade treat.
Tips for Tiramisu Perfection:
- Quality Ingredients are Key: Always use the freshest strawberries and high-quality mascarpone cheese for the best flavor and texture.
- Don’t Over-Soak Ladyfingers: A quick dip is enough. Over-soaked ladyfingers can make your tiramisu soggy.
- Room Temperature Mascarpone: This ensures a smooth, lump-free cream. Cold mascarpone can be difficult to beat smoothly.
- Chilled Whipping Cream and Bowl: For stiff peaks, ensure your whipping cream, bowl, and beaters are very cold before whipping.
- Proper Chilling Time: Do not rush this step. The 4-hour minimum (or overnight) chilling is essential for the tiramisu to set properly and for flavors to fully develop.
- Acetate Sheets: While optional, these really help achieve clean, straight sides when unmolding. You can find them at baking supply stores or online.
Serving Suggestions & Variations:
This strawberry tiramisu is exquisite on its own, but you can elevate it further. Serve it with a dusting of powdered sugar, a few fresh mint leaves, or a dollop of extra whipped cream on the side. For a boozy adult version, consider adding a splash of Grand Marnier or a strawberry liqueur to your dipping sauce. Feel free to experiment with other fruits as well; raspberries or mixed berries could also make fantastic no-bake tiramisu variations.
Storage Best Practices:
Store your strawberry tiramisu covered in the refrigerator for up to 3-4 days. While it might be tempting to make a huge batch, it’s best enjoyed fresh, within a few days of preparation, to appreciate the delicate balance of flavors and textures. It is not recommended for freezing, as the texture of the mascarpone and ladyfingers can change upon thawing.
This easy no-bake strawberry tiramisu recipe is more than just a dessert; it’s an experience. It’s the taste of summer, the joy of a homemade treat, and the satisfaction of creating something truly delicious with love. We hope you enjoy making and sharing this delightful recipe as much as we do!
*All these images are credited to Home Cooking Adventure via YouTube. Give her channel a visit and subscribe for more amazing culinary inspiration!