
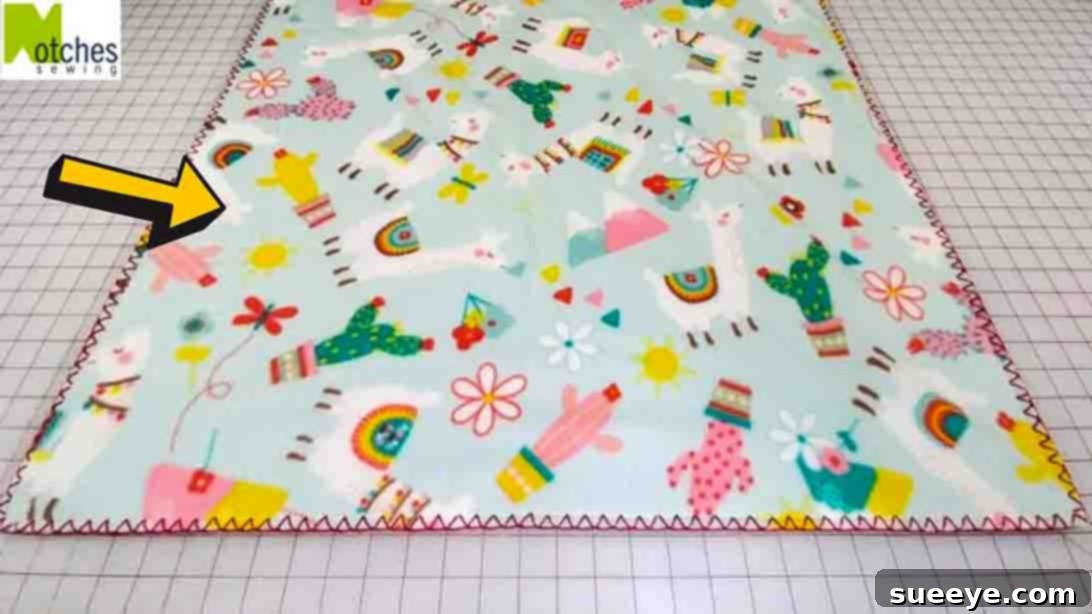
Are you searching for your next incredibly rewarding and enjoyable DIY project? Look no further! We highly recommend this charming fleece blanket tutorial, expertly guided by Notches Sewing on YouTube. This project is a fantastic way to create something beautiful and functional with your own hands. Requiring just two pieces of soft fleece fabric and your favorite color of embroidery thread, you’ll be able to craft a delightful baby-sized fleece blanket. It’s absolutely perfect for a thoughtful, handmade gift for new parents, a cozy addition to a nursery, or even a comforting personal throw. This project is not only satisfying but also adds a touch of handmade warmth to any occasion.
This fleece blanket project stands out as a quick, accessible, and profoundly beginner-friendly endeavor. Even if you’re new to the world of sewing, or simply looking for a relaxing craft, you’ll find immense joy in bringing this blanket to life. It’s an ideal project for those who appreciate the tactile pleasure of fabric and the satisfaction of a finished handmade item. The blanket features a closed blanket stitch edge, which not only adds a professional and decorative finish but also provides excellent durability. Dive into the world of fabric and thread, and learn how to make this lovely blanket by following our detailed, step-by-step instructions below. We’ll guide you through each stage, ensuring a smooth and enjoyable crafting experience from start to finish. Get ready to transform simple materials into a cherished keepsake!
Essential Materials for Your DIY Fleece Blanket Project
Gathering the right materials is the first step towards a successful and enjoyable crafting experience. Here’s a detailed list of what you’ll need for your fleece blanket, along with some tips for selection:
- 2 Pieces of Polar Fleece Fabric: The heart of your blanket! Polar fleece is chosen for its incredible softness, warmth, and ease of use. It doesn’t fray, making it perfect for beginner sewers. You’ll want two pieces of coordinating or contrasting colors/patterns to create a reversible blanket. For a baby-sized blanket, two pieces measuring approximately 1 yard (or 36 inches x 60 inches, standard bolt width) each should be sufficient. Consider anti-pill fleece for longevity and a smooth finish.
- Ruler: A sturdy ruler is essential for accurate measuring and cutting. A quilting ruler (clear acrylic ruler) is highly recommended as its transparency allows you to see your fabric underneath, ensuring precise straight lines and square corners, which are crucial for a professional-looking blanket.
- Fabric Marker: Choose a fabric marker that is either washable or air-erasable. This will help you mark your cutting and stitching lines precisely without leaving permanent marks on your beautiful fabric. A good quality marker ensures your guidelines are clear but temporary.
- Rotary Cutter & Cutting Mat: While sharp fabric scissors can work, a rotary cutter paired with a self-healing cutting mat will make squaring off and cutting your fleece significantly faster and more accurate. Rotary cutters provide clean, crisp edges with minimal effort, which is especially beneficial when working with multiple layers of fabric like fleece.
- Pins or Fabric Clips: These are indispensable for securing your two layers of fleece together, preventing them from shifting while you sew. Fabric clips are often preferred for fleece as pins can sometimes leave small holes or get lost in the thick fabric. Using clips along all edges will ensure your layers stay perfectly aligned.
- Sewing Machine: Any basic sewing machine capable of a straight stitch will work wonderfully for this project. Ensure it’s in good working order and you have a fresh needle suitable for medium-weight fabrics. A walking foot attachment can be incredibly helpful when sewing fleece, as it helps feed both layers of fabric through evenly, preventing puckering or stretching.
- Embroidery Thread: This thread is for the decorative closed blanket stitch edge. Choose a color that complements or contrasts beautifully with your fleece fabrics. DMC six-strand embroidery floss or pearl cotton (#8 or #5 weight) are excellent choices. You’ll want a good quantity, typically a skein or two, depending on the size of your blanket, as the blanket stitch uses a fair amount of thread.
- #20 Chenille Needle: This specific type of hand-sewing needle is perfect for embroidery on fleece. Chenille needles have a very sharp point, which glides easily through fabric, and a large eye, making it simple to thread with thicker embroidery floss. The #20 size is a good general-purpose size for this type of decorative stitching.
Step-by-Step Instructions: Crafting Your Fleece Blanket with a Closed Blanket Stitch Edge
Now that you have all your materials ready, let’s begin the exciting process of creating your cozy fleece blanket. Follow these detailed steps for a beautifully finished project.
Step 1: Preparing Your Fleece Fabric and Initial Machine Stitching
The foundation of a perfect blanket lies in precise preparation. Begin by laying one piece of polar fleece flat on a large, clean surface, ensuring it is smooth and wrinkle-free. Place the second piece of fleece directly on top of the first, aligning all edges as perfectly as possible. Make sure the ‘wrong sides’ of the fabric are facing each other – this means the right sides of both pieces will be facing outwards. This creates a reversible blanket with a clean finish on both sides.
Once your layers are aligned, the first critical step is to trim and square off your fabric. Fleece often comes with a selvage edge, which is the factory edge that might be tighter or slightly uneven. Carefully cut away these selvage edges using your rotary cutter and ruler, ensuring you create straight, clean lines. After removing the selvages, square off the bottom and all remaining sides of your combined fleece layers. This ensures your blanket has perfectly right-angled corners and straight edges, which is crucial for a neat finish and for the subsequent blanket stitch. Measure and cut your fleece to your desired finished size. A common baby blanket size is around 30×40 inches, but feel free to adjust based on your preference. Once cut, use your fabric clips or pins to secure the two layers of fleece together all around the perimeter. Place clips every 3-4 inches to prevent any shifting during the next sewing step.
Next, set up your sewing machine. Adjust your machine to the longest straight stitch length it offers. For fleece, a longer stitch length (e.g., 3.5mm to 4.5mm) is preferred as shorter stitches can sometimes perforate the fabric too much or make it look puckered. You’ll be sewing a perimeter stitch around the entire blanket. To ensure consistent spacing for your upcoming blanket stitch, align the inside edge of your sewing machine’s presser foot with the raw edge of your fleece. This will create a stitching line approximately 3/8″ (about 1cm) away from the edge. This initial stitching line serves two purposes: it securely joins the two layers of fleece, and it provides a perfect guideline for your hand-embroidered blanket stitch.
Begin sewing along one edge. When you approach a corner, slow down. Stop sewing precisely 3/8″ from the edge, with your needle still down in the fabric. Lift your presser foot, pivot your fabric 90 degrees, lower the presser foot, and continue sewing along the next edge. Repeat this process for all four corners. Once you’ve completed the entire perimeter, secure your stitches at the beginning and end. This machine stitching creates a stable border, making the hand-stitching much easier and neater. If desired, you can now use your fabric marker and ruler to draw small, evenly spaced marks (e.g., 1/2 inch apart) along the perimeter, just below your machine stitching line, as guides for your blanket stitch. This can be especially helpful for maintaining uniform stitch size and spacing.
Step 2: Initiating the Closed Blanket Stitch Edge
Now for the beautiful decorative touch! Take a nice, long length of your chosen embroidery thread – approximately 30-40 inches is a good starting point to avoid too many knots, but also not so long that it tangles easily. Thread your #20 Chenille needle and tie a secure knot at the very end of your thread. Ensure the knot is robust enough not to pull through the fleece.
To begin, select any side of your blanket. Gently separate the two layers of fleece slightly at the edge. Insert your needle through only the back layer of fleece, coming up through the top layer just below your machine-stitched line (or at your first marked point if you’ve drawn guides). Pull the thread through until the knot is neatly hidden between the two layers of fleece, ensuring a clean start with no visible knot on either side of your blanket. This technique creates a very professional finish.
Now, at the very top edge again, stitch through both layers of fabric, just above where your thread emerged, bringing the needle from the back to the front. This creates your first anchor stitch. From the right side of your work, insert your needle underneath this top stitch, pulling it through gently. Next, place your needle below the machine stitch line (or at your next marked point), push your needle through both layers of fabric, making sure your working thread (the long tail coming from your previous stitch) is positioned in front of the needle. Then, pull your thread up and to the left, firmly but not so tightly that it puckers the fabric. This action forms the first half of your blanket stitch, creating a small “L” shape. To secure this angle in place and start the next part of the stitch, make a tiny securing stitch through the fabric right beside the initial vertical stitch you just made. This helps to define the corner and ensures the loop remains consistent.
Step 3: Completing and Repeating the Closed Blanket Stitch Pattern
With your first “L” shape established, let’s complete the closed blanket stitch. Insert your needle into the same bottom mark (or very close to it) where your last vertical stitch emerged. As you pull the needle through to the right, ensure the working thread is positioned in front of the needle. This motion creates a small, neat triangular shape, effectively closing the “L” and forming a complete, self-contained stitch. This is what distinguishes the “closed” blanket stitch from a traditional open blanket stitch.
To continue the pattern, move to the next mark along the bottom edge (or estimate an even spacing, typically 1/2 inch from the previous stitch). From behind the fabric, push your needle upwards through both layers, aiming to emerge just above your machine stitch line. As the needle comes through, guide the working thread behind the needle. This is a crucial step: *the thread must always be behind the needle* as you pull it up. Pull the thread to the left again, forming the next vertical leg of your stitch. Now, put the needle into the same mark at the bottom where your current stitch emerged, and pull it up to the right, again making sure the thread is in front of the needle to create the closing triangle.
Repeat these steps meticulously around the entire perimeter of your fleece blanket. Consistency is key to a beautiful finish. Always ensure you are going in just below the machine stitch line (or at your marked points) for uniform depth. Continuously check that your working thread is brought behind the needle when pulling up for the vertical stitch, and in front of the needle when pulling up for the closing horizontal stitch. This technique creates a series of interlocking “L” shapes, resulting in a dense, decorative, and incredibly durable edge. This stitch not only enhances the aesthetic appeal of your blanket but also reinforces the edges, preventing stretching or fraying over time. Take your time, maintain even tension, and enjoy the rhythmic process of hand-stitching. When you come to the end, neatly secure your thread by weaving it back into the existing stitches on the underside of the blanket, trimming any excess to hide the tail. Your beautiful DIY fleece blanket with a closed blanket stitch edge is now complete!
Your Beautiful DIY Fleece Blanket with a Closed Blanket Stitch Edge Awaits!
Congratulations on completing your stunning handmade fleece blanket! You’ve transformed simple pieces of fabric into a warm, inviting, and beautifully finished item. The closed blanket stitch doesn’t just add a decorative touch; it provides a strong, durable edge that will withstand countless snuggles and washes. This project is a testament to the joy of DIY crafts and the satisfaction of creating something truly unique.
Whether this blanket is destined to be a treasured baby gift, a cozy addition to your home decor, or a comforting companion for yourself, you can take pride in the craftsmanship. The combination of soft fleece and the intricate hand-stitched edge makes it a standout piece. Don’t hesitate to experiment with different fleece colors, patterns, and embroidery thread combinations for future projects. Each blanket you make will be a unique expression of your creativity!
We encourage you to share your finished fleece blankets with us! Tag us on social media or send us a picture – we love seeing your handmade creations come to life. This project is an excellent stepping stone for exploring more advanced sewing and embroidery techniques, opening up a world of possibilities for your crafting journey. Enjoy the warmth and beauty of your new blanket, a true labor of love!