
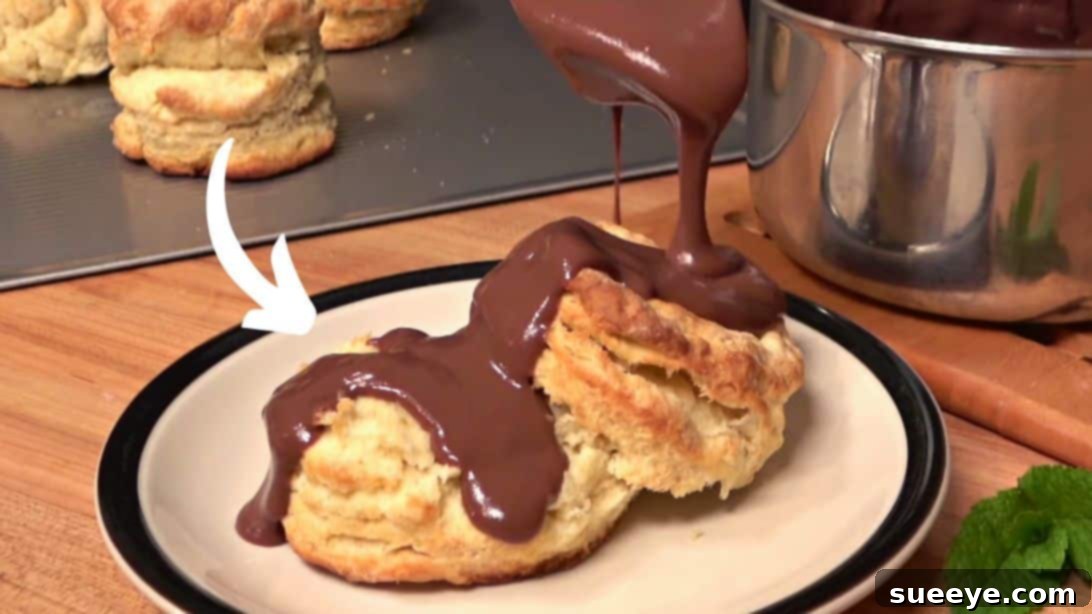
There’s an undeniable magic to a warm, comforting breakfast that sets the tone for the entire day. For many, especially in the American South, biscuits hold a revered place at the breakfast table. While usually paired with savory gravies, there’s a delectable twist that transforms this humble staple into an extraordinary treat: chocolate gravy. If you’re like me and appreciate the simple joy of a biscuit elevated to new heights, then you’re in for a discovery that might just become your new favorite obsession. This particular chocolate gravy recipe, expertly demonstrated by The Sauce and Gravy Channel on YouTube, is remarkably straightforward, quick to prepare, and yields a rich, velvety sauce that many enthusiasts claim surpasses even popular chocolate spreads like Nutella. Get ready to indulge in a timeless Southern classic that’s surprisingly easy to master.
Ingredients:
Crafting the perfect chocolate gravy requires just a handful of pantry staples. The quality of these ingredients can subtly influence the final taste and texture, so choosing fresh, good-quality components is always recommended for the best results.
- ¾ cup or 170g of granulated sugar
- 1/3 cup or 35g of unsweetened cocoa powder
- 3 tbsp or 24g of all-purpose flour
- 2 cups or 500ml of milk (whole milk often yields a richer consistency)
- 2 tsp of pure vanilla extract
- 1 tbsp or 14g of unsalted butter
- A dash of salt, to taste, optional (enhances chocolate flavor)
Understanding Your Ingredients: The Keys to Flavor and Texture
Each ingredient in this chocolate gravy recipe plays a vital role. The **granulated sugar** provides the foundational sweetness, balancing the bitterness of the cocoa. You can adjust this amount slightly to suit your preference, though the ¾ cup offers a well-rounded sweetness.
**Unsweetened cocoa powder** is where the deep chocolate flavor comes from. Using good quality cocoa can significantly impact the richness and complexity of your gravy. Dutch-processed cocoa tends to be darker and less acidic, yielding a smoother chocolate taste, while natural cocoa is brighter. Either works beautifully.
**All-purpose flour** is the essential thickening agent. It helps create that luscious, gravy-like consistency. Precisely measuring the flour is crucial to avoid a gravy that is either too thin or overly thick and pasty. While some recipes use cornstarch, flour offers a more traditional texture for gravy.
**Milk** forms the liquid base, carrying all the flavors. Whole milk is often preferred for its creaminess and richness, which contributes to a more decadent gravy. However, you can use 2% or even skim milk for a lighter version, though the texture might be slightly less luxurious. Dairy-free alternatives like almond or oat milk can also be used, though they may alter the final flavor profile.
**Pure vanilla extract** is added at the end to impart a warm, aromatic finish that complements the chocolate beautifully. Adding it off the heat ensures its delicate flavor isn’t cooked away.
**Unsalted butter** provides richness, a silky mouthfeel, and a subtle gloss to the gravy. Using unsalted butter allows you to control the overall salt content of the dish, especially if you decide to add an extra dash of salt.
Finally, a **dash of salt** is optional but highly recommended. Just a tiny pinch can dramatically enhance and deepen the chocolate flavor, preventing the gravy from tasting flat. It’s a secret weapon for bringing out the best in chocolate.
Directions:
Creating this delicious chocolate gravy is a simple process, but paying attention to a few key techniques will ensure a perfectly smooth and rich outcome every time. Follow these steps for a delightful experience.
Step 1: Preparing the Base and Initial Cooking
Begin by placing a fine-mesh sieve over a medium-sized saucepan. Add the granulated sugar, unsweetened cocoa powder, and all-purpose flour into the sieve. Gently tap the sieve or use a spoon to push the dry ingredients through. This crucial step helps break up any lumps in the flour or cocoa powder, ensuring a smooth gravy from the start. If you don’t have a sieve, don’t worry! You can add the dry ingredients directly to the saucepan. In this case, it’s even more important to whisk them together very thoroughly using a dry whisk until they are completely combined and there are no visible lumps. This pre-mixing prevents the flour from clumping when the liquid is added.
Once the dry ingredients are lump-free, gradually begin to pour the milk into the saucepan while continuously whisking. This slow, steady addition, combined with constant whisking, helps to create a smooth, homogenous mixture, preventing the formation of lumps. Continue whisking until the milk is fully incorporated and the mixture is entirely smooth. Place the saucepan on your stove over medium to medium-high heat. The goal here is to gently bring the mixture to a simmer without scorching it, so keep an eye on the heat and maintain steady whisking.
Step 2: Thickening, Finishing, and Serving
Continue whisking the mixture constantly as it heats up. This continuous motion is vital to prevent sticking to the bottom of the pan and to ensure even thickening. You’ll notice the mixture beginning to thicken and bubble as it approaches a simmer. This process typically takes about 15 minutes, but keep an eye on the consistency rather than strictly the clock. You’re looking for a consistency that coats the back of a spoon without running off immediately. Once the gravy reaches a gentle simmer and has noticeably thickened, reduce your heat setting to low. Allow it to simmer gently for an additional 2 to 3 minutes. This final simmer is crucial for cooking out any raw flour taste, ensuring a perfectly smooth and palatable gravy.
After the simmering period, turn off the heat and immediately remove the saucepan from the stove. This stops the cooking process and prevents the gravy from becoming too thick. Now, add the pure vanilla extract to the hot gravy. Mix it in thoroughly until well combined. Adding vanilla off the heat preserves its delicate flavor. Next, add the unsalted butter. If you’ve decided to include a dash of salt to enhance the chocolate flavor, this is also the perfect time to add it. Give the gravy a final, vigorous whisk until the butter has completely melted and is fully incorporated, creating a glossy, smooth, and rich sauce.
Your homemade chocolate gravy is now ready! It’s best served warm, immediately poured generously over warm, flaky biscuits. The combination of the sweet, rich chocolate gravy and the tender biscuit is simply heavenly. You can also get creative with how you serve it, as this versatile sauce isn’t just for biscuits. Enjoy every delicious bite!
Serving Suggestions & Creative Variations
While chocolate gravy and biscuits are a match made in culinary heaven, this delightful sauce’s versatility extends far beyond that classic pairing. For biscuits, consider serving it with warm, buttermilk biscuits fresh from the oven, as their slight tang and flaky texture provide a perfect counterpoint to the sweet gravy. But don’t stop there! Drizzle this rich chocolate gravy over pancakes, waffles, or French toast for an indulgent breakfast. It’s also fantastic as a dessert topping for vanilla ice cream, pound cake, or even fresh fruit like bananas and strawberries. For a subtle twist, try adding a pinch of cinnamon or a teaspoon of espresso powder to the dry ingredients for an extra layer of flavor complexity that deepens the chocolate notes.
Tips for a Perfect Chocolate Gravy
- Preventing Lumps: The golden rule for smooth gravy is to thoroughly whisk your dry ingredients together before adding any liquid, or even better, sieve them. Adding milk gradually while continuously whisking is also key.
- Consistent Whisking: Throughout the cooking process, especially as the mixture heats and thickens, continuous whisking prevents sticking, scorching, and ensures an even consistency.
- Heat Management: Medium to medium-high heat is ideal for the initial heating, but once it simmers, reduce to low. Too high heat can cause scorching or an overly thick gravy.
- Achieving the Right Thickness: The gravy will thicken further as it cools. If it becomes too thick, you can thin it out by whisking in a little warm milk, one tablespoon at a time, until it reaches your desired consistency. If it’s too thin, you can return it to low heat and whisk gently for a few more minutes, ensuring it simmers adequately to activate the flour’s thickening properties.
- Storage: Leftover chocolate gravy can be stored in an airtight container in the refrigerator for up to 3-4 days.
- Reheating: To reheat, gently warm the gravy in a saucepan over low heat, whisking frequently. You may need to add a splash of milk to restore its creamy consistency as it often thickens significantly when chilled.
The Southern Charm: A Nod to Tradition
Chocolate gravy holds a special place in the hearts and kitchens of the Southern United States, particularly in Appalachian regions. It’s a comforting, economical, and deeply satisfying breakfast dish, often prepared from scratch with ingredients readily available in most homes. Far from a modern gourmet creation, chocolate gravy is a beloved tradition, evoking memories of childhood breakfasts, family gatherings, and simple, wholesome comfort food. It represents a resourceful and delicious way to bring a touch of sweetness to the morning meal, cementing its status as a cherished part of Southern culinary heritage.
Frequently Asked Questions About Chocolate Gravy
Q: What exactly is chocolate gravy?
A: Chocolate gravy is a sweet, creamy, and thick chocolate sauce, similar in consistency to a traditional savory gravy, but made with cocoa powder, sugar, flour, and milk. It’s typically served warm, generously spooned over biscuits, and is a beloved breakfast or dessert item in many Southern US households.
Q: Can I make chocolate gravy ahead of time?
A: Yes, you can! While it’s best enjoyed fresh and warm, chocolate gravy can be made a day or two in advance. Store it in an airtight container in the refrigerator. When ready to serve, gently reheat it over low heat on the stove, whisking frequently. You might need to add a tablespoon or two of milk to achieve the desired consistency, as it tends to thicken considerably when chilled.
Q: How long does chocolate gravy last in the refrigerator?
A: Properly stored in an airtight container, homemade chocolate gravy will last for about 3 to 4 days in the refrigerator. Always trust your senses; if it looks or smells off, it’s best to discard it.
Q: Can I make this recipe dairy-free or vegan?
A: Absolutely! To make a dairy-free or vegan version, substitute the milk with a plant-based alternative such as almond milk, oat milk, or soy milk. For the butter, use a vegan butter substitute. Be aware that the flavor profile might vary slightly depending on the plant-based milk chosen, but the general technique remains the same, yielding a delicious result.
Q: What kind of biscuits are best with chocolate gravy?
A: Flaky, soft, and slightly savory buttermilk biscuits are traditionally the perfect companion for chocolate gravy. Their tender texture and subtle tang create a wonderful balance with the sweet, rich chocolate. However, any warm, plain biscuit will be delicious!
Q: Can I use different types of sugar or cocoa?
A: Granulated sugar is standard, but you could experiment with light brown sugar for a subtle caramel note. For cocoa, Dutch-processed cocoa will give a darker, less acidic flavor, while natural cocoa is brighter. Both work well, so choose based on your preference for chocolate intensity.
How To Make Chocolate Gravy For Biscuits
This recipe from The Sauce and Gravy Channel truly simplifies the art of making this Southern delicacy. It’s a testament to how simple ingredients can come together to create something truly magical and comforting. Whether you’re a long-time admirer of chocolate gravy or experiencing it for the first time, this recipe is sure to impress with its ease and incredible flavor. Give it a try this weekend, share it with loved ones, and immerse yourself in a delightful culinary tradition. Don’t forget to visit The Sauce and Gravy Channel on YouTube for more fantastic recipes and consider subscribing to his channel for endless inspiration!