
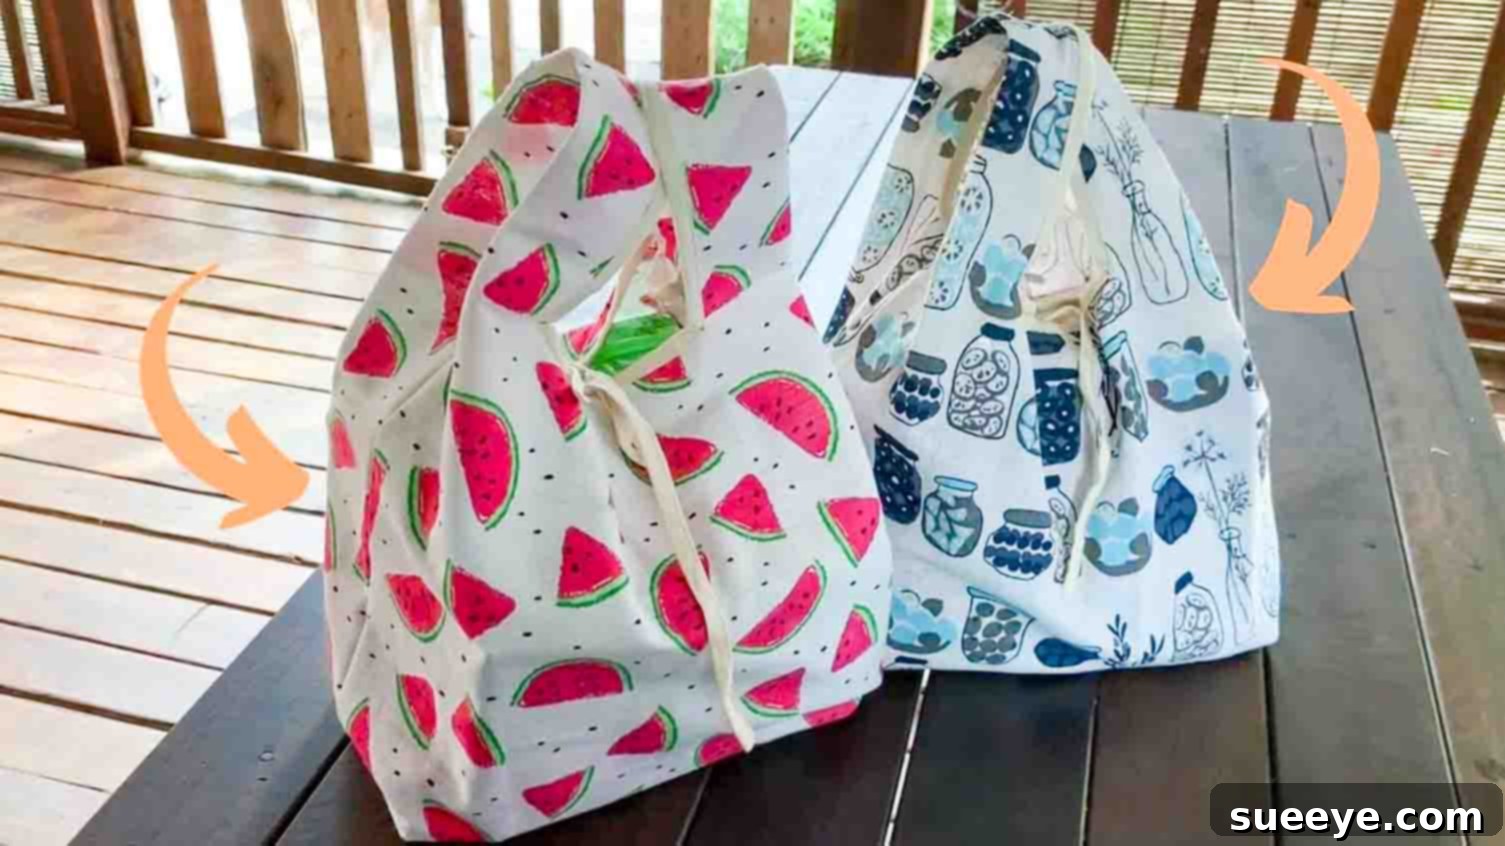
In an increasingly environmentally conscious world, embracing sustainable practices is not just a trend but a necessity. One of the simplest yet most impactful changes we can make in our daily lives is to reduce our reliance on single-use plastics, especially plastic grocery bags. These ubiquitous bags contribute significantly to landfill waste, ocean pollution, and harm to wildlife. Imagine a future where every shopping trip doesn’t involve bringing home a handful of flimsy plastic that will quickly end up in the trash. That future starts with a reusable bag, and what could be more satisfying than creating your own?
This comprehensive guide will walk you through crafting a durable, stylish, and incredibly useful DIY reusable grocery bag. Forget about complicated patterns or advanced sewing techniques; this project is designed specifically with beginners in mind. Even if you’ve never touched a sewing machine before, this step-by-step tutorial will make you feel like a seasoned tailor. We’re drawing inspiration from the fantastic and easy-to-follow instructions provided by Daisy Love Country life on YouTube, ensuring a smooth and enjoyable crafting experience. By the end of this project, you’ll not only have a functional and eco-friendly shopping companion but also a wonderful sense of accomplishment.
Making your own reusable grocery bag offers numerous advantages. Firstly, it significantly cuts down on plastic waste, contributing directly to a healthier planet. Secondly, it allows for personalization; you can choose fabrics that reflect your style, whether that’s a vibrant print, a sophisticated solid, or a sturdy canvas. This means your bag won’t just be practical, it’ll be a fashion statement! Thirdly, it’s a cost-effective solution in the long run, saving you money on disposable bags. Finally, the act of creating something with your own hands is incredibly rewarding and can be a stepping stone to exploring more sewing projects. So, let’s gather our materials and embark on this journey to create your very own sustainable shopping essential.
This tutorial is structured to be as clear and encouraging as possible. We’ll start with a list of all the materials you’ll need, including some optional but highly recommended additions that will make your sewing experience even smoother. Then, we’ll dive into the detailed directions, breaking down each part of the bag’s construction into manageable steps. We’ll cover everything from cutting your fabric to creating sturdy handles and adding a convenient tie closure. Prepare to transform simple pieces of fabric into an indispensable tool for your sustainable lifestyle.
Materials You’ll Need:
Before diving into the creative process, it’s crucial to gather all your materials. Having everything ready beforehand will make the project flow smoothly and prevent interruptions. Here’s a detailed list:
- Main Fabric (of your choice): For a durable grocery bag, consider sturdy options like cotton canvas, duck cloth, denim, or even thick upholstery fabric. Lightweight cotton can work, but heavier fabrics will offer more longevity and strength for carrying groceries. Choose a fabric that is washable and can withstand repeated use. The recommended initial size for cutting is 46 cm x 100 cm, but having a little extra for mistakes is always a good idea. Think about patterns and colors that you love – this is your chance to personalize!
- Contrasting or Coordinating Fabric for Linings/Binding (Optional but Recommended): A small piece of fabric, approximately 3.5 cm in width and long enough to bind the handle edges, will add a professional finish and extra durability. This can be a plain color that complements your main fabric or a bold pattern for a pop of contrast.
- Sharp Fabric Scissors: Good quality, sharp scissors are essential for clean, precise cuts. Avoid using these scissors for paper or other materials, as it will dull them quickly.
- Fabric Marker or Tailor’s Chalk: Used for marking cutting lines, sewing lines, and placement points on your fabric. It’s important to use a marker that will either wash out easily or disappear with heat, leaving no permanent marks.
- Large Sheet of Paper (for template): A sturdy piece of paper or cardboard, measuring at least 16 cm x 14 cm, will be used to create a precise template for the bag’s handle openings. This ensures symmetry and consistency.
- Sewing Machine: While hand sewing is possible, a sewing machine will make this project significantly faster and result in much stronger, more durable seams.
- Matching or Contrasting Thread: High-quality polyester all-purpose thread is suitable. Choose a color that matches your main fabric or a contrasting color if you want your stitches to be a decorative element.
- Pins or Fabric Clips: These are indispensable for holding fabric pieces together before sewing, ensuring they don’t shift.
- Iron and Ironing Board: Pressing seams as you go is a professional technique that makes your finished bag look much neater and helps with accurate sewing.
- Ruler or Measuring Tape: For accurate measurements and marking.
Step-by-Step Directions to Sew Your Reusable Grocery Bag:
Now that you have all your materials organized, let’s begin the exciting process of constructing your very own reusable grocery bag. Follow these steps carefully, and remember that precision in cutting and pressing will lead to a beautifully finished product.
Step 1: Constructing the Bag’s Body and Shaping the Handles
This initial stage focuses on creating the main structure of your bag and defining the openings for the handles.
- Cut Your Main Fabric: Begin by carefully cutting your chosen main fabric into a rectangular piece measuring 46 cm in width by 100 cm in length. Precision here is key, so use your ruler or measuring tape and fabric marker to draw clear lines before cutting with your sharp fabric scissors.
- Prepare the Side Hems: Lay your fabric flat with the wrong side facing up. This ensures that any raw edges or temporary marks will be hidden on the inside of the finished bag. Along each of the 100 cm long sides, fold the fabric horizontally inwards by 9 cm. Press these folds firmly with an iron to create crisp creases. This fold will form a sturdy hem along the sides of your bag, adding durability and a clean finish.
- Sew the Side Hems: With the 9 cm folds still in place, sew along the middle of each folded section. Use a straight stitch with a 1 cm seam allowance. Be sure to backstitch at the beginning and end of each seam to secure the stitches and prevent unraveling. These seams reinforce the side edges of the bag.
- Form the Main Bag Body: Next, fold the entire fabric piece in half, bringing the two 46 cm ends together, with the wrong side of the fabric still facing outwards. Align the raw edges carefully. Pin the raw side edges together securely.
- Sew the Side Seams: Sew along the two pinned raw side edges of the bag, again using a 1 cm seam allowance. Backstitch at the beginning and end of each seam. After sewing, you’ll have a tube-like shape. For extra durability, you can use a serger to finish these raw edges or zigzag stitch them to prevent fraying. Press these seams open.
- Turn the Bag Right Side Out: Now, carefully flip your bag right side out. You should now see the right side of your fabric and a neatly formed bag shape, albeit without handles or a finished top edge.
- Create the Handle Template: Take your paper and cut a template measuring 16 cm wide by 14 cm high. This template will guide you in shaping the handle openings at the top of your bag.
- Mark and Cut the Handle Openings: Place this 16 cm x 14 cm template on the top part of the bag, centered along the width, aligning the bottom edge of the template with the top edge of the bag. You will place one template at each side of the bag’s top opening. Trace around the template using your fabric marker. This will define the area to be cut out for your handles. Carefully cut along these traced lines using your sharp scissors. You now have two distinct handle openings at the top of your bag.
Step 2: Finishing the Handles and Adding the Tie Closure
This final stage involves adding a professional finish to your handles and incorporating a practical tie to secure your bag or keep it neatly folded.
- Prepare the Handle Binding Fabric: Take your plain or contrasting fabric, cut to 3.5 cm in width. The length should be sufficient to go around the entire perimeter of both handle openings. You might need to cut two separate strips or join smaller pieces to achieve the necessary length. Press one long edge of this strip inwards by about 0.5 cm.
- Attach the Handle Binding: With the right side of your main bag fabric facing up, align the raw edge of your 3.5 cm wide fabric strip (the one with the pressed edge) with the raw edges of your handle openings. Pin it all the way around, gently easing it around any curves. Sew this strip to the raw edges of the handles with a 0.75 cm seam allowance.
- Finish the Handle Edges: Once sewn, fold the binding strip over to the wrong side of the bag, enclosing the raw edges. The previously pressed edge of the binding strip should now neatly meet the seam line on the inside. Pin in place and topstitch along the folded edge from the right side of the bag, catching the folded binding on the wrong side. This creates a clean, durable, and decorative finish for your handles. Repeat for both handle openings.
- Reinforce the Top Edge of the Bag: For added strength and a tidy finish, fold the entire top edge of the bag (including the area between the handles) inwards by approximately 1.5 to 2 cm. Press firmly and then topstitch close to the folded edge. This reinforces the stress points around the handles and gives a crisp look to the bag’s opening.
- Create and Attach the Tie Straps: Cut two pieces of fabric, each about 3 cm wide and 25-30 cm long. These will form the ties for your bag. Fold each strip lengthwise, right sides together, and sew along the raw edge to create a tube. Turn these tubes right side out (a safety pin or loop turner can help here) and press them flat. Topstitch along both long edges for a neat finish.
- Position and Sew the Ties: Locate the center of the inside top edge of your bag. Attach one tie strap securely to the top edge on one side of the bag’s opening and the other tie strap to the corresponding position on the opposite side. Ensure they are sewn very securely with multiple lines of stitching, as these will be subject to tension. These ties will allow you to close your bag when full or neatly secure it when folded for storage.
Embrace Sustainability: Your Easy DIY Reusable Grocery Bag Tutorial
Congratulations! You’ve successfully created your very own reusable grocery bag. This isn’t just a simple sewing project; it’s a tangible step towards a more sustainable lifestyle and a testament to your creativity and determination. By choosing to make and use this bag, you are actively participating in reducing plastic waste, lessening your environmental footprint, and inspiring others around you to consider their own impact.
The beauty of this DIY reusable grocery bag lies not only in its eco-friendliness but also in its practicality and personalized charm. Unlike generic store-bought bags, yours carries the unique touch of your effort and style. It’s durable enough to handle your heaviest shopping loads, washable for easy cleaning, and designed for convenience with its integrated handles and handy tie closure. Whether you’re heading to the supermarket, the farmer’s market, or simply need an extra tote for daily errands, your handmade bag will serve you well.
This project, adapted from the clear guidance of Daisy Love Country life, demonstrates that even beginners can achieve impressive results with a sewing machine and a little patience. You’ve honed your skills in measuring, cutting, pressing, and stitching, and these foundational techniques will open doors to a myriad of other exciting sewing adventures. Don’t stop here! Consider making more bags in different sizes and fabrics for various purposes – a small one for produce, a large one for bulk shopping, or even gift bags for friends and family.
So, the next time you head out to shop, proudly grab your handmade reusable grocery bag. It’s more than just a container; it’s a symbol of conscious living, a practical solution to a global problem, and a reflection of your commitment to a greener future. Enjoy your new, eco-chic shopping companion!