
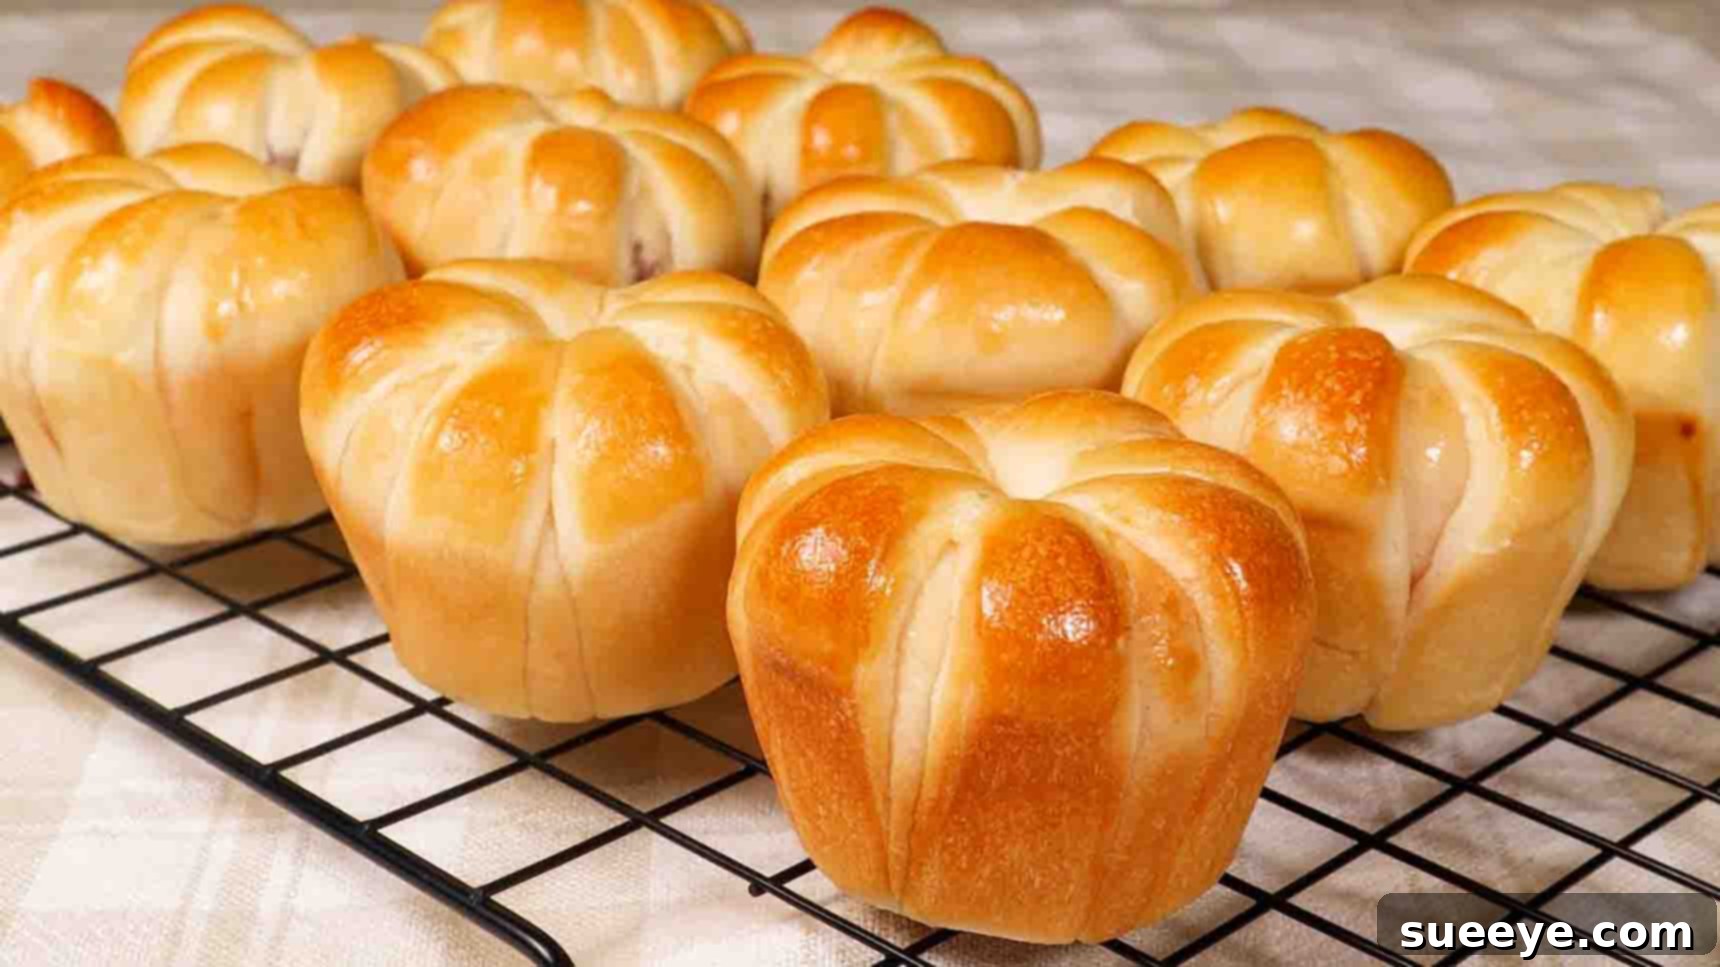
Tired of store-bought bread? Imagine sinking your teeth into a warm, incredibly soft, and utterly delicious homemade bun, fresh from your oven. With this super easy bread recipe, inspired by Helly’s Simple Recipe on YouTube, you can transform your kitchen into a comforting bakery. These delightful cheese buns are so light, fluffy, and packed with savory flavor that they are guaranteed to make your mouth water and become an instant family favorite. The best part? You don’t need any fancy stand mixers, bread machines, or complicated baking tools. This simple recipe is designed for everyone, from novice bakers to experienced home cooks looking for a straightforward, rewarding project. Impress your loved ones with your baking skills today and discover the joy of homemade bread. Follow our comprehensive step-by-step tutorial below to create these irresistible fluffy cheese buns.
Why Bake Your Own Easy Cheese Buns?
Baking bread at home offers numerous advantages that extend beyond just a delicious treat. When you make these easy cheese buns, you’re not just creating food; you’re crafting an experience. Firstly, the freshness is unmatched. There’s nothing quite like the aroma of freshly baked bread filling your home. Secondly, you have complete control over the ingredients, ensuring no unwanted preservatives or additives. This recipe, in particular, uses simple, wholesome ingredients you likely already have in your pantry. Thirdly, it’s incredibly cost-effective compared to buying artisanal buns from a bakery. Lastly, the process itself is wonderfully therapeutic and a fantastic activity to share with family. With minimal effort and no complex equipment, you’ll be amazed at the professional-quality results you can achieve.
Ingredients for Your Fluffy Cheese Buns:
Gathering your ingredients correctly is the first step to successful baking. This recipe calls for common pantry staples, ensuring that these delectable cheese buns are accessible to everyone.
- 210 ml Warm Milk: Essential for activating the yeast. Ensure it’s comfortably warm, not hot (around 105-115°F or 40-46°C), to encourage yeast activity without killing it.
- 1 tsp Active Dry Yeast: The leavening agent that makes your buns soft and fluffy. Make sure your yeast is fresh and active for optimal rise.
- 2 tbsp White Sugar: Feeds the yeast, aiding its activation and providing a subtle sweetness that balances the savory cheese. It also contributes to the golden-brown crust.
- 2 cups of Bread Flour: High in protein, bread flour provides the necessary gluten structure for chewy, airy buns. While all-purpose flour can be used, bread flour yields superior texture.
- 1/2 tsp Salt: Crucial for enhancing flavor and controlling yeast activity. Don’t skip it, as it brings out the best in your bread.
- 2 tbsp Softened Unsalted Butter: Adds richness, tenderness, and a beautiful texture to the dough. Ensure it’s softened to room temperature for easy incorporation.
- Shredded Cheese or Jam (for the filling): The star of the show! Use your favorite shredded cheese like cheddar, mozzarella, or a blend. For a sweet twist, a good quality jam also works wonderfully.
Directions: Crafting Your Easy Homemade Cheese Buns
Step 1: Activating Yeast & Preparing the Dough
This initial stage is where the magic begins, transforming simple ingredients into a living, breathing dough that promises fluffy results. Precision and patience here will set you up for success.
Begin by pouring 210 ml of warm milk into a spacious mixing bowl. The warmth of the milk is critical; it should feel like a warm bath on your wrist, not hot. Too hot, and it will kill the yeast; too cold, and the yeast won’t activate properly. To the warm milk, add 1 tsp of active dry yeast and 2 tbsp of white sugar. The sugar acts as food for the yeast, helping it to wake up and become active. Gently mix these ingredients together until they are well combined. Now, let this mixture sit undisturbed for about 5 minutes. During this time, you should observe a thin, frothy layer forming on the surface – this is a clear indication that your yeast is alive and ready to work its magic. If you don’t see any foam, your yeast might be expired, or the milk was too hot/cold, and it’s best to start again.
Once your yeast is bubbly, add 2 cups of bread flour and 1/2 tsp of salt to the bowl. Using a spatula or your hands, begin mixing the ingredients. Continue mixing until a shaggy, cohesive dough starts to form. It might look a bit rough at first, but don’t worry. As the dough comes together, add 2 tbsp of softened unsalted butter. Incorporate the butter into the dough until it’s fully absorbed. Now, it’s time to knead! Transfer the dough to a lightly floured surface. Knead the dough for approximately 8-10 minutes. The goal is to achieve a smooth, elastic surface. You’ll notice the dough becoming less sticky and more manageable as you knead. This process develops the gluten, which is essential for the soft and chewy texture of the buns.
After kneading, form the dough into a smooth ball. Place it back into a lightly oiled bowl, turning it once to coat the entire surface with oil. This prevents the dough from sticking. Cover the bowl tightly with plastic wrap or a clean kitchen towel and let it rise in a warm, draft-free place for about one and a half hours. The ideal temperature for rising is around 75-80°F (24-27°C). During this first rise, also known as bulk fermentation, the dough should roughly double in size, becoming visibly puffy and airy. This is a crucial step for developing flavor and texture.
Once the dough has completed its first rise, gently punch it down to release the trapped air bubbles. This step is important for creating a fine, even crumb structure. Transfer the deflated dough to a lightly floured work surface. Shape the dough into a large round and then divide it into 12 equal pieces. For best results and uniform bun size, you can use a kitchen scale to ensure each piece weighs approximately the same. Roll each individual dough piece into a smooth, tight ball. Once all 12 pieces are shaped, cover them with plastic wrap or a kitchen towel and let them rest for another 15 minutes. This brief rest period allows the gluten to relax, making the dough much easier to roll out and shape in the next step.
After the 15-minute rest, take one piece of dough. Lightly flour your work surface and a rolling pin. Roll out the dough ball into an oval or rectangular shape, about 4-5 inches long and 3 inches wide. Place a generous spoonful of your chosen filling—shredded cheese or jam—along one long edge of the rolled-out dough. Carefully wrap the dough over the filling, sealing it tightly to form a log. Then, using a sharp knife or a pastry cutter, make 6 small, evenly spaced cuts on the remaining exposed dough (the part that isn’t covering the filling), without cutting all the way through to the filling. Finally, gently roll the dough log up from the filled end. Once rolled, bring the two ends of the log together, pinching them firmly to create a secure, ring-like shape. This unique shaping not only looks beautiful but also ensures the filling stays put during baking.
Step 2: Second Rise, Baking, and Serving
With your buns expertly shaped, it’s time for the final touches before they make their grand entrance into the oven, transforming into golden, savory perfection.
Carefully place each shaped bun into a greased non-stick muffin pan. Using a muffin pan helps the buns maintain their individual shape and encourages a lovely rise. If you don’t have a muffin pan, you can also place them on a baking sheet lined with parchment paper, ensuring they are spaced about 2 inches apart to allow for expansion. Repeat the detailed shaping process from Step 1 for all remaining dough pieces until your pan is full. Remember, you have the flexibility to experiment with fillings at this stage. While shredded cheese is fantastic, you can also use a spoonful of your favorite fruit jam for a delightful sweet bun variation. Other savory options include a blend of herbs and garlic powder with the cheese, or even finely chopped ham.
Once all the buns are in the pan, cover the muffin pan loosely with plastic wrap or a clean kitchen towel. Allow the dough to undergo its second rise, or “proofing,” for approximately 45 minutes in a warm, draft-free spot. This second rise is crucial for developing an even lighter and fluffier texture. The buns should look noticeably puffy and increased in size, but not necessarily doubled. While they are proofing, preheat your oven to 350 degrees F (175 degrees C). Proper preheating ensures the oven reaches and maintains the correct temperature, leading to consistent baking results.
Just before baking, gently brush the tops of each bun with an egg wash (one egg whisked with a tablespoon of water or milk) or simply a little milk. This step is optional but highly recommended as it contributes to a beautiful golden-brown crust and a slightly shiny finish, making your buns even more appealing. Carefully place the muffin pan into the preheated oven and bake for 15 to 20 minutes. The exact baking time may vary slightly depending on your oven, so keep an eye on them. The buns are ready when they are puffed up, golden brown on top, and sound hollow when lightly tapped on the bottom.
Once baked to perfection, remove the pan from the oven. Let the buns rest in the pan for a few minutes before carefully transferring them to a wire rack to cool completely. Cooling on a rack prevents the bottoms from becoming soggy. While these cheese buns are utterly delicious warm, fresh from the oven, allowing them to cool slightly also helps the internal structure to set. Serve them as a delightful breakfast pastry, a savory snack, or a perfect accompaniment to soups and salads. They are incredibly versatile and sure to be a hit with everyone who tries them!
Tips for Perfect Fluffy Cheese Buns Every Time
Achieving consistently perfect homemade buns is easier with a few expert tips:
- Ingredient Temperatures are Key: Always ensure your milk is warm (not hot!) and your butter is truly softened to room temperature. These small details significantly impact yeast activation and dough consistency.
- Don’t Rush the Rise: Dough rising is a biological process that can’t be rushed. Provide a warm, draft-free environment and allow the dough to complete its full rising times. Under-proofed dough leads to dense buns, while over-proofed dough can collapse.
- Use Bread Flour: While all-purpose flour can work, bread flour’s higher protein content provides better gluten development, resulting in a chewier, more structured, and ultimately fluffier bun.
- Measure Accurately: For baking, precision matters. Using a kitchen scale to measure flour (instead of volume cups) can prevent inconsistencies, as flour can pack differently.
- Knead Until Smooth: The kneading process develops gluten, which is crucial for the elasticity and texture of your buns. Don’t skimp on this step; a smooth, elastic dough is your goal.
- Customize Your Filling: Don’t limit yourself to just one type of cheese. Experiment with different cheeses (cheddar, mozzarella, Monterey Jack, feta) or even add finely chopped herbs like chives or garlic powder for extra flavor. For sweet buns, consider cream cheese fillings, chocolate chips, or various fruit jams.
- The Egg Wash Effect: Brushing with an egg wash (egg + water/milk) before baking isn’t just for aesthetics. It contributes to a beautifully golden-brown, shiny crust and a slightly softer exterior.
- Know Your Oven: Ovens can vary. If your buns are browning too quickly or not enough, adjust the baking time slightly or consider investing in an oven thermometer to ensure accurate temperature.
- Cooling is Crucial: Always transfer baked buns to a wire rack to cool. This allows air to circulate around them, preventing condensation and ensuring the bottoms don’t become soggy.
Troubleshooting Common Bread Baking Issues
Even with an “easy” recipe, baking can sometimes present challenges. Here are solutions to common issues you might encounter:
- Buns Not Rising: This is almost always due to inactive yeast. Ensure your yeast is fresh and the milk temperature is ideal (105-115°F). Old yeast or milk that is too hot or too cold will hinder or kill yeast activity.
- Dense or Heavy Buns: This can stem from several factors:
- Not enough kneading: Insufficient gluten development leads to a poor structure.
- Not enough rising time (under-proofed): The yeast didn’t have enough time to produce gas and expand the dough.
- Too much flour: Adding too much flour can make the dough stiff and heavy.
- Over-kneading: While rare, over-kneading can tighten the gluten too much, resulting in a dense texture.
- Dry Buns: Over-baking is the most common cause of dry buns. Keep an eye on the baking time and rely on visual cues (golden brown) rather than just the clock. Also, ensure you’re using the correct amount of butter for moisture.
- Buns Spreading Too Much: This might indicate that your dough was a bit too wet, or you might have over-proofed the buns, causing the gluten structure to weaken and collapse slightly. Ensure your flour measurements are accurate.
- Unevenly Baked Buns: This could be an oven issue. Try rotating your pan halfway through baking, or consider getting an oven thermometer to check for hot spots.
Variations to Customize Your Easy Cheese Buns
While this classic easy cheese bun recipe is fantastic on its own, it also serves as a perfect base for endless customizations. Get creative and make these buns truly your own!
- Herb & Garlic Buns: Add 1-2 teaspoons of dried Italian herbs (oregano, basil, thyme) and a teaspoon of garlic powder to the flour mixture. You can also mix some fresh minced garlic into the butter.
- Spicy Cheese Buns: Incorporate a pinch of red pepper flakes or a dash of cayenne pepper into your cheese filling for a kick.
- Sweet Jam & Cream Cheese Buns: For a dessert-like bun, fill with your favorite fruit jam (strawberry, apricot, raspberry) and a dollop of sweetened cream cheese. You can even drizzle a simple glaze made from powdered sugar and milk after baking.
- Cinnamon Sugar Swirls: Instead of savory filling, spread softened butter, then sprinkle with a generous mix of cinnamon and sugar before rolling.
- Chocolate Chip Buns: Fold in a cup of mini chocolate chips into the dough during the last few minutes of kneading, or use them as a filling.
- Everything Bagel Seasoning Buns: Before the second rise, brush the buns with egg wash and sprinkle generously with everything bagel seasoning for a unique savory flavor and texture.
- Sun-Dried Tomato & Feta Buns: Mix finely chopped sun-dried tomatoes and crumbled feta cheese into your filling for a Mediterranean twist.
These variations demonstrate the versatility of this easy bread recipe. Don’t hesitate to experiment with different cheeses, herbs, spices, and sweet fillings to discover your perfect homemade bun!
Your Journey to Homemade Bread Starts Here!
We hope this detailed guide has inspired and empowered you to try making these incredibly easy and delicious cheese buns at home. This recipe proves that you don’t need to be a professional baker or own complex equipment to create soft, fluffy, and mouth-watering bread. Whether you’re a beginner taking your first steps into the world of yeast baking or a seasoned home cook looking for a reliable and simple recipe, these homemade cheese buns are a rewarding project.
The joy of biting into a warm bun you’ve made with your own hands, sharing it with family and friends, is an unparalleled experience. It’s more than just a recipe; it’s an invitation to create, to savor, and to enjoy the simple pleasures of home baking. So, gather your ingredients, follow these clear steps, and get ready to fill your home with the irresistible aroma of freshly baked bread. You’ll be amazed at how simple it is to achieve such fantastic results. Happy baking!