
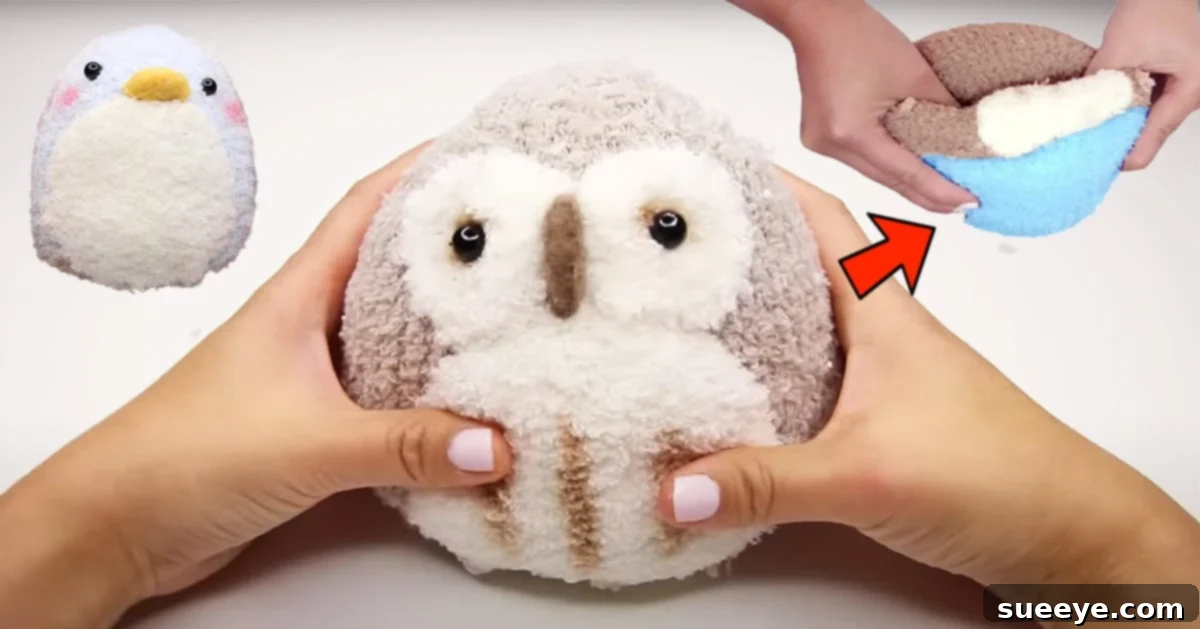
Craft an Adorable Reversible Owl & Penguin Sock Plush: The Ultimate DIY Gift Guide
In a world increasingly driven by mass-produced items, there’s a special charm and warmth that comes with a handmade gift. This is especially true when that gift is as clever, cute, and budget-friendly as the reversible owl and penguin sock plush, a delightful creation popularized by Maqaroon on YouTube. This innovative DIY project transforms a simple pair of fluffy socks into a charming two-in-one plush toy, perfect for any occasion from baby showers to Christmas. It’s not just a toy; it’s a testament to thoughtful crafting, offering a personalized touch that store-bought gifts simply can’t match.
What makes this reversible sock plush truly exceptional is its simplicity and adaptability. You don’t need complex patterns or advanced sewing skills; it’s a freestyle DIY project that encourages creativity. Imagine creating a cozy owl that, with a simple flip, transforms into a cheerful penguin! This inherent versatility makes it an ideal present for babies and young children, providing double the fun and a delightful surprise. Made from soft, fluffy socks, these plushies are inherently safe and cuddly, making them a worry-free choice for even the tiniest hands. Beyond its appeal as a toy, this project also offers a fantastic way to engage in seasonal crafting, allowing you to seamlessly transition your decor from autumn themes to winter wonders with a single, reversible item.
Why Choose a DIY Reversible Sock Plush?
- Budget-Friendly: Utilizing readily available and inexpensive materials like socks and fiberfill, this project is incredibly cost-effective.
- Personalized Touch: Handmade gifts carry sentimental value, showcasing effort and love.
- Easy & Accessible: No complicated patterns or extensive sewing experience required, making it perfect for beginners.
- Versatile Gifting: Ideal for baby shower gifts, birthday presents, Christmas stockings, or simply as a thoughtful gesture.
- Child-Safe: When crafted with care (e.g., embroidered eyes instead of beads for infants), fluffy socks make for soft, safe, and huggable toys.
- Creative Expression: The “freestyle” nature allows you to experiment with different animal designs, colors, and embellishments.
- Seasonal Decor: Easily adapt your plushie to fit various seasons or holidays, offering a fun decorative element.
Essential Supplies for Your Reversible Sock Plush Project
Before diving into the creative process, gathering your materials is key. The beauty of this project lies in its minimal requirements, often utilizing items you might already have around the house. Here’s a detailed look at what you’ll need:
- Fluffy Socks (Different Colors): The star of the show! Opt for soft, plush socks made of chenille, velvet, or thick terry cloth. The fluffier, the better for a truly cuddly feel. Choose contrasting or complementary colors if you want your owl and penguin to have distinct palettes when reversed. For instance, a white sock for the penguin’s body and a brown or grey one for the owl. Ensure the socks are clean and have good elasticity.
- Polyester Stuffing (Fiberfill): This is what gives your plush its shape and squishiness. Look for hypoallergenic fiberfill, especially if the toy is for a baby. You’ll want enough to create a firm yet soft body and head for both characters. Small, consistent pieces work best for smooth stuffing.
- Water Bottle (or similar cylindrical object): A simple yet ingenious tool! An empty plastic water bottle helps stretch the sock evenly and prevent it from sticking to itself during the initial stuffing phase, making the process much smoother. A cardboard tube or even a rolling pin could work as an alternative.
- Hot Glue Gun and Glue Sticks: Essential for quickly securing stuffing in place and attaching smaller embellishments. Use a low-temperature glue gun for safety, especially if crafting with children. Always use caution to avoid burns. For parts that need extra durability or will be handled frequently, sewing is always a stronger option.
- Needle and Thread: For sewing on eyes, noses, or closing up any openings. An all-purpose sewing needle and strong polyester thread in colors that blend with your socks are ideal. Embroidery floss can also be used for decorative stitching or creating embroidered eyes.
- Sharp Fabric Scissors: A good pair of fabric scissors is crucial for clean cuts. Avoid using them on paper to keep them sharp for your crafting projects.
- Black Beads (Small): Traditionally used for eyes. However, for toys intended for infants or toddlers, beads pose a choking hazard. It is highly recommended to *embroider* the eyes using black embroidery floss or use small circles of black felt securely glued and stitched instead. Safety first!
- Q-tips and Blush (or Fabric Markers): To give your plushies a rosy, adorable cheek flush. Scrape a tiny bit of pastel chalk or use actual makeup blush, then apply gently with a Q-tip or soft paintbrush. Fabric markers can also be used for a more permanent color.
- Small Paintbrush: Ideal for applying blush or dusting pastel colors precisely.
- Needle Felt (Small amount for noses/beaks): Needle felting is a process of using a barbed needle to intertwine wool fibers, creating dense shapes. Small pieces can be used to sculpt adorable noses or beaks. If needle felting isn’t your forte, small scraps of colored felt fabric or embroidery can serve as excellent alternatives.
- Pastel Colors (Chalk Pastels): Scrape off a small amount of dust from chalk pastels to create natural-looking rosy cheeks or other subtle color accents on your plush. This technique offers a soft, blended look.
- Optional Embellishments: Consider small felt scraps for wings, ears, or beaks; ribbon for bows; fabric paint for intricate details; or even small, securely sewn buttons (again, with extreme caution for child safety).
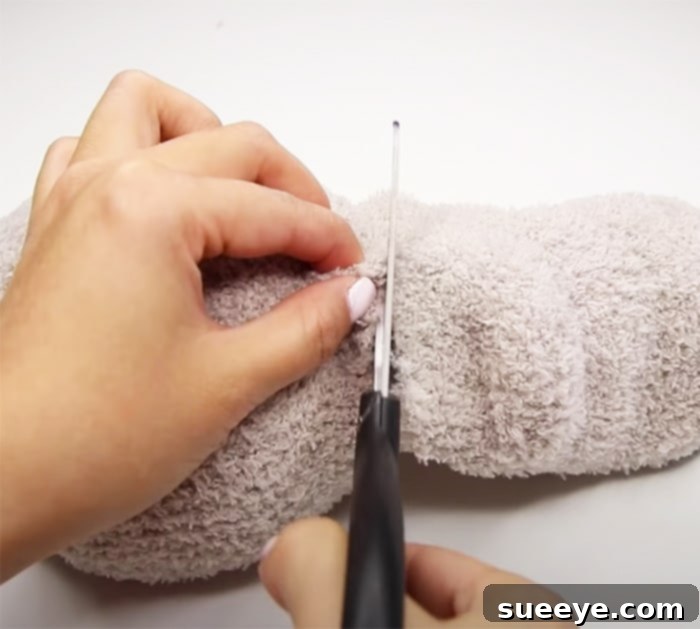
Step-by-Step Directions: Crafting Your Reversible Plush Toy
Creating this reversible owl and penguin plush is a fun and rewarding process. While the original tutorial by Maqaroon provides excellent visual guidance, here’s a detailed breakdown of the steps, allowing you to follow along and understand the mechanics of this clever design.
Step 1: Preparing Your Sock and Initial Stuffing (The Body)
- Select Your Sock: Choose one fluffy sock that will serve as the base for your reversible toy. Consider its color and texture; a solid color might be easier for a first attempt, but patterned socks can also add character.
- Turn Inside Out: Turn your chosen sock completely inside out. This is crucial because the “outer” surface of your first character will become the “inner” surface of the second, and vice-versa.
- Stretch with Water Bottle: Carefully pull the sock over an empty water bottle or similar cylindrical object. This technique stretches the fabric evenly, prevents it from sticking to itself, and creates a smooth surface to work on.
- Stuff the Body: Begin stuffing the toe end of the sock with small, egg-sized pieces of polyester fiberfill. As you add stuffing, use a dab of hot glue to secure each piece in place. This prevents the stuffing from shifting over time and helps create a dense, firm base that will form the main body of your plush toy. Continue stuffing until approximately two-thirds of the sock is filled, creating a rounded, plump body shape.
Step 2: Forming the Head and Reversible Section
- Create the ‘Neck’ Section: Leave a small section of the sock unstuffed, just above the body you’ve created. This flexible, unstuffed area will act as the ‘neck’ and is critical for the toy’s reversible function, allowing the head to be tucked in and flipped.
- Stuff the Head: Carefully stuff the remaining open part of the sock, which is the cuff end, shaping it into the head of your first character. Ensure this head section is well-formed but remains flexible enough to be easily tucked down into the body. The goal is a clear head shape that can still be manipulated.
Step 3: Decorating Your First Character (e.g., The Penguin)
With the sock still inside out, the side you are currently working on will be your first character. Let’s assume this is your penguin side.
- Eyes: For safety, especially if the toy is for a baby, it is highly recommended to embroider the eyes using black embroidery floss. Alternatively, cut two small black felt circles and securely hot-glue them in place, then reinforce with a few stitches. If using beads, ensure they are very securely sewn on with strong thread and multiple passes to prevent them from becoming a choking hazard.
- Nose/Beak: Use a small piece of orange or yellow needle felt to create a tiny beak shape. If using felt fabric, cut a small triangle or diamond shape and securely hot-glue it.
- Rosy Cheeks: Dip a Q-tip or small paintbrush into the pastel dust (scraped from a chalk pastel) or blush. Gently dab and blend it onto the “cheeks” of your penguin for a cute, flushed look.
- Optional Details: Consider adding small felt wings or embroidering tiny details like belly patches with white thread.
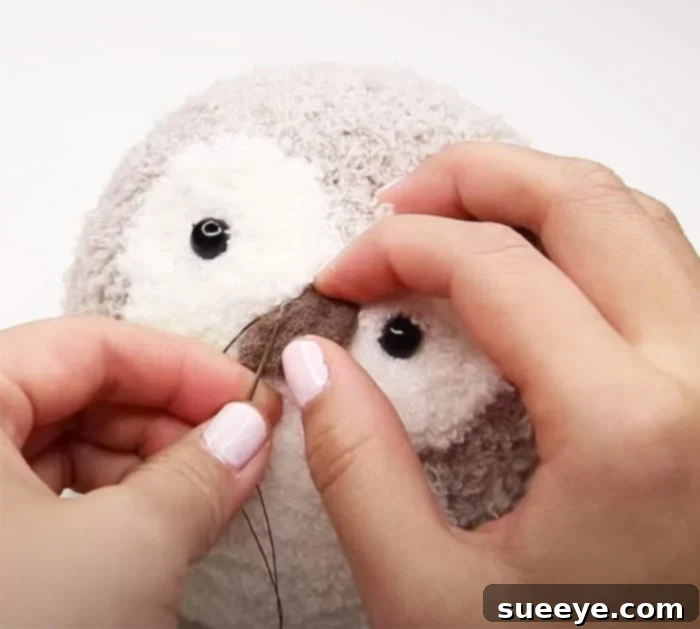
Step 4: Reversing and Decorating Your Second Character (e.g., The Owl)
Now for the magical transformation!
- Reverse the Plush: Carefully turn the entire plush toy right side out. The previously decorated “inside” surface (your penguin) will now be tucked inside, and the previously “outside” surface (the new blank canvas) will become the outer, visible character. The unstuffed neck section should allow this reversal smoothly.
- Decorate the Owl: Now, you have a fresh surface to decorate as your second character, the owl. Repeat the steps for adding facial features, keeping in mind the distinct characteristics of an owl.
- Eyes: Use larger embroidered eyes or securely attached felt circles for a wise owl look.
- Nose/Beak: A small, pointed triangle of yellow or brown felt, or a simple embroidered ‘V’ shape for a beak.
- Rosy Cheeks: Again, a touch of blush or pastel dust can add warmth.
- Optional Details: Add small felt triangles for ears on top of the head, or embroider feather patterns with different colored threads to give your owl more texture and detail.
Step 5: Final Touches and Security
- Secure All Attachments: Double-check that all eyes, noses, and other embellishments are very securely attached, especially if the toy is for a young child. Reinforce any hot-glued parts with a few discreet stitches for added durability.
- Trim Loose Threads: Snip away any visible loose threads to give your reversible plush a neat, professional finish.
- Test Reversibility: Practice flipping your plush toy from the owl to the penguin and back again to ensure it reverses smoothly and both characters are clearly visible and well-defined.
The Joy of Handmade: More Than Just a Toy
This reversible owl and penguin sock plush is more than just a cute toy; it’s a wonderful expression of creativity and a thoughtful gesture. The ease with which it can be made, combined with its charming functionality, makes it an ideal project for crafters of all skill levels. Imagine the delight on a child’s face as they discover two beloved animals hidden within one cuddly companion!
Beyond gifting, this project encourages eco-friendly practices by repurposing old socks and offers a fantastic way to personalize items. The concept of reversing decor, as mentioned, opens doors to other creative ideas—think a spooky Halloween pumpkin that turns into a cheerful Thanksgiving turkey, or a vibrant spring flower that transforms into a frosty winter snowflake. The possibilities are endless when you embrace the magic of reversible crafts.
So, gather your supplies, let your imagination soar, and embark on this delightful DIY journey. Whether you’re making it for a baby shower, a Christmas gift, or simply to add a touch of handmade charm to your home, this reversible sock plush promises to bring smiles and warmth. Dive into the world of creative crafting and make something truly special that will be cherished for years to come!