
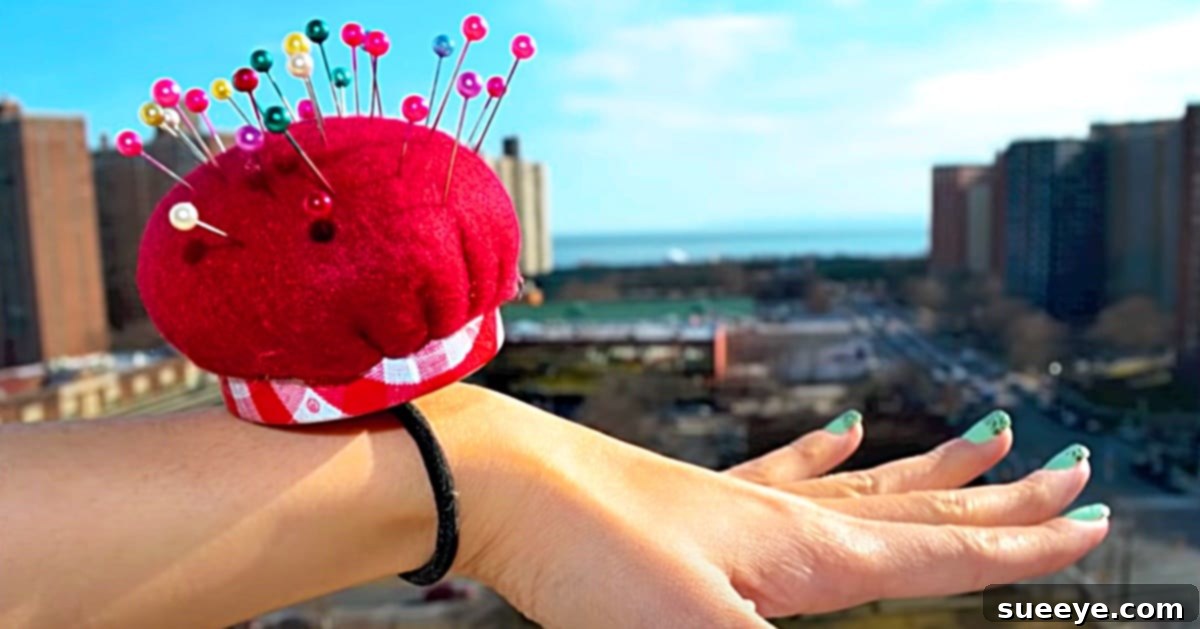
DIY Pincushion Bracelet: Your Ultimate Guide to a Handy Sewing Companion
For anyone who spends time behind a sewing machine, the quest for the perfect pincushion is a familiar one. Pins have a notorious habit of disappearing into the fabric pile or rolling off the table, often when you need them most. That’s why the innovative pincushion bracelet has become a favorite among crafters and sewers worldwide. This brilliant accessory keeps your pins and needles right at your fingertips, eliminating frustrating searches and allowing for a smoother, more efficient sewing experience. Initially, I noticed these practical and stylish bracelets gracing the wrists of many talented YouTubers in their sewing tutorials. Intrigued by their convenience but unable to find them readily available for purchase, I embarked on a journey to discover how to create one myself. The internet, a treasure trove of DIY wisdom, led me to a fantastic tutorial by Natalie’s Creations on YouTube. Her pincushion bracelet video tutorial provided the perfect step-by-step guide to bring this essential sewing tool to life. Not only are these bracelets incredibly functional, but they also make thoughtful, personalized gifts for fellow sewing enthusiasts. Remember, the beauty of DIY lies in its flexibility; feel free to customize your bracelet with different fabrics, colors, and embellishments to truly make it your own.
Why Every Sewer Needs a Pincushion Bracelet
Beyond simply holding pins, a pincushion bracelet offers numerous advantages that elevate your sewing projects:
- Unmatched Convenience: No more reaching across your workspace or searching for a misplaced traditional pincushion. Your pins are always accessible, right on your wrist, speeding up your workflow.
- Enhanced Safety: With pins safely nestled in a dedicated cushion on your wrist, you reduce the risk of them scattering onto the floor, where they can be a hazard to bare feet or pets.
- Fashion Meets Function: These bracelets aren’t just practical; they can be a stylish addition to your crafting attire. Choose fabrics and colors that match your personality or project theme.
- Perfect Handmade Gift: A DIY pincushion bracelet is a heartfelt and incredibly useful gift for anyone who sews, whether they’re a beginner or an experienced tailor. It shows thoughtfulness and appreciation for their craft.
- Repurpose and Recycle: This project cleverly utilizes a small jar lid, turning an everyday item into a valuable tool and promoting sustainable crafting practices.
Materials You’ll Need for Your Pincushion Bracelet
One of the best aspects of this DIY project is that it requires only a few common, inexpensive items, many of which you might already have around your house. Gathering your materials before you begin will ensure a smooth and enjoyable crafting process.
- A Small Lid: An empty Smucker’s jelly jar lid or an olive jar lid works perfectly due to their ideal size and sturdy construction. The metal rim provides a stable base for your pincushion. Look for lids roughly 2-3 inches in diameter.
- An Elastic Hair Tie: Choose a strong, comfortable elastic hair tie that will fit snugly but not too tightly around your wrist. Wider elastics tend to be more comfortable and secure for this purpose. Black or a color matching your fabric can be a good choice.
- A Piece of Felt (Approximately 12″ x 12″): Felt is an excellent choice for the pincushion itself because it’s durable, doesn’t fray, and holds pins securely. You can use any color you like. Alternatively, thick cotton fabric could work, but felt is recommended for its ease of use.
- Cotton or Dacron Stuffing: This will fill your pincushion, providing the cushion for your pins. Polyester fiberfill (Dacron) is lightweight and readily available. Scraps of fabric can also be used as stuffing in a pinch, though fiberfill offers a smoother finish.
- Thread: All-purpose sewing thread in a color that matches your felt or a contrasting shade for decorative effect.
- A Pair of Scissors: Sharp fabric scissors are essential for clean cuts, especially when working with felt.
- A Hot Glue Gun: This tool will be used for quickly and securely attaching various components. Ensure it’s in good working condition and you have a safe surface to work on.
- Glue Sticks: Plenty of glue sticks for your hot glue gun.
Step-by-Step Directions to Craft Your Own Pincushion Bracelet
Creating your pincushion bracelet is a rewarding experience, and following these detailed steps will guide you through the process. For a visual demonstration, I highly recommend watching the original pincushion bracelet video tutorial by Natalie’s Creations on YouTube, which offers clear, step-by-step instructions.
1. Prepare Your Lid and Elastic Base
Begin by ensuring your chosen lid is clean and dry. This provides a good surface for the glue to adhere to. Take your elastic hair tie and position it on the *back* (the underside) of the jar lid. You’ll want to place it so that the elastic forms a loop that can comfortably go around your wrist when the bracelet is finished. Apply a generous bead of hot glue to secure the ends of the elastic to the back of the lid. Hold it firmly in place until the glue sets, which usually takes only a few seconds. To reinforce this attachment and ensure maximum durability, cut a small, circular piece of felt – slightly larger than the glued area – and glue it directly over the elastic ends. This extra layer of felt provides a robust anchor for the elastic, preventing it from detaching during use.
2. Craft the Pincushion Pad
Now it’s time to create the soft, pin-holding core of your bracelet. From your piece of felt, cut a large circle. The diameter of this felt circle should be roughly 2.5 to 3 times the diameter of your jar lid. This extra fabric is crucial for creating the puffiness of the pincushion. Using your needle and thread, sew a running stitch around the outer edge of this large felt circle, about a quarter to half an inch from the edge. Do not tie off your thread; leave long tails at both ends. Once you’ve stitched all the way around, gently pull on both thread tails to start gathering the felt. As the felt gathers, insert your cotton or Dacron stuffing into the center of the gathered fabric. Stuff it firmly but not excessively, aiming for a plump, dome-like shape that will hold its form. Once you’re happy with the amount of stuffing, pull the threads tightly to close the opening, forming a small, gathered pouch. Securely tie off the threads with a strong knot, trimming any excess.
3. Assemble Your Pincushion Bracelet
With both the lid base and the pincushion pad ready, it’s time for the final assembly. Apply a generous amount of hot glue to the *inside* (the top surface) of the jar lid. Make sure to cover the entire inner surface where the pincushion will sit. Carefully center your finished felt pincushion pad onto the hot glue in the lid, pressing down firmly. Hold it in place for a good minute or two, allowing the glue to cool and create a strong bond. Check all around the edges to ensure the pincushion is securely attached and won’t wobble. Once the glue has completely set, your new pincushion bracelet is ready to be worn! It should feel comfortable on your wrist and provide a stable spot for all your sewing pins.
Tips for a Perfect Pincushion Bracelet
- Lid Size Matters: While a standard jelly lid works well, consider the size of your hand and the types of pins you use. A slightly larger lid offers more pin capacity, while a smaller one might be more discreet.
- Stuffing Density: Don’t under-stuff your pincushion; it needs to be firm enough to hold pins upright without letting them sink too deep. However, over-stuffing can make it hard to insert pins. Aim for a balance.
- Reinforce Glue Joints: Hot glue is strong, but for active use, adding an extra layer of felt over the elastic attachment provides significant reinforcement and prevents wear and tear.
- Choosing Your Elastic: Test the elastic around your wrist before gluing. It should be snug enough not to spin freely but loose enough to be comfortable during long sewing sessions.
- Safety First: Always exercise caution when using a hot glue gun. Work in a well-ventilated area and avoid touching the hot nozzle or freshly applied glue.
Personalize Your Pincushion Bracelet: Customization Ideas
The beauty of a DIY project is the opportunity for personalization. Make your pincushion bracelet truly unique:
- Fabric Choices: Instead of plain felt, experiment with patterned cotton fabrics for the pincushion pad. Floral prints, polka dots, or geometric designs can add a vibrant touch. You might need to reinforce cotton fabric with a layer of interfacing to prevent fraying.
- Embellishments: Before attaching the pincushion to the lid, you could add small buttons, charms, or even a bit of hand embroidery to the top of the pincushion for extra flair.
- Lid Decoration: The metal lid itself can be decorated. You could paint it with acrylic paints, cover it with decorative paper using Mod Podge, or even use washi tape for a temporary design.
- Elastic Style: Beyond a basic hair tie, consider using decorative elastic trim, a piece of patterned elastic ribbon, or even a soft elastic headband, ensuring it still fits comfortably on your wrist.
- Themed Bracelets: Create holiday-themed pincushion bracelets! Use red and green felt for Christmas, orange and black for Halloween, or pastels for Easter. These make fantastic festive gifts.
This pincushion bracelet idea is not just functional; it’s genuinely adorable and brings a touch of handmade charm to your sewing space. I’ve personally made several of these for my friends, and they’ve all expressed how much they love them, appreciating both the utility and the thoughtful gesture. It’s a simple project that yields impressive results, proving that the best tools are often those crafted with a bit of creativity and care.
So, gather your materials, set aside a little time, and embark on this delightful DIY adventure. You’ll soon wonder how you ever sewed without your trusty pincushion bracelet securely on your wrist. Happy crafting!