
Ever wonder why your car’s interior windshield seems perpetually hazy, even after a quick wipe? It’s a common frustration that not only detracts from your car’s aesthetic appeal but, more importantly, can significantly impair driving visibility and safety. Unlike the exterior, which faces elements like rain, dust, and bugs, the interior accumulates a unique and often stubborn type of film—a persistent mix of dust, oils, and chemical residues from plastic outgassing. This guide will walk you through a simple, yet highly effective method to achieve a crystal-clear, streak-free interior windshield, transforming your driving experience and ensuring optimal road awareness.
A pristine windshield is more than just about cleanliness; it’s a critical component of safe driving. Haze and streaks on the interior glass can cause dangerous glare, especially when driving into the sun, through fog, or at night with oncoming headlights. This reduced clarity can diminish your reaction time and overall perception of the road. By investing a little time in properly cleaning your interior windshield, you’re not just improving your car’s appearance; you’re actively contributing to a safer and more comfortable journey.
Many drivers overlook the interior of their windshield, focusing primarily on the exterior. However, the internal surfaces are prone to accumulating a greasy film from various sources: volatile organic compounds (VOCs) released by interior plastics and vinyl (known as ‘outgassing’), smoke residue, dust, pet dander, fingerprints, and even airborne particles from food or air fresheners. Over time, this buildup creates a hazy layer that resists ordinary cleaning methods, demanding a targeted approach for true clarity. Fortunately, with the right materials and techniques, you can banish this persistent film and enjoy an unobstructed view.
Essential Materials for a Crystal-Clear Windshield
Achieving a pristine, streak-free finish on your interior windshield requires the right tools. Each item plays a crucial role in lifting grime and ensuring a brilliant shine:
- Three High-Quality Microfiber Cloths: These are indispensable. Microfiber is excellent for trapping dust and lint without scratching, and having multiple cloths prevents cross-contamination. Designate one for initial dry wiping, one for residue removal, and a final one for buffing.
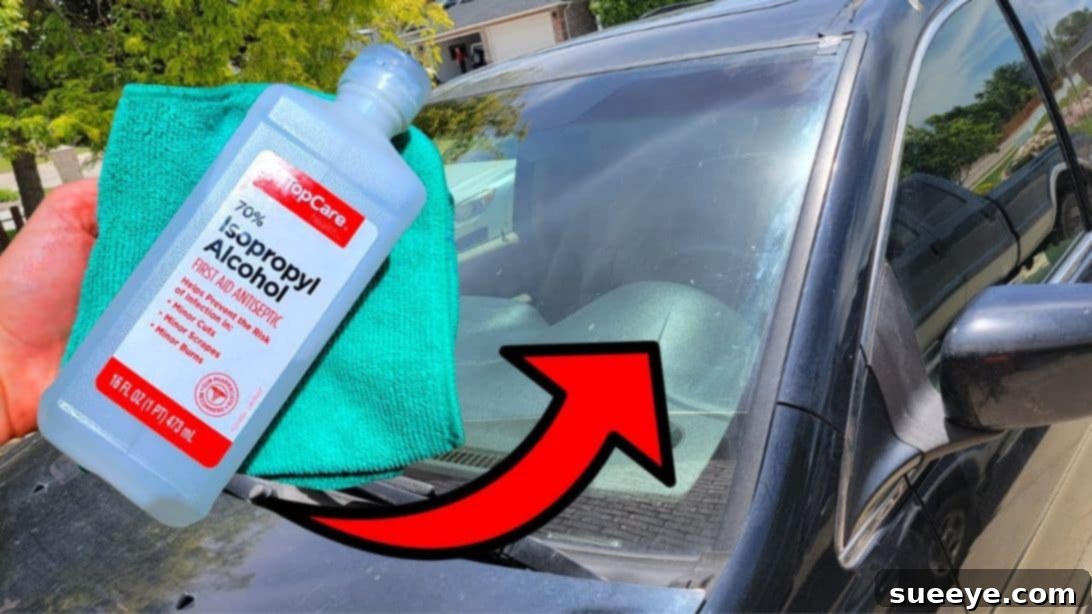
- Melamine Sponge (Magic Eraser) or Rubbing Alcohol: Choose one of these for deep cleaning. A melamine sponge is incredibly effective at lifting stubborn films and greasy residues. Alternatively, rubbing alcohol (isopropyl alcohol) serves as an excellent degreaser, breaking down oils and other tenacious contaminants.
- High-Quality Automotive Glass Cleaner: Select a cleaner specifically designed for automotive use to ensure a streak-free result. It’s crucial to choose an ammonia-free formula if your vehicle has tinted windows, as ammonia can damage and discolor tint over time.
Step-by-Step Guide to a Flawless Interior Windshield
Follow these detailed steps from Clean Freak & Germaphobe on YouTube to achieve professional-level results and enjoy unparalleled clarity.
Step 1: Preparing Your Workspace and Initial Dry Wipe
Before you begin any wet cleaning, proper preparation is key. This simple preliminary step will save you time and prevent potential issues later on.
- Protect Your Dashboard: Place a clean towel or a piece of cardboard on your dashboard, extending it close to the windshield. This crucial step acts as a protective barrier, catching any drips, sprays, or spills of cleaning product, thus preventing potential stains or damage to sensitive dashboard materials and electronics. Should any product inadvertently drip, wipe it away immediately.
- First Pass – Dry Microfiber Wipe: Take one of your clean, dry microfiber cloths. Gently wipe the entire interior surface of the windshield in overlapping circular motions, starting from the top edge and systematically working your way down. The primary goal of this initial pass is to remove any loose dust, dirt, pet hair, and superficial debris that has settled on the glass. This pre-cleaning step is vital because it prevents you from simply spreading grit around when you introduce liquid cleaners, which could lead to scratches on the glass or a muddy, streaky mess.
- Second Pass – Flip and Wipe: Once the initial dry wipe is complete, flip the same microfiber cloth over to a fresh, clean side. Perform a second dry wipe over the windshield. This ensures that any remaining loose particles are captured, leaving the surface ready for the deep cleaning stage.
Step 2: Deep Cleaning with a Melamine Sponge (Recommended for Stubborn Film)
The melamine sponge is a powerful tool for tackling the notorious greasy film that often accumulates on interior windshields. It acts like an ultra-fine abrasive, gently scrubbing away embedded grime.
- Prepare the Melamine Sponge: Thoroughly wet a clean melamine sponge under running water until it is fully saturated. Once wet, squeeze out as much excess water as possible. The sponge should be damp, not dripping, to avoid oversaturating the windshield or dashboard.
- Gently Scrub the Windshield: Using light to moderate pressure, gently rub the damp melamine sponge over the entire interior windshield surface. Work in small, manageable sections, using circular or overlapping linear motions. You will notice the sponge effectively lifting away the stubborn grime, oils, and chemical residue that ordinary cloths often miss. The sponge may appear to disintegrate slightly as it works, which is a normal part of its cleaning action.
- Remove Residue Immediately: This step is critical. As soon as you’ve treated a section with the melamine sponge, immediately grab a *new*, clean, and dry microfiber cloth. Vigorously wipe away any residue left by the melamine sponge. This ensures that the lifted grime doesn’t redeposit onto the glass, preventing streaks and ensuring a truly clean surface. Continue this process, working in sections, until the entire windshield has been treated and wiped clean.
Step 3: Deep Cleaning with Rubbing Alcohol (Alternative Method)
If a melamine sponge isn’t available or you prefer a different approach, rubbing alcohol is an excellent degreaser that effectively breaks down oils and other tough contaminants.
- Apply Alcohol to Microfiber Cloth: Do not spray rubbing alcohol directly onto the windshield, as it can drip onto delicate dashboard surfaces and potentially cause damage. Instead, apply a small amount of rubbing alcohol (isopropyl alcohol) directly to a *clean* microfiber cloth, ensuring it is damp but not soaking wet.
- Wipe Down for Degreasing: Using the alcohol-dampened cloth, thoroughly wipe down the entire interior windshield surface. The alcohol will quickly dissolve and remove grease, oil, fingerprints, and the hazy film that often plagues car windows. Work in small, overlapping sections to ensure complete coverage.
- Remove Alcohol Residue: Immediately after wiping a section with the alcohol, flip the microfiber cloth to a clean, dry section. Wipe away any alcohol residue, ensuring the surface is clean and ready for the final glass cleaner application. This initial pass with alcohol is designed to strip away the toughest contaminants, leaving a clean foundation.
- Final Polish with Glass Cleaner (after either Step 2 or 3): Regardless of whether you used the melamine sponge or rubbing alcohol for deep cleaning, the final step involves applying a high-quality automotive glass cleaner for a flawless, streak-free finish.
- Mist onto a Clean Cloth: Again, avoid spraying the glass cleaner directly onto the windshield. Instead, lightly mist the glass cleaner onto a *third*, completely clean and dry microfiber cloth. This technique prevents overspray onto your dashboard and allows for more controlled and even application.
- Wipe in Overlapping Strokes: Starting from one corner of the windshield, wipe the surface using consistent, overlapping strokes. You can choose to wipe vertically, horizontally, or in circular motions—the key is to maintain consistency and ensure every inch of the glass is covered. Work in small sections, turning your microfiber cloth frequently to a clean part to avoid redepositing grime.
- Final Buff for Shine: For the ultimate streak-free result, use a completely dry section of your microfiber cloth, or ideally, a brand-new, fresh microfiber cloth, to buff the entire windshield until it is perfectly dry and glistening. This final buffing stage is where you eliminate any potential streaks and achieve that coveted crystal-clear clarity.
Essential Tips for a Perfect, Streak-Free Shine
To ensure your efforts yield the best possible results and a truly immaculate windshield, keep these additional tips in mind:
- Work in the Shade: Always clean your windshield in a shaded area or when your car’s interior is cool. Cleaning in direct sunlight or on a hot surface can cause cleaning products to evaporate too quickly, leaving unsightly streaks and making buffing much harder.
- Use Plenty of Microfiber Cloths: Don’t be afraid to use multiple clean microfiber cloths. Having fresh, dry cloths available for each stage (dry wipe, residue removal, final buff) prevents you from inadvertently spreading dirt, grime, or lint, which is a common cause of streaks.
- Consistent Technique: Whether you prefer vertical, horizontal, or circular motions, maintain consistency throughout the cleaning process. Overlapping your strokes ensures every inch of the glass is covered and evenly cleaned.
- Avoid Ammonia-Based Cleaners on Tinted Windows: If your car has aftermarket window tint, it is absolutely crucial to use only ammonia-free glass cleaners. Ammonia can severely damage, fade, and discolor window tint over time. Most dedicated automotive glass cleaners are formulated to be tint-safe.
- Regular Maintenance is Key: Don’t wait until your windshield is heavily soiled and hazy. A quick dry wipe or a light clean with a glass cleaner every few weeks can prevent heavy buildup, making deeper cleans less frequent and easier.
- Clean Your Wipers (Exterior Consideration): While focusing on the interior, remember that dirty exterior wiper blades can redeposit grime onto the outside of your windshield, affecting overall visibility. Occasionally clean your wiper blades with a damp cloth to remove any accumulated dirt.
Troubleshooting Common Streaks and Haze
If, after all your diligent efforts, you still notice persistent streaks or a lingering haze, don’t despair! This is often a sign of one of a few common issues that can be easily rectified:
- Too Much Product: Using an excessive amount of glass cleaner can leave residue behind, which then shows up as streaks. Try using less product, ensuring it’s lightly misted onto the cloth, not saturated.
- Insufficient Buffing: Streaks frequently occur when the glass isn’t thoroughly buffed dry. The final buffing step with a *completely fresh, dry* microfiber cloth is essential to remove all remaining moisture and product residue. Buff until the glass literally squeaks under the cloth.
- Dirty Cloths: Using a microfiber cloth that has already absorbed dirt, oils, or cleaning solution will simply spread that residue around, creating more streaks. Always switch to a clean, dry cloth for each critical stage, especially the final buff.
- Deep-Seated Film: If the haze persists, it might indicate that the initial deep cleaning (with the melamine sponge or rubbing alcohol) didn’t entirely remove the stubborn, built-up film. Consider repeating the deep cleaning step to ensure all contaminants are completely stripped away before reapplying the glass cleaner.
- Water Quality: In some cases, hard water can leave mineral deposits. If your tap water is very hard, using distilled water for wetting the melamine sponge or even a final wipe can help prevent mineral-based streaks.
Beyond Alcohol: Achieving Lasting Clarity
Achieving a crystal-clear interior windshield isn’t just about aesthetics; it’s a vital step for enhancing driving safety and comfort. By consistently applying these straightforward steps and utilizing the right tools, you can easily banish stubborn haze and unsightly streaks, enjoying a pristine, unobstructed view of the road ahead. Make interior windshield cleaning a regular and integral part of your car care routine. The improved visibility, reduced glare, and overall enhanced driving experience will undoubtedly be worth the effort every time you get behind the wheel. Drive safer, drive clearer!
All images are credited to Clean Freak & Germaphobe via YouTube. Visit her channel and subscribe for more insightful cleaning tips!