
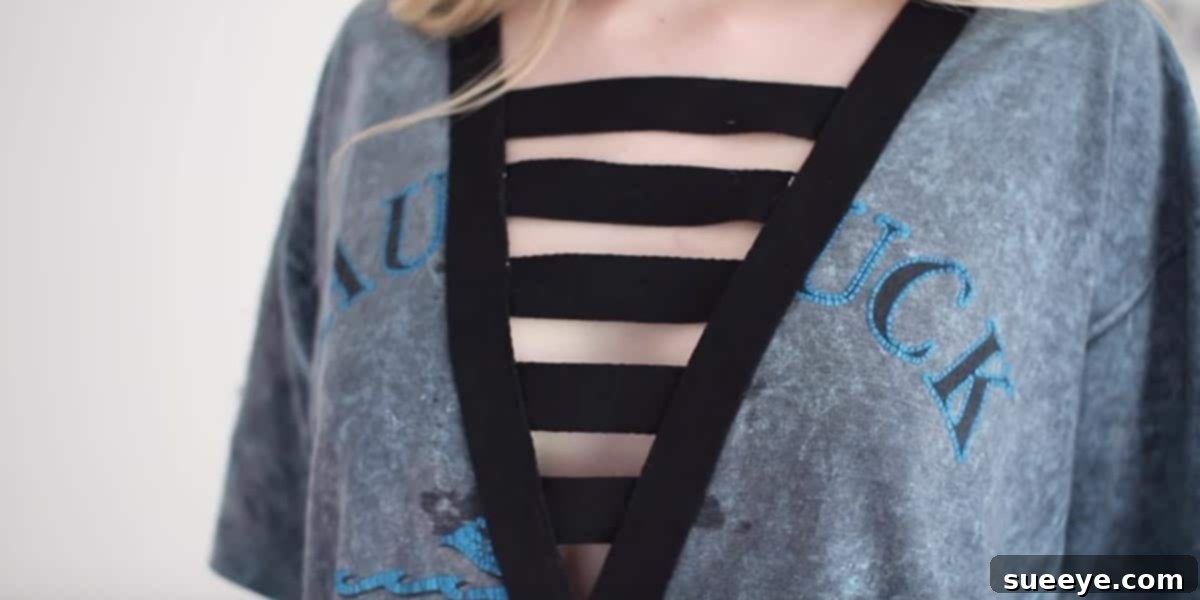
Unlock Your Style: Creative DIY T-Shirt Cutting Ideas for Unique Fashion
Do you ever find yourself staring into a closet full of clothes, yet feeling like you have nothing to wear? Or perhaps you own several T-shirts that are perfectly good but just feel a little… boring? Instead of discarding those forgotten garments, it’s time to unleash your inner fashion designer! With a few simple tools and a dash of creativity, you can completely transform your old T-shirts into unique, stylish, and highly personalized pieces. Welcome to the exciting world of DIY T-shirt cutting, where fashion meets sustainability and individuality.
Embrace Uniqueness: Why DIY T-Shirts Are Your Style Secret Weapon
In a world of fast fashion and mass-produced clothing, it’s increasingly common to encounter someone wearing the exact same outfit as you. While there’s nothing inherently wrong with this, the desire for personal expression and distinctive style often leads us to seek alternatives. DIY T-shirt cutting projects offer the perfect solution. They empower you to create bespoke items that nobody else will have, ensuring your wardrobe is a true reflection of your personality. This trend isn’t just about avoiding an awkward fashion twin moment; it’s about crafting a wardrobe that truly speaks to who you are, making every outfit an authentic statement.
Beyond Style: The Sustainable Impact of Upcycling Your Wardrobe
Beyond the undeniable allure of unique style, upcycling your old T-shirts carries significant environmental benefits. The fashion industry is a major contributor to global waste and pollution. By giving a new lease of life to garments you already own, you actively participate in reducing textile waste, conserving resources, and minimizing your carbon footprint. This practice aligns perfectly with the growing movement towards sustainable and ethical fashion, proving that looking good doesn’t have to come at the planet’s expense. It’s a win-win: you get a fabulous new top, and Mother Earth gets a little break.
From Mundane to Masterpiece: The Evolution of Cut-Out T-Shirt Fashion
The concept of cut-out T-shirt fashion has undergone a remarkable transformation over the years. What once began as a raw, edgy, and sometimes grungy statement seen on runways or in alternative subcultures has evolved into a versatile and sophisticated trend. Years ago, during a pivotal New York Fashion Week, the style made waves with its darker, more distressed aesthetic. Today, the shredded and cut-out trend has matured, becoming classier and more adaptable. It’s no longer just about rebellion; it’s about artfully combining an edgy vibe with a touch of demure elegance. From subtle shoulder cut-outs to intricate back designs, this fashion movement allows for a wide spectrum of creative expression, proving that a simple pair of scissors can be a powerful fashion tool.
Getting Started: Your Essential DIY T-Shirt Toolkit
One of the most appealing aspects of DIY T-shirt cutting is how accessible it is. You don’t need expensive equipment or advanced sewing skills to get started. In most cases, all you truly need is a keen imagination and a good pair of scissors. However, to achieve more polished results or experiment with complex designs, a few additional items can be incredibly helpful:
- Sharp Fabric Scissors: Invest in a good pair. They make clean cuts and prevent fraying.
- Fabric Chalk or Marker: Essential for marking your cut lines before you snip.
- Ruler or Measuring Tape: For straight lines and precise measurements.
- Fabric Glue: Useful for securing hems without sewing or adding embellishments.
- Needle and Thread: Optional, for minor repairs or if you want to hem raw edges.
- Safety Pins: Great for holding fabric in place or testing designs.
- A Cutting Mat or Cardboard: Protects your work surface.
When selecting your T-shirt, consider the fabric. Cotton and cotton blends are generally easy to work with. T-shirts with some stretch can create interesting drapes and effects once cut. Always wash and dry your T-shirt before starting, as this will pre-shrink the fabric and ensure your cuts remain accurate.
Inspiring DIY T-Shirt Cutting Ideas to Ignite Your Creativity
Ready to turn that plain T-shirt into a fashion statement? Here are some fantastic DIY T-shirt cutting ideas that cater to various styles and skill levels. Remember, these are just starting points – feel free to adapt and combine them to create something truly unique!
1. The Effortless Fringe T-Shirt
A classic and incredibly popular choice, the fringe T-shirt adds instant boho chic to any outfit. It’s surprisingly simple to create. Lay your T-shirt flat and decide where you want the fringe to begin (usually around the waist or hip). Use a ruler and fabric marker to draw a horizontal line. Then, cut vertical strips from this line down to the bottom hem. The width of your strips can vary – wider strips create a bolder look, while thinner ones offer a more delicate drape. You can also create a V-shaped fringe or fringe just the sleeves for a subtle touch.
2. The Alluring Lace-Up or Weave Back
This design transforms a simple T-shirt into a captivating piece, perfect for a night out or a festival. On the back of your T-shirt, draw a long, vertical rectangle in the center. Carefully cut out this rectangle. Then, cut small, evenly spaced horizontal slits along both raw edges of the opening. Using fabric strips (perhaps from another old T-shirt in a contrasting color) or even ribbon, weave them through these slits in a crisscross pattern, similar to lacing up a shoe. Tie the ends securely. This creates a stunning, adjustable detail that adds immense visual interest.
3. Chic Cold Shoulder or Cut-Out Sleeves
Embrace one of the most enduring trends with a cold-shoulder T-shirt. Lay the shirt flat, focusing on the shoulder area. Measure about 2-3 inches from the top shoulder seam down the sleeve. Draw a horizontal line across the top of the sleeve, curving slightly downwards on both sides to follow the natural line of your shoulder. Cut along this line. You can also experiment with other sleeve cut-outs, like slitting the entire length of the sleeve or creating geometric shapes on the bicep area, for an edgier look.
4. The Artfully Distressed or Shredded Look
Achieve that perfectly worn-in, effortlessly cool aesthetic with strategic distressing. This technique involves creating intentional rips, tears, and holes for a grunge or subtly textured effect. Use your scissors to make small snips in areas like the collar, sleeves, or across the back. For a more “shredded” look, cut several short, parallel lines close together in a desired area (like across the shoulders or upper back), then gently pull at the fabric to encourage fraying. Remember to start small; you can always add more cuts, but you can’t un-cut!
5. Playful Heart or Geometric Back Cut-Outs
For a truly personalized touch, cut a specific shape into the back of your T-shirt. A heart is a popular choice, but you could opt for a star, a crescent moon, or even a series of small geometric shapes. Draw your chosen design on the back of the T-shirt with fabric chalk. Carefully cut it out. For an extra pop, you could wear a contrasting colored camisole or bralette underneath, or even sew a piece of patterned fabric behind the cut-out for a unique layered effect. This idea allows for incredible creativity and personal branding.
6. Simple T-Shirt to Tank Top or Crop Top Transformation
Sometimes, the simplest transformations are the most effective. To create a tank top, simply cut off the sleeves along the seam. You can leave the raw edge or fold it over and secure it with fabric glue for a cleaner finish. To make a crop top, decide on your desired length, mark a horizontal line across the body of the shirt, and cut. Again, you can leave the raw hem or create a neat edge. This is a fantastic way to revitalize oversized T-shirts or those with graphic designs you love but in an unflattering cut.
7. The Trendy Off-the-Shoulder Neckline
Convert any crew neck or scoop neck T-shirt into a stylish off-the-shoulder top. Lay the shirt flat and cut the neckline much wider, extending almost to the sleeve seams. Create a generous, boat-neck-style opening. The cut edge will naturally roll slightly, giving it a relaxed, effortless vibe. For added security and to prevent it from riding up, you can thread elastic through the new neckline, gathering it slightly, though it often looks great simply left raw.
Tips for DIY T-Shirt Cutting Success
- Plan Before You Cut: Always sketch your design with fabric chalk first. Measure twice, cut once!
- Start Small: Especially with distressing or fringe, begin with conservative cuts. You can always remove more fabric, but you can’t put it back.
- Use a Good Reference: If you’re unsure, watch online tutorials (there are countless free resources available!) or look at photos of similar designs for inspiration.
- Try it On: Periodically try the shirt on during the process to ensure the cuts are landing where you want them and the fit is as desired.
- Embrace Imperfection: Part of the charm of DIY is its unique, sometimes slightly imperfect, character. Don’t strive for factory perfection; aim for personal style.
Caring for Your Newly Restyled Creations
After all your creative efforts, proper care will ensure your restyled T-shirts last. For items with extensive fringe or delicate cut-outs, consider hand washing or using a delicate cycle in a mesh laundry bag to prevent further fraying or damage. Air drying is often best to maintain the shape and integrity of your custom designs. If you’ve used fabric glue, allow ample drying time before washing. With a little care, your unique creations will continue to turn heads and express your inimitable style for seasons to come.
Unleash Your Inner Designer
The journey of transforming an old T-shirt into a new, fashionable piece is incredibly rewarding. It’s an opportunity to embrace your creativity, express your unique personal style, and contribute to a more sustainable fashion future. So, gather your scissors, find those forgotten T-shirts, and let your imagination run wild. The possibilities are endless, and the only limit is your creativity. Dive into the world of DIY T-shirt cutting today and discover the joy of wearing something truly one-of-a-kind!