
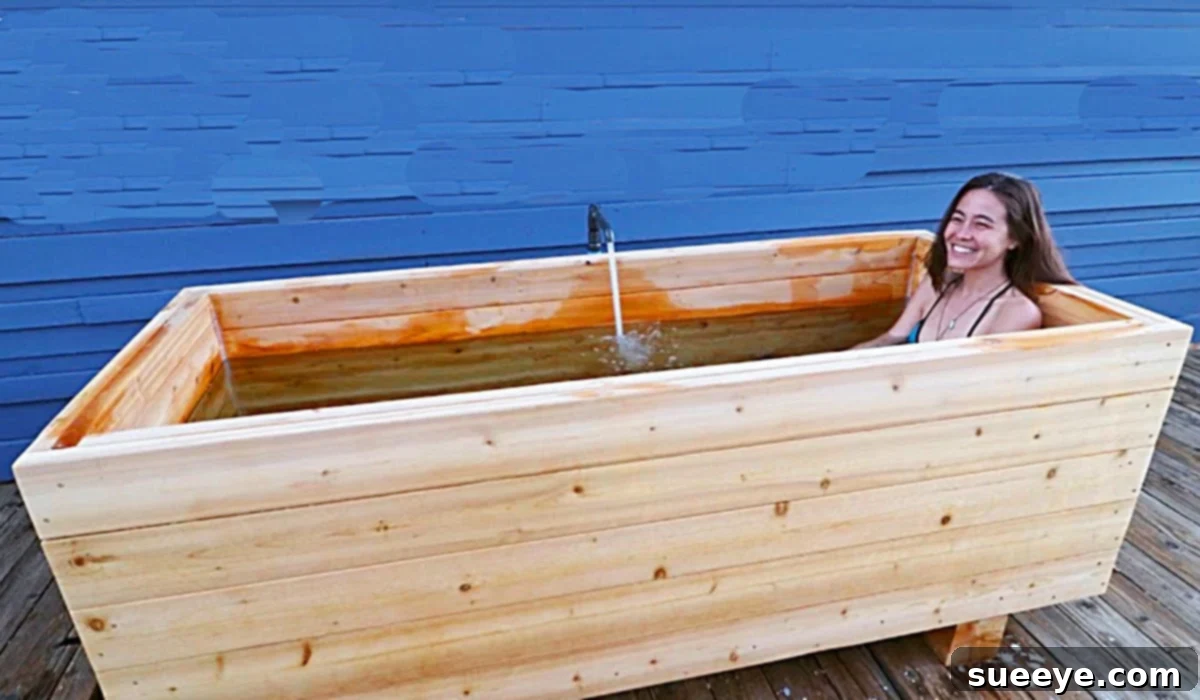
Transforming your backyard into a personal oasis doesn’t have to break the bank. While commercial hot tubs can come with a hefty price tag and often lack a unique aesthetic, the dream of soaking in warm, bubbling water under the stars remains a popular one. Many homeowners seek an affordable, stylish solution for adding a hot tub to their outdoor living space without extensive construction or a generic appearance. This guide will delve into an incredibly rewarding DIY project: building your very own wooden hot tub from durable 2×6 planks. Inspired by innovative designs like those shared by Homemade Modern, this approach offers a blend of rustic charm, customizability, and significant cost savings.
The quest for an affordable backyard hot tub often leads to exploring various options, from inflatable models to pre-fabricated above-ground units. While these serve their purpose, they frequently fall short on visual appeal, requiring additional landscaping or a custom structure to truly blend with your outdoor decor. Even popular alternatives like galvanized stock tank hot tubs, while sleek and cost-effective, don’t always capture the warm, natural ambiance that wood provides. That’s where the beauty of a handcrafted wooden hot tub shines. Made from cedar 2x6s, this freestanding design offers a luxurious, custom look that can elevate any patio or deck, providing a truly unique and inviting relaxation spot.
Why Choose a DIY Wooden Hot Tub from 2x6s?
Opting to build your own wooden hot tub presents numerous advantages over purchasing a factory-made unit. The primary appeal lies in its unparalleled aesthetic. Unlike plastic or acrylic tubs, a wooden hot tub made from cedar planks exudes a natural, organic beauty that harmonizes perfectly with outdoor environments. Cedar, in particular, is renowned for its rich color, pleasing aroma, and natural resistance to rot, decay, and insects, making it an ideal material for a water-holding structure.
Beyond aesthetics, the cost-effectiveness of a DIY project is a major draw. While material costs are involved, they are typically a fraction of what you would pay for a commercial hot tub of similar size and quality. This project empowers you to achieve a high-end look without the high-end price. Furthermore, building it yourself offers the immense satisfaction of creating something with your own hands, tailoring every detail to your specific preferences and backyard layout. You gain complete control over dimensions, seating arrangements, and the type of heating and filtration system, ensuring your hot tub perfectly suits your needs and vision.
Planning Your Backyard Oasis: The Wooden Hot Tub Project
Successful DIY projects begin with meticulous planning, and building a wooden hot tub is no exception. Before you even cut the first plank, consider several crucial aspects to ensure a smooth build and a durable, enjoyable end product.
Site Selection and Foundation for Your Hot Tub
Choosing the right location is paramount. Your hot tub will be heavy when filled with water, so a strong, level foundation is essential. Options include a reinforced concrete slab, a compacted gravel pad, or a sturdy deck designed to support significant weight. Consider proximity to electrical outlets for the pump and heater, and a water source for filling. Privacy, sun exposure, and ease of drainage should also influence your decision. An ideal spot might be semi-secluded, offering a tranquil retreat, yet easily accessible from your home.
Tools and Equipment for Wooden Hot Tub Construction
While this project is designed for the DIY enthusiast, having the right tools will make the process much smoother and ensure professional results. Essential woodworking tools typically include a miter saw for precise cuts, a circular saw for longer cuts, a drill/driver for fasteners, clamps to hold planks during assembly, a router for creating watertight joints (if desired), measuring tapes, levels, and squares. Safety gear, such as eye protection and gloves, should always be worn.
Understanding the Wooden Hot Tub Design and Principles
Traditional wooden hot tubs rely on the natural swelling of wood when wet to create a watertight seal. However, for a more robust and immediate seal, modern DIY wooden hot tubs often incorporate a flexible liner or employ marine-grade sealants in conjunction with precise joinery. The design typically involves a sturdy floor and vertical walls constructed from stacked and secured 2×6 planks, forming a circular or rectangular shape. The internal components, such as heating, filtration, and plumbing, are then carefully integrated to ensure efficient operation and water hygiene.
Materials To Build A Wooden Hot Tub From 2×6’s:
Selecting the right materials is critical for the longevity and performance of your DIY wooden hot tub. Here’s a comprehensive look at what you’ll need, expanding on the core components:
- 2×6 planks of cedarwood: Cedar is the preferred choice for wooden hot tubs due to its natural durability, resistance to rot and insects, and excellent insulating properties. Its natural oils act as preservatives, and its pleasant aroma enhances the spa experience. You will need a significant quantity of these planks, the exact amount depending on the desired dimensions and height of your hot tub. Plan for extra to account for cuts and potential mistakes.
- Portable Hot Tap Water Heater (or similar tankless system): For many DIY projects, especially those designed for a freestanding setup, a portable propane-fired tankless water heater offers an excellent solution. These units are compact, efficient, and provide on-demand hot water, eliminating the need for a complex electrical heating element. Ensure the heater is rated for outdoor use and has adequate flow rates for your tub size.
- Goal Zero Power Pack (or comparable portable power station): A portable power pack is invaluable for running essential components like a small circulation pump or filter, especially if your hot tub is situated far from a direct power outlet. These units are quiet, environmentally friendly, and provide reliable power for hours. For more permanent installations, a dedicated GFI-protected electrical circuit might be considered for a larger pump or heater.
- Waterproof Liner or Marine-Grade Sealant: To ensure a completely watertight structure, especially for those new to woodworking, a heavy-duty, flexible pond liner or a custom-fitted hot tub liner is highly recommended. Alternatively, for a truly traditional build, marine-grade epoxy sealants and specific joinery techniques (like tongue-and-groove or biscuit joints) can be used, relying on the wood’s natural expansion.
- Circulation Pump and Filter System: Essential for maintaining water hygiene and clarity, a robust circulation pump and a cartridge filter system are vital. These components work together to continuously clean the water, preventing the growth of algae and bacteria. Choose a pump and filter sized appropriately for your hot tub’s volume.
- Plumbing Components: You’ll need various PVC pipes, flexible hoses, connectors, valves, and drain fittings to plumb your heater, pump, and filter effectively. Ensure all components are rated for hot water use and are resistant to chemicals.
- Stainless Steel Fasteners and Waterproof Adhesive: Use only stainless steel screws and bolts to prevent rust and corrosion, which can stain the wood and compromise structural integrity. A high-quality waterproof construction adhesive will provide additional strength and sealing at joints.
- Wood for Seating/Benches: Additional cedar planks or similar water-resistant wood will be needed to construct comfortable internal seating, allowing bathers to relax fully submerged.
- Safety Cover: A well-fitting hot tub cover is crucial for retaining heat, keeping debris out, and ensuring safety, especially for homes with children or pets.
Directions: Step-by-Step Guide to Building Your Wooden Hot Tub
Building a wooden hot tub is a project that combines woodworking skills with careful planning for water containment and system integration. This detailed guide, inspired by excellent tutorials like the one from Homemade Modern on YouTube, will walk you through the process.
Step 1: Preparing the Foundation
As discussed, a stable, level foundation is non-negotiable. Whether you opt for a concrete pad, a reinforced deck section, or a well-compacted gravel base, ensure it can safely support thousands of pounds. A typical 4-person hot tub can weigh well over 2,000 lbs when filled. Use a long level to confirm the surface is perfectly flat. This prevents undue stress on the tub’s structure and ensures even water distribution.
Step 2: Constructing the Hot Tub Floor
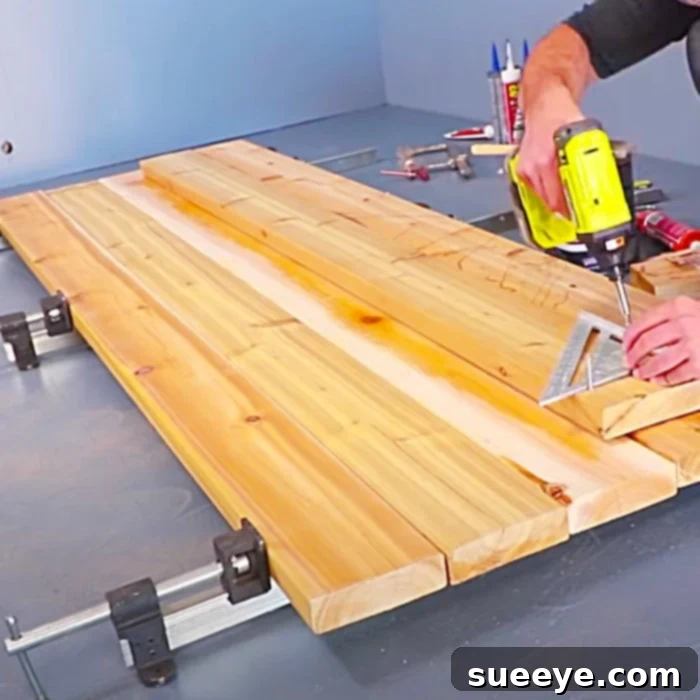
Begin by meticulously cutting your 2×6 cedar planks to form the floor of your hot tub. For a circular design, this might involve cutting planks into wedge shapes or using a series of shorter planks to create a segmented base. For a square or rectangular tub, simple straight cuts will suffice. Once cut, apply a generous amount of waterproof adhesive to the edges of the planks and then clamp them together tightly. Allow the adhesive to cure completely, creating a solid, singular floor panel. This initial clamping step, as shown in the Homemade Modern tutorial, is crucial for establishing a strong base.
Step 3: Building the Walls
This is where your hot tub truly takes shape. If building a circular tub, each 2×6 plank for the walls will need to be carefully cut with a curve. A router can be used to create tongue-and-groove or lap joints along the edges of the planks, enhancing the seal and structural integrity. Start by laying the first course of wall planks around the perimeter of your finished floor, securing them with stainless steel screws and waterproof adhesive. Continue stacking subsequent courses, offsetting joints for strength, and ensuring each layer is level. Use plenty of clamps to hold the planks firmly as the adhesive sets and you drive in fasteners. External banding or stainless steel cables can be added around the circumference for additional reinforcement, especially for larger tubs.
Step 4: Sealing and Waterproofing
Once the walls are complete, it’s time to make your tub watertight. If using a flexible liner, carefully fit it inside the wooden structure, smoothing out wrinkles and securing the top edge over the rim of the tub. Trim any excess liner. If you opt for a traditional wood-swelling method, generously apply marine-grade sealant to all internal joints and seams. Fill the tub slowly and inspect for any leaks, marking and sealing as necessary. The wood will naturally swell once saturated, further tightening the seals.
Step 5: Installing the Plumbing, Heating, and Filtration System
This step requires careful attention to detail. Create strategically placed openings in the tub walls for water intake, return jets, and the drain. Mount your portable water heater, circulation pump, and filter system securely nearby, following the manufacturer’s instructions. Connect the various components using appropriate PVC pipes, flexible hoses, and fittings. Ensure all connections are tight and leak-free. For electrical components, always use GFI-protected outlets and consider consulting a qualified electrician to ensure safety and compliance with local codes.
Step 6: Adding Internal Features and Finishing Touches
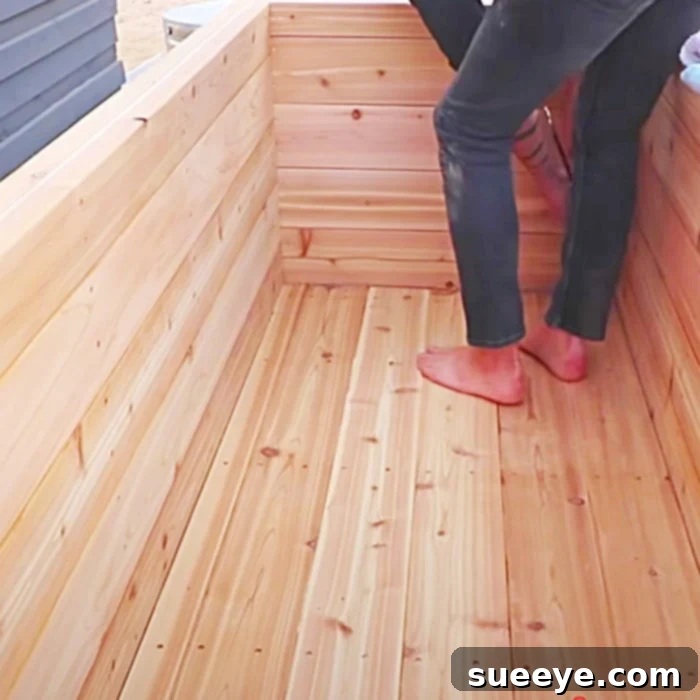
Build and install internal benches or seating using cedar planks, securing them firmly to the walls. These provide comfort and can also serve to reinforce the structure. Sand any rough edges on the wood, both inside and out, to ensure a smooth, splinter-free finish. For the exterior, you may choose to apply a marine-grade sealant or a UV-resistant stain to protect the cedar from weathering and maintain its beautiful appearance. Finally, ensure you have a durable, well-fitting cover to keep your hot tub clean and retain heat when not in use.
Step 7: First Fill and Testing
With everything in place, it’s time for the moment of truth. Fill your hot tub slowly with water, meticulously checking for any leaks. Turn on your pump and heater to ensure they are functioning correctly. Monitor water temperature and circulation. Once satisfied, you can begin the initial water treatment process with appropriate sanitizers and pH balancers.
Maintaining Your Homemade Wooden Hot Tub
Proper maintenance is key to extending the life and enjoyment of your DIY wooden hot tub. Regular water testing and chemical balancing are essential to keep the water clean and safe. This includes monitoring pH, alkalinity, and sanitizer levels. The filter should be cleaned or replaced according to the manufacturer’s recommendations. Periodically, the tub will need to be drained, cleaned, and refilled to prevent buildup and refresh the water. For the wooden exterior, occasional re-sealing or re-staining might be necessary, especially if exposed to harsh elements, to preserve its integrity and appearance. In colder climates, proper winterization procedures, including draining the plumbing and protecting components, are crucial to prevent freezing damage.
Enjoying Your Unique Backyard Retreat
Once completed, your homemade wooden hot tub is more than just a functional amenity; it’s a testament to your craftsmanship and a unique addition to your outdoor living space. Imagine unwinding after a long day, soaking in the naturally warm waters, surrounded by the calming aroma of cedar. This DIY project offers not only financial savings but also the profound satisfaction of creating a custom, beautiful, and deeply relaxing retreat right in your own backyard. It’s a space where memories will be made, stress will melt away, and the simple pleasure of an outdoor soak will become a cherished part of your routine. So, gather your materials, follow these steps, and prepare to enjoy the fruits of your labor in your very own wooden hot tub.