
The Art of Decorating Your Christmas Tree with Ribbon: A Step-by-Step Guide
Transforming your Christmas tree into a festive masterpiece often involves more than just lights and ornaments. One of the most impactful yet often overlooked elements is ribbon. While it might seem like a straightforward task, there’s a genuine art to adorning your tree with ribbon that can elevate its entire appearance. Many people struggle, wrapping long lengths of ribbon in a way that feels cumbersome and frustrating. However, with the right techniques, you can achieve a professional, fluid, and stunning look with surprising ease, saving you time and hassle this holiday season.
This comprehensive guide will walk you through the entire process, from selecting the perfect ribbon to applying it like a seasoned decorator. We’ll explore different styles, offer practical tips, and ensure your tree becomes the sparkling centerpiece of your holiday home.
Why Ribbon is a Christmas Tree Game Changer
Ribbon offers unparalleled versatility in Christmas tree decoration, providing texture, color, and depth that other elements simply can’t match. Here’s why incorporating ribbon is a brilliant idea:
- Adds Depth and Dimension: Ribbon breaks up the flat surface of the tree, creating visual interest and making the tree appear fuller and more luxurious.
- Enhances Color Schemes: It’s an excellent way to introduce new colors or reinforce an existing palette, allowing you to easily change your tree’s theme each year without buying all new ornaments. Imagine a base of white and metallic ornaments; simply swapping out your ribbon color can completely redefine the tree’s look.
- Creates Flow and Movement: When applied correctly, ribbon guides the eye around the tree, creating a sense of movement and elegance.
- Fills Gaps: For trees that might be a little sparse in places, strategically placed ribbon can effectively fill in those areas, making your tree look lusher.
- Cost-Effective Elegance: Compared to purchasing a large quantity of new ornaments, ribbon is a relatively inexpensive way to make a significant decorative impact.
Choosing the Perfect Ribbon: Materials, Widths, and Quantities
The success of your ribbon application starts with choosing the right materials. Not all ribbons are created equal when it comes to tree decorating.
Types of Ribbon That Work Best
- Wired Ribbon: This is by far the most recommended type for Christmas trees. The wire edges allow you to shape, bend, and mold the ribbon, ensuring it holds its form beautifully. It’s essential for creating those elegant loops and cascades.
- Mesh Ribbon: As mentioned in the original tip, ribbon with a mesh texture works exceptionally well because it naturally “sticks” to piney branches. Its open weave also adds unique texture and can create a beautiful base layer. Wired mesh ribbon combines the best of both worlds.
- Satin or Velvet Ribbon: While beautiful, these non-wired options can be trickier to work with as they tend to flop. If using them, ensure they are relatively narrow or use them sparingly for accents, securing them tightly.
Selecting the Right Widths
Using a variety of widths adds visual interest and allows for layering. A common approach is to use a wider ribbon as your base and then layer narrower ribbons over or alongside it for accent:
- Wide Ribbon (2.5 inches to 4 inches / 6-10 cm): Ideal for creating significant impact, large loops, or flowing cascades. This is often your “base” ribbon.
- Medium Ribbon (1.5 inches to 2 inches / 4-5 cm): Great for secondary layers, smaller loops, or crisscrossing patterns.
- Narrow Ribbon (0.5 inches to 1 inch / 1-2.5 cm): Perfect for delicate accents, weaving through branches, or adding a touch of sparkle.
How Much Ribbon Do You Need?
One of the most common questions is how much ribbon to buy. A general rule of thumb for a standard 7-foot tree is approximately 50-75 yards (45-68 meters) of wider ribbon, with an additional 25-50 yards (23-45 meters) for accent ribbons. However, this can vary significantly based on your tree’s density, your chosen application method, and your desired level of “ribbon saturation.”
A smart strategy, as suggested previously, is to purchase more than you think you’ll need. Many stores offer generous return policies for unused, untangled spools. Places like Michael’s are fantastic for “after Christmas sales,” where you can stock up for next year. For immediate needs, stores like Costco often carry large, affordable spools of wide ribbon (e.g., 50 yards for $9.99), making them excellent sources for your base layer.
Preparation is Key: Gathering Your Tools
Before you begin, gather everything you’ll need:
- Your Chosen Ribbons: Ensure they are unrolled and ready.
- Sharp Scissors: For clean cuts.
- Wire Cutters (Optional): If you’re cutting through very thick wired ribbon.
- Floral Wire or Pipe Cleaners (Optional but Recommended): These are incredibly helpful for securing ribbon ends or loops deep within the tree, especially for heavier or non-wired ribbons.
- Step Stool or Ladder: For reaching the top of your tree safely.
Mastering the Application: Different Methods for Stunning Results
There are several popular methods for applying ribbon to a Christmas tree, each offering a distinct look. We’ll focus on the “tufts” or “puffs” method, as it allows for great control and layering, aligning with the spirit of the original advice, but we’ll also briefly touch on other techniques.
Method 1: The “Puffs” or “Tufts” Technique (Recommended)
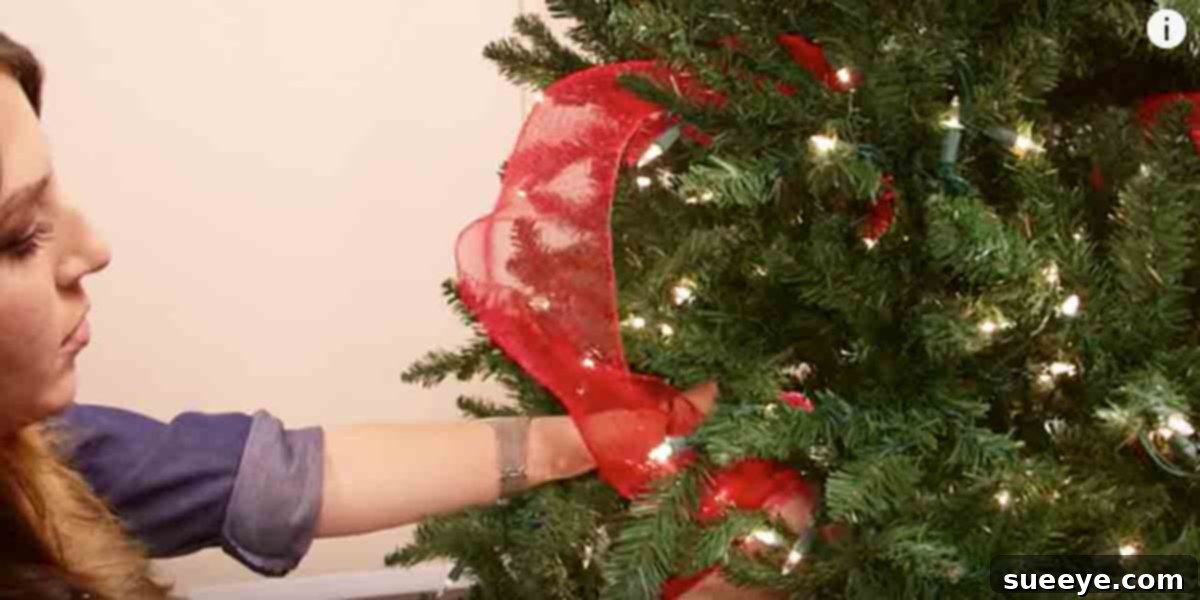
This method involves cutting ribbon into shorter segments and creating voluminious puffs or loops that are tucked into the tree. It’s excellent for creating depth, dimension, and a rich, layered look.
Step-by-Step for “Puffs” or “Tufts”:
- Start with Your Base Ribbon: Begin with your widest ribbon (e.g., a 2.5-inch mesh ribbon). This will be the foundation of your ribbon design.
- Don’t Cut All at Once: Resist the urge to pre-cut all your ribbon strips. The ideal length for each “puff” will vary depending on the size of your tree, the density of the branches, and how deep you want to tuck the ribbon. Start with a test piece and adjust as you go. A good starting point for a mid-sized tree might be pieces ranging from 18 to 36 inches (45-90 cm).
- Create Your First Puff:
- Take one length of ribbon.
- Measure out about 6-12 inches (15-30 cm) from one end to be a “tail” that drapes.
- Gather the ribbon a few inches after the tail, forming a small bundle.
- Now, create a generous loop (a “puff” or “bubble”) with the main body of the ribbon, aiming for a loop that’s 6-10 inches (15-25 cm) long.
- Gather the ribbon again at the end of this loop. You’ll essentially have a tail, a gathered point, a loop, and another gathered point.
- You can create a second loop if your ribbon piece is long enough, creating a double puff.
- Tuck and Secure:
- Take the gathered section of your ribbon puff and tuck it deep into the branches of your tree. You want the branches to grip the ribbon firmly.
- Use the natural stiffness of the branches to hold the puff in place. If it feels loose or you’re using a heavier ribbon, use a small piece of floral wire or a pipe cleaner to twist around the gathered point and secure it to a branch.
- Fluff out the loops and tails to create volume and movement.
- Placement Strategy:
- Work Top-Down or Bottom-Up: Either method works, but consistency is key.
- Spiral or Random: You can place these puffs in a loose spiral down the tree or distribute them more randomly, ensuring an even spread of color and texture.
- Vary Depth: Tuck some puffs deeper into the tree for a layered look, and place others closer to the tips of the branches for more prominence.
- Layering Colors and Textures:
- Once your base ribbon is in place, repeat the process with your secondary, narrower ribbons.
- You can place these accent puffs directly next to, slightly overlapping, or even “crisscross” them over your base ribbon for a different and dynamic look. For example, if your base is red mesh, you might add gold satin ribbon puffs cascading alongside or across the red.
- Experiment with different textures. A metallic ribbon next to a velvet one can create a beautiful contrast.
Method 2: Vertical Cascades or Strips
This method creates long, flowing lines of ribbon down the tree, giving an elegant and elongated appearance.
- Cut Long Strips: Measure long lengths of ribbon (e.g., 2-3 feet or 60-90 cm, or even longer for a dramatic effect).
- Start at the Top: Secure one end of a ribbon strip at the very top of your tree, perhaps under the tree topper or tied to a strong branch.
- Drape Downwards: Let the ribbon fall naturally, creating graceful curves as it descends.
- Tuck and Loop: Every foot or so, gently tuck a section of the ribbon deep into the branches, creating a natural-looking loop or cascade. Secure with floral wire if necessary.
- Fluff the Loops: Pull the tucked sections slightly to give them volume and ensure they don’t look flat.
- Repeat: Add multiple vertical strips around the tree, spacing them evenly.
Method 3: Horizontal Weaving/Spiraling
This creates a more traditional, band-like effect around the tree.
- Attach Ribbon: Secure one end of a long ribbon (can be from the spool) deep into the tree near the top.
- Weave In and Out: Gently weave the ribbon horizontally around the tree, going over some branches and tucking it behind others.
- Create Puffs: As you weave, occasionally pull out a section of the ribbon and create a small puff or loop, securing it to a branch before continuing the horizontal path. This prevents a flat, candy-cane stripe look.
- Continue Downwards: Work your way down the tree in a spiral motion, ensuring consistent spacing between each ‘ring’ of ribbon.
- Finish: When you reach the bottom or run out of ribbon, secure the end deeply within the tree.
Pro Tips for a Flawless Ribbon Tree
- Start Early: Don’t wait until the last minute. Give yourself time to experiment and adjust.
- Step Back and Assess: Periodically step away from the tree (5-10 feet) to get a full view. This helps you identify any sparse areas or uneven distribution.
- Don’t Be Afraid to Experiment: Ribbon is forgiving! If you don’t like how a section looks, simply un-tuck it and try again.
- Layer with Other Decorations: Ribbon is a fantastic base, but remember to integrate it with your lights and ornaments. Often, it’s best to put lights on first, then ribbon, then ornaments, but there’s no strict rule. Sometimes placing some ornaments first can help guide ribbon placement.
- Consider the “Back” of the Tree: If your tree is visible from all angles, ensure the ribbon application is consistent all the way around. If it’s against a wall, you can focus more effort on the front and sides.
- Storage for Next Year: When taking down your tree, carefully remove the ribbon. For longer strips, you can gently roll them. For “puff” segments, carefully flatten and store them in clear bins to prevent tangling and to easily see them next year.
Conclusion: Embrace the Ribbon Revolution!
Decorating your Christmas tree with ribbon is truly an enjoyable and transformative experience. It’s an opportunity to inject personality, texture, and a refined elegance into your holiday decor. By choosing the right materials, understanding various application techniques like the popular “puff” method, and following our expert tips, you’ll find that creating a stunning, professionally decorated tree is not only achievable but also incredibly rewarding.
So, gather your beautiful ribbons, unleash your creativity, and get ready to impress your family and friends with a Christmas tree that truly stands out. Happy decorating!