
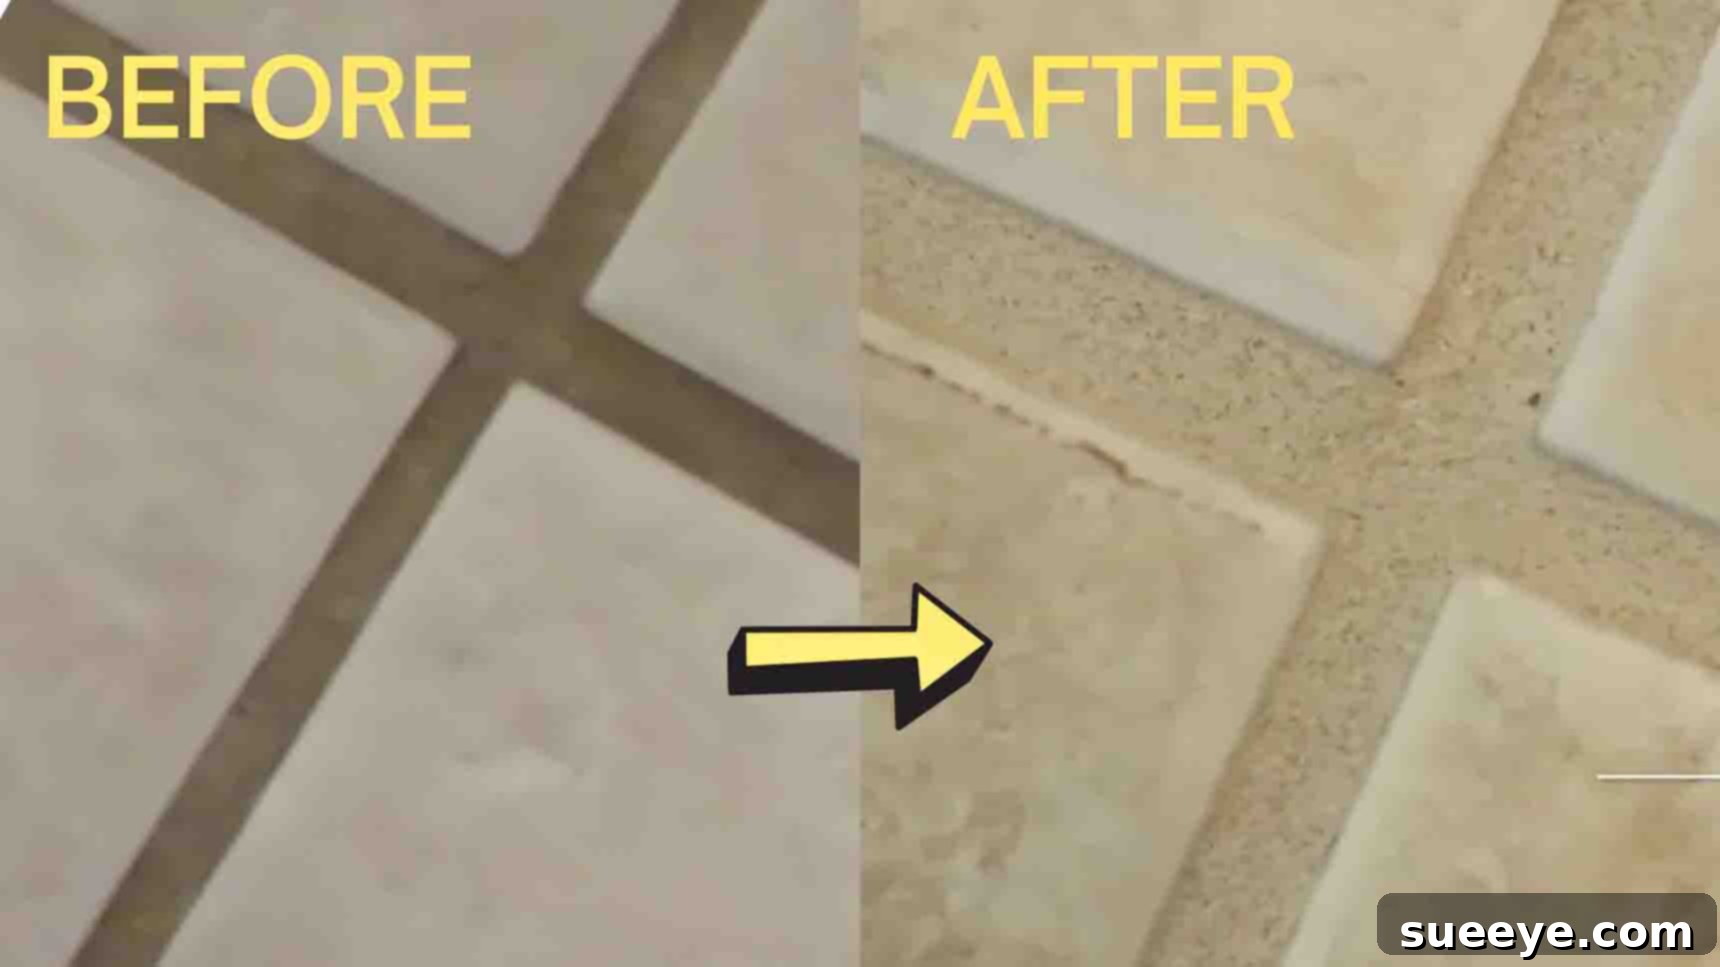
Tired of spending endless hours on your hands and knees, scrubbing stubborn grout lines only to be met with lackluster results? Grout cleaning can be one of the most physically demanding and frustrating household chores. The porous nature of grout makes it a magnet for dirt, grime, mold, mildew, and soap scum, gradually transforming its pristine white appearance into a dingy, discolored mess. Traditional cleaning methods often involve harsh chemicals and vigorous scrubbing that can be exhausting and, quite frankly, painful. But what if there was a revolutionary way to achieve sparkling clean grout without all the back-breaking effort? Prepare to say goodbye to your scrubbing brush, because an ingenious, no-scrub method has emerged, promising dazzling results with minimal fuss. This easy cleaning technique, popularized by Townie Homestead on Youtube, harnesses the power of a common household product to dissolve dirt and stains, leaving your grout looking brand new. It’s fast, incredibly easy, and remarkably inexpensive. Get ready to transform your home and discover the secret to effortlessly bright grout!
Effortlessly Clean Grout Without Scrubbing: The Ultimate No-Scrub Method
Grout lines, while essential for the structural integrity and aesthetic appeal of tiled surfaces, are notoriously difficult to keep clean. Their sandy, porous composition acts like a sponge, absorbing everything from spilled coffee to shower residue, leading to unsightly discoloration. Over time, this buildup of dirt, soap scum, grease, and even mildew can make your entire floor or wall look old and unkempt, regardless of how clean the tiles themselves are. Many homeowners resort to aggressive scrubbing tools, steam cleaners, or powerful, often toxic, chemical solutions, all of which demand significant time and effort. The good news is, a simpler, more effective approach exists, allowing you to reclaim your weekends and enjoy a cleaner home with far less strain. This guide will walk you through a game-changing method that virtually eliminates the need for scrubbing, making grout cleaning a task you no longer dread.
Why Grout Gets Dirty (And Why Scrubbing Isn’t Always the Answer)
Before diving into the no-scrub solution, it’s helpful to understand why grout becomes so problematic. Grout is typically a mixture of cement, sand, and water, making it highly porous. This porosity means it readily absorbs moisture, dirt particles, oils, and anything else that settles on your floors or walls. In bathrooms, soap scum, body oils, and mold thrive in damp environments, embedding themselves deep within the grout lines. In kitchens, food spills and grease contribute to the discoloration. While scrubbing can remove surface-level grime, it often fails to penetrate deep stains, and excessive scrubbing can even damage the grout or scratch nearby tiles. This is where a chemical solution designed to break down and lift these embedded contaminants becomes a superior choice.
The No-Scrub Revolution: A Powerful Solution from Your Bathroom
The secret to this incredibly effective no-scrub method lies in an unexpected, yet powerful, cleaning agent: Lysol toilet bowl cleaner. While primarily designed for toilets, its unique formulation makes it exceptionally good at tackling the types of stains found in grout. Many toilet bowl cleaners contain acids (like hydrochloric acid) that are highly effective at dissolving mineral deposits, calcium buildup, soap scum, and even mildew stains. Furthermore, their gel-like consistency allows them to cling to vertical and horizontal surfaces, giving the active ingredients ample time to work their magic without immediately running off. This means less effort for you and more effective cleaning power directed right where it’s needed.
Materials You’ll Need:
- Lysol Toilet Bowl Cleaner: Opt for a formula specifically designed for tough stains, often containing an acidic agent. The thicker gel varieties work best as they cling to grout lines.
- Microfiber Cloth: Essential for wiping away the dissolved grime and solution. Microfiber is highly absorbent and gentle on surfaces.
- Warm Water: For rinsing the treated area thoroughly.
- Protective Gear (Highly Recommended): Rubber gloves and eye protection are crucial when working with strong cleaning agents.
- Ventilation: Ensure the area is well-ventilated by opening windows or using a fan.
Step-by-Step Guide to Sparkling Grout (No Scrubbing Required!):
Step 1: Prepare the Area and Apply the Cleaner
Before you begin, ensure the area you plan to clean is clear of any obstacles. A quick sweep or vacuum can remove loose dirt and debris, allowing the cleaner to directly access the grout lines. Don your rubber gloves and eye protection to safeguard your skin and eyes from chemical exposure. Ensure proper ventilation by opening windows or turning on an exhaust fan, especially in bathrooms. Now, carefully apply the Lysol toilet bowl cleaner directly to the grout lines. The goal is to apply a generous, even amount, creating a continuous bead of cleaner along the grout. Try to move quickly and steadily to keep the application in a straight, consistent line, minimizing contact with the surrounding tiles. While most tiles are resistant to this cleaner for a short period, avoiding direct contact is always a good practice, especially with sensitive tile materials like natural stone or unglazed ceramic. For larger areas, work in sections to prevent the cleaner from drying out prematurely.
Step 2: Let the Cleaner Work Its Magic
Once the cleaner has been applied, the most crucial step is patience. Allow the Lysol toilet bowl cleaner to sit and penetrate the grout for an extended period. While a minimum of fifteen to twenty minutes is often sufficient for light to moderate discoloration, heavily soiled or stained grout may benefit from a longer dwelling time. If possible, letting it sit for an hour or even a few hours can yield even more impressive results. The acidic agents in the cleaner need time to break down and dissolve the embedded dirt, soap scum, mineral deposits, and mildew. During this waiting period, you’ll notice the cleaner slowly lifting the stains, transforming the dingy grout without you having to lift a finger. Ensure the cleaner does not completely dry out during this process; if it starts to dry in very warm conditions, you might lightly reapply to very stubborn spots.
Step 3: Wipe Away and Rinse Thoroughly
After the designated waiting period, put your microfiber cloth to good use. Gently wipe away the cleaning solution and the dissolved grime. You’ll be amazed at how easily the dirt comes off, often without any resistance. The microfiber cloth will efficiently pick up the loosened particles and the chemical residue. Once you’ve wiped the majority of the solution, it’s time to rinse the floor with warm water. This step is critical to remove any remaining chemical residue and ensure your floor is safe and sparkling. Use a clean, damp microfiber cloth or mop to thoroughly rinse the entire treated area, changing the rinse water frequently to avoid spreading dirty water. For a truly pristine finish, you may want to do a final rinse with plain water and then allow the area to air dry completely, or dry it with a clean, dry towel.
Why This Method Works: The Science Behind the Sparkle
The effectiveness of using Lysol toilet bowl cleaner for grout hinges on its chemical composition. Most powerful toilet cleaners contain strong acids, such as hydrochloric acid, phosphoric acid, or glycolic acid. These acids are highly reactive with the common culprits behind dirty grout: calcium carbonate (a component of hard water stains and soap scum), magnesium deposits, and mineral buildup. When applied, the acid reacts with these alkaline deposits, effectively dissolving them. The gel-like consistency of the cleaner ensures prolonged contact time, allowing the acid to deeply penetrate the porous grout and break down embedded grime. This chemical reaction negates the need for physical abrasion (scrubbing), as the stains are chemically loosened and lifted, ready to be simply wiped away. It’s a testament to targeted chemistry making a difficult chore remarkably easy.
Important Safety Precautions When Using This Method:
While this no-scrub method is highly effective, it involves strong chemicals. Prioritizing safety is paramount:
- Ventilation is Key: Always work in a well-ventilated area. Open windows and doors, or use an exhaust fan to minimize inhalation of fumes.
- Protect Your Skin and Eyes: Wear rubber gloves to protect your hands from chemical irritation. Safety glasses or goggles are essential to prevent splashes from entering your eyes.
- Patch Test First: Before applying to a large area, always test the cleaner on an inconspicuous spot of your grout and tile. This ensures there are no adverse reactions, especially with colored grout or delicate tile types (like natural stone, marble, or unglazed ceramic, which might be sensitive to acids).
- Never Mix Cleaners: Absolutely never mix Lysol toilet bowl cleaner with other cleaning products, especially those containing bleach (e.g., chlorine bleach). Combining certain chemicals can produce dangerous, toxic fumes.
- Keep Children and Pets Away: Ensure children and pets are kept out of the cleaning area until the entire process is complete and the floor is thoroughly rinsed and dry.
- Address Spills Immediately: If the cleaner spills on unintended surfaces, wipe it up immediately and rinse thoroughly with water.
- Avoid Prolonged Contact with Metals: Acids can corrode metals. If you have metal fixtures near your grout, protect them or wipe off any splashes instantly.
Tips for Maintaining Clean Grout:
Achieving clean grout is one thing, but maintaining it is another. Here are some tips to keep your grout looking fresh between deep cleans:
- Regular Cleaning: Incorporate regular, gentle cleaning of your tiled surfaces into your routine. A mild, pH-neutral cleaner can help prevent daily grime buildup.
- Seal Your Grout: Grout sealant acts as a protective barrier, making the grout less porous and more resistant to stains and moisture. Reapply sealant every 1-2 years, or as recommended by the product manufacturer.
- Wipe Down Showers: After each shower, use a squeegee or a towel to wipe down tiled walls. This removes excess moisture and soap scum before it has a chance to settle into the grout.
- Address Spills Promptly: Clean up any spills on tiled floors immediately to prevent them from soaking into the grout lines.
- Improve Ventilation: In bathrooms, use an exhaust fan during and after showers to reduce humidity, which helps prevent mold and mildew growth in grout.
Pros and Cons of the Lysol Grout Cleaning Method:
Pros:
- No Scrubbing Required: The biggest advantage, saving immense time and physical effort.
- Highly Effective: Excellent at dissolving tough stains like soap scum, hard water deposits, and mildew.
- Inexpensive: Lysol toilet bowl cleaner is a common and affordable household product.
- Fast Results: You can see a noticeable difference within minutes to an hour.
- Accessible: Materials are readily available in most stores.
Cons:
- Chemical Use: Involves strong acids, requiring strict safety precautions.
- Fumes: Requires good ventilation due to potentially irritating fumes.
- Not for All Surfaces: Unsuitable for natural stone tiles (like marble, granite, travertine) or unsealed/unglazed tiles, as the acid can damage them. Always patch test!
- Potential for Damage: If left on too long or applied incorrectly, it could potentially affect certain tile glazes or grout colors, though this is rare with proper use.
Conclusion: Reclaim Your Grout with Ease
Gone are the days when clean grout meant hours of tedious scrubbing and aching joints. This innovative no-scrub method, leveraging the powerful cleaning properties of Lysol toilet bowl cleaner, offers a refreshing alternative that is both effective and efficient. By understanding the science behind the clean and meticulously following the simple steps, coupled with essential safety precautions, you can effortlessly restore your grout to its original luster. Imagine stepping into a bathroom or kitchen where the grout lines sparkle, enhancing the beauty of your entire tiled space, all without breaking a sweat. So, gather your materials, follow this guide, and prepare to be amazed by the transformation. Share this fantastic tip with your friends and family, and join the revolution of effortless home cleaning. Your knees (and your sparkling home) will thank you!