
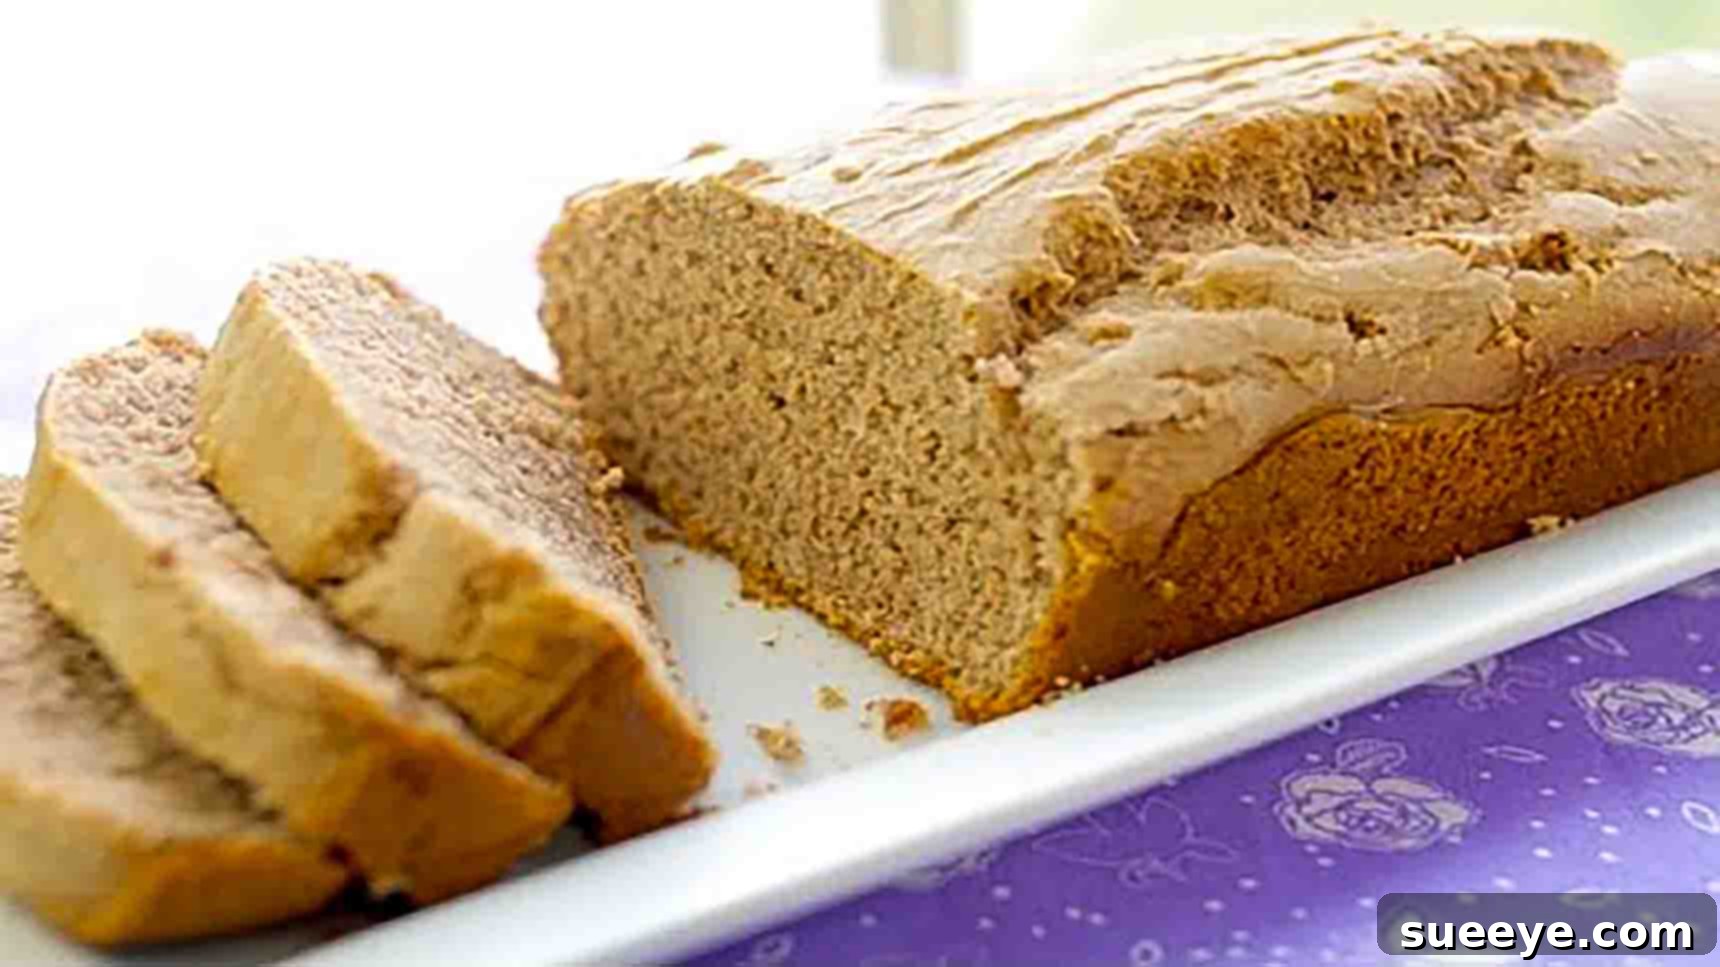
Who would have thought that crafting a delightful, sweet loaf of bread could be as simple as combining just two humble ingredients? Prepare to be amazed by this incredibly straightforward recipe, brilliantly demonstrated by SimplyBakings on YouTube. This revolutionary approach to baking yields a delicious, tender loaf of sweet bread in under an hour, making it an absolute game-changer for busy mornings, last-minute cravings, or simply any moment you desire a homemade treat without the fuss. Imagine fresh, warm bread filling your kitchen with its inviting aroma, all with minimal effort. This recipe is not just easy; it’s a culinary revelation that opens up a world of quick baking possibilities for even the most novice bakers.
Amazingly Easy 2-Ingredient Ice Cream Bread: Your New Go-To Quick Bake
Baking can often seem daunting, with lengthy ingredient lists, complex steps, and precision measurements. However, some recipes defy expectations, proving that incredible flavors can emerge from the simplest combinations. The 2-ingredient ice cream bread is one such marvel. It’s a testament to minimalist baking, offering a sweet, fluffy, and utterly satisfying bread that requires almost no prior experience. Whether you’re looking for a delightful breakfast, an afternoon snack, or a unique dessert, this recipe delivers on all fronts: speed, simplicity, and undeniable deliciousness. Get ready to transform two common pantry staples into a loaf of pure comfort.
Why You’ll Love This Simple Ice Cream Bread Recipe
- Unbelievably Easy: With only two ingredients and two main steps, it’s virtually foolproof.
- Super Quick: From prep to plate, you can have fresh bread in under an hour.
- Deliciously Sweet: The ice cream infuses the bread with a wonderful sweetness and a soft, tender crumb.
- Highly Customizable: Adapt the flavor by simply changing your ice cream choice or adding extra mix-ins.
- Perfect for All Skill Levels: A great entry point for beginner bakers and a fantastic quick fix for experienced ones.
- Minimal Cleanup: Fewer ingredients mean fewer dishes!
The Magic Behind Just Two Ingredients
At first glance, the idea of making bread with ice cream might sound like a culinary myth, but there’s solid science behind this delightful trick. The two star ingredients, ice cream and self-rising flour, are perfectly engineered to work in harmony:
- Self-Rising Flour: This isn’t just plain flour. It’s a pre-mixed combination of all-purpose flour, baking powder (a leavening agent), and a touch of salt. The baking powder reacts when wet and heated, creating carbon dioxide bubbles that make the bread rise and become light and airy. The salt enhances the flavor.
- Ice Cream: More than just a sweet treat, ice cream brings several crucial elements to the dough:
- Liquid: It provides the necessary moisture to activate the baking powder in the self-rising flour.
- Fat: The milk fat in ice cream contributes to the bread’s tender texture and rich mouthfeel, preventing it from drying out.
- Sugar: This is where the sweetness comes from, and it also aids in browning the crust beautifully during baking.
- Flavor: Whatever flavor of ice cream you choose will subtly (or not-so-subtly!) permeate your bread, creating endless possibilities.
When these two components combine, the liquid and fat from the ice cream activate the leavening agents in the flour, resulting in a perfectly risen, sweet, and incredibly moist loaf. It’s truly a testament to the simplicity and ingenuity of baking.
Ingredients You’ll Need:
Gathering your ingredients for this recipe is perhaps the quickest part of the entire process! You only need two items, readily available at any grocery store.
- 2 cups of your favorite ice cream: Any flavor will work, so pick something you love! Vanilla, chocolate, strawberry, cookies and cream, or even a more adventurous seasonal flavor can lead to unique bread variations. Ensure it’s full-fat for the best texture.
- 1 & 1/2 cups of self-rising flour: This is crucial. Do not substitute with all-purpose flour unless you add your own leavening agents (see our FAQ for more details).
That’s it! With these two simple ingredients, you’re ready to embark on your quick-baking adventure.
Step-by-Step Directions: How to Bake 2-Ingredient Ice Cream Bread
Following these clear and concise steps will ensure you create a perfect loaf every time. Remember, simplicity is key here, so don’t overthink it!
Step 1: Soften the Ice Cream and Combine Ingredients
Begin by taking your chosen ice cream out of the freezer and allowing it to soften at room temperature for approximately 15 minutes. This step is crucial as it makes the ice cream easier to mix and ensures a smooth batter. Once softened, scoop the 2 cups of ice cream into a large mixing bowl. Using a spatula or spoon, stir the ice cream gently to make it more liquid and pliable. This helps integrate the flour more smoothly.
Next, gradually add the 1 & 1/2 cups of self-rising flour to the bowl with the softened ice cream. Mix them well, using a folding motion, until the flour is thoroughly combined with the ice cream. Be careful not to overmix; just combine until no dry streaks of flour remain. Overmixing can develop the gluten in the flour too much, leading to a tougher bread texture. The batter will be thick but manageable.
Step 2: Transfer to Pan and Bake to Golden Perfection
Once your batter is perfectly mixed, it’s time to prepare it for baking. Lightly grease and flour a standard loaf pan (approximately 9×5 inches), or line it with parchment paper for easy removal. This step prevents the bread from sticking and ensures a beautiful, intact loaf. Carefully transfer the entire batter mixture into the prepared nonstick loaf pan, spreading it evenly with your spatula to fill the pan from edge to edge.
Preheat your oven to 350 degrees Fahrenheit (175 degrees Celsius). Once the oven reaches the correct temperature, place the loaf pan into the preheated oven. Bake for approximately 35 to 40 minutes. Baking times can vary slightly depending on your oven, so keep an eye on it. The bread is done when the top is golden brown and a wooden skewer or toothpick inserted into the center comes out clean. If the top starts browning too quickly, you can loosely tent it with aluminum foil for the last few minutes of baking.
Once baked, remove the bread from the oven and let it cool in the pan for about 10-15 minutes before transferring it to a wire rack to cool completely. Slicing it while warm is tempting, but a little cooling time helps the bread set and prevents it from crumbling.
Expert Tips for the Perfect 2-Ingredient Bread
While this recipe is incredibly simple, a few tips can elevate your ice cream bread from good to absolutely fantastic:
- Choose Your Ice Cream Wisely: The flavor of your ice cream will directly impact the flavor of your bread. Experiment with different types! Richer, full-fat ice creams tend to yield a more tender and moist crumb. Avoid “light” or “fat-free” ice creams, as they may not provide enough fat for the desired texture and might affect the leavening process.
- Don’t Overmix the Batter: Once you add the flour, mix just until combined. Overmixing develops gluten, which can lead to a dense, tough loaf instead of a light and tender one. A few lumps are perfectly fine!
- Soften, Don’t Melt: Ensure your ice cream is softened to a consistency where it’s easily stirrable but not completely melted and liquid. If it melts too much, the batter might become too thin.
- Proper Pan Preparation: Always grease and flour your loaf pan, or use parchment paper. This prevents sticking and ensures your beautiful loaf comes out easily.
- Test for Doneness: Use the toothpick test! Insert a wooden skewer or toothpick into the center of the loaf. If it comes out clean, your bread is fully baked. If it has wet batter on it, continue baking for a few more minutes.
- Cooling is Key: While it’s tempting to slice into a warm loaf, letting it cool for at least 10-15 minutes in the pan, then completely on a wire rack, allows the internal structure to set. This makes for cleaner slices and a better overall texture.
Delicious Variations & Add-Ins for Your Ice Cream Bread
The beauty of this 2-ingredient bread lies in its versatility. The base recipe is fantastic, but you can easily customize it to create endless flavor combinations. Here are some ideas to spark your creativity:
- Fruit Boost: Fold in fresh or frozen berries (blueberries, raspberries), diced apples, or mashed bananas for added moisture and flavor. Be gentle when mixing to avoid crushing delicate fruits.
- Chocolate Lover’s Dream: Add chocolate chips (milk, dark, or white), cocoa powder (for a richer chocolate flavor), or even chopped candy bars to the batter.
- Nutty Crunch: Stir in chopped nuts like walnuts, pecans, or almonds for a delightful texture contrast.
- Spice It Up: Enhance the flavor with a dash of cinnamon, nutmeg, or pumpkin pie spice, especially if using a vanilla or autumnal ice cream flavor.
- Extract Excitement: A teaspoon of vanilla extract, almond extract, or even a citrus zest can deepen and brighten the bread’s flavor profile.
- Glaze or Frosting: Once cooled, drizzle with a simple powdered sugar glaze, a chocolate ganache, or a cream cheese frosting for an extra touch of indulgence.
- Savory Twist (Advanced): While this recipe is inherently sweet due to the ice cream, adventurous bakers might experiment with a plain vanilla ice cream and savory add-ins like cheese and herbs, though this requires careful balancing of flavors. For a truly savory bread, a different base recipe might be more suitable.
Remember to keep the total volume of your add-ins to about 1/2 to 1 cup to avoid overwhelming the bread’s structure.
Serving Suggestions for Your Homemade Sweet Bread
This sweet ice cream bread is incredibly versatile and can be enjoyed in many ways. Here are some serving ideas:
- Plain and Simple: Enjoy a slice on its own, appreciating its natural sweetness and tender texture.
- Toasted Perfection: Lightly toast slices and spread with butter, cream cheese, or your favorite jam for a delightful breakfast or brunch.
- Dessert Delight: Serve warm slices with a scoop of… you guessed it, more ice cream! A drizzle of chocolate sauce or caramel can make it an even more decadent dessert.
- With Your Favorite Beverage: Pair a slice with a cup of coffee, tea, or a glass of milk for a comforting snack.
- Breakfast Treat: It makes a fantastic grab-and-go breakfast or a lovely addition to a breakfast spread, alongside fresh fruit or yogurt.
Storage and Shelf Life
To keep your delicious 2-ingredient ice cream bread fresh for as long as possible, proper storage is key:
- Room Temperature: Store cooled bread in an airtight container or wrapped tightly in plastic wrap at room temperature for up to 2-3 days.
- Refrigeration: If you live in a warm climate or prefer to extend its shelf life, you can refrigerate the bread for up to 5-7 days. Bring to room temperature or lightly toast before serving for the best flavor and texture.
- Freezing: For longer storage, slice the cooled bread and wrap individual slices tightly in plastic wrap, then place them in a freezer-safe bag or container. It can be frozen for up to 2-3 months. Thaw slices at room temperature or warm them gently in a toaster or microwave.
Frequently Asked Questions About 2-Ingredient Bread
Can I use regular all-purpose flour instead of self-rising flour?
No, you cannot directly substitute all-purpose flour. Self-rising flour contains leavening agents (baking powder) and salt, which are essential for the bread to rise. If you only have all-purpose flour, you’ll need to add 1.5 teaspoons of baking powder and 1/4 teaspoon of salt for every cup of all-purpose flour to replicate self-rising flour.
What kind of ice cream works best?
Any full-fat ice cream flavor will work! Vanilla is a classic and versatile choice. Chocolate, strawberry, coffee, mint chocolate chip, or even seasonal flavors like pumpkin spice can create unique and delicious breads. Avoid low-fat or fat-free ice creams, as they may result in a less tender texture and may not rise as well.
How do I know when the bread is fully baked?
The bread is done when the top is golden brown, and a wooden skewer or toothpick inserted into the center comes out clean. If you notice it browning too quickly, you can tent it loosely with aluminum foil for the remaining bake time.
Why is my bread dense or not rising?
Several factors can cause a dense loaf:
- Overmixing: Mixing the batter too much develops gluten, leading to a tough, dense texture.
- Incorrect Flour: Using regular all-purpose flour without adding leavening agents.
- Expired Self-Rising Flour: The baking powder in self-rising flour can lose its potency over time.
- Low-Fat Ice Cream: Insufficient fat can impact the bread’s texture and rise.
- Oven Temperature: An inaccurate oven temperature can affect rising. Consider using an oven thermometer.
Can I add mix-ins to the bread?
Absolutely! This bread is fantastic with additions like chocolate chips, nuts, dried fruit, or spices. Gently fold them into the batter after mixing the ice cream and flour, ensuring not to overmix. About 1/2 to 1 cup of mix-ins is a good starting point.
Is this bread good for sandwiches?
This bread is on the sweeter side, making it more suitable for breakfast, dessert, or a sweet snack. While you could make a peanut butter and jelly sandwich with it, it’s not typically used for savory sandwiches.
Embrace the Simplicity of 2-Ingredient Bread
This 2-ingredient ice cream bread recipe is more than just a quick bake; it’s a delightful testament to how simple ingredients can create something truly magical and delicious. With minimal effort, you can transform a pint of ice cream and a bag of self-rising flour into a tender, sweet loaf that’s perfect for any occasion. It’s a fantastic recipe for beginner bakers, a fun project with kids, or a go-to for anyone craving homemade goodness without the fuss.
So, the next time you’re looking for an incredibly easy and satisfying baking project, reach for these two ingredients. Experiment with different ice cream flavors, add your favorite mix-ins, and discover your new favorite quick bread. We encourage you to try this recipe from SimplyBakings and experience the joy of effortless baking. Happy baking!