
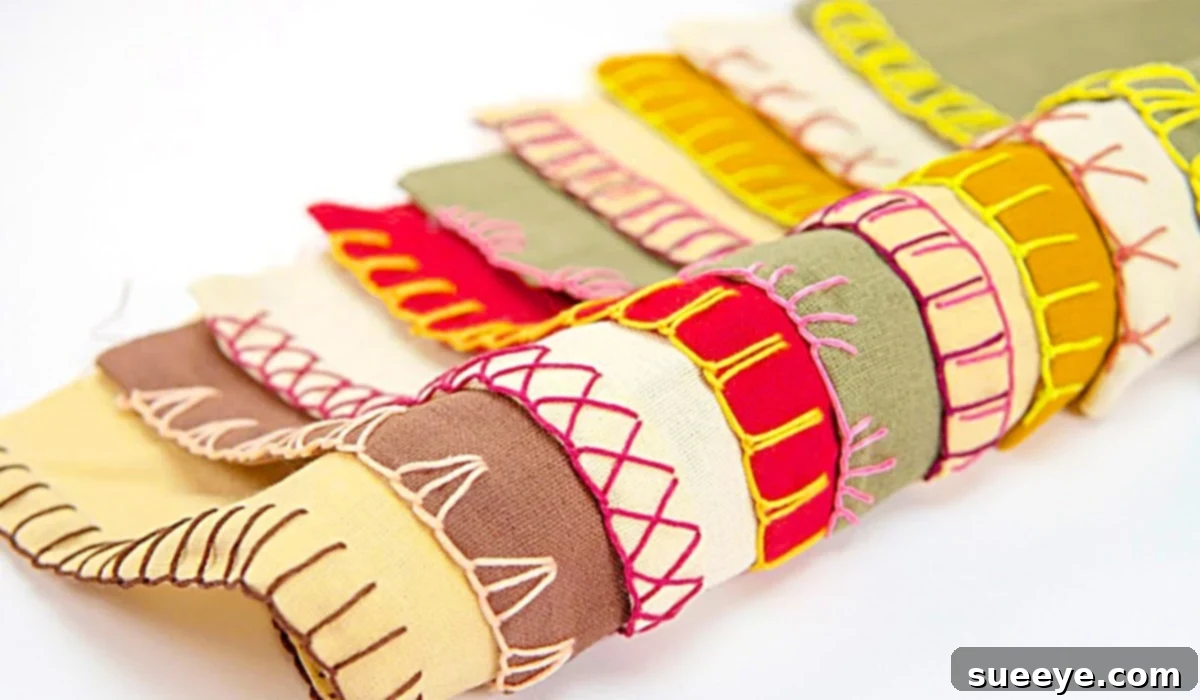
Mastering the Art of the Hand-Sewn Blanket Stitch: A Comprehensive Guide
The blanket stitch is a timeless and versatile hand-sewing technique that adds a beautiful, finished edge to countless projects. Whether you’re a seasoned crafter or just beginning your sewing journey, mastering this stitch opens up a world of creative possibilities. From securing edges on cozy blankets to adding a decorative flair to garments and home decor, a well-executed blanket stitch elevates any textile project with its distinctive looped edge. While many modern sewing machines offer a blanket stitch function, the charm, precision, and therapeutic rhythm of a hand-sewn stitch are truly unparalleled. This guide will delve into everything you need to know about this essential stitch, complemented by an excellent video tutorial that showcases ten easy and stunning variations.
For those looking for an accessible and comprehensive resource, the Handy Works YouTube channel offers an outstanding video tutorial. This invaluable guide demystifies the hand-sewn blanket stitch, proving that it’s far less intimidating than it might appear. Beyond the basic technique, the tutorial introduces an impressive array of ten different blanket stitch variations, each presented with clear, easy-to-follow instructions. This makes it an ideal starting point for beginners and a fantastic source of inspiration for experienced stitchers looking to expand their repertoire.
Why Choose the Hand-Sewn Blanket Stitch?
In an age dominated by machine sewing, the hand-sewn blanket stitch stands out for several compelling reasons. Firstly, it offers unmatched control and precision. Each stitch can be meticulously placed, ensuring perfectly even spacing and tension, which is crucial for a professional finish. Secondly, it provides a deeply satisfying and meditative crafting experience. The rhythmic motion of hand sewing can be incredibly relaxing, offering a wonderful escape from daily stresses. Thirdly, it’s incredibly portable. You can take your project and a few supplies anywhere, making it perfect for travel or crafting on the go. Finally, the hand-sewn blanket stitch imbues your projects with a unique, handmade charm that a machine simply cannot replicate. It’s a testament to the care and effort you put into your creations, adding a personal touch that is truly cherished.
Essential Materials for Your Blanket Stitch Projects:
Before you begin, gathering the right materials is crucial for a smooth and enjoyable hand-sewing experience. While the list is relatively short, selecting quality tools will significantly impact your final results.
- Embroidery Floss or Thread: The choice of thread is paramount. Embroidery floss, typically six-stranded cotton, is a popular choice for its vibrant colors, durability, and ease of use. You can use all six strands for a bold, chunky stitch or separate them for a finer, more delicate look. Perle cotton, available in various weights, offers a lovely sheen and is excellent for definition. Consider the weight and fiber content of your fabric when choosing your thread – a thicker thread will stand out more on a heavier fabric, while a finer thread suits lightweight materials. Don’t be afraid to experiment with contrasting colors to make your stitches pop or coordinating shades for a more subtle effect.
- Sharp Scissors: A small, sharp pair of embroidery scissors is indispensable for clean cuts. Precision is key when trimming thread ends close to your work or cutting floss to length, preventing frayed edges and maintaining neatness.
- Hand-Sewing Needle: The right needle makes all the difference. An embroidery needle (also known as a crewel needle) with a sharp point and a long eye is ideal for working with embroidery floss. Choose a needle size that is appropriate for your thread thickness and fabric type – it should pass easily through the fabric without leaving large holes, but also be large enough to accommodate your chosen thread.
- Your Project Fabric (Blanket, Garment, or Craft Item): This is where your blanket stitch will come to life. Whether it’s a cozy fleece blanket, a wool garment, a felt appliqué, or a delicate linen napkin, ensure your fabric edges are prepared. For raw edges, a simple turned-under hem or a clean-cut edge is usually sufficient. The blanket stitch works beautifully on a variety of materials, providing a sturdy and decorative finish.
- Optional but Recommended:
- Thimble: Protects your finger when pushing the needle through thicker fabrics.
- Fabric Marking Tool: A fabric pencil or disappearing ink pen can help you mark even stitch placement and spacing, especially useful for beginners.
- Small Ruler or Gauge: To ensure consistent stitch length and spacing.
- Embroidery Hoop: Can help keep your fabric taut and stable, especially for smaller or more intricate work.
Directions: Understanding the Basic Blanket Stitch Technique
While the Handy Works video tutorial on YouTube offers a visual guide to ten decorative blanket stitches, understanding the fundamental mechanics of the basic stitch is your first step. The blanket stitch forms a series of L-shaped stitches along an edge, creating a neat, reinforced border.
Here’s a conceptual overview of how to execute a standard blanket stitch:
- Prepare Your Thread: Cut a manageable length of embroidery floss (usually no more than 18-24 inches to prevent tangling). Thread your needle and knot the end, or use a “waste knot” that will be hidden within the stitches.
- Starting the Stitch: Bring your needle up from the back (wrong side) of your fabric, a short distance in from the edge. This hides your knot.
- Forming the First Loop: Insert your needle back down through the fabric a small distance to the right of your initial entry point, and then bring it up again, directly below your first entry point, very close to the edge of the fabric. Crucially, ensure your working thread is *under* the needle point as you pull it through. This action creates the characteristic “L” shape and locks the thread in place.
- Continuing the Stitches: For each subsequent stitch, insert your needle down into the fabric at your desired spacing from the previous vertical bar, then bring it up again, close to the fabric edge, ensuring the working thread is always looped under the needle before you pull it taut. Maintain consistent spacing and tension to create an even, beautiful row of stitches.
- Turning Corners: When you reach a corner, you can place several stitches radiating from the corner point to create a neat turn, or simply angle your last stitch towards the corner, and start the next stitch at a new angle on the adjacent edge. The video tutorial will likely demonstrate specific techniques for clean corners.
- Finishing Off: Once you’ve completed your edge, secure your thread on the back of the fabric with a small knot or by weaving it discreetly through a few stitches.
The beauty of this stitch lies in its simplicity and adaptability. With practice, you’ll develop a rhythm and an eye for evenness, making each hand-sewn edge a work of art.
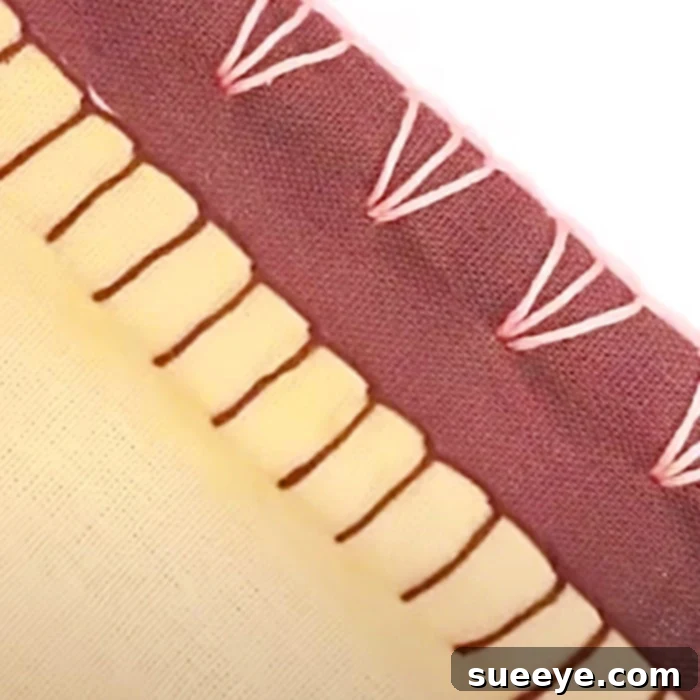
Exploring Decorative Blanket Stitch Variations
Beyond the basic technique, the blanket stitch serves as a foundation for an incredible array of decorative styles. The Handy Works tutorial highlights ten easy variations, each capable of transforming a simple edge into a stunning embellishment. These variations often involve altering the length, spacing, or angle of your stitches, or even combining them with other simple embroidery elements.
- Closed Blanket Stitch: This variation creates a denser, more connected edge by bringing the vertical bars closer together or even sharing a common entry point at the top. It offers a more solid, braid-like appearance.
- Crossed Blanket Stitch: By adding a small diagonal stitch across the vertical bar, you can create a charming X-pattern, adding texture and visual interest.
- Looped or Whipped Blanket Stitch: After creating a row of basic blanket stitches, you can “whip” or “loop” a second thread (or the same thread) around the vertical bars, adding another layer of dimension and color.
- Blanket Stitch with Beads: Incorporate small beads or sequins into your stitches for a touch of sparkle and elegance. This is perfect for decorative items or special occasion garments.
- Varying Lengths and Spacing: Simply by changing the length of your vertical bars or the distance between each stitch, you can create unique patterns, from tightly packed fringes to widely spaced, airy designs.
- Double Blanket Stitch: This involves working two rows of blanket stitches, often in contrasting colors or directions, to create a richer, more elaborate border.
These variations are not just functional; they are artistic expressions. They allow you to customize your projects, adding a personal touch that truly makes them unique. Whether you prefer a subtle accent or a bold statement, there’s a blanket stitch variation to suit every taste and project.
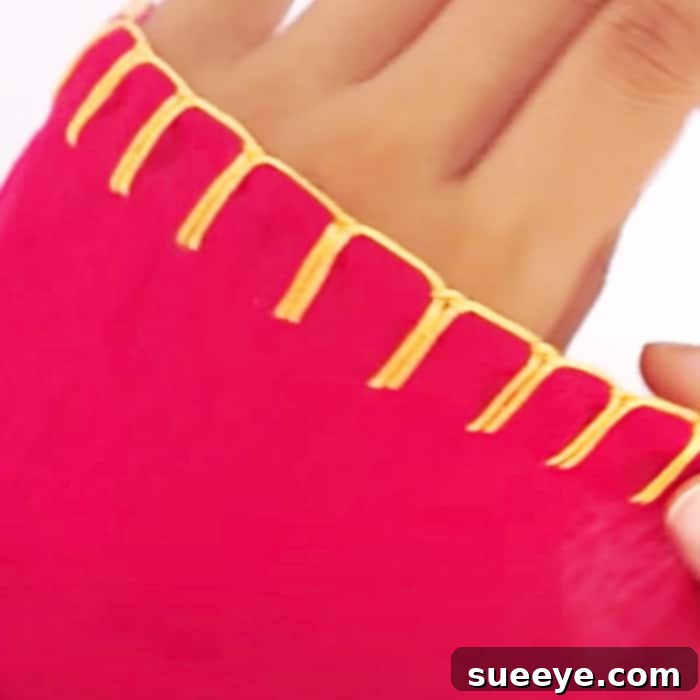
Applications: Where to Use Your New Skills
The versatility of the blanket stitch extends far beyond just blankets. Once you’ve mastered the basic stitch and its variations, you’ll find endless opportunities to apply this beautiful technique across a wide range of textile crafts.
- Blankets and Throws: The most obvious application, a hand-sewn blanket stitch provides a durable and decorative edge for fleece, wool, or flannel blankets, preventing fraying and adding a cozy touch.
- Apparel and Garments: Use the blanket stitch to finish the edges of cuffs, collars, or hemlines on jackets, cardigans, or children’s clothing. It adds a handcrafted, boutique-style detail.
- Home Decor: Embellish throw pillows, placemats, coasters, table runners, or even decorative towels with a neat blanket stitch border. It’s a simple way to personalize and elevate your living space.
- Quilting: The blanket stitch is a popular choice for appliqué in quilting, securely attaching fabric shapes to a background with a clean, decorative edge. It can also be used for binding quilt edges, offering a softer alternative to machine binding.
- Felt Crafts and Soft Toys: For felt projects like ornaments, finger puppets, or stuffed animals, the blanket stitch is ideal for joining pieces together, providing a sturdy seam that is also highly decorative.
- Mending and Reinforcement: Beyond decoration, the blanket stitch can be used to reinforce weak edges or artfully mend small tears, adding strength while making the repair a feature.
- Accessories: From handmade bags and pouches to key fobs and fabric jewelry, the blanket stitch can add a professional and polished finish to your accessories.
Each of these applications benefits from the unique character and strength that a hand-sewn blanket stitch provides. The possibilities are truly limited only by your imagination.
Tips for Success and Troubleshooting Common Issues
Even with an easy tutorial, hand-sewing takes practice. Here are some tips to help you achieve beautiful results and address common challenges:
- Practice on Scraps: Before working on your final project, practice your stitches on a similar type of scrap fabric. This allows you to get a feel for the tension, spacing, and rhythm without fear of mistakes.
- Maintain Even Tension: Consistent tension is key to uniform stitches. Avoid pulling your thread too tightly, which can pucker the fabric, or leaving it too loose, which results in sloppy stitches.
- Use a Good Quality Thread: Cheaper threads are more prone to tangling, knotting, and breaking. Investing in quality embroidery floss will save you frustration and yield better results.
- Keep Your Needle Sharp: A sharp needle glides easily through fabric, making stitching smoother and less strenuous.
- Good Lighting: Work in a well-lit area to clearly see your stitches and fabric. This helps in maintaining accuracy and reduces eye strain.
- Don’t Rush: Hand sewing is a craft to be savored. Take your time, enjoy the process, and focus on each stitch. Speed will come with practice.
Common Troubleshooting:
- Uneven Stitches: This is the most common issue for beginners. Practice, using a fabric marker for guidelines, and focusing on consistent spacing and depth will improve evenness.
- Thread Tangling/Knotting: Use shorter lengths of thread, condition your thread with beeswax, and let your needle dangle periodically to untwist the thread.
- Fabric Puckering: This usually indicates you’re pulling your stitches too tight. Loosen your tension slightly and ensure your needle is piercing the fabric without gathering it.
Conclusion: Embrace the Beauty of Hand-Stitching
The hand-sewn blanket stitch is more than just a technique; it’s an invitation to slow down, create with intention, and add a personal touch to everything you make. Its enduring appeal lies in its simplicity, versatility, and the beautiful finish it provides. With resources like the Handy Works tutorial, learning and mastering this stitch, along with its many decorative variations, has never been easier. So grab your needle and thread, choose your favorite fabric, and embark on a rewarding journey of hand-stitching. You’ll be amazed at the gorgeous, professional-looking edges you can create, transforming everyday items into cherished keepsakes and truly unique pieces.