
Effortless Microwave Brownies: Your Quick No-Bake Chocolate Dessert Recipe
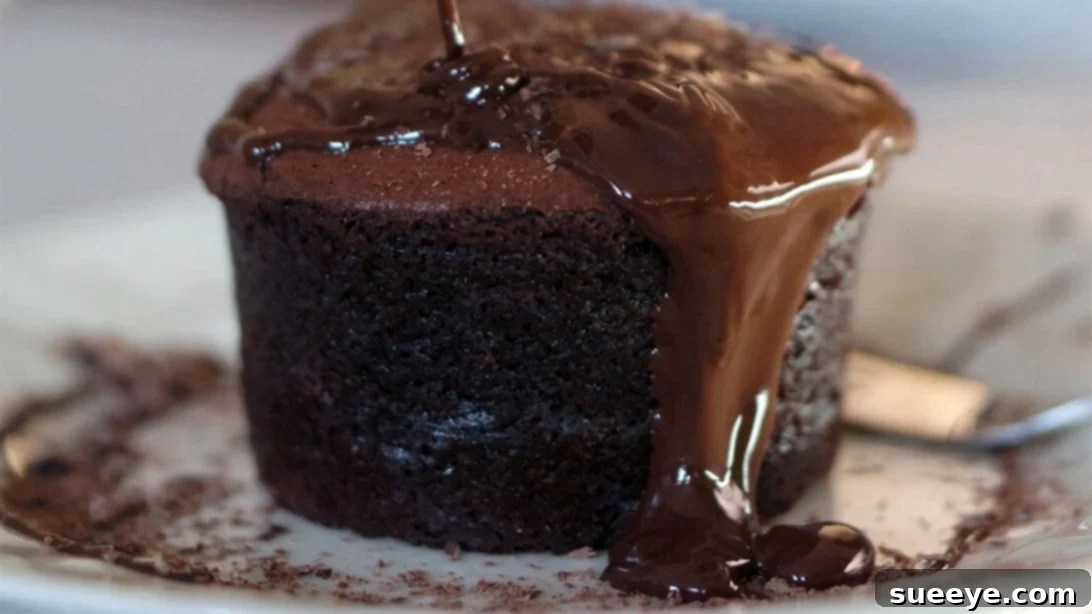
Are you yearning for a truly decadent chocolate treat but find yourself short on time, lacking an oven, or simply seeking a hassle-free baking experience? Look no further! This incredible no-bake brownie chocolate dessert is the perfect answer to satisfying your deepest sweet cravings with minimal effort and maximum flavor. Whether you’re a busy student, a parent juggling multiple tasks, or simply someone who loves indulging in delicious desserts without the typical fuss of traditional baking, this recipe is designed with you in mind. Imagine a rich, moist brownie base, crowned with a light, airy cream, and generously draped in a luscious chocolate ganache – all prepared quickly and easily, right in your microwave.
Inspired by Hearty Food’s brilliant tutorial on YouTube, this recipe promises a dessert experience that will astound you with its simplicity and exquisite taste. It’s not only incredibly quick to assemble but also remarkably budget-friendly, requiring no eggs or gelatin, making it an excellent choice for a wider range of dietary preferences and everyday convenience. Get ready to impress your taste buds and your guests with a dessert that tastes like it took hours of painstaking effort, yet truly only demands minutes of active preparation time. This comprehensive guide will walk you through every step, ensuring a perfect, delightful result that you’ll be proud to share.
Essential Ingredients for Your No-Bake Brownie Masterpiece
Crafting this sensational dessert requires a select few, readily available ingredients. The quality of your chosen ingredients can significantly impact the final taste and texture, so whenever possible, opt for good quality chocolate and fresh dairy products. Here’s a detailed breakdown of what you’ll need to create this indulgent microwave brownie, complete with helpful tips for each component:
- Dark Chocolate (100 g): This forms the foundational rich, deep chocolate flavor of your brownies. We recommend using a good quality dark chocolate with a cocoa content ranging from 50% to 70% for the best flavor balance. Whether you opt for baking chocolate in a bar or convenient chocolate chips, ensure it’s chopped into small, uniform pieces for easier and more even melting.
- Unsalted Butter (100g): Butter is crucial for adding unparalleled richness and essential moisture, contributing to that desired gooey, melt-in-your-mouth brownie texture. Using unsalted butter provides the advantage of allowing you to precisely control the overall saltiness of your finished dessert.
- All-Purpose Flour (40g): A small but important amount of all-purpose flour provides the necessary structure to your brownie, preventing it from being too crumbly. Sifting the flour before incorporating it is highly recommended to ensure a smooth, lump-free batter.
- Unsweetened Cocoa Powder (2 teaspoons): This ingredient is a flavor enhancer, intensifying the chocolate notes and adding depth to your brownies, making them even more decadent. For a darker color and a slightly milder flavor, consider using Dutch-processed cocoa powder.
- Baking Powder (1 teaspoon): Even in a microwave dessert, baking powder plays an essential role as a leavening agent. It helps the brownie achieve a slightly airy, lighter texture, preventing it from becoming overly dense.
- Warm Milk (30-40 ml): A small quantity of warm milk is added to help achieve the perfect, smooth, and pourable consistency for your brownie batter. While whole milk provides the richest results, feel free to use your preferred milk alternative if you have dietary restrictions or preferences.
- Rectangular Baking Dish (approx. 10cm x 25cm): The specific dimensions of your baking dish are important for ensuring your brownie cooks evenly in the microwave and achieves the ideal thickness for easy cutting and serving. Lining it thoroughly with parchment paper is an absolute must for effortless removal after cooking.
- Heavy Whipping Cream (200ml): This will be whipped into a light, fluffy, and airy topping, providing a delightful textural and flavor contrast to the rich brownie base. For optimal whipping results, ensure your heavy cream is well-chilled before you begin.
- Powdered Sugar (40g): Also commonly known as confectioners’ sugar or icing sugar, this ingredient sweetens the whipped cream and helps stabilize it, ensuring a smooth consistency without any grainy texture.
- Additional Chocolate (100g): This separate portion of chocolate is dedicated to creating your luscious, glossy chocolate ganache topping. Again, dark or semi-sweet chocolate varieties are highly recommended for the best flavor profile.
- Warm Cream (100g): Used in conjunction with the additional chocolate, the warmth of the cream helps the chocolate melt perfectly and emulsify smoothly, resulting in a rich and velvety ganache.
Step-by-Step Directions: Crafting Your Microwave Brownie Dessert
Follow these detailed instructions meticulously to ensure a perfect, mouth-watering dessert every single time. Even for a seemingly simple microwave recipe, precision in each step will lead to the most delicious and satisfying results.
Phase 1: Preparing the Irresistible Brownie Base
To start, place 100 grams of dark chocolate and 100 grams of butter into a microwave-safe bowl. Heat this mixture in your microwave using short bursts of approximately 30-second intervals. After each interval, stir the mixture thoroughly to prevent scorching and ensure even melting. Continue this process until both the chocolate and butter are fully melted and smoothly combined into a glossy mixture. As an alternative, you can also use a double boiler method on the stovetop for a more controlled and gentle melt. Once melted, set the bowl aside to cool slightly while you prepare the dry ingredients.
Next, it’s time to incorporate your dry components. Using a small sifter, gradually sift 40 grams of all-purpose flour directly into the bowl containing your melted chocolate and butter mixture. Follow this by sifting in 2 teaspoons of unsweetened cocoa powder and 1 teaspoon of baking powder. Sifting these dry ingredients directly into the wet mixture is a crucial step; it helps eliminate any potential lumps and ensures that all ingredients are evenly distributed, ultimately contributing to a wonderfully silky-smooth batter free from dry pockets.
With all the ingredients now in the bowl, take a whisk and gently combine everything. Whisk until the chocolate mixture transforms into a wonderfully cohesive, silky-smooth, and enticingly gooey consistency. It’s important to avoid overmixing at this stage, as excessive whisking can overdevelop the gluten in the flour, potentially leading to a tougher rather than tender brownie. Once the ingredients are well-combined, slowly pour in 30-40 ml of warm milk. Continue whisking until the entire mixture is completely uniform and smooth, with no visible streaks of unmixed ingredients.
Now, prepare your chosen baking container, which should be approximately 10 cm x 25 cm. Line it thoroughly with parchment paper, ensuring the paper extends slightly over the edges. This step is absolutely vital for easy and clean removal of your baked brownie later. Carefully pour the prepared chocolate mixture evenly into the parchment-lined container, spreading it gently to create a level surface. Place the container into the microwave and cook for approximately 4-5 minutes. Please note that microwave timings can vary significantly based on your oven’s wattage and power settings, so it’s advisable to keep a close eye on your brownie. The brownie should appear set around the edges, but it’s perfectly fine, and even desirable, for the center to remain slightly moist and gooey. A quick test with a toothpick inserted into the center should come out with moist crumbs, not wet batter. Once cooked to perfection, carefully remove it from the microwave and allow it to cool completely at room temperature. This cooling period is essential for the brownie to fully set and firm up its structure.
Phase 2: Crafting the Luxurious Creamy Topping
Pour 200 ml of well-chilled heavy whipping cream into a clean, dry measuring mug or a medium-sized mixing bowl. The colder the cream, the better it will whip. Using an electric mixer (or a sturdy hand whisk if you’re looking for a good arm workout!), begin to whip the cream on medium-high speed. Continue whipping until the cream becomes wonderfully light, airy, and fluffy, forming soft to medium peaks that hold their shape. Exercise caution to avoid overwhisking, as this can cause the cream to become granular or even turn into butter. Once whipped, carefully transfer this beautifully fluffy cream to a separate glass bowl. Gradually add in 40 grams of powdered sugar, sifting it as you go to ensure no lumps are introduced. Gently fold the powdered sugar into the whipped cream using a spatula until it is perfectly combined, ensuring the cream retains its delightful airy and fluffy texture. This will form your delightful and decadent creamy icing layer.
Phase 3: Preparing the Velvety Chocolate Ganache
In a separate, heat-proof bowl, place 100 grams of additional chocolate (ensure it’s chopped into small, uniform pieces if you’re using a chocolate bar). In a separate saucepan or microwave-safe container, gently heat 100 grams of cream until it is warm but crucially not boiling. You can achieve this on the stovetop over low heat or in the microwave for about 30-60 seconds. Once the cream is warm, pour it directly over the chopped chocolate in the bowl. Allow the mixture to sit undisturbed for about 1-2 minutes; this crucial resting time allows the residual heat from the warm cream to thoroughly melt the chocolate. After resting, using a spoon, gently begin to mix both ingredients. Start stirring slowly in a circular motion from the center of the bowl and gradually work your way outwards until the mixture is perfectly combined, resulting in a smooth, glossy, and luxurious chocolate ganache. This rich ganache will slightly thicken and set upon chilling, providing a perfect topping.
Phase 4: Assembling and Chilling Your Decadent Dessert
Once your microwave brownie has cooled completely and set, carefully transfer it to a wooden platter or a clean cutting board. Gently peel off the parchment paper that was lining the dish. Using a sharp knife, carefully cut the brownie cake into uniform squares or rectangles that will fit snugly into your individual serving bowls or a larger communal serving dish, depending on how you plan to present it. Arrange your perfectly cut brownie squares neatly in your chosen bowls.
Now, generously cover the tops of each brownie square with the creamy, fluffy whipped icing you prepared earlier. Aim for an even, appealing layer that completely covers the brownie. The delightful contrast between the intensely rich brownie base and the light, airy cream is one of the true highlights of this exquisite dessert.
Once your brownies are beautifully layered with the white creamy icing, it’s time for the crowning glory. Carefully pour the prepared chocolate ganache mixture over each bowl, ensuring it thoroughly covers the whipped cream icing. The warm ganache will create a smooth, glossy, and inviting layer that will subtly firm up when chilled. For the best possible results, place your assembled desserts into the refrigerator for at least 30 minutes. This essential chilling time allows the ganache to set properly and, more importantly, permits all the magnificent flavors to meld beautifully together, creating a harmonious taste experience.
After the recommended 30 minutes (or even longer if you prefer a firmer set), carefully retrieve the bowls from the fridge. Now comes the truly fun and creative part: decoration! While the original tutorial suggests using bread crumbs for a rustic touch, feel entirely free to get creative and personalize your dessert. You can decorate the tops with elegant chocolate shavings, colorful sprinkles, a scattering of finely chopped nuts (such as walnuts or pecans), a delicate dusting of cocoa powder, or even a few fresh berries for a vibrant pop of color and a hint of refreshing tartness.
Serving Suggestions & Customization for Your No-Bake Brownies
And there you have it – a magnificent, hassle-free brownie chocolate dessert ready to be savored and enjoyed! This sweet indulgence pairs absolutely perfectly with a warm cup of freshly brewed coffee or a comforting mug of tea, making it an ideal treat for an afternoon pick-me-up, a delightful dessert after dinner, or a charming offering for guests during tea time.
Beyond its remarkable simplicity, this recipe offers fantastic versatility, allowing you to tailor it to your personal tastes. For an extra layer of complexity and depth in the brownie base, consider stirring in a teaspoon of pure vanilla extract or a pinch of instant coffee powder – these additions will subtly enhance and amplify the rich chocolate notes without overpowering them. You can also experiment with different types of chocolate for your ganache; perhaps using milk chocolate for a sweeter, creamier profile, or a higher percentage dark chocolate for a more intense and sophisticated bitterness.
Feeling a little adventurous? Don’t hesitate to incorporate your favorite mix-ins! Chopped walnuts, crunchy pecans, or extra chocolate chips can be folded into the brownie batter before microwaving to add delightful texture and flavor bursts. For the creamy topping, consider infusing your whipped cream with a touch of mint extract for a refreshing twist, or a hint of orange zest for a bright, citrusy counterpoint. The possibilities for customization are truly endless, allowing you to make this recipe uniquely your own!
Storage Tips for Freshness
Should you be fortunate enough to have any leftovers (which is a rare occurrence with this delicious dessert!), they can be stored in an airtight container in the refrigerator for up to 3-4 days. While the brownie base itself remains wonderfully moist, the cream and ganache layers are undoubtedly best enjoyed fresh, but will still maintain their deliciousness for a few days when properly chilled.
This no-bake microwave brownie recipe truly stands as a game-changer for anyone craving a quick, satisfying, and utterly chocolatey dessert. Its remarkable ease of preparation, combined with its rich, indulgent flavor and endless possibilities for customization, makes it an instant staple in any dessert lover’s repertoire. So, gather your ingredients, follow these simple and straightforward steps, and prepare to be genuinely amazed by the deliciousness you can effortlessly create without ever having to turn on an oven. Enjoy this delightful sweet treat with your cherished friends and family, and relish in the pure joy of effortless indulgence!