
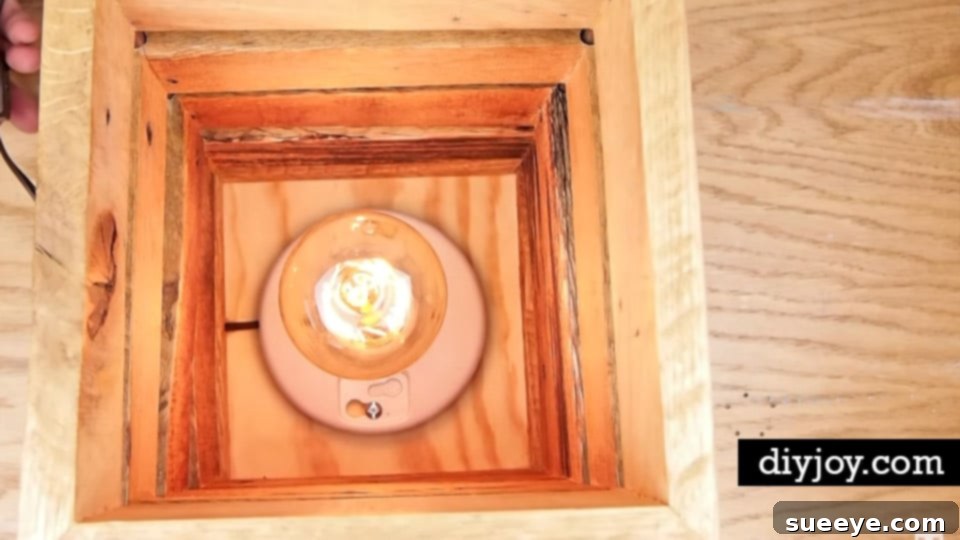
Illuminate Your Home: The Ultimate Guide to Crafting Stunning DIY Pallet Wood Lamps
Are you searching for an affordable, charming, and distinctive lighting solution to elevate your home’s ambiance? Look no further than the enduring appeal of rustic, vintage-inspired decor, especially when it comes to handmade items. One of the most rewarding and visually striking projects you can undertake is creating your own lighting fixtures from reclaimed pallet wood. This guide will walk you through everything you need to know about designing, building, and installing beautiful pallet wood lamps, transforming humble shipping pallets into captivating statement pieces that reflect your personal style.
The allure of DIY lighting stems from its ability to offer truly unique pieces that are both functional and decorative. Unlike mass-produced items, a handcrafted pallet lamp carries a story, a sense of authenticity, and a connection to sustainable living. Not only is this project incredibly cost-effective, often requiring minimal investment beyond basic tools and electrical components, but it also delivers spectacular results that can dramatically enhance any room. Whether you aim to infuse your bedroom with a cozy, industrial charm or add a warm glow to your living space, a homemade pallet lamp is an exceptional choice. Imagine two of these unique lamps flanking your bed, creating a perfectly balanced and inviting atmosphere, or perhaps a series of them illuminating a hallway or study. This engaging project is perfectly suited for a creative weekend, offering a fulfilling sense of accomplishment and a beautiful addition to your home decor.
Why Choose Pallet Wood for Your DIY Lighting Project?
The decision to utilize pallet wood for crafting lamps is driven by several compelling advantages, making it a favorite among DIY enthusiasts:
- Cost-Effectiveness: Pallets are often available for free or at very low cost from local businesses, construction sites, or industrial areas. This significantly reduces the material expense, allowing you to invest more in quality electrical components or other design elements.
- Sustainability and Upcycling: Repurposing pallets diverts waste from landfills, giving new life to materials that would otherwise be discarded. This eco-friendly approach aligns with sustainable living practices and reduces your environmental footprint.
- Unique Rustic Aesthetic: Pallet wood naturally boasts a weathered, distressed look, offering an authentic rustic, industrial, or farmhouse aesthetic that is highly sought after in modern interior design. Each piece of wood tells a story through its grain, knots, and imperfections, ensuring your lamp is truly one-of-a-kind.
- Versatility and Customization: Pallet wood is incredibly versatile. It can be cut, sanded, stained, painted, or left natural to suit any decor style. From minimalist designs to elaborate multi-tiered fixtures, the possibilities for customization are endless.
- Satisfaction of Creation: There’s immense satisfaction in creating something beautiful and functional with your own hands. A DIY pallet lamp is not just a light source; it’s a testament to your creativity and craftsmanship, a conversation starter that proudly showcases your efforts.
Before You Begin: Sourcing and Preparing Your Pallets
The foundation of a successful pallet lamp project lies in properly sourcing and preparing your wood. This crucial initial step ensures both the safety and durability of your final product.
1. Sourcing Pallets Responsibly
Look for pallets at local hardware stores, small businesses, industrial parks, or construction sites. Always ask for permission before taking pallets. When choosing, inspect them for signs of damage, excessive rot, or chemical spills. More importantly, pay close attention to the stamps or markings on the pallet:
- HT (Heat Treated): These pallets have been heat-treated to kill pests and are generally safe for indoor use. This is the preferred type for DIY projects.
- MB (Methyl Bromide): Pallets marked with ‘MB’ have been treated with a toxic pesticide and should be avoided for any indoor projects, especially those involving heat like lamps.
- EUR/EPAL: These are European standard pallets, typically heat-treated and safe.
- No Markings: If there are no markings, it’s best to err on the side of caution and avoid using them, as their treatment history is unknown.
2. Cleaning and Disassembling Pallets Safely
Once you’ve secured safe pallets, they’ll need thorough cleaning and disassembly:
- Cleaning: Use a stiff brush, soap, and water to scrub off any dirt, grime, or surface contaminants. For stubborn stains, a pressure washer can be effective. Allow the wood to dry completely, preferably in the sun, for several days.
- De-Nailing: Carefully remove all nails, screws, and staples using a hammer, pry bar, or pliers. This step is critical for safety and to prevent damage to your tools during cutting and sanding.
- Disassembly: Pallets can be challenging to take apart. A reciprocating saw with a metal-cutting blade can cut through the nails holding the planks to the stringers, making the process much easier. Alternatively, a pry bar and hammer can be used with patience. Aim to preserve as much of the wood as possible.
Essential Tools and Materials for Your Pallet Lamp
Having the right tools and materials on hand will make your project smoother and more enjoyable. Here’s a comprehensive list:
Tools:
- Measuring Tape and Pencil: For accurate measurements and markings.
- Saw: A miter saw or circular saw for straight, precise cuts. A jigsaw might be useful for intricate shapes.
- Drill/Driver: For drilling holes for wiring and attaching components.
- Sandpaper/Orbital Sander: For smoothing rough edges and preparing the wood for finishing.
- Hammer and Pry Bar: For pallet disassembly (if not using a saw).
- Safety Gear: Gloves, safety glasses, and a dust mask are crucial.
- Wire Strippers and Pliers: For handling electrical wires.
Materials:
- Reclaimed Pallet Wood: Your primary building material.
- Lamp Kit: This typically includes a lamp socket, electrical wire (appropriate gauge for lighting), and a plug. Ensure it’s rated for your intended bulb wattage.
- Light Bulb: Choose an LED or incandescent bulb that complements your design (e.g., Edison bulb for a vintage look).
- Wood Glue: For strong, durable joints.
- Screws/Nails: Wood screws (e.g., pocket hole screws) or finishing nails for assembly.
- Wood Stain, Varnish, or Paint (Optional): To achieve your desired finish.
- Polyurethane or Sealant (Optional): To protect the wood.
- Mounting Hardware (if wall-mounted): Screws, wall anchors, or picture hangers.
Step-by-Step Guide: Crafting Your Pallet Lamp
Once your materials are ready, it’s time to bring your vision to life. This general guide can be adapted to various lamp designs:
1. Design and Planning
Before making any cuts, sketch out your lamp design. Decide on its dimensions, whether it will be a table lamp, floor lamp, or wall sconce, and how the wood pieces will fit together. Consider how the wiring will run through or along the structure.
2. Cutting and Shaping the Wood
Measure and mark your pallet planks according to your design. Use your saw to make precise cuts. For a box-style lamp, you’ll need pieces for the base and sides. For a simpler design, you might just need a solid block or a few planks joined together. Ensure all edges are clean and straight.
3. Assembling the Wooden Structure
Begin assembling the wooden components. Apply wood glue to all joining surfaces before securing them with screws or nails. Use clamps to hold pieces together while the glue dries. For a clean finish, consider using pocket hole joinery. If creating a hollow structure, ensure there’s enough space inside for wiring and the lamp socket.
4. Drilling for Wiring
Once the main structure is stable, drill a hole for the lamp cord to exit the base or back of the lamp. You’ll also need a larger hole at the top of the lamp’s structure where the lamp socket will be secured. Ensure these holes are smoothly drilled to avoid fraying the wire.
5. Installing the Electrical Components
This step involves electrical wiring. If you are uncomfortable or unsure, consult a qualified electrician or seek a detailed video tutorial. Safety is paramount.
- Feed the lamp cord through the exit hole you drilled in the base/back of the lamp.
- Thread the cord up through the lamp structure to the top where the socket will sit.
- Separate the two wires at the end of the cord and strip about half an inch of insulation from each.
- Attach these wires to the terminals on your lamp socket (typically one to the smooth side and one to the ribbed side of the wire, corresponding to the neutral and hot terminals on the socket). Secure the socket firmly within the pre-drilled hole in your lamp structure.
- Ensure all connections are tight and secure.
6. Finishing Touches
Thoroughly sand all surfaces of your lamp, starting with coarser grit sandpaper and progressing to finer grits. This will create a smooth, splinter-free finish. After sanding, apply your chosen finish: wood stain for enhancing the natural grain, paint for a pop of color, or a clear varnish/polyurethane for protection and a subtle sheen. Allow ample drying time between coats.
7. Final Assembly and Testing
Screw in your chosen light bulb. Plug in your lamp to a wall socket and test it. Ensure it lights up correctly and there are no flickering issues. If all checks out, your unique DIY pallet lamp is ready to illuminate your space!
Creative Variations and Design Ideas
The beauty of working with pallet wood is its adaptability. Here are a few ideas to inspire your next creation:
- Table Lamps: Simple cube designs, layered planks, or a single sturdy block as a base.
- Floor Lamps: Taller, more substantial designs, often incorporating multiple sections or a robust stand.
- Wall Sconces: Flat-backed designs that mount directly to the wall, often with exposed Edison bulbs for an industrial look.
- Pendant Lights: While more complex (requiring proper ceiling mounting and wiring), small wooden cages or suspended blocks can create stunning pendant fixtures.
- Integrated Shelves: Design your lamp to include a small shelf for a plant, book, or other decorative items.
- Mixed Materials: Combine pallet wood with metal pipes, glass jars, or even concrete bases for a more eclectic look.
- Lighting Elements: Experiment with different bulb types – vintage Edison bulbs, modern LEDs, or even colored bulbs for mood lighting.
Safety First: Important Considerations
While DIY projects are rewarding, safety should always be your top priority:
- Pallet Sourcing: Reiterate the importance of using only ‘HT’ marked pallets to avoid chemical exposure.
- Tool Safety: Always wear appropriate personal protective equipment (PPE) like safety glasses, gloves, and a dust mask when cutting, drilling, and sanding. Understand how to operate your tools safely.
- Electrical Wiring: Incorrect wiring can be a fire hazard or cause electric shock. If you are not confident in your electrical skills, consider purchasing pre-wired lamp kits, or have a qualified electrician inspect your work. Ensure all connections are secure and properly insulated. Use appropriate wire gauges for your lamp’s power requirements.
- Bulb Wattage: Do not exceed the maximum wattage specified for your lamp socket to prevent overheating and potential fire risks. LED bulbs are a great choice as they produce less heat.
- Ventilation: If using stains or paints, ensure adequate ventilation to avoid inhaling fumes.
Where to Place Your Pallet Lamp
A well-crafted pallet lamp can find a perfect home in almost any room, adding a touch of rustic elegance:
- Bedside Tables: Create a cozy, symmetrical look with a pair of matching lamps.
- Living Room Accents: Place on side tables, console tables, or even as a unique floor lamp beside a sofa.
- Entryways: A single, striking lamp can warmly welcome guests into your home.
- Home Offices: Adds character and functional light to your workspace.
- Dining Areas: A series of smaller, consistent pallet lamps can provide ambient lighting.
- Outdoor Spaces (with caution): If properly sealed and protected from the elements, some designs could work on covered patios or porches, but always use outdoor-rated electrical components for such applications.
Conclusion: Light Up Your Life with Upcycled Beauty
Embarking on a DIY pallet wood lamp project is more than just creating a light fixture; it’s an opportunity to express your creativity, embrace sustainability, and add truly unique character to your home. By following this comprehensive guide, from responsibly sourcing your materials to carefully assembling your electrical components, you can craft a stunning, rustic lamp that not only illuminates your space but also sparks conversations and brings immense satisfaction. Say goodbye to generic lighting and hello to a personalized, handmade masterpiece. So, gather your tools, unleash your inner craftsman, and start building your very own pallet wood lamp this weekend. The warm, inviting glow of your handcrafted creation awaits!