
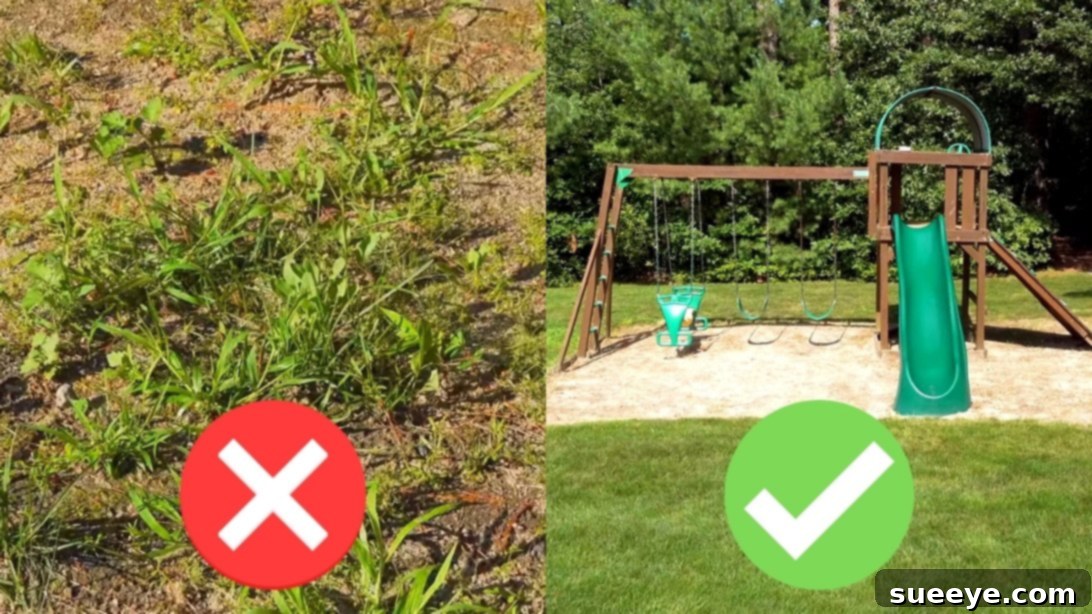
Unlock the Secret to a Weed-Free Lawn: Your Ultimate Guide to Homemade Organic Weed Control
Are unsightly weeds taking over your beautiful lawn, garden, or pathways? If you’re searching for an effective, eco-friendly, and budget-friendly solution to combat these persistent invaders, you’ve come to the right place. Many commercial herbicides contain harsh chemicals that can be harmful to your family, pets, and the environment. Fortunately, you can achieve remarkable results with a simple, natural formula easily made at home.
In this comprehensive guide, inspired by the practical insights from Silver Cymbal, we’ll walk you through the process of creating a potent homemade organic weed control solution that truly works. Forget those ineffective DIY remedies you might have encountered online; this method has proven its efficacy time and again. We’ll delve into the benefits of using this natural formula, discuss essential safety precautions, and provide expert tips to ensure your success in achieving a naturally weed-free outdoor space.
Embracing organic weed control not only protects your loved ones and local ecosystems but also empowers you to take control of your gardening practices with confidence. Say goodbye to harmful chemicals and hello to a greener, healthier approach to weed management. Read on to discover how simple it is to craft your own powerful organic weed killer.
Why Choose Homemade Organic Weed Killer? The Natural Advantage
In a world increasingly concerned with environmental sustainability and personal well-being, the appeal of homemade organic solutions for common household and gardening problems is growing. When it comes to weed control, opting for a DIY organic formula offers numerous advantages over conventional chemical herbicides:
- Environmental Safety: Commercial weed killers often contain synthetic chemicals that can leach into the soil, contaminate groundwater, and harm beneficial insects, local wildlife, and even aquatic life. Our homemade solution primarily uses biodegradable ingredients, significantly reducing your ecological footprint.
- Healthier Home Environment: You eliminate the risk of exposing your children and pets to toxic residues that can linger on your lawn or garden surfaces. This provides greater peace of mind, knowing your outdoor spaces are safe for everyone to enjoy.
- Cost-Effective: The ingredients for this organic weed killer are readily available and significantly cheaper than purchasing specialized chemical herbicides from garden centers. You likely already have some of these components in your pantry!
- Empowerment and Control: Making your own solution gives you full control over what goes into your weed killer, allowing you to tailor its strength to your specific needs. It’s a satisfying way to take an active role in maintaining your property.
- Reduced Chemical Exposure: For gardeners and homeowners who frequently manage their outdoor spaces, minimizing contact with harsh chemicals is a major health benefit. This natural approach means less inhalation of fumes and less skin exposure to potentially irritating substances.
By choosing a homemade organic weed killer, you’re not just solving a problem; you’re making a conscious decision towards a healthier, more sustainable lifestyle for your home and the planet.
The Science Behind the Solution: How This Natural Formula Works
Understanding why this simple combination of ingredients is so effective will help you appreciate its power and use it more strategically. Each component plays a vital role in eradicating unwanted plant growth:
Vinegar: The Acidic Powerhouse
The primary active ingredient in this formula is vinegar, specifically varieties with a higher acetic acid concentration. While standard household vinegar (typically 5% acetic acid) can have some effect on very young or tender weeds, a 30% acidity level is highly recommended for significantly more potent and rapid results, especially on stubborn or mature weeds. Acetic acid works by rapidly drawing moisture out of plant cells, causing them to dehydrate and effectively “burn” the foliage. This rapid desiccation leads to visible wilting and death of the plant’s above-ground parts within hours.
Salt: A Natural Desiccant and Growth Inhibitor
Salt acts as a powerful desiccant, meaning it aggressively absorbs water. When applied to weeds, it exacerbates the dehydration process initiated by the vinegar, further disrupting the plant’s cellular structure and vital functions. Additionally, salt can create an inhospitable environment for plant growth by increasing soil salinity. While beneficial for immediate weed kill, it’s crucial to use salt cautiously, especially in areas where you plan to plant desirable vegetation later, as excessive salt buildup can hinder future plant growth.
Dish Soap: The Essential Spreader and Penetrator
Dishwashing soap, often referred to as a surfactant in horticultural applications, plays a crucial supporting role. Weeds, like many plants, have a waxy cuticle on their leaves that repels water, making it difficult for liquids to adhere and penetrate. Dish soap breaks down this waxy barrier, reducing the surface tension of the mixture. This allows the vinegar and salt solution to spread evenly over the weed’s leaves, stick more effectively, and penetrate the plant tissue more rapidly, ensuring maximum contact and absorption of the active ingredients.
Together, these three common household items create a synergistic effect, offering a powerful, natural alternative to synthetic herbicides. The combination ensures that the weeds are not just superficially treated but effectively attacked at a cellular level, leading to their demise.
Gather Your Arsenal: Materials You’ll Need
Before you begin mixing your powerful homemade weed killer, ensure you have all the necessary materials on hand. The beauty of this solution lies in its accessibility – most items are either in your home already or easily purchased at local stores.
- 2 quarts of Vinegar with a 30% Acidity Level: This high-strength horticultural vinegar is key to the formula’s effectiveness. Unlike common kitchen vinegar (5%), the 30% concentration provides the necessary power to tackle even tough, established weeds quickly. You can typically find it at garden supply stores, hardware stores, or online.
- 3 tablespoons of Table Salt or Any Kind of Salt: Regular table salt, rock salt, Epsom salt (though Epsom salt is technically magnesium sulfate and less potent for weed killing than sodium chloride, it can contribute to dehydration), or even pickling salt will work. The goal is to use a salt that will readily dissolve and contribute to the dehydrating effect on the weeds.
- 1 tablespoon of Regular Dishwashing Soap: Opt for a basic liquid dish soap, not an antibacterial or ultra-concentrated degreasing variety, as these can sometimes contain additional chemicals that are not necessary or beneficial for this application. The soap acts as a surfactant, helping the mixture stick to the weeds’ leaves.
- Container: You’ll need a sturdy, non-reactive container for mixing your solution. A large plastic bucket or a glass jar is ideal, as vinegar is acidic and could react with certain metals. Ensure it has a lid for safe storage if you plan to make extra.
- Water (Optional): While highly effective at full strength, you may choose to dilute the mixture with water if you are dealing with smaller, more tender weeds, or if you wish to cover a larger area with less potent vinegar. However, for maximum impact on stubborn weeds, full strength is recommended.
- Pump Spray or Spray Bottle: A garden pump sprayer is excellent for covering larger areas efficiently, while a standard spray bottle is perfect for spot treatments or smaller infestations. Ensure your sprayer is clean and in good working order.
- Gloves: Essential for protecting your hands from the high-acidity vinegar and to prevent skin irritation. Always prioritize safety when handling chemicals, even natural ones.
Having these materials ready will make the mixing process smooth and ensure you’re prepared for safe and effective application.
Step-by-Step Guide to Crafting Your Organic Weed Killer
Creating this powerful homemade weed control solution is straightforward. Follow these steps carefully to ensure both effectiveness and safety.
Step 1: Mixing the Potent Concoction
Safety is paramount when working with high-acidity vinegar. Before you begin, always wear your protective gloves. It’s also advisable to work in a well-ventilated area to avoid inhaling strong vinegar fumes.
Carefully pour the 2 quarts of 30% acidity vinegar into your chosen mixing container. This high concentration is what gives your weed killer its formidable strength against even the most resilient weeds. If you’re dealing with exceptionally tough, established weeds, using the vinegar undiluted is highly recommended. However, if your weed problem is minor, consisting of young or delicate weeds, or if you simply wish to extend your mixture to cover a larger area, you can cautiously add some water to dilute it. Remember, dilution will lessen its immediate potency.
Next, add 3 tablespoons of salt to the vinegar solution. Stir the mixture vigorously to ensure that the salt completely dissolves. Undissolved salt will not be as effective and can clog your spray nozzle. Continue stirring until no granules are visible at the bottom of the container.
Finally, incorporate 1 tablespoon of regular dishwashing soap into the mixture. Stir gently to combine the soap without creating excessive suds. The soap’s role is critical; it helps the solution adhere to the waxy leaves of the weeds, allowing the vinegar and salt to penetrate more effectively and deliver their potent effects. Once all ingredients are thoroughly mixed, your organic weed killer is ready for transfer and application.
Step 2: Precision Application for Maximum Impact
Once your solution is thoroughly mixed, carefully pour it into your pump spray or desired spray bottle. Securely close the lid. Before each use, give the mixture another good shake to ensure all ingredients are well-distributed and ready for application.
Now comes the most critical part: application. It is vital to remember that this homemade formula is a non-selective weed killer. This means it will kill any plant it comes into contact with, including your prized garden plants, delicate flowers, and even your lawn grass. Exercise extreme caution and precision when spraying. For best results, use a targeted approach, aiming directly at the weeds you wish to eliminate. Avoid spraying on windy days, as the mist can easily drift onto desirable vegetation.
This solution is particularly effective in areas where you want absolutely no plant growth, such as cracks in driveways and sidewalks, gravel paths, patios, fences, or along property lines. It’s also a great choice for playgrounds where you want a natural solution to keep weeds at bay without commercial chemicals.
For optimal results, ensure the weeds are dry before application. The best time to spray is on a warm, sunny day. The sun’s heat accelerates the dehydration process, maximizing the effectiveness of the vinegar and salt. Within as little as 30 minutes, you can often start to observe the initial effects of the formula, with weeds beginning to wilt and change color. For the full, definitive results, allow at least 24 hours. You’ll be amazed at how quickly this natural solution transforms your weed-infested areas.
Understanding the Results and Long-Term Weed Management
While this homemade organic weed killer is remarkably effective at eliminating unwanted plant growth, it’s important to understand how it works and what to expect, especially concerning perennial weeds. This formula primarily acts as a “burn-down” herbicide, meaning it quickly desiccates and kills the visible, above-ground foliage of the weeds.
For annual weeds with shallow root systems, a single application can often be sufficient to kill the entire plant, roots included. However, for stubborn perennial weeds, which possess deep and extensive root systems capable of storing nutrients and regenerating growth, the initial application may only kill the top growth. You might observe the foliage shriveling and turning brown, giving the appearance of complete eradication.
It’s crucial to understand that some of the roots of these more resilient weeds might not die immediately from a single application. These roots can still harbor energy reserves, leading to potential regrowth over time. The good news is that repeated applications will significantly weaken these perennial weeds. Each application depletes the root’s energy stores, making it harder for the plant to recover and regrow. Consistent treatment will eventually exhaust the weed’s ability to sprout new foliage, bringing it under control and often leading to its complete demise.
Therefore, while you’ll see dramatic results within 24 hours, be prepared for follow-up applications, especially on persistent weeds like dandelions, thistles, or bindweed. This consistent approach is key to keeping them under control and preventing them from regrowing, ultimately leading to a more manageable and weed-free landscape.
Advanced Tips and Important Considerations for Success
To maximize the effectiveness of your homemade organic weed killer and ensure safe application, keep these advanced tips and considerations in mind:
Optimal Application Timing
As mentioned, applying your weed killer on a warm, dry, and sunny day is ideal. The heat from the sun intensifies the dehydrating action of the vinegar and salt. Aim to apply it in the morning, allowing the mixture maximum daylight exposure before cooler evening temperatures or potential dew sets in. Avoid application if rain is expected within 24-48 hours, as precipitation will wash away the solution before it has a chance to fully work. Also, steer clear of windy days to prevent accidental drift onto desirable plants or areas where you don’t want bare earth.
Targeting Specific Weeds
This formula is highly effective against most broadleaf weeds and young grassy weeds. However, very mature, thick-stemmed weeds or those with extensive rhizomatous root systems might require more frequent applications or a higher concentration for initial knockdown. Don’t be discouraged if a particularly stubborn weed shows signs of regrowth; simply reapply as needed.
Soil Health and Salt Accumulation
While effective, the salt component of this mixture can accumulate in the soil over time. In small, targeted applications on driveways, pathways, or cracks, this is generally not an issue. However, if you’re frequently treating larger areas within garden beds or near desired planting spots, excessive salt can raise soil salinity, making it difficult for other plants to thrive. For garden areas, consider using this formula sparingly or flushing the area with water after the weeds have died to help dilute residual salt. For long-term garden bed weed prevention, mulching is often a better choice.
Safety First: Protecting Yourself and Others
Always wear gloves and eye protection when mixing and applying the solution. Although natural, the 30% acidity vinegar can cause skin irritation or eye damage. If contact occurs, rinse immediately with plenty of water. Keep pets and children away from treated areas until the solution has dried, usually within a few hours, to prevent accidental ingestion or contact. Store any leftover mixture in a clearly labeled container, out of reach of children and pets, in a cool, dry place.
Beyond the Spray: Integrated Weed Management
While your homemade weed killer is a powerful tool, it’s most effective when integrated into a broader weed management strategy. Consider combining its use with other natural methods such as:
- Mulching: Applying a layer of organic mulch (wood chips, straw, shredded leaves) to garden beds smothers weed seeds and prevents new growth by blocking sunlight.
- Hand-Pulling: For scattered weeds or those near desirable plants, good old-fashioned hand-pulling is still a highly effective and precise method.
- Proper Lawn Care: Maintaining a healthy, dense lawn through proper mowing height, watering, and fertilization makes it more difficult for weeds to establish themselves.
By adopting a multi-faceted approach, you can significantly reduce your weed problems and maintain a beautiful, thriving outdoor space with minimal effort and without harmful chemicals.
Your Path to a Beautiful, Weed-Free Outdoor Space
Congratulations! You are now equipped with the knowledge and the recipe to create an incredibly effective homemade organic weed killer. This natural formula offers a powerful, environmentally responsible, and cost-effective alternative to conventional chemical herbicides. By following these simple instructions and incorporating the advanced tips, you can take significant strides toward achieving and maintaining a beautifully manicured, weed-free lawn and garden.
Say goodbye to synthetic chemicals and welcome a greener, safer approach to gardening. The satisfaction of knowing you’re using a solution that protects your family, pets, and the planet, while still delivering impressive results, is truly rewarding. Empower yourself with this DIY method and transform your outdoor spaces into thriving, healthy environments.
Don’t let weeds dictate the beauty of your property any longer. Take action today, mix up your batch of homemade organic weed control, and reclaim your outdoor oasis naturally!