
Few cleaning tools have earned the “magic” moniker quite like the Magic Eraser. This seemingly simple white block of melamine foam has revolutionized household cleaning, making quick work of grime and stubborn marks that once seemed impossible to remove. Its versatility is truly astounding, capable of transforming everything from stained kitchen counters to scuffed bathroom walls, and even giving your personal items a new lease on life. If you’re looking to harness the full power of this everyday marvel and discover the most effective ways to use it, you’ve come to the right place. Dive into our comprehensive guide below for detailed instructions and a plethora of clever cleaning hacks. For a visual demonstration, make sure to watch the informative video tutorial on YouTube by Andrea Jean Cleaning.
What Makes Magic Erasers So Magical?
Before we delve into the myriad uses, it’s helpful to understand what makes a Magic Eraser so effective. These unassuming white blocks are made from melamine foam, a material with a unique, open-cell structure similar to extremely fine sandpaper. When dampened, the microscopic fibers of the foam become incredibly hard, acting as a gentle abrasive. This micro-abrasive quality allows the eraser to lift and scrub away dirt, grime, and stains from surfaces without the need for harsh chemicals. It essentially sands away the top layer of dirt, revealing the clean surface underneath. This unique mechanism is why it excels where traditional sponges and cleaners often fail, making it a staple in any cleaning arsenal.
Essential Tips for Using Your Magic Eraser Effectively
While Magic Erasers are incredibly powerful, a few best practices will ensure optimal results and protect your surfaces. Always begin by slightly dampening the eraser with water; a wet eraser is far more effective than a dry one, as water activates its abrasive properties. Remember, you don’t need to drench it – just enough to make it pliable and active. Always test the Magic Eraser on an inconspicuous area first, especially on new or delicate surfaces. This quick test helps ensure that it won’t damage the finish or remove paint. Apply gentle, consistent pressure; scrubbing too hard can damage surfaces or cause the eraser to disintegrate quickly. The melamine foam works best with light, even strokes. Finally, remember that Magic Erasers are disposable. They will gradually wear down and crumble as you use them. Discard them when they become too small or lose their effectiveness, and always keep a fresh supply handy for your next cleaning challenge.
Top Magic Eraser Cleaning Hacks: Transform Your Home
Let’s explore the countless ways you can put your Magic Eraser to work, tackling some of the toughest cleaning challenges around your home.
1. Hair Styling Tools: From Grime to Shine
Hair styling tools like curling irons and hair straighteners often accumulate a sticky residue from hairspray, heat protectants, and other styling products. This buildup not only looks unsightly but can also affect the performance of your tools. A damp Magic Eraser effortlessly cuts through this tough, baked-on grime on ceramic or metal plates, leaving them sparkling clean. Simply ensure the tool is completely cool and unplugged before gently wiping down the heated surfaces. You’ll be amazed at how quickly the caked-on gunk disappears, restoring your tools to their original pristine condition.
2. Banishing Bathroom Buildup: Shower Curtains and Doors
The bathroom is a prime spot for the Magic Eraser to shine. Shower curtains and glass shower doors are notorious for collecting soap scum, mildew, hard water spots, and general grime. Instead of battling these tough stains with harsh chemicals, dampen a Magic Eraser and gently rub the affected areas. Watch as soap scum dissolves and mildew stains lighten significantly. For plastic shower curtains, it can lift embedded dirt and even help remove stubborn rings. For glass doors, it’s excellent for tackling water spots and film, revealing streak-free clarity.
3. Keeping Your Tech Tidy: Phone Cases
Our phone cases are a breeding ground for germs and can quickly become discolored and dirty from daily handling. Whether it’s a silicone case that has yellowed over time or a hard plastic case with embedded dirt, a Magic Eraser can bring it back to life. Gently wipe down the case – ensuring your phone is removed first – to lift away oils, dirt, and discoloration. It’s particularly effective on light-colored cases that tend to show grime more readily, leaving them looking fresh and clean.
4. Eradicating Permanent Marks: A Surprising Solution
Perhaps one of the most surprising uses for a Magic Eraser is its ability to tackle permanent marker stains. While it might not work on every surface or every type of marker, it’s definitely worth a try on non-porous surfaces like plastic containers, countertops, or even some appliances where a permanent mark has accidentally appeared. The micro-abrasive action can slowly but surely lift the ink, often saving you from having to replace the marked item. Always test first, especially on delicate finishes.
5. Microwave Makeover: Tackling Yellowing Rubber and Grime
The rubber seals around your microwave door can yellow and accumulate stubborn grease and food splatter over time, making your appliance look old and dirty. Similarly, the corners and crevices inside the microwave often harbor stuck-on grime that’s hard to reach with a regular sponge. A Magic Eraser, when slightly damp, can meticulously clean these areas. It’s excellent for whitening the yellowish rubber seals and for scrubbing away dried-on food bits from the microwave’s interior, revitalizing its appearance.
6. The Instant Whiteboard Fix: A Classroom Hero
Ever lost your whiteboard eraser or found that dry-erase markers have stained your board even after erasing? A Magic Eraser comes to the rescue! It acts as an incredibly effective, temporary whiteboard eraser, capable of removing dry-erase ink with ease. What’s more, it can often remove those ghosting marks and stubborn stains that a standard whiteboard eraser leaves behind, restoring your whiteboard to a pristine, clean surface for your next brainstorming session or lesson.
7. Revitalizing Footwear: White Shoe Rubber
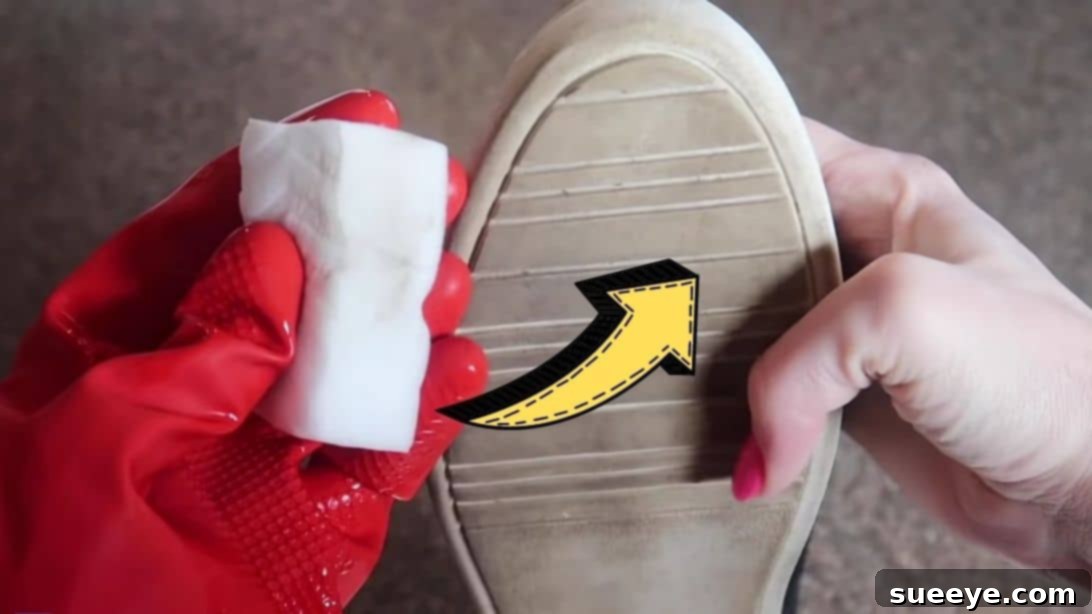
White rubber soles on sneakers and trainers are notorious for picking up scuffs, dirt, and grime, quickly making your shoes look worn out. Instead of scrubbing endlessly, grab a damp Magic Eraser. It works wonders on the rubber components of your shoes, erasing scuff marks, dirt, and discoloration with remarkable efficiency. Gently rub the eraser over the dirty areas, and watch as your shoe soles transform back to their original bright white, giving your favorite footwear a fresh new look.
8. Wall Wonders: Erasing Childhood Art and Scuff Marks
For parents, a Magic Eraser can be an absolute lifesaver. Random drawings or marks on walls, especially crayon or pencil, are no match for its gentle abrasive power. It’s also incredibly effective at removing scuff marks from shoes or furniture against baseboards and walls. Always dampen the eraser first and apply light pressure in a small, inconspicuous area to test for paint removal, as some delicate paints can be affected. Once tested, you can confidently tackle those unsightly marks, restoring your walls to their original cleanliness.
9. Sparkling Grout Lines: A Bathroom and Kitchen Essential
Dirty grout lines can make even the cleanest kitchen or bathroom look dingy. Regular cleaning often struggles to penetrate the tiny pores where dirt and grime accumulate. The Magic Eraser’s fine abrasive texture is perfect for digging into these narrow crevices. Dampen the eraser and gently scrub along the grout lines. You’ll see dirt and discoloration lift away, revealing brighter, cleaner grout without the need for harsh chemicals or intense scrubbing with a brush. This hack is particularly satisfying for achieving a truly deep clean.
10. Outdoor Furniture Refresh: Restoring Plastic Patio Chairs
Outdoor plastic furniture, especially chairs and tables, can quickly accumulate stubborn dirt, mildew, and weather stains from exposure to the elements. These stains can be incredibly tough to remove with just soap and water. A Magic Eraser is an excellent tool for restoring these items. Simply dampen the eraser and gently rub over the stained areas. The abrasive foam will lift away the embedded dirt and discoloration, making your patio furniture look nearly new again, ready for your next outdoor gathering.
11. Beyond the Basics: More Clever Uses
- Sticker Residue: Struggling to remove sticky residue left behind by price tags or labels? A Magic Eraser can often gently rub it away.
- Oven Door Glass: The inside of your oven door glass can get covered in baked-on grease and food splatter. A damp Magic Eraser can work wonders, cutting through the grime.
- Light Switches and Outlet Covers: These frequently touched areas often accumulate grime and discoloration. A quick wipe with a Magic Eraser restores their crisp white appearance.
- Coffee and Tea Stains on Ceramic Mugs: For those stubborn rings left by coffee or tea in ceramic mugs, a Magic Eraser can scrub them away without scratching the surface.
- Scuff Marks on Floors and Baseboards: Much like walls, floors and baseboards can gather unsightly scuff marks from shoes or furniture. The Magic Eraser makes short work of these.
Important Precautions: When NOT to Use a Magic Eraser
While the Magic Eraser is incredibly versatile, it’s crucial to remember its abrasive nature. There are certain surfaces where it should be avoided to prevent damage:
- Glossy or Painted Surfaces: On some glossy paints, polished wood, or delicate finishes, the abrasive action can dull the shine or even remove paint. Always test in an inconspicuous area first.
- Stainless Steel Appliances with Special Coatings: Many modern stainless steel appliances have protective coatings. Using a Magic Eraser can scratch or remove these, leaving permanent marks.
- Delicate Wood Surfaces: Untreated or unsealed wood, as well as highly polished wooden furniture, can be easily damaged or dulled by the abrasive foam.
- Car Paint: Never use a Magic Eraser on car paint, as it will scratch the clear coat and cause permanent damage.
- Screens: Avoid using it on TV, computer, or phone screens, as it can scratch the delicate surface.
- Skin: The melamine foam can irritate or abrade skin, so avoid using it directly on your body.
Always exercise caution and, when in doubt, perform a spot test to ensure compatibility with your surface.
Get Started with Your Magic Eraser
Materials:
- Magic Eraser
- Water (for dampening)
Directions:
Step 1: Dampen the Eraser
Hold the Magic Eraser under running water until it’s slightly damp, but not dripping wet. Squeeze out any excess water thoroughly. A damp eraser is much more effective than a dry one and will prevent premature disintegration.
Step 2: Test an Inconspicuous Area
Before tackling the main stain, gently rub the damp eraser on a small, hidden part of the surface you intend to clean. This crucial step helps ensure that the eraser won’t damage, scratch, or discolor the material. Wait a few minutes to check for any adverse reactions.
Step 3: Gently Rub the Stain
Once you’ve confirmed it’s safe, gently rub the damp Magic Eraser over the stain or grime using light, circular motions. Avoid excessive pressure, as the micro-abrasive nature of the foam does the work with minimal effort. You’ll notice the eraser slowly crumbling away as it lifts the dirt.
Step 4: Wipe Away Residue and Discard
After the stain is removed, wipe the area with a clean, damp cloth to remove any leftover foam residue. When the Magic Eraser becomes too small, worn, or loses its cleaning effectiveness, simply discard it and grab a fresh one for your next cleaning task.
Watch and Learn: Expert Cleaning Tips
To see these ingenious cleaning hacks in action and gain further insights into optimizing your Magic Eraser use, we highly recommend checking out the video tutorial on YouTube by Andrea Jean Cleaning. Her demonstrations provide valuable visual context that can help you master these techniques.
*These amazing images are all credited to Andrea Jean Cleaning via YouTube. Check her other content and follow for more!
The Magic is Real: Conclusion
From tackling tough hairspray residue on styling tools to erasing permanent marker mishaps and breathing new life into yellowed shoe soles, the Magic Eraser truly lives up to its name. Its unique melamine foam structure offers an unparalleled cleaning solution for a vast array of household challenges, often outperforming traditional cleaners and sponges. By understanding its mechanism and adhering to simple usage guidelines and precautions, you can unlock its full potential to keep your home pristine and tackle seemingly impossible messes with surprising ease. Incorporate these incredible hacks into your cleaning routine, and prepare to be amazed by the transformative power of this humble yet mighty cleaning tool.