
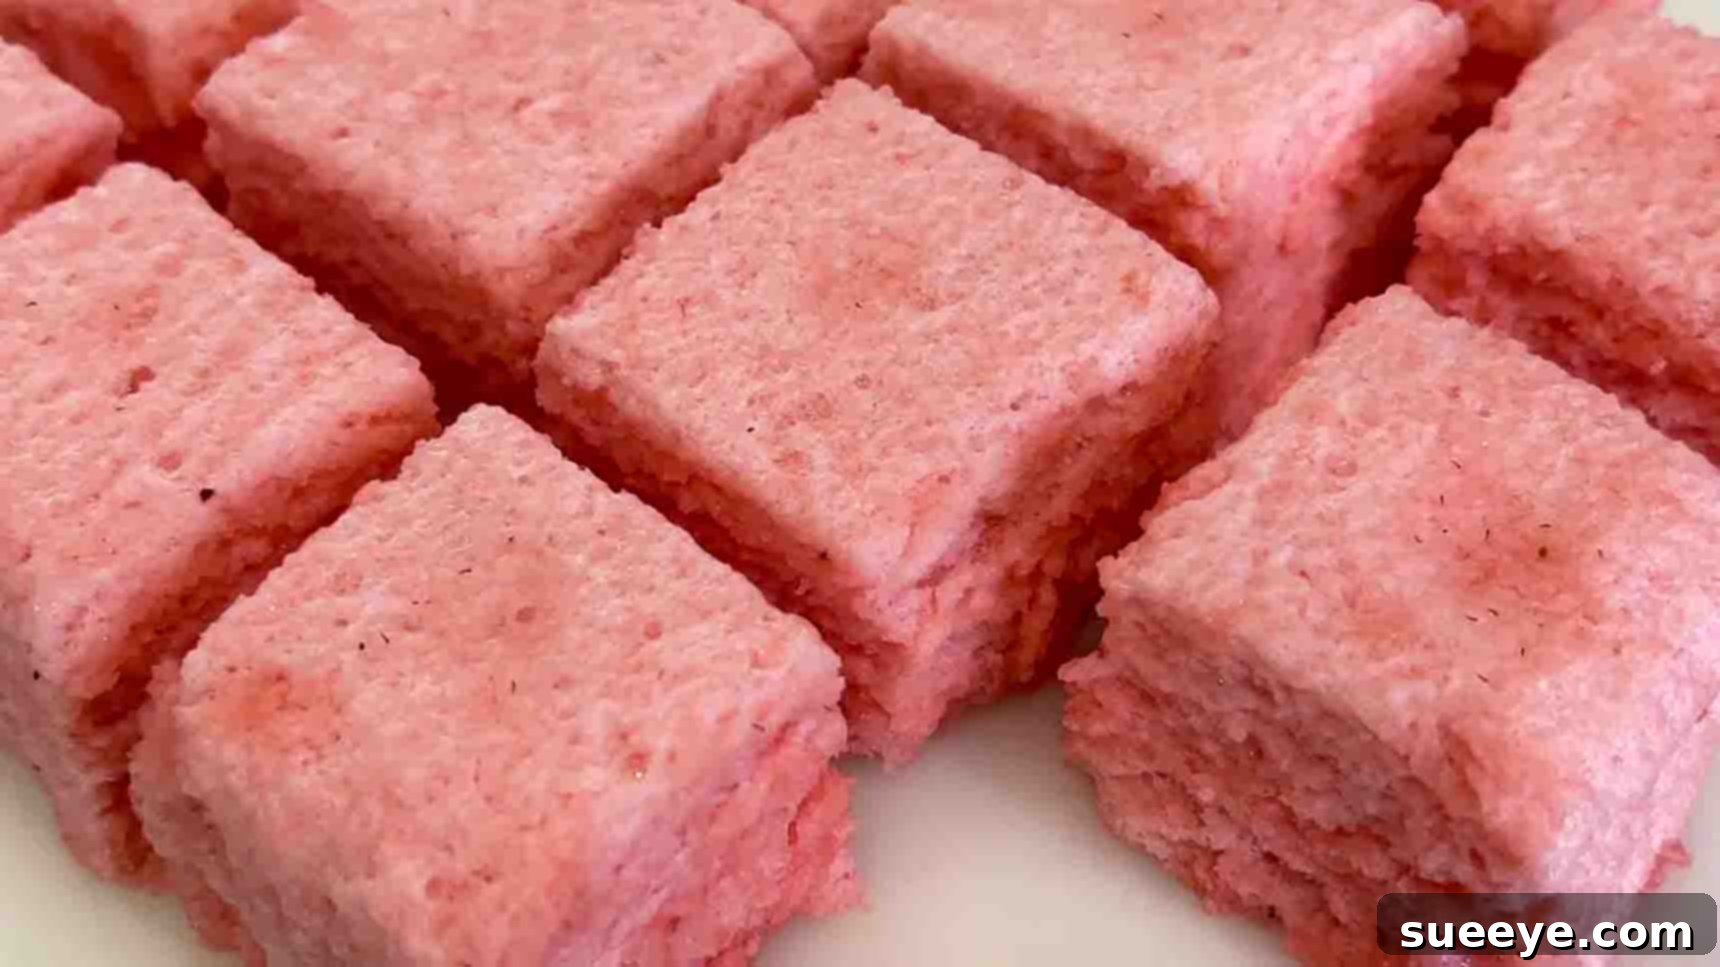
Are you searching for a dessert that’s effortlessly simple, incredibly delicious, and caters to those who prefer less sweetness? Look no further! This delightful 2-ingredient Strawberry Clouds recipe, originally inspired by the culinary magic of Real Cooking In My Kitchen on YouTube, is the answer to your dessert cravings. It’s a remarkable creation that requires minimal effort, only two readily available ingredients, and promises a taste and texture experience that will truly blow your mind. Imagine a dessert so light and airy, it feels like biting into a sweet, strawberry-flavored cloud – that’s exactly what awaits you. Gluten-free by nature and surprisingly satisfying, this recipe is perfect for impressing your family and friends without spending hours in the kitchen. Get ready to transform humble ingredients into a show-stopping treat today!
Why These 2-Ingredient Strawberry Clouds Will Become Your Go-To Dessert
In a world full of complex recipes, sometimes simplicity truly shines. This easy 2-ingredient dessert stands out for several compelling reasons. Firstly, its sheer ease of preparation makes it accessible to even the most novice home cooks. You don’t need fancy equipment or a long list of obscure ingredients. Secondly, it’s a fantastic option for those following a gluten-free diet, as both primary ingredients are naturally gluten-free. Forget the hassle of special flours or binders; this dessert is inherently safe and delicious for everyone. Furthermore, unlike many traditional desserts that can be overwhelmingly sweet, these Strawberry Clouds offer a balanced flavor profile, making them ideal for individuals who appreciate a lighter, more refreshing finish to a meal. The texture is truly unique – incredibly fluffy, airy, and melts in your mouth, providing a delightful contrast to heavier options. It’s quick to prepare, but does require some chilling time, making it a perfect make-ahead option for parties, family gatherings, or just a treat to enjoy throughout the week. Once you try this recipe, you’ll understand why it’s gaining popularity as a simple yet sophisticated dessert choice.
The Magic Behind Strawberry Clouds: Just Two Ingredients
The beauty of this recipe lies in its minimalist approach. With just two core ingredients, you can conjure a dessert that looks and tastes far more elaborate than it is. The secret to achieving that ethereal, cloud-like consistency and vibrant flavor rests on the careful selection and combination of these simple items.
- 500 ml Strawberry-Flavored Applesauce: This is the heart of your strawberry clouds, providing both the delightful fruit flavor and natural sweetness. When selecting your applesauce, look for a good quality, naturally flavored strawberry variety. You can opt for unsweetened versions if you prefer even less sweetness, or a lightly sweetened one for a more pronounced dessert-like taste. The natural pectin in the applesauce also contributes to the final texture, working in harmony with the gelatin. Ensure it’s smooth and consistent, without large chunks, for the best cloud-like result.
- 5 tsp Unflavored Gelatin Powder: Gelatin is the structural hero of this dessert. As an unflavored powder, it allows the natural taste of the strawberry applesauce to shine through without any interference. Gelatin is responsible for setting the mixture into a solid yet wobbly form, and when whipped vigorously, it transforms into the incredibly light, airy, and fluffy texture that defines “strawberry clouds.” It’s crucial to use unflavored gelatin to maintain the purity of the strawberry essence.
That’s it! These two humble ingredients, when combined with the right technique, unlock a world of light, fruity, and irresistibly fluffy dessert possibilities. Gather your ingredients, and let’s embark on this simple culinary adventure.
Step-by-Step Guide: Crafting Your Fluffy Strawberry Clouds
Creating these delicate Strawberry Clouds is an engaging process that combines gentle heating with vigorous whipping to achieve their signature airy texture. Follow these detailed instructions carefully to ensure a perfect, fluffy outcome every time.
Step 1: Preparing and Whipping the Mixture
The first stage involves blooming the gelatin, gently dissolving it, and then whipping the mixture into an incredible volume, transforming it from a liquid to a pale, fluffy mass.
- Combine Ingredients: Begin by pouring 500 ml of your chosen strawberry-flavored applesauce into a medium-sized, heat-proof bowl. Ensure the bowl is clean and dry. Over the surface of the applesauce, evenly sprinkle 5 teaspoons of unflavored gelatin powder. Sprinkling rather than dumping helps prevent clumps and allows the gelatin to hydrate more uniformly.
- Whisk and Bloom: Immediately after sprinkling, whisk the mixture thoroughly until the gelatin powder is well combined with the applesauce. This initial whisking helps distribute the gelatin. Once combined, let the mixture sit undisturbed for approximately ten minutes. This critical period, known as “blooming,” allows the gelatin granules to absorb moisture and swell, preparing them for even dissolution later. You’ll notice the mixture becoming thicker during this time.
- Prepare a Double Boiler: While your gelatin is blooming, set up a double boiler. Place a pot of water on your stove and bring it to a gentle simmer over medium heat. Once simmering, reduce the heat to medium-low to maintain a steady, gentle heat. It’s essential that the water does not boil vigorously, as excessive heat can degrade the gelatin’s setting power.
- Gently Dissolve Gelatin: Carefully place your bowl of applesauce and bloomed gelatin over the pot of simmering water. Crucially, ensure that the bottom of the applesauce bowl does not touch the hot water. The steam from the simmering water is what will gently heat the mixture. Stir the mixture constantly as it heats. The goal is to slowly and completely dissolve the gelatin without boiling or overheating the applesauce. You’ll see the mixture become smooth and homogeneous, with no visible gelatin granules. This process typically takes about 5-7 minutes. Once all the gelatin has dissolved, remove the bowl from the heat.
- Cool and Whip to Perfection: Immediately transfer the warm mixture into a large, clean mixing bowl. Using an electric mixer (handheld or stand mixer with a whisk attachment), begin to beat the mixture on high speed. Initially, this vigorous beating will help to slightly cool the mixture. Continue beating on high for a full 20 minutes. This is where the magic happens! As you whip, you’ll witness a remarkable transformation: the mixture will become progressively paler, significantly increase in volume, and develop an incredibly light, airy, and fluffy consistency, resembling soft peaks or actual clouds. The continuous whipping incorporates a large amount of air, creating the signature texture of this dessert. Ensure you beat for the full duration to achieve maximum fluffiness.
Step 2: Setting and Chilling for Perfection
Once your mixture is beautifully whipped, the final stage is to gently set it and chill it to firm up into its delightful cloud-like form.
- Prepare Your Pan: Select a 9×9 inch pan (or similar sized dish). Line the pan generously with plastic wrap, ensuring that there’s enough overhang on all sides to easily lift the set dessert out later. A well-lined pan is key for clean removal and presentation.
- Transfer and Spread: Gently pour or spoon the incredibly fluffy, whipped strawberry mixture into the prepared pan. Use a spatula to spread the mixture evenly across the pan. Take care not to press down too much, as this could compress the air you’ve just incorporated, reducing the fluffiness. The goal is an even, light layer.
- Cover and Refrigerate: Once evenly spread, cover the pan with another layer of plastic wrap, making sure it lightly touches the surface of the mixture to prevent a skin from forming. Transfer the covered pan to the refrigerator. Allow the dessert to chill until it is completely set. This usually takes a minimum of six to eight hours, but for the best and firmest results, it’s highly recommended to refrigerate it overnight. Patience during this chilling phase is crucial for the perfect texture.
- Serve and Enjoy: Once fully set, carefully use the plastic wrap overhangs to lift the large slab of Strawberry Clouds out of the pan. Place it on a cutting board. Using a sharp knife (lightly oiled if it sticks), cut the dessert into desired shapes – squares, rectangles, or even use small cookie cutters for fun shapes. Garnish as desired with fresh strawberries, a sprinkle of powdered sugar, or a sprig of mint. Serve immediately and revel in the light, airy, and fruity delight you’ve created!
Expert Tips for Flawless Strawberry Clouds Every Time
While this 2-ingredient Strawberry Clouds recipe is remarkably simple, a few expert tips can ensure your dessert turns out perfectly fluffy and delicious on your first attempt and every time thereafter.
- Proper Gelatin Blooming is Key: Don’t skip the 10-minute blooming time. This allows the gelatin to hydrate fully, which is crucial for smooth dissolution and optimal setting power. If the gelatin isn’t bloomed properly, you might end up with grainy texture or a less firm dessert.
- Gentle Heat is Essential: When dissolving the gelatin over the double boiler, maintain a low, consistent simmer. Never let the mixture come to a boil or overheat. Boiling gelatin can break down its protein structure, preventing it from setting correctly. The goal is just enough heat to dissolve the granules.
- Whip for the Full Duration: The 20 minutes of high-speed whipping might seem long, but it’s non-negotiable for achieving the signature fluffy, airy texture. This process incorporates maximum air, transforming the liquid into a voluminous cloud. Don’t stop short, even if it looks fluffy sooner; continue for the full time for best results.
- Patience During Chilling: While 6-8 hours might seem sufficient, an overnight chill (10-12 hours) ensures the Strawberry Clouds are perfectly set, firm, and easy to handle and cut. Rushing the chilling process can result in a softer, less defined dessert.
- Quality Applesauce Matters: The flavor of your applesauce will directly impact your final dessert. Choose a high-quality strawberry-flavored applesauce that you genuinely enjoy. For a richer color, you can even add a drop or two of red food coloring during the whipping stage, though it’s entirely optional.
- Lining the Pan: For easy removal, ensure your pan is thoroughly lined with plastic wrap, with plenty of overhang. This creates a non-stick surface, allowing you to lift the entire set dessert out with ease before slicing.
Creative Variations and Serving Suggestions
While the classic 2-ingredient Strawberry Clouds are divine as they are, don’t hesitate to get creative with variations and serving ideas to suit different tastes and occasions. This recipe is wonderfully adaptable!
- Explore Fruit Flavors: Swap out strawberry applesauce for other fruit purees. Imagine peach clouds, mango clouds, or even a mixed berry version! Just ensure the puree is smooth and of similar consistency to applesauce for best results.
- Sweetness Adjustment: If you prefer a sweeter dessert, you can add a touch of natural sweetener like maple syrup, honey, or a sugar substitute to the mixture after the gelatin has dissolved and before whipping. Start with a small amount and taste as you go.
- Aromatic Enhancements: A few drops of vanilla extract, almond extract, or a pinch of lemon zest can add another layer of flavor complexity. Add these after the gelatin is dissolved and before the whipping phase.
- Layered Desserts: Create beautiful layered desserts by preparing two different colored or flavored batches and chilling them separately, then layering them in a clear glass dish or individual serving cups.
- Fun Shapes: Instead of a 9×9 pan, pour the whipped mixture into decorative silicone molds (ensure they’re lightly oiled first) or individual serving glasses for elegant single portions. Once set, use cookie cutters to create fun shapes for children or festive occasions.
- Garnish Galore: Elevate your presentation with simple garnishes. Fresh berries (strawberries, raspberries, blueberries), a dusting of powdered sugar, a sprig of fresh mint, or a dollop of dairy-free whipped cream can add visual appeal and extra flavor.
- Crumbly Base: For a textural contrast, press a layer of crushed gluten-free graham crackers or digestive biscuits mixed with a little melted vegan butter at the bottom of your pan before adding the strawberry cloud mixture. Chill well before adding the cloud layer.
Storage and Make-Ahead Advice
One of the fantastic aspects of this 2-ingredient gluten-free dessert is its excellent make-ahead potential and ease of storage. This makes it a perfect candidate for meal prepping your treats or preparing for guests in advance.
- Refrigeration: Once set, Strawberry Clouds should always be stored in an airtight container in the refrigerator. This maintains their delicate texture and freshness.
- Shelf Life: Properly stored, these delightful treats will remain fresh and delicious for 3-4 days in the refrigerator. The longer they sit, the slight possibility of them losing a bit of their peak fluffiness, but they will still be enjoyable.
- Freezing: Freezing is generally not recommended for this dessert. The high water content and airy texture mean that freezing and thawing can significantly alter the consistency, making them watery and less fluffy.
- Make-Ahead: This recipe is ideal for making ahead! Prepare it the day before your event or when you want to enjoy a quick dessert. The overnight chilling ensures they are perfectly set and ready to slice and serve when you need them.
Indulge in Simplicity: Your New Favorite Gluten-Free Treat
The journey from just two ingredients to these magnificent 2-ingredient Strawberry Clouds is a testament to the fact that extraordinary desserts don’t always require extraordinary effort. This recipe offers a unique blend of simplicity, lightness, and deliciousness, making it an indispensable addition to your repertoire, especially if you’re looking for gluten-free dessert ideas or easy no-bake treats. The vibrant strawberry flavor combined with the ethereal, cloud-like texture creates a truly memorable experience that caters to a wide range of palates, particularly those who appreciate less sugary options. So, gather your applesauce and gelatin, follow our detailed guide, and prepare to be amazed by this effortlessly elegant dessert. It’s time to treat yourself and your loved ones to a taste of pure, fluffy bliss. Don’t forget to share your creations and any variations you try – we love hearing about your culinary adventures!
2-Ingredient Strawberry Clouds Recipe
Get ready to create an unforgettable, light, and fluffy dessert with minimal fuss!