
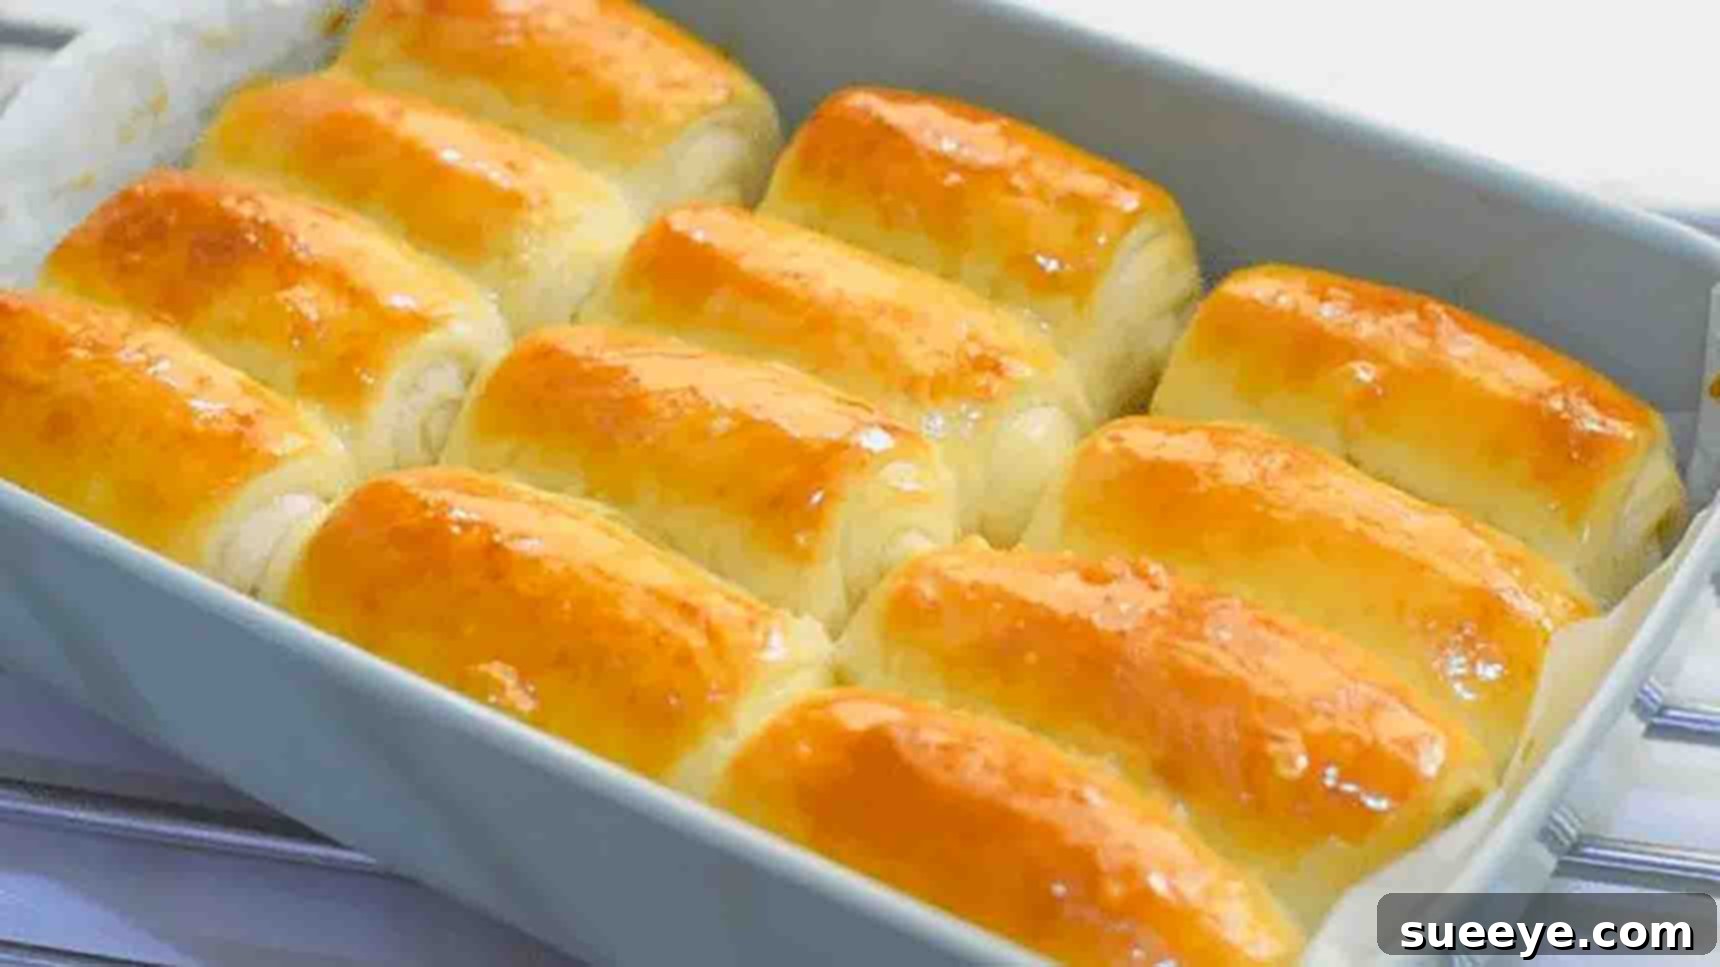
The Ultimate No-Knead Soft Dinner Rolls Recipe: Effortless & Irresistibly Delicious
Embark on a delightful baking journey with our ultimate guide to crafting the most exquisite no-knead soft dinner rolls. Whether you’re a seasoned baker or taking your very first steps into the world of bread making, this incredibly simple yet rewarding recipe, inspired by the brilliant insights from Bincy Chris on YouTube, promises perfection without the traditional fuss. Forget about arduous kneading sessions; these rolls are so effortlessly easy to prepare, you’ll wonder why you ever hesitated.
Imagine biting into a dinner roll that is not only light, airy, and bursting with flavor but also boasts an impossibly soft crumb. These aren’t just any dinner rolls; they are a revelation – a testament to how simple ingredients and minimal effort can yield extraordinary results. The secret lies in the ‘no-knead’ method, which allows time and yeast to do most of the work, developing gluten naturally and creating a texture that defies expectations. Get ready to impress your family and friends with warm, homemade bread that tastes like it came straight from a gourmet bakery, all from your own kitchen. Let’s dive into the step-by-step instructions to create these irresistible fluffy delights.
Ingredients for Your Fluffy No-Knead Dinner Rolls
Gathering your ingredients is the first step to baking success. For these incredibly soft no-knead dinner rolls, you’ll need just a few basic pantry staples. Quality ingredients make a noticeable difference in the final taste and texture, so choose fresh options where possible.
- 2 & 3/4 cups All-Purpose Flour (measured accurately for best results)
- 1 cup + 2 tbsp Warm Water (ideally between 105-115°F / 40-46°C, crucial for yeast activation)
- 1 tsp Instant Yeast (ensure it’s fresh for a good rise)
- 1 tsp Salt (fine grain salt works best for even distribution)
- 3 tbsp Unsalted Butter, Melted (adds richness and tenderness)
- 2 & 1/2 tbsp Granulated Sugar (or a little more, up to 3 tbsp, for enhanced flavor and browning)
- 1 Egg (for egg wash, optional but recommended for a golden shine)
Step-by-Step Guide: Crafting Your Perfect No-Knead Dinner Rolls
Follow these detailed instructions carefully to ensure your dinner rolls turn out wonderfully soft, airy, and golden brown every single time. Precision in measurements and attention to the subtle cues of the dough are key.
Step 1: Mixing the Dough and the First Rise
Begin by preparing your mixing bowl. Into a generously sized bowl, pour 1 cup + 2 tablespoons of warm water. The temperature of the water is vital here; it should be warm to the touch but not hot, as excessively hot water can kill the yeast, preventing your dough from rising. Next, add 2 & 1/2 tablespoons of granulated sugar and 1 teaspoon of salt. Stir these ingredients thoroughly until the sugar and salt have dissolved completely. This initial mix ensures even distribution of flavor and helps activate the yeast.
Once the sugar and salt are dissolved, sprinkle 1 teaspoon of instant yeast over the water mixture. Give it a gentle stir. Instant yeast doesn’t require proofing like active dry yeast, but allowing it a moment to hydrate is beneficial. Follow this with 3 tablespoons of melted butter. The melted butter incorporates easily into the mixture, contributing to the rolls’ tender texture and rich flavor. Finally, add 2 & 3/4 cups of all-purpose flour. Using a sturdy spatula or a wooden spoon, mix all the ingredients until a shaggy, cohesive dough forms. It won’t be perfectly smooth at this stage, and that’s perfectly normal.
After mixing, cover the bowl tightly with plastic wrap or a clean kitchen towel. Place the dough in a warm environment to rise for one hour. A warm spot could be a slightly warm oven (turned off), a sunny window, or simply a warm corner of your kitchen. During this first rise, the yeast will ferment, producing carbon dioxide and causing the dough to significantly increase in volume, typically doubling in size.
Once the hour is up, carefully remove the cover. You’ll notice the dough is puffy and filled with air. Gently deflate the dough by pressing it down with your hands. This releases the accumulated gases and helps redistribute the yeast for the next stage. Next, lightly flour your working surface. Transfer the dough onto this surface. Perform a simple “slap and fold” technique three to four times. This involves picking up the dough, lightly slapping it down, and folding it over itself. This brief, gentle handling helps to further develop gluten without intensive kneading, resulting in a smoother, softer dough that is more manageable for shaping.
Step 2: Shaping, Second Rise, and Baking to Golden Perfection
Lightly flour your working surface again to prevent sticking, but be careful not to incorporate too much extra flour into the dough. Using a rolling pin, gently flatten the dough into a rectangular shape, aiming for an even thickness of about 1/2 inch (approximately 1.25 cm). This uniform thickness ensures that your rolls will bake evenly.
Once flattened, use a sharp knife or a bench scraper to divide and cut the dough into 12 equal pieces. Consistency in size is important for even baking and presentation. Take each piece of dough and roll it into a small, smooth log. To do this, gently cup the dough in your hand and roll it against the surface, creating tension on the surface of the dough, which helps create a smooth, round top for your rolls.
Next, prepare your baking tray. Grease it generously with some butter, then line it with parchment paper. The butter helps prevent sticking, while the parchment paper ensures easy removal and cleanup. Arrange the rolled dough logs on the prepared baking tray, leaving a little space between each roll to allow for expansion during the second rise and baking. Covering them with plastic wrap, place the tray back into a warm environment for another hour. This second proofing allows the rolls to become even lighter and more tender.
While the rolls are undergoing their second rise, preheat your oven to 350 degrees F (175 degrees C). This ensures the oven is at the correct temperature when the rolls are ready to bake, leading to a perfect rise and crust. After an hour, the rolls should have significantly increased in size, looking plump and airy. In a small bowl, whisk one egg to create an egg wash. Gently brush the top of each rolled dough with the egg wash. This step is optional but highly recommended as it gives the rolls a beautiful golden-brown color and a slightly shiny, appealing crust.
Carefully place the baking tray into the preheated oven. Bake for 22 to 25 minutes, or until the rolls are beautifully golden brown on top and cooked through. The exact baking time may vary slightly depending on your oven, so keep an eye on them towards the end of the baking cycle. Once baked, remove the rolls from the oven and let them cool slightly on the tray before transferring them to a wire rack. Serve warm with butter, jam, or alongside your favorite meal.
Why Choose No-Knead Dinner Rolls? The Benefits Unveiled
In a world of complex baking recipes, the no-knead method stands out as a beacon of simplicity and brilliance. But beyond just being “easy,” what makes these no-knead soft dinner rolls truly exceptional and a preferred choice for many home bakers?
- Minimal Effort, Maximum Flavor: The most obvious benefit is the reduction in physical effort. Traditional bread making often involves strenuous kneading to develop gluten. With the no-knead method, time and hydration do the heavy lifting. The long fermentation period allows the yeast to work its magic slowly, creating complex flavors that might surprise you, resulting in a depth of taste often associated with artisanal breads.
- Beginner-Friendly: If you’ve ever felt intimidated by bread baking, this recipe is your perfect entry point. Without the need for specialized equipment or advanced techniques, it demystifies the process, making homemade bread accessible to everyone. The steps are straightforward, and the forgiving nature of the dough ensures success even for novices.
- Superior Texture: Despite the lack of intense kneading, these rolls develop an incredibly tender, airy, and open crumb structure. The extended rise time contributes to the formation of a delicate network of gluten, resulting in rolls that are unbelievably soft and fluffy – a stark contrast to some denser, more traditional breads.
- Time-Efficient (Hands-On): While the overall process involves waiting for the dough to rise, the actual hands-on time is incredibly short. You can mix the dough in minutes, let it rise while you go about your day, and then quickly shape and bake. This makes it a fantastic option for busy individuals who crave homemade goodness but don’t have hours to dedicate to active baking.
- Perfect for Any Occasion: From a casual weeknight dinner to a festive holiday feast, these versatile dinner rolls fit seamlessly into any meal. Their appealing golden crust and irresistible aroma make them a crowd-pleaser every time.
Expert Tips for Perfecting Your No-Knead Soft Dinner Rolls
Even with an “easy” recipe, a few insider tips can elevate your baking from good to extraordinary. Keep these pointers in mind for consistently perfect no-knead rolls:
- Accurate Ingredient Measurement: Baking is a science. Use a kitchen scale for flour if possible (1 cup of flour is roughly 120-125g). If using measuring cups, spoon the flour into the cup and level it off; don’t scoop directly from the bag, as this can compact the flour and lead to too much being used.
- Yeast Vitality: Always check the expiry date of your instant yeast. Stale yeast is a common culprit for dough that doesn’t rise. Store yeast in an airtight container in the refrigerator or freezer to prolong its freshness.
- Water Temperature is Key: The “warm water” specified (105-115°F / 40-46°C) is crucial. Too cold, and the yeast won’t activate; too hot, and it will die. An instant-read thermometer is a great tool for this.
- Warm Environment for Rising: Dough loves warmth. If your kitchen is cool, find a warm spot. Ideas include:
- Placing the bowl in an oven that’s been turned off but had the light on for a few minutes.
- Setting the bowl on top of a warm appliance (like a running dishwasher).
- Using a proofing box or a warm spot near a radiator.
Ensure the environment isn’t *too* hot, which can overproof the dough or affect flavor.
- Don’t Overwork the Dough: While there’s no traditional kneading, avoid excessive handling during shaping. The brief “slap and fold” is sufficient. Too much manipulation can make the rolls tough.
- Patience During Rising: Don’t rush the rising process. The dough should visibly double in size during both proofing stages. If it’s taking longer than an hour, your environment might be too cool, so give it more time.
- Even Shaping: Try to make your dough logs as uniform in size and shape as possible. This ensures they bake evenly and have a consistent texture.
- Egg Wash Benefits: The egg wash isn’t just for aesthetics. It helps create a beautiful golden crust and a slightly chewy exterior that contrasts wonderfully with the soft interior. For a vegan alternative, brush with plant-based milk or melted vegan butter.
- Oven Temperature Check: An oven thermometer can be a valuable tool to ensure your oven is truly at the set temperature. Inaccurate oven temperatures can lead to under or overbaked rolls.
Customization and Serving Suggestions for Your Rolls
These no-knead soft dinner rolls are fantastic on their own, but they also serve as a wonderful canvas for culinary creativity. Here are some ideas to customize them and serving suggestions:
Creative Customization Ideas:
- Garlic & Herb: Before the second rise, mix finely minced garlic, dried oregano, basil, or rosemary into the dough. You can also brush the baked rolls with melted garlic butter for an extra punch of flavor.
- Cheesy Delights: Fold in 1/2 cup of shredded cheddar, Parmesan, or a blend of your favorite cheeses during the initial mixing stage.
- Sweet Cinnamon Sugar Rolls: For a delightful treat, after the first rise, roll out the dough into a rectangle, spread a thin layer of softened butter, then sprinkle with cinnamon sugar before rolling it up and cutting into rolls.
- Everything Bagel Topping: Just before baking, after applying the egg wash, sprinkle generously with everything bagel seasoning for a savory and textural crunch.
- Sesame Seeds or Poppy Seeds: A classic addition for an appealing look and subtle flavor, sprinkled on top before baking.
Serving Suggestions:
- Classic Dinner Companion: The obvious choice! These rolls are perfect with any main course, from hearty stews and roasts to lighter grilled chicken or fish.
- Soup and Salad Pairing: A warm roll is the ideal accompaniment to a comforting bowl of soup or a fresh, crisp salad.
- Breakfast or Brunch: Serve them warm with butter, jam, honey, or a savory spread like cream cheese.
- Mini Sandwiches: Slice them horizontally and fill with deli meats, cheese, or even egg salad for delightful sliders or appetizers.
- Garlic Bread Alternative: Halve the baked rolls, spread with garlic butter, and broil briefly until golden and fragrant.
Storing and Reheating Your Homemade Rolls
Freshly baked rolls are best enjoyed warm from the oven. However, if you have leftovers, here’s how to store and reheat them to maintain their deliciousness:
- At Room Temperature: Once completely cooled, store the rolls in an airtight container or a resealable plastic bag at room temperature for up to 2-3 days. This prevents them from drying out.
- Freezing: For longer storage, you can freeze the baked rolls. Place cooled rolls in a freezer-safe bag, removing as much air as possible. They can be frozen for up to 1-2 months.
- Reheating:
- From Room Temperature: For a soft, warm roll, wrap individual rolls in foil and heat in a preheated oven at 300°F (150°C) for about 5-10 minutes. Alternatively, a quick zap in the microwave (10-20 seconds) can warm them up, but be careful not to overheat, as this can make them chewy.
- From Frozen: Thaw rolls at room temperature first, then reheat as above. For a quicker option, you can also reheat frozen rolls directly in foil in a 325°F (160°C) oven for 15-20 minutes, or until heated through.
A little butter brushed on top before reheating can also help keep them moist.
Frequently Asked Questions About No-Knead Dinner Rolls
Even with clear instructions, questions can arise. Here are some common queries and their answers to help you troubleshoot and succeed:
- Can I use active dry yeast instead of instant yeast?
- Yes, you can! If using active dry yeast, you’ll need to “proof” it first. Combine the warm water (105-115°F), sugar, and active dry yeast in the bowl and let it sit for 5-10 minutes until foamy. This indicates the yeast is active. Then proceed with adding the melted butter and flour.
- Why didn’t my dough rise?
- Several factors can cause this:
- Expired Yeast: Always check the date on your yeast.
- Water Temperature: Water that’s too hot will kill the yeast, too cold won’t activate it.
- Cold Environment: The dough needs warmth to rise properly. Find a warmer spot for proofing.
- Too Much Salt: High amounts of salt can inhibit yeast activity. Ensure accurate measurement.
- Can I make these rolls ahead of time?
- Absolutely! You can prepare the dough through the first rise, then punch it down, cover it tightly, and refrigerate it overnight (up to 24 hours). The next day, let it come to room temperature for about 30-60 minutes before proceeding with shaping, the second rise, and baking.
- What if I don’t have parchment paper?
- You can skip the parchment paper, but make sure your baking tray is very well greased with butter or cooking spray to prevent sticking. Using parchment paper simplifies cleanup and guarantees no sticking.
- My rolls aren’t golden brown. What went wrong?
- Ensure your oven temperature is accurate and that you used the egg wash. The egg wash contributes significantly to the golden color and shine. You can also bake them for a few extra minutes, watching them closely, until they reach your desired color.
Your Journey to Irresistible Homemade Bread Begins Now!
This no-knead soft dinner rolls recipe is more than just a list of ingredients and steps; it’s an invitation to experience the joy and satisfaction of baking truly incredible bread with minimal fuss. From the simplicity of its preparation to the delightful texture and taste, every aspect of these rolls is designed to bring warmth and deliciousness to your table. Whether you’re serving them alongside a hearty meal, enjoying them as a snack, or sharing them with loved ones, these rolls are guaranteed to be a hit. So, roll up your sleeves, gather your ingredients, and get ready to transform simple staples into bakery-quality bread right in your own kitchen. Happy baking!