
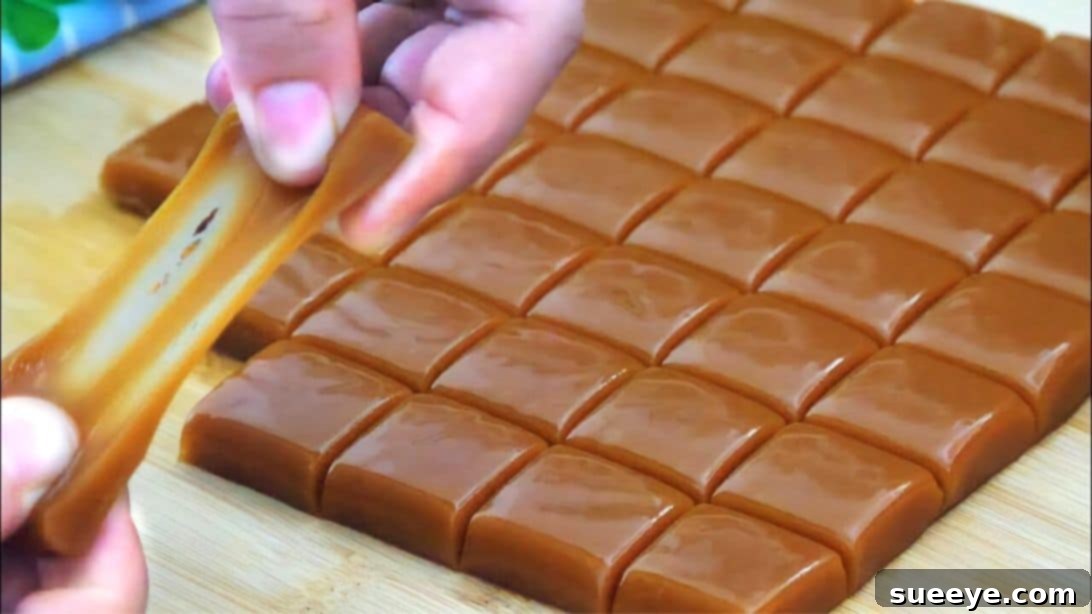
There’s something uniquely satisfying about homemade candy, especially when it’s as simple and delicious as this incredible 3-ingredient caramel candy. For anyone with a serious sweet tooth, finding recipes that are both quick to make and yield impressive results is a true delight. This particular caramel recipe, inspired by the fantastic creation from Delmira Cooking on Youtube, has quickly become a cherished favorite in my kitchen. Forget those overly complicated candy-making processes; this recipe simplifies everything, allowing you to whip up a batch of rich, buttery, and perfectly chewy caramels with minimal effort. While they might look deceptively hard, each bite reveals a wonderfully soft and satisfyingly chewy texture that melts in your mouth. These homemade caramels are incredibly versatile; enjoy them as a standalone treat to curb those sudden cravings, or melt them down to create a luxurious caramel sauce for drinks, desserts, and more. This isn’t just a recipe; it’s an invitation to experience the pure joy of crafting a timeless classic right in your own home. Get ready to transform basic pantry staples into an extraordinary indulgence!
Essential Ingredients for Your Perfect Caramel Candy
The beauty of this recipe truly lies in its simplicity, requiring just three core ingredients. Each plays a vital role in creating that signature caramel flavor and chewy texture. Quality matters, even with just a few items, so choose wisely for the best possible outcome.
- 1 cup of White Granulated Sugar: This is the foundation of our caramel, providing the sweetness and undergoing the magical caramelization process that gives caramel its distinctive color and deep, complex flavor.
- Approximately 1/2 cup of Heavy Whipping Cream (Full-Fat): The cream introduces richness, smoothness, and helps to achieve the desired chewy consistency. Full-fat cream is essential for the best texture and flavor; avoid lighter versions as they won’t provide the same luxurious mouthfeel.
- 1 and 1/2 tablespoons of Unsalted Butter: Butter adds a velvety texture, a wonderful depth of flavor, and helps to prevent crystallization, ensuring your caramels are smooth and luscious. Using unsalted butter allows you to control the saltiness, though a tiny pinch of sea salt added at the end can elevate the flavors even further if desired.
Having these three ingredients ready and measured out before you begin will make the cooking process smooth and enjoyable.
Step-by-Step Guide to Crafting Your Homemade Chewy Caramel Candies
Making caramel can seem intimidating, but by following these clear steps, you’ll achieve perfect results every time. Precision and attention to detail are key, especially when working with hot sugar. Always prioritize safety and have all your tools ready before you start.
Step 1: Prepare Your Workstation for Caramel Perfection
Before you even think about heating sugar, ensure your workspace is fully prepared. This crucial “mise en place” step will make the caramel-making process much smoother and prevent last-minute rushes. Start by selecting a sturdy baking sheet; a standard 9×13 inch size works well for creating a uniform thickness. Line this baking sheet generously with parchment paper. Parchment paper is non-negotiable here, as it provides a naturally non-stick surface that will allow your cooled caramel to be easily lifted and removed without any sticking or tearing. You can also lightly grease the parchment paper with a tiny bit of butter or non-stick spray for extra insurance, though it’s often not necessary. Having your sheet ready means you can pour the hot caramel immediately once it reaches the correct consistency, which is vital as caramel sets quickly.
Step 2: Mastering the Art of Melting Sugar
The first truly transformative step is melting the sugar. Add 1 cup of white granulated sugar to a heavy-bottomed saucepan or pot. Using a heavy-bottomed pan is important as it distributes heat more evenly, reducing the risk of scorching the sugar. Place the pan over medium heat. At this stage, patience is key. The sugar will gradually begin to melt around the edges, forming a clear liquid before slowly turning into an amber-colored syrup. Continuously mix the sugar with a heat-resistant spatula or wooden spoon. This constant stirring helps to break up any lumps and ensures the sugar melts evenly without burning. You’re aiming for a beautiful, rich golden-brown syrup – think the color of an old penny or dark honey. Be careful not to let it get too dark, as burnt sugar will taste bitter. The entire process of melting the sugar should result in a smooth, lump-free, deeply colored liquid. This is the foundation of all the rich caramel flavor to come.
Step 3: Introducing the Cream for a Velvety Smoothness
Once your sugar has transformed into that gorgeous amber syrup, it’s time to add the heavy whipping cream. This is a critical step that requires caution, as the hot sugar will react vigorously with the cooler cream. Carefully and slowly pour the approximately 1/2 cup of whipping cream into the melted sugar. The mixture will bubble up and steam considerably, so be prepared and keep your face and hands at a safe distance. Continue to mix vigorously and continuously over medium heat using your heat-resistant spatula. The goal here is to fully incorporate the cream into the sugar, creating a smooth, homogenous caramel sauce. Keep stirring until all the lumps from the initial reaction have dissolved and the mixture is once again a smooth, glossy, and uniform caramel. This process usually takes a few minutes, and you’ll notice the caramel becoming richer in color and thickening slightly.
Step 4: The Cold Water Test and Adding Butter for Irresistible Chewiness
To determine if your caramel has reached the perfect candy consistency, we’ll perform a simple cold water test. Have a small bowl filled with cold water ready beside your stove. Carefully drop a very small amount of the hot caramel mixture into the cold water. Let it cool for a few seconds, then pick it up with your fingers. If it can be easily shaped into a soft ball and has a delightful chewy consistency, your caramel is ready for the final touch. If it’s too soft or dissolves, continue cooking and re-test every minute or so. If you have a candy thermometer, you’re aiming for the “soft ball” stage, which is typically between 245-250°F (118-121°C). Once the caramel passes the cold water test, remove the pan from the heat briefly and add the 1 and 1/2 tablespoons of butter. Stir the butter into the hot caramel until it is completely melted and thoroughly incorporated. The butter not only adds an incredible depth of flavor and richness but also contributes to the smooth, non-grainy texture of the finished candy. Continue stirring for about 2 minutes on very low heat after adding the butter to ensure everything is perfectly blended and heated through. This final stir also helps distribute the butterfat evenly, contributing to the caramel’s stability and shine.
Step 5: Pouring and Initial Cooling for Setting
With the caramel mixture perfectly cooked and buttered, immediately turn off the heat. Carefully pour the hot caramel onto the prepared baking sheet lined with parchment paper. Work quickly but cautiously, as the caramel is extremely hot. Use your spatula to spread the mixture evenly across the entire surface of the parchment paper, ensuring a uniform thickness. Pay particular attention to spreading it into the corners to avoid uneven cooling and setting. The thickness of your caramel layer will directly impact the size and chewiness of your finished candies, so aim for consistency. Once spread, set the baking sheet aside at room temperature and allow the caramel to cool completely. This initial cooling at room temperature helps the caramel to set slowly and evenly, contributing to its smooth texture. Resist the urge to poke or touch it too much while it’s cooling.
Step 6: The Chilling Phase for Firmness
After the caramel has cooled sufficiently at room temperature (it should be firm enough to handle without being sticky), it’s time to move it to the refrigerator. Place the entire baking sheet, with the caramel still on the parchment paper, into the fridge for approximately 30 to 40 minutes. This chilling period is essential for firming up the caramel to a point where it can be easily sliced into individual pieces without sticking to the knife or losing its shape. Avoid over-chilling, as this can make the caramel too hard and brittle, making it difficult to cut. You’re looking for a firm, yet still pliable and slightly yielding texture when gently pressed.
Step 7: Slicing and Wrapping Your Homemade Caramel Delights
Once the caramel has achieved the ideal firmness after chilling, remove the baking sheet from the fridge. Gently lift the entire slab of caramel off the baking sheet by grabbing the edges of the parchment paper. Peel the parchment paper away from the back of the caramel. Now, place the caramel slab on a clean cutting board. Using a sharp, lightly oiled knife (or even a pizza cutter for long, straight lines), slice the caramel into small, bite-sized cubes. For an extra touch of elegance and to prevent the candies from sticking together, wrap each individual caramel cube in small squares of baking paper or wax paper. Twist the ends of the paper to secure them, much like classic store-bought caramels. This not only keeps them fresh and prevents sticking but also makes them perfect for sharing or gifting. Store your wrapped caramels in an airtight container at room temperature or in the refrigerator, and they will stay fresh and delicious for several weeks.
Bonus Treat: Decadent Caramel Milk Refresher
Your homemade caramels aren’t just for eating plain! They make a fantastic base for a truly indulgent drink. Elevate your everyday milk into a luxurious caramel delight with this simple recipe:
Gather some of your freshly made caramel candies. Place them in a small saucepan over very low heat. Add a tiny splash of water (about 1-2 teaspoons per 3-4 caramels) or a tablespoon of milk to help them melt smoothly. Continuously stir the mixture until the caramels are completely melted and have formed a smooth, pourable caramel sauce. Be careful not to let it boil. While the caramel is melting, fill a tall glass with ice. Pour in your desired amount of milk (dairy or non-dairy works beautifully). Then, slowly pour the warm, melted caramel sauce over the milk and ice. Stir everything together thoroughly until the caramel is well integrated, creating a beautifully sweetened and flavored milk. You can adjust the amount of caramel to your preference for sweetness. For an extra special touch, top with a dollop of whipped cream and a drizzle of extra caramel sauce. This refreshing caramel milk is the perfect pick-me-up and a wonderful way to enjoy your homemade treats!
Your New Favorite 3-Ingredient Chewy Caramel Candy
Congratulations! You’ve successfully made a batch of exquisite, chewy caramel candies with just three simple ingredients. This recipe proves that you don’t need fancy equipment or a lengthy ingredient list to create something truly special. From the rich, buttery aroma that fills your kitchen to the satisfying chewiness of each handcrafted piece, these homemade caramels are a testament to the magic of simple cooking. Whether you’re enjoying them on their own, sharing them with loved ones, or transforming them into a delightful drink, these caramels are sure to become a beloved staple in your recipe collection. Embrace the joy of homemade treats and savor every moment of this sweet creation!