
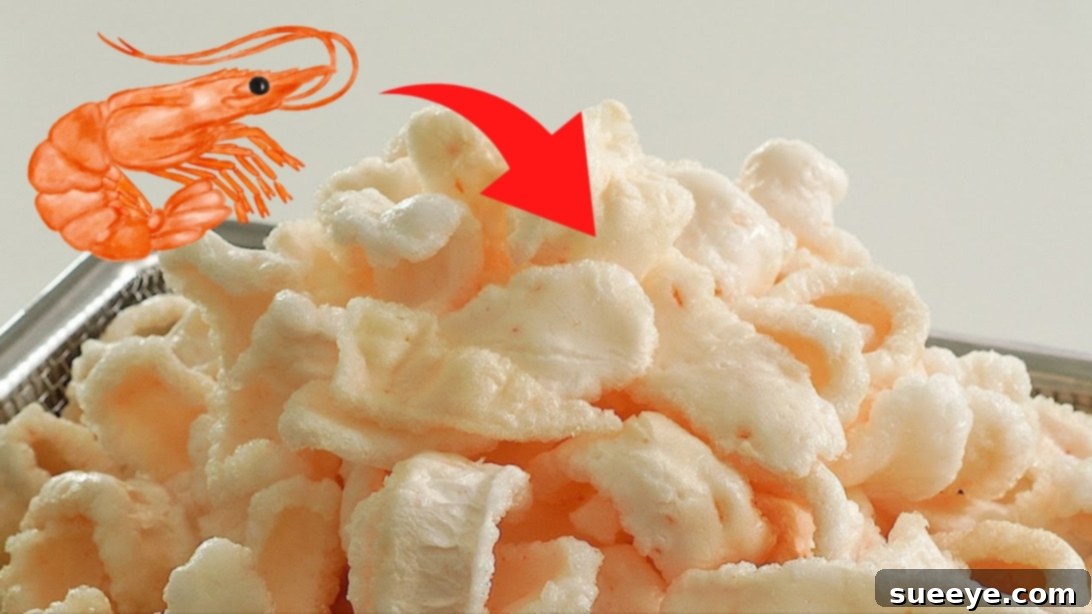
Are you a seafood enthusiast constantly craving that irresistible crunch? Imagine creating your own batch of intensely flavorful and incredibly crispy shrimp chips right in your kitchen with just four simple ingredients! Forget the store-bought versions that often fall short on taste and freshness. This homemade recipe for crispy shrimp chips, inspired by the culinary brilliance of table diary 식탁일기, promises an addictively delicious snack that’s far superior in every way. Get ready to embark on a delightful culinary journey that will elevate your snacking experience and impress anyone lucky enough to try these gourmet-quality chips.
Why Homemade Crispy Shrimp Chips Are a Must-Try
Shrimp chips, also known as prawn crackers or Krupuk, are a beloved snack across many cultures, especially in Southeast Asia. Their unique savory flavor and satisfying crunch make them a popular choice for appetizers or standalone treats. However, store-bought varieties often contain preservatives, artificial flavors, and can sometimes lack the true essence of fresh shrimp. By making your own crispy shrimp chips at home, you gain complete control over the ingredients, ensuring a wholesome, incredibly fresh, and deeply flavorful product. This particular recipe stands out for its simplicity, requiring only four core ingredients to produce an astonishingly authentic and delightful snack. You’ll be amazed at how easily you can transform fresh shrimp into a light, airy, and spectacularly crispy chip that melts in your mouth, leaving a lingering taste of the sea.
The Essential 4 Ingredients for Perfect Crispy Shrimp Chips
The magic of this recipe lies in its minimalist approach, proving that you don’t need a pantry full of exotic items to create something extraordinary. Each ingredient plays a crucial role in achieving the desired texture and flavor profile of these delectable crispy shrimp chips.
- 3.5 oz of Shrimp (Peeled Weight): The star of our show! Fresh shrimp is paramount for the best flavor. While any variety of shrimp can work, medium to large shrimp often yields a richer taste. Ensure they are completely peeled and deveined before weighing. The fresh, sweet flavor of the shrimp is what truly defines these chips, so choose wisely.
- 1 cup and 5 1/4 tablespoons of Tapioca Starch: This is the secret to the incredible crispiness and light texture of the shrimp chips. Tapioca starch, derived from the cassava plant, is known for its ability to create a very elastic dough and a wonderfully crisp product when fried. It’s naturally gluten-free and contributes to the signature airy crunch that sets these chips apart. Do not substitute with cornstarch or other flours, as tapioca starch’s unique properties are essential for this recipe.
- 1/3 cup of Water: Simple yet vital. Water helps to bind the ingredients together, creating a smooth paste with the shrimp and allowing the tapioca starch to form a pliable dough. The precise measurement ensures the right consistency for both blending and kneading.
- 1 level teaspoon of Salt: The primary seasoning for our shrimp chips. Salt enhances the natural sweetness of the shrimp and balances the flavors, making the chips irresistibly savory. A level teaspoon ensures adequate seasoning without overpowering the delicate shrimp taste. You can adjust this slightly to your preference, but this measurement provides a perfectly balanced flavor.
These four humble ingredients, when combined with careful preparation, unlock a world of flavor and texture that will make these homemade crispy shrimp chips a new favorite in your snack repertoire.
Step-by-Step Instructions to Create Your Own Crispy Shrimp Chips
Making crispy shrimp chips from scratch is a rewarding process that involves a few key stages. Follow these detailed steps to ensure perfectly flavorful and crunchy results every time.
Step 1: Preparing Your Shrimp for Optimal Flavor
The foundation of great shrimp chips is well-prepared shrimp. Begin by meticulously removing the heads from your shrimp. Next, carefully peel off the skin from each shrimp, ensuring no shell fragments remain. Finally, and crucially, devein each shrimp. This involves making a shallow cut along the back of the shrimp and removing the dark digestive tract. This step is important not just for aesthetics but also for taste and hygiene, as the vein can carry grit and an undesirable flavor. Thoroughly rinse the cleaned shrimp under cold water and pat them dry with paper towels. Achieving the precise peeled weight of 3.5 oz is important for the right dough consistency.
Step 2: Blending Ingredients into a Smooth Shrimp Paste
Transfer your cleaned and prepped shrimp into a sturdy mixing bowl. Add the exact measurement of one-third cup of water and one level teaspoon of salt. Now, using an immersion blender – a hand blender is ideal for this task as it allows for direct blending in the bowl – thoroughly mix everything. Blend until the mixture transforms into a completely smooth, uniform paste. There should be no visible chunks of shrimp remaining. This smooth consistency is vital for creating a cohesive and evenly textured dough later on. If you don’t have an immersion blender, a regular blender or food processor can be used, ensuring you scrape down the sides frequently to achieve a consistent paste.
Step 3: Creating the Dough for Your Crispy Chips
Once you have your smooth shrimp paste, gradually add the tapioca starch to the bowl. Begin mixing with a silicone spatula or a sturdy spoon until the starch is fully incorporated into the paste. The mixture will start to come together, forming rough crumbs. At this stage, it’s best to switch to using your hands. Knead the mixture vigorously until it comes together to form a smooth, pliable, and non-sticky dough. It should resemble a soft playdough, easy to handle and consistent in texture. Proper kneading ensures all ingredients are evenly distributed and the tapioca starch develops its elasticity, which is key for the chip’s structure.
Step 4: Shaping the Dough for Even Cooking
Transfer the well-kneaded shrimp dough to a clean, lightly floured workspace. Roll the dough with your hands, pressing and stretching it until it forms a long, cylindrical shape, similar to a thick sausage. Aim for a consistent thickness throughout the log. Once you have a uniform log, cut it in half horizontally. This makes the dough more manageable for the next step and helps in achieving uniform pieces.
Step 5: Pre-Cooking the Shrimp Dough Pieces
Take one of the dough halves. Using the palm of your hand, gently beat and flatten it slightly. This doesn’t need to be perfectly thin, just enough to make it easier to cut and handle. Then, cut this flattened dough log into three equal-sized pieces. Repeat the same process with the other half of the dough, resulting in a total of six roughly equal dough portions. These pieces are now ready for boiling.
Step 6: Boiling the Dough to Perfection
Fill a large pot with water and bring it to a rolling boil over high heat. Once the water is vigorously boiling, carefully add the pieces of shrimp dough into the pot. To prevent them from sticking to the bottom or to each other, gently stir the dough pieces for the first few minutes. Reduce the heat to medium and allow the dough to cook for approximately 10 minutes, or until they are thoroughly cooked through. You’ll notice them floating to the surface and appearing slightly translucent. A good way to check for doneness is if they are firm to the touch and have expanded slightly. Remove them carefully with a slotted spoon.
Step 7: The Initial Drying Phase for Optimal Crispiness
Once the dough pieces are cooked, drain them immediately and transfer them onto a wire cooling rack. Arrange them in a single layer, ensuring there’s space between each piece for air circulation. Allow them to dry at room temperature for approximately 5 hours. This initial drying period helps to remove a significant amount of surface moisture, which is crucial for achieving the desired crispiness later. A well-ventilated area is best for this stage.
Step 8: Slicing and Final Drying for Ultimate Crunch
After the initial 5-hour drying period, the dough pieces should be firmer and less sticky. Now comes the critical step of slicing. Using a very sharp knife, slice the dough as thinly as you possibly can. The thinner the slices, the crispier your final shrimp chips will be. Aim for almost paper-thin slices. Once sliced, carefully arrange these thin pieces onto a clean cooling rack, again ensuring good air circulation. Allow them to dry overnight (typically 8-12 hours) at room temperature. This prolonged drying period removes almost all moisture, making the chips light and airy when fried. If you’re not planning to fry them immediately after drying, store the completely dried slices in an airtight ziplock bag or container and place them in your refrigerator. This will keep them fresh and ready for frying whenever the craving strikes.
Step 9: Frying Your Homemade Crispy Shrimp Chips to Golden Perfection
The final, most exciting step! In a deep pot or wok, add a generous amount of neutral-flavored oil (like vegetable, canola, or peanut oil). The oil should be deep enough for the chips to float and expand. Heat the oil to precisely 356°F (180°C). An accurate kitchen thermometer is highly recommended for this step, as oil temperature is paramount for perfect results. Too cold, and the chips will be greasy; too hot, and they will burn. Once the oil reaches the correct temperature, carefully drop a few thinly sliced shrimp chips into the hot oil. Do not overcrowd the pot; fry in small batches. The chips will immediately puff up and become crispy. This happens very quickly, typically within 10-20 seconds. As soon as they are puffed and golden brown, remove them from the oil using a slotted spoon or spider, and transfer them to a plate lined with paper towels to drain any excess oil. Work quickly to avoid burning, and repeat with the remaining slices until all your homemade crispy shrimp chips are fried to perfection.
Expert Tips for Flawless Crispy Shrimp Chips
Achieving the perfect batch of crispy shrimp chips can be enhanced with a few key considerations and techniques. These tips will help you avoid common pitfalls and ensure your chips are consistently delicious and crunchy.
- Dough Consistency is Key: Ensure your shrimp paste is absolutely smooth before adding the tapioca starch. When kneading, aim for a dough that is firm but pliable, similar to Play-Doh. If it’s too sticky, add a tiny bit more tapioca starch; if too dry, a few drops of water can help, but be very sparing.
- Optimal Drying Environment: The drying process is arguably the most crucial step for crispiness. A dry, well-ventilated area at room temperature is ideal. Avoid humid environments, as they will hinder drying. If you live in a very humid climate, consider using a food dehydrator on a low setting (around 100-110°F / 38-43°C) or placing the racks in an oven with just the light on (generating minimal heat) to assist the drying process overnight.
- Mastering Oil Temperature: As mentioned in the frying step, the oil temperature is non-negotiable for perfectly crispy chips. A thermometer is your best friend. Maintaining 356°F (180°C) ensures the chips puff up rapidly without absorbing too much oil or burning. If the temperature drops too low (from adding too many chips), wait for it to recover before adding more.
- Slicing for Superior Crunch: The thinner you slice the dried dough, the crispier and lighter your chips will be. Practice makes perfect with a sharp knife, but a mandoline slicer can also be used with extreme caution to achieve uniform, paper-thin slices.
- Storage for Longevity: Once fried and cooled, store your homemade crispy shrimp chips in an airtight container at room temperature. They will retain their crunch for several days. If they start to lose their crispness, a quick re-fry for a few seconds or a brief warming in a dry pan can revive them.
Serving Suggestions and Flavor Variations for Your Homemade Shrimp Chips
These four-ingredient crispy shrimp chips are fantastic on their own, but their versatility allows for various serving styles and flavor enhancements.
- Classic Dipping: Serve with classic sweet chili sauce, a popular accompaniment that provides a delightful balance of sweet, spicy, and tangy flavors. For a different profile, try a simple squeeze of lime juice, a sprinkle of fresh cilantro, or even a creamy sriracha mayo.
- Spice It Up: Before frying, you can lightly dust the dried shrimp chip slices with a touch of garlic powder, onion powder, paprika, or even a pinch of cayenne pepper for a spicy kick. Add these seasonings to the dough during the kneading stage for a more integrated flavor.
- Savory Enhancements: A sprinkle of dried seaweed flakes or finely grated Parmesan cheese immediately after frying can add another layer of umami and saltiness.
- As a Side: These crispy shrimp chips make an excellent crunchy side to Asian-inspired dishes, soups, or salads, adding texture and flavor complexity. They’re particularly good with noodle dishes or curries.
Troubleshooting Common Shrimp Chip Issues
Even with the simplest recipes, challenges can arise. Here are solutions to some common problems you might encounter while making your crispy shrimp chips:
- Chips Not Crispy Enough: This is almost always due to insufficient drying. The dough needs to be completely dehydrated before frying. Ensure your room is not too humid, and extend the overnight drying time if necessary. Also, check your oil temperature; if it’s too low, chips will absorb oil and become soggy instead of crisp.
- Chips Burning Too Quickly: This indicates the oil is too hot. Lower the heat and let the oil cool down slightly before continuing to fry. Consistency in temperature is vital. Also, ensure you are removing them as soon as they puff and turn golden.
- Chips Sticking Together During Boiling: This happens if the pot is overcrowded or if you didn’t stir them gently at the beginning. Boil in smaller batches to give the dough pieces enough room, and give them a good stir immediately after adding them to the boiling water.
- Dough Difficult to Knead/Too Sticky: If your dough is too sticky, gradually add small amounts of tapioca starch until it reaches a manageable, non-sticky consistency. Humidity can affect how much starch is needed, so adjust as necessary.
Enjoy Your Homemade 4-Ingredient Crispy Shrimp Chips!
With just four ingredients and a little patience, you can create a truly exceptional snack that outshines any store-bought alternative. These homemade crispy shrimp chips are not just a treat for your taste buds but also a testament to the joy of simple, delicious cooking. Whether you’re making them for a party, a movie night, or simply to satisfy a craving, this recipe guarantees a flavorful, crunchy, and utterly satisfying experience. So, roll up your sleeves, gather your ingredients, and get ready to enjoy the incredible taste of your very own perfectly crispy shrimp chips!