
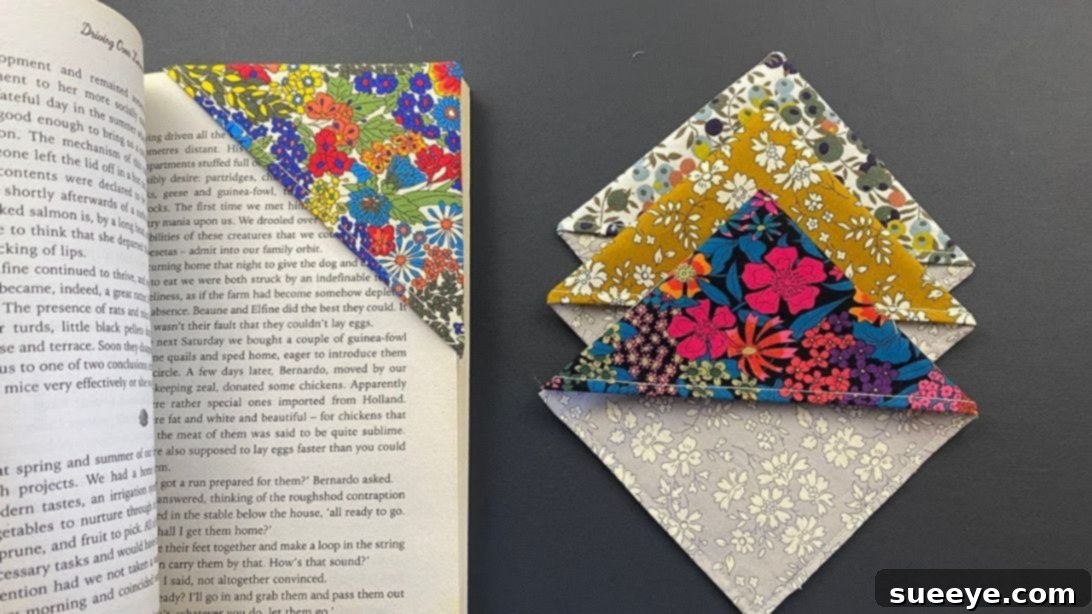
Craft Charming Fabric Corner Bookmarks: The Ultimate Scrapbuster Project
Do you have a cherished book you’re currently engrossed in, only to find yourself constantly searching for a convenient way to mark your page? Traditional bookmarks can be flimsy, fall out easily, or simply lack that personal touch. What if you could create something both functional and beautiful, all while putting your leftover fabric scraps to good use?
Look no further! We’re diving into the delightful world of DIY fabric corner bookmarks. These adorable creations are not only incredibly practical for any avid reader but also serve as a fantastic “scrapbuster” project, transforming those small, otherwise unused fabric pieces into something truly special. With the clear and engaging video tutorial from Red Blossom Designs, you’ll be amazed at how simple and quick it is to craft these charming accessories.
Imagine having a collection of these personalized fabric bookmarks – each one a small work of art. They are perfectly suited as thoughtful gifts for the book lovers in your life, delightful stocking stuffers during the holidays, or even charming little presents for teachers, friends, and family. The best part? You can complete one in just a few minutes, making it an ideal project for a quick creative burst or a relaxing crafting session.
RELATED: 7 Easy and Practical Ways to Use Up Tiny Fabric Scraps
Why Fabric Corner Bookmarks Are a Must-Try DIY
Beyond their obvious utility, fabric corner bookmarks offer a multitude of advantages that make them a truly rewarding DIY endeavor. Unlike paper bookmarks that can tear, bend, or slip out of place, these fabric creations are durable and designed to snugly fit over the corner of your page, ensuring you never lose your spot. The soft fabric also means there’s no risk of creasing or damaging your book’s pages.
But the benefits extend far beyond functionality. This project is a celebration of sustainability and creativity. Every crafter accumulates a stash of fabric scraps – remnants from larger projects, offcuts from clothing alterations, or even beloved pieces too small to use for anything substantial. These tiny fabric scraps often end up in landfills, contributing to textile waste. By transforming them into corner bookmarks, you’re not only creating something beautiful but also engaging in an eco-friendly practice that reduces waste and gives new life to discarded materials.
Furthermore, these bookmarks provide a wonderful canvas for personalization. Want to make a bookmark that reflects the personality of its recipient? Add a small embroidered initial, a charming appliqué, or select fabrics in their favorite colors or patterns. The possibilities are endless! It’s a small, fun project that anyone, from seasoned sewers to absolute beginners, can confidently tackle at home. This makes it an awesome scrapbuster idea, proving that even the smallest pieces of fabric hold the potential for something wonderful.
Here’s another project for you to try: Fabric Scrap Patchwork Block For Beginners
Gather Your Supplies: What You’ll Need for Your Corner Bookmark
One of the most appealing aspects of this project is its minimal material requirements. You likely have most of these items lying around your craft space already, especially if you’re a textile enthusiast! Here’s a breakdown of the essential components:
- 3 pieces of 12 cm by 12 cm cotton fabric: You’ll need one piece for the visible front part of your bookmark and two pieces for the back, which forms the “pocket” that slides onto your page. Cotton fabric is highly recommended because it’s easy to work with, holds its shape well, and comes in an endless variety of patterns and colors. Feel free to mix and match coordinating fabrics to create unique designs!
- 3 pieces of 10 cm by 10 cm iron-on fabric stabilizer: This crucial component gives your bookmark structure and durability. It helps the fabric maintain its shape, prevents fraying, and ensures your bookmark feels substantial and high-quality. Iron-on stabilizer is simple to apply and significantly enhances the finished product’s longevity.
- Basic sewing supplies: While not listed above, you’ll also need a sewing machine (or needle and thread for hand sewing), scissors (preferably fabric shears), an iron and ironing board, pins or fabric clips, a ruler or measuring tape, and a fabric marking tool (like a chalk pencil or erasable fabric pen).
Having your materials ready before you begin will ensure a smooth and enjoyable crafting experience. Remember, selecting your fabrics is part of the fun – choose patterns and colors that inspire you!
Step-by-Step Guide: How to Craft Your Fabric Corner Bookmark
Ready to turn those fabric scraps into something truly useful and beautiful? Follow these detailed steps to create your very own fabric corner bookmark. Precision in cutting and sewing will ensure a professional-looking finish, but don’t worry if you’re a beginner – this project is very forgiving!
Step 1: Prepare Your Fabrics with Stabilizer
Start by laying your three cotton fabric squares (12 cm x 12 cm) right side down on your ironing board. Take your three iron-on fabric stabilizer squares (10 cm x 10 cm) and place one on top of each fabric square. It’s important to make sure the stabilizer is centered on each fabric piece, leaving a consistent border of fabric around its edges. The rough or adhesive side of the stabilizer should be facing down, in contact with the wrong side of your fabric. Carefully press with a warm iron according to the stabilizer manufacturer’s instructions. This fuses the stabilizer to the fabric, providing the necessary body and structure for your bookmark.
Step 2: Create the Front Triangle Piece
Now, take the fabric square you’ve designated for the front part of your bookmark (which now has stabilizer fused to its wrong side). Fold it in half diagonally, bringing one corner to meet the opposite corner, forming a perfect triangle. Press this fold with your iron for a crisp crease. Next, sew along the longest side (the folded edge) of this triangle with a small 3mm (approx. 1/8 inch) seam allowance. This step is crucial for defining the clean edge of your bookmark’s front flap.
Step 3: Assemble the Bookmark Layers
Get one of your remaining stabilized back fabric squares. Place it right side up on your work surface. Take the fabric triangle you just sewed in Step 2 and place it on top, ensuring the 90-degree corner of the triangle aligns perfectly with the upper-left corner of the back fabric square. Next, take the second stabilized back fabric square and place it on top of everything, right side down. Carefully align all the raw edges. To ensure you have an opening for turning, make a small mark (using a fabric pen or chalk) on the center of the right-hand side edge of these layered fabrics. This mark will guide where you stop and start sewing in the next step.
Step 4: Sew the Layers Together and Trim
With all your layers carefully pinned or clipped in place, sew them together all the way around the raw edges. Use a 1 cm (approx. 3/8 inch) seam allowance for this step. Remember to leave a small opening (about 4-5 cm or 1.5-2 inches) on the side you marked in the previous step. This opening is vital for turning your bookmark right side out. Be sure to backstitch at the beginning and end of your stitching at the opening to reinforce it. Once sewn, trim the corners of your bookmark closely but carefully, making sure not to snip your stitches. Trimming the corners reduces bulk and allows for sharp, crisp points when the bookmark is turned right side out.
Step 5: Turn Right Side Out and Press
Now for the magical part! Carefully fold the seam allowances flat around the entire perimeter. Then, gently push and manipulate your fabric through the opening you left, turning the entire bookmark right side out. Take your time with this step, especially around the corners, using a blunt tool (like a turning tool or a chopstick) to gently push out the corners from the inside, ensuring they are as sharp as possible. Once turned, press the entire bookmark flat with an iron, paying close attention to the edges to get a neat and crisp finish. Make sure the raw edges of the opening are tucked neatly inside.
Step 6: Finish with Topstitching
The final sewing step involves topstitching. With your bookmark neatly pressed and right side out, sew along the sides of the back fabric with a precise 3 mm (approx. 1/8 inch) seam allowance. This line of stitching will serve a dual purpose: it will securely close the opening you used for turning and add a professional, finished look to your bookmark. Topstitching also helps to reinforce the edges and gives the bookmark a more structured feel. Once this step is complete, your beautiful DIY fabric corner bookmark is ready to adorn the pages of your favorite book!
Personalize Your DIY Corner Bookmark: Creative Embellishment Ideas
One of the joys of handmade crafts is the ability to infuse your personality and creativity into every piece. Your fabric corner bookmarks can be customized in countless ways to make them truly unique:
- Embroidered Details: Before assembling, add a small, hand-embroidered motif, an initial, or a simple design to the front fabric piece.
- Appliqués and Patches: Attach small fabric appliqués of animals, flowers, or geometric shapes for an added touch of whimsy.
- Decorative Stitching: Use a contrasting thread color for your topstitching or experiment with decorative stitches on your sewing machine.
- Tassels or Beads: Add a small fabric tassel or a string of beads to the corner of the bookmark for an elegant finish. You’d attach this before the final sewing step.
- Fabric Paint or Markers: Use permanent fabric paints or markers to add intricate designs, quotes, or personal messages.
- Mixed Fabrics: Don’t be afraid to experiment with different coordinating fabrics for the front and back pieces. A vibrant pattern on the front with a solid color on the back can create a striking contrast.
Tips for Success for Beginner Sewers
If you’re new to sewing, don’t be intimidated! This project is an excellent starting point. Here are a few tips to ensure your first few bookmarks turn out perfectly:
- Practice on Scraps: Before sewing your actual bookmark pieces, practice stitching straight lines and turning corners on some spare fabric. This helps you get a feel for your machine.
- Use Good Quality Thread: A strong, good-quality polyester thread will prevent breakage and ensure your seams hold up well over time.
- Pin, Pin, Pin!: Don’t skimp on pins. They help keep your fabric layers aligned, especially when working with small pieces, ensuring accurate seams.
- Slow and Steady Wins the Race: There’s no need to rush. Sew at a comfortable, steady pace, especially around corners.
- Backstitch at the Start and End: Always backstitch a few stitches at the beginning and end of each seam. This locks your stitches in place and prevents them from unraveling.
- Press as You Go: Using your iron after each major step (like folding, fusing stabilizer, or turning right side out) makes a huge difference in the crispness and professionalism of your finished project.
DIY Corner Bookmark: Your Next Creative Adventure
Crafting these easy DIY fabric corner bookmarks is more than just a sewing project; it’s an opportunity to embrace sustainability, unleash your creativity, and make meaningful items. Whether you’re making them for yourself, as gifts, or to sell at a local craft fair, each bookmark will carry the unique charm of being handmade.
This beginner-friendly project proves that you don’t need extensive sewing experience or expensive materials to create something beautiful and functional. So, gather those fabric scraps, fire up your sewing machine, and embark on this rewarding journey. You’ll soon have a stack of delightful fabric corner bookmarks, ready to hold your place in countless literary adventures. Share your creations, inspire others, and continue exploring the wonderful world of DIY!