
For countless enthusiasts around the globe, working with yarn is more than just a hobby; it’s a creative outlet, a therapeutic escape, and a way to bring beautiful, tangible objects to life. From cozy blankets and stylish scarves to charming coasters, warm hats, practical dishcloths, unique plant holders, adorable amigurumi animals, and an endless array of other crafts, the possibilities with yarn are truly limitless. It’s a wonderfully rewarding way to spend your time, transforming strands of fiber into intricate designs and cherished keepsakes.
Yarns themselves come in an astonishing variety of colors, textures, and weights, each offering a unique character to your projects. However, a common challenge many crafters face is dealing with unruly skeins or hanks that need to be wound into neat, manageable balls or cakes before they can be used. This process can often be tedious and time-consuming, especially when you’re eager to start a new project or consolidate leftover yarns. Imagine finding yourself with a beautiful two-toned yarn that’s a tangled mess or needing to join two different yarn colors into a single, cohesive ball, but without a dedicated yarn winder at hand. What if there was a simple, ingenious hack that could transform this chore into a quick, effortless task?
Fortunately, there is! Thanks to innovative ideas shared by creators like Rumble Viral, a clever trick has emerged that allows you to wind an entire skein of yarn in just a minute, all without the need for manual winding or expensive equipment. This hack utilizes a common household appliance, redefining its purpose to serve your crafting needs. Prepare to save significant time and energy, allowing you to focus on the joy of creating rather than the frustration of yarn preparation.
RELATED: How to Make a DIY Yarn Ladybug with a Fork
Why Efficient Yarn Winding is Crucial for Every Crafter
Before diving into the specifics of this remarkable hack, it’s worth considering why proper yarn winding is so important. Many yarns, especially those purchased in hanks (large loops of yarn) or even some skeins, can easily tangle if not wound correctly. A well-wound yarn ball or cake offers several advantages:
- Prevents Tangles: A compact, uniformly wound ball significantly reduces the likelihood of frustrating knots and snarls, ensuring a smooth crafting experience.
- Easy Storage: Neatly wound yarn takes up less space and is easier to organize in your craft stash.
- Center-Pull Access: Many crafters prefer working from a center-pull ball, which keeps the yarn stationary and prevents it from rolling away as you work. This hack can help create such a ball.
- Consistent Tension: Winding yarn yourself allows you to control the tension, ensuring your stitches remain even and your finished project looks professional.
- Project Continuity: When you need to join multiple yarns or wind leftovers, having an efficient method means less downtime and more crafting time.
This hand mixer hack addresses these points directly, offering a practical solution that every knitter, crocheter, and weaver can benefit from.
Essential Materials: What You Need to Wind Up Yarn Faster
The beauty of this hack lies in its simplicity and the accessibility of its required tools. You likely already have these items in your home, making it a truly budget-friendly and convenient solution. To get started, you will need just four basic materials:
- Scissors: Any standard pair of scissors will do for a quick snip.
- Toilet Roll Core: An empty cardboard tube from a toilet paper roll is the perfect cylindrical base for your yarn ball.
- Hand Mixer: Yes, your kitchen hand mixer, typically used for baking, is the star of this innovative setup.
- Yarn: Of course, you’ll need the yarn you intend to wind! This method works for various yarn weights and fibers.
Note: It is crucial to ensure that the toilet roll core fits snugly, yet not too tightly, inside one of the beaters of your hand mixer. A good fit will ensure stability and efficient winding. If the core is too loose, it might wobble; if too tight, it could be difficult to attach or remove.
Step-by-Step Guide: How to Quickly Wind Up Yarn with a Hand Mixer
Follow these simple steps to transform your unruly yarn into a perfectly wound ball in no time:
Step 1: Prepare Your Equipment for Winding
Begin by setting up your workstation. Lay your hand mixer down on a stable, flat surface such as a table or counter. Position it so that its main body lies flat, and one of the beaters is pointing upwards or to the side, ready to receive the toilet roll. Now, carefully place the empty cardboard toilet roll core inside one of the beaters of the hand mixer. Ensure it’s centered and secure. This setup forms the core around which your yarn will be wound, using the mixer’s power to do the hard work.
Step 2: Create the Yarn Anchor Point
Take your scissors and make a small, shallow slit on the bottom edge of the toilet roll core. This slit serves a vital purpose: it will act as an anchor for the initial end of your yarn, preventing it from slipping as the winding process begins. Make sure the slit is just deep enough to securely hold the yarn strand without tearing the entire roll.
Step 3: Initiate the High-Speed Winding Process
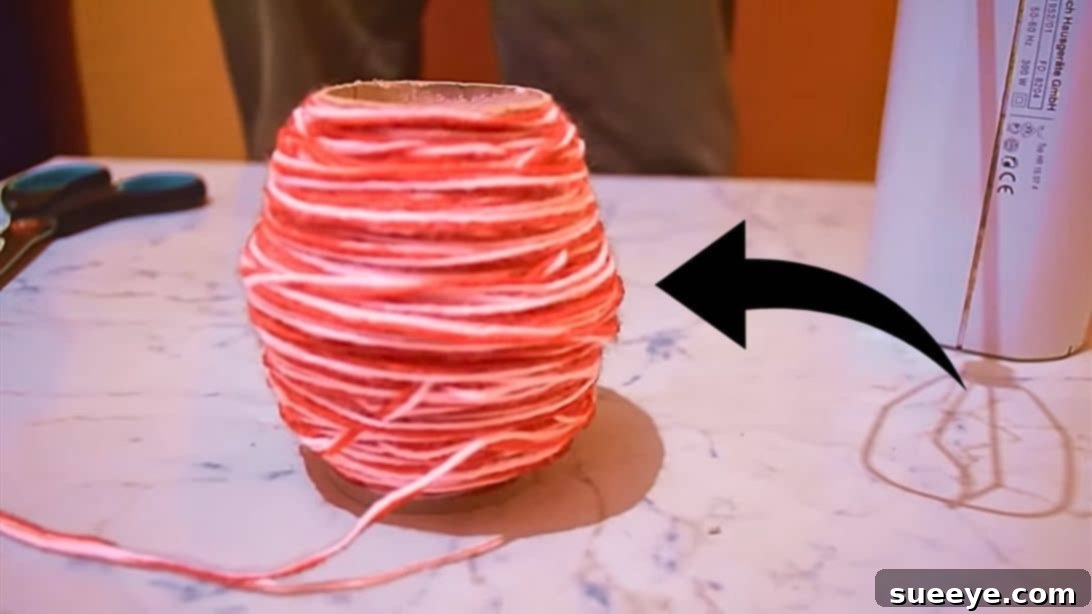
Now, gently insert one end of your yarn through the slit you just made on the toilet roll. This secures the starting point. Next, manually wrap the working yarn around the toilet roll a few times with your hand to establish a stable base. Once you have a few secure wraps, take the free strand of yarn (the one coming from your main yarn supply) and hold it firmly with your dominant hand, maintaining a light but consistent tension. With your other hand, gently press the “on” button of your hand mixer, starting at a low speed. As the beater rotates, it will swiftly wind the yarn around the toilet roll. Do not release your grip on the yarn until you have reached the other end or completed your desired ball size. To ensure an even and well-formed yarn ball, you can control the direction of the yarn feed by moving your guiding hand slightly left or right along the length of the toilet roll as it spins.
Step 4: Finishing and Removing Your Yarn Ball
Once you’ve wound all your yarn or reached the desired size for your ball, turn off the hand mixer. Carefully snip the yarn, leaving a tail that can be tucked into the finished ball. Gently slide the newly wound yarn ball off the toilet roll core and off the mixer beater. You’ll be left with a perfectly wound, compact yarn cake that is ready for your next project, often with a convenient center-pull option.
Benefits of This Ingenious Yarn Winding Method
Embracing this hand mixer hack offers a multitude of advantages for crafters of all skill levels:
- Unparalleled Speed: The most significant benefit is the sheer speed. What used to take several minutes of manual winding can now be accomplished in under a minute, drastically cutting down preparation time.
- Effortless Process: Say goodbye to hand cramps and tedious winding. The hand mixer does the heavy lifting, saving your hands and wrists for the actual knitting or crocheting.
- Neater, More Consistent Yarn Balls: The consistent rotation of the mixer ensures a uniform and compact yarn ball, minimizing tangles and creating a professional-looking cake every time.
- Cost-Effective Solution: There’s no need to invest in expensive standalone yarn winders. This hack utilizes an appliance you likely already own, making it a zero-cost solution.
- Increased Productivity: By streamlining the winding process, you free up more time to devote to your creative projects, allowing you to finish them faster or start new ones sooner.
- Accessibility: This method is accessible to almost anyone, requiring minimal tools and a straightforward technique.
Tips for Mastering Your Hand Mixer Yarn Winding
While the process is simple, a few tips can help you achieve the best results:
- Start Slow: Begin with the lowest speed setting on your hand mixer. This allows you to get a feel for the process and ensures the yarn winds evenly without tangling initially. You can gradually increase the speed as you become more comfortable.
- Maintain Consistent Tension: The key to a well-formed ball is consistent tension on the yarn as it feeds onto the toilet roll. Don’t pull too tightly, which can stretch the yarn, or too loosely, which can result in a floppy ball.
- Watch Your Yarn Feed: Keep an eye on how the yarn is coming off your original skein or hank. Ensure it’s not getting snagged or creating knots before it reaches the winding mechanism.
- Experiment with Yarn Types: This hack works well with most yarn types, but some very fine or very bulky yarns might require slight adjustments in speed or tension. Practice with a small amount of yarn first.
- Clean Your Mixer Beater: After winding, always remove the toilet roll and inspect your mixer beater for any stray yarn fibers. A quick clean ensures your mixer is ready for its next culinary task.
- Safety First: Ensure your hand mixer is on a stable surface and you have a clear workspace. Keep fingers away from the rotating beater, and always unplug the mixer before attaching or removing the toilet roll or yarn.
Expanding Your Crafting Horizons with Perfectly Wound Yarn
With a reliable and efficient method for yarn winding at your fingertips, you’re free to explore new dimensions of your crafting journey. Imagine effortlessly preparing multiple colors for a vibrant colorwork project, quickly winding leftover scraps into manageable mini-balls, or transforming large, intimidating hanks into perfectly useable cakes. This hack not only saves time but also reduces frustration, allowing you to fully immerse yourself in the creative flow of knitting, crocheting, or weaving.
Properly wound yarn enhances the overall crafting experience. It leads to smoother stitches, fewer interruptions from tangles, and ultimately, a more enjoyable process from start to finish. You can confidently tackle complex patterns, experiment with different yarn weights, and even undertake larger projects, knowing that your yarn preparation will be a breeze.
Wind Up Yarn Quickly With This Hack
The quest for efficient and enjoyable crafting often leads to discovering clever shortcuts and innovative uses for everyday items. This hand mixer yarn winding hack is a brilliant example of such ingenuity. It transforms a common kitchen tool into an invaluable asset for any yarn enthusiast, providing a rapid, effortless, and cost-effective way to prepare your yarn for your next project. By adopting this simple yet genius trick, you’ll not only save precious time and energy but also ensure your yarn is always in perfect condition, ready to be transformed into your next masterpiece. So, grab your hand mixer, a toilet roll, and your favorite yarn, and get ready to revolutionize your crafting routine!