
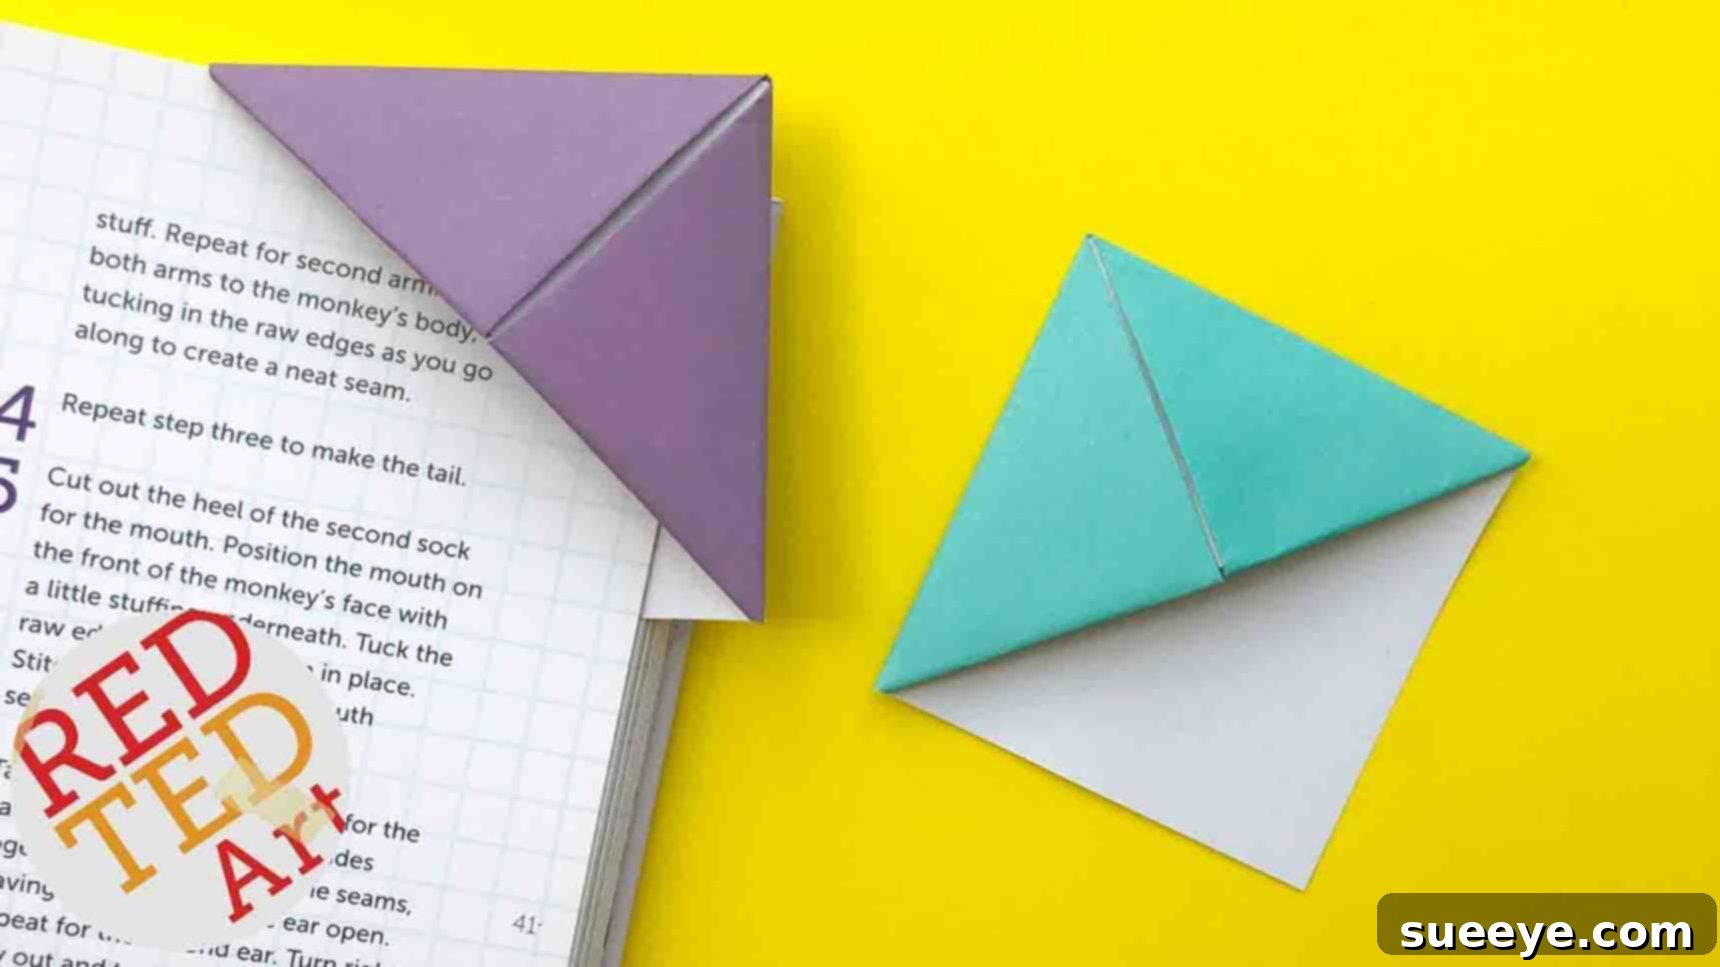
Easy & Fun DIY Origami Corner Bookmarks: A Creative Craft Tutorial
Transform your reading experience and unleash your creativity with these delightful DIY origami corner bookmarks! Inspired by the fantastic tutorial from Red Ted Art on Youtube, making your own bookmarks is not only incredibly fun but also surprisingly simple. Whether you’re a seasoned crafter or a beginner looking for an engaging project, these unique paper bookmarks offer endless possibilities for personalization. You can design each one to reflect your personality, match a favorite book cover, or even create a themed collection. Beyond being a charming addition to your own reading toolkit, they also make thoughtful and budget-friendly gifts for the bookworms in your life – be it friends, family members, or even teachers. Gather your craft materials today and embark on a rewarding journey of handmade artistry. Follow our detailed step-by-step guide below to master the art of creating these charming corner bookmarks!
Why Craft Your Own Origami Corner Bookmarks?
In an increasingly digital world, there’s a unique charm in tangible, handmade items. DIY origami corner bookmarks stand out as a perfect blend of utility and personal expression. Here’s why you should consider making them:
- Personalized Touch: Unlike mass-produced bookmarks, yours will be truly unique. You can customize them with colors, patterns, and characters that resonate with you or the recipient, making each bookmark a reflection of individual style.
- Eco-Friendly & Budget-Conscious: Often made from paper scraps or readily available materials, these bookmarks are an excellent way to upcycle and save money. They offer a sustainable and creative alternative to buying new, reducing waste and encouraging resourcefulness.
- Therapeutic & Mindful Activity: The process of folding paper, choosing colors, and adding decorations can be incredibly relaxing and meditative. It’s a wonderful way to de-stress, improve focus, and engage in a calming creative outlet away from screens.
- Perfect Handmade Gifts: Struggling to find a unique gift for a book lover? A collection of handmade corner bookmarks, perhaps paired with a new book, shows thoughtfulness and effort that store-bought items simply can’t replicate. They are gifts from the heart.
- Fun for All Ages: This craft is simple enough for children to enjoy with adult supervision, yet sophisticated enough for adults to explore intricate designs and variations. It’s a fantastic family activity that brings everyone together for creative fun.
- Boosts Creativity: From the initial fold to the final decorative flourish, each step encourages creative thinking, problem-solving, and the development of fine motor skills.
- Practical & Functional: Beyond their aesthetic appeal, these bookmarks serve a very practical purpose, neatly holding your place in any book without damaging pages.
Essential Materials for Your DIY Origami Bookmarks:
One of the best aspects of this DIY project is its accessibility. You likely have most of these materials lying around your home already, making it an ideal spontaneous craft. Here’s what you’ll need to get started on your origami corner bookmark adventure:
- White Printer Paper (or any base paper): A standard 15 x 15 cm (approximately 6 x 6 inch) square is ideal for a classic bookmark size. This dimension offers ample space for decoration without being overly bulky for most books. While standard printer paper works perfectly for beginners and practice, slightly thicker paper like lightweight cardstock (e.g., 100-120 gsm) will result in a more durable and professional-looking bookmark that stands up to frequent use.
- A Pad of Colored Paper (or patterned paper): This is where the fun really begins and your creativity can shine! Choose a variety of colors and patterns to bring your bookmarks to life. Scrapbooking paper, construction paper, or even carefully selected cut-outs from magazines can work wonders. Having a selection allows for diverse designs and themes.
- Coloring Pens (or markers, pencils, paints): Essential for adding details, drawing faces, creating intricate patterns, or personalizing your bookmarks with unique designs. Consider having a range of colors and different tip sizes (fine-point for details, broad-tip for filling in) for various effects.
- Scissors: A good pair of sharp scissors will ensure clean, precise cuts, especially if you plan to trim edges, create shapes, or add decorative elements. For younger crafters, safety scissors are highly recommended and should be used under adult supervision.
- Glue Stick (or PVA glue): Crucial for securely fastening flaps and attaching any additional decorative elements you might want to add. A glue stick is generally less messy than liquid glue and dries quickly, making it ideal for paper crafts and ensuring a neat finish without causing the paper to warp.
For those looking to add an extra flourish, optional materials might include stickers, glitter, googly eyes, decorative tape (washi tape), small fabric scraps, or anything else that sparks your imagination and enhances your design!
Step-by-Step Directions to Create Your Origami Corner Bookmark:
Follow these detailed instructions to fold your very own charming corner bookmark. Precision in folding is key to a neat, functional, and aesthetically pleasing bookmark. Take your time with each step to ensure crisp creases.
Step 1: Preparing Your Paper and Initial Folds
Begin by taking your chosen square piece of paper, ideally 15 x 15 cm. This size is versatile, suitable for most standard books, and provides ample surface area for decoration. Place your paper flat on a clean, hard surface, oriented so it looks like a traditional square (with sides perfectly horizontal and vertical).
- Initial Diamond Orientation: First, gently rotate your square paper by 45 degrees so that one of its corners points directly upwards. This creates a diamond shape, making the subsequent folds more intuitive and aligning the paper for the bookmark’s triangular structure.
- First Major Fold – Base Triangle: Take the bottom corner of your diamond and carefully bring it all the way up to meet the top corner. Align the edges precisely, ensuring there are no overlaps or gaps. Once aligned, firmly press down along the fold line, starting from the center and working outwards, to create a crisp crease. This fold forms the fundamental large triangle that will be the base of your bookmark.
- Creating Guide Folds for Tucking: With your large triangle still folded, take the pointy corner that is now at the bottom (which was originally one of the side corners of the initial square) and bring it upwards. Fold it so its tip meets the top corner of the large triangle. Make a neat, firm crease along this new fold. Repeat this exact action with the other pointy bottom corner, bringing it up to the same top corner and creasing neatly. These two folds are crucial guide folds; they do not form part of the final visible structure but prepare the paper for the next steps by indicating where the flaps will be tucked.
- Unfolding for the Next Step: Once you have made both guide creases from the previous step, carefully unfold the two corners you just brought up. Your paper should now be back in the shape of the large triangle from the second step, but with two visible crease lines extending from the bottom two corners to the top corner. Making sure all your creases are nice and neat throughout this process is paramount, as clean folds make the finished bookmark look professional and function correctly.
Step 2: Forming the Corner Pocket and Finalizing the Basic Bookmark
Now that you have your base triangle with its guide creases, you’re ready to create the functional pocket that will allow your bookmark to snugly hold onto the corner of a book page. This step is where the magic of the “corner” bookmark truly comes to life.
- Bringing Down One Flap to Create the Pocket Opening: With the large triangle still oriented with its longest, open side at the bottom and the single folded corner pointing upwards, take only the top layer (one of the two “flaps” that meet at the top point) and bring it down towards the bottom edge. The tip of this flap should align precisely with the center of the bottom edge of your large triangle. Crease this fold firmly and smoothly. This action creates a smaller triangular flap that will form the outer layer of your bookmark’s pocket.
- Tucking the Side Flaps – First Side: Now, identify one of the side flaps of the large triangle. This is one of the corners that you previously folded up to create a guide crease. Take this pointy bottom corner and bring it upwards, folding it along the guide crease you made in Step 1. As you bring it up, carefully tuck this entire folded section *into* the pocket you started to form in the previous step. Ensure it goes all the way in and sits snugly against the inner crease. Press down firmly to secure this tuck, using a glue stick if necessary to hold it in place.
- Tucking the Side Flaps – Second Side: Repeat the exact same tucking process with the other side flap. Bring the remaining pointy bottom corner upwards, folding it along its guide crease, and carefully tuck it into the same pocket. Make sure both tucked flaps are neat and smooth, creating a clean, secure, and functional pocket.
Congratulations! Your basic corner bookmark is now fully formed. It should have a sturdy, open pocket ready to embrace the corner of any book page, keeping your place without slipping. At this point, you have a perfectly functional bookmark, but the real fun begins with decoration. You can absolutely stop here if you prefer a minimalist look, or continue to personalize it to your heart’s content, making it truly unique!
Creative Decoration Ideas for Your DIY Corner Bookmarks
This is where your origami corner bookmark truly transforms from a simple folded paper into a unique work of art that expresses your personality or serves as a thoughtful gift. The possibilities for decoration are limitless, allowing you to create distinctive designs for every mood, season, or book genre imaginable.
Simple & Classic Bookmark Designs:
- Character Faces: The triangular shape of the corner bookmark is perfectly suited for creating simple, endearing faces. Add two googly eyes (or draw them on with markers), then use coloring pens to sketch a mouth, nose, and expressive eyebrows. Experiment with happy, surprised, sleepy, or even comically grumpy expressions!
- Adorable Animal Faces: Extend the face idea to charming animals. Easily add ears by cutting small triangles, rounded shapes, or elongated ovals from colored paper and gluing them to the top corners of your bookmark. Think about cute bunny ears, pointy cat ears, or round bear ears. Draw on whiskers, snouts, spots, or stripes to bring your animal to life.
- Monsters & Aliens: Unleash your imagination with fun monster and alien designs! Use vibrant, unusual colors, add multiple eyes, sharp teeth cut from contrasting paper, or whimsical antennae made from pipe cleaners or paper strips. These are especially popular and fun for children’s books.
- Geometric Patterns: For a more sophisticated look, use rulers and coloring pens to draw precise stripes, polka dots, checkerboard patterns, or intricate geometric designs. This approach can yield very clean, modern, and stylish bookmarks.
- Quote Bookmarks: Personalize your bookmark by writing a favorite short quote, an inspiring word, a meaningful phrase, or a simple “Read More” message. Use neat handwriting, calligraphy, or stencils for a polished finish.
Themed & Advanced Bookmark Concepts:
- Seasonal Bookmarks:
- Autumn: Decorate with motifs like falling leaves in warm hues of orange, red, and brown, acorns, or charming pumpkin themes.
- Winter/Holiday: Adorn with delicate snowflakes, cheerful reindeer, miniature Santa hats, cozy sweater patterns, or festive scenes. Think cool blues, crisp whites, and traditional reds and greens.
- Spring: Celebrate with vibrant flowers, playful butterflies, buzzing bees, or a palette of fresh pastel colors.
- Summer: Capture the essence of summer with suns, beach scenes, ice cream cones, or ocean-themed elements. Use bright blues, sunny yellows, and tropical colors.
- Book Genre Bookmarks:
- Fantasy: Incorporate designs like majestic dragons, towering castles, magical symbols, or mystical starry night skies.
- Mystery: Create intriguing bookmarks with magnifying glasses, enigmatic question marks, or dark, intriguing patterns that hint at secrets.
- Romance: Embellish with delicate hearts, beautiful flowers, or elegant script.
- Science Fiction: Design with futuristic elements like stars, planets, spaceships, abstract geometric patterns, or cute robots.
- Specific Characters: If you know a friend’s favorite book or movie character, try to recreate a simplified version of their face, costume elements, or iconic symbols on the bookmark.
- Layering & Embellishments: Cut out various shapes from different colored papers and layer them onto your bookmark for a three-dimensional effect. Add small stickers, glitter glue, sequins, buttons, or even tiny ribbon bows for extra texture, sparkle, and visual interest.
- Pop-Up Elements: For a more advanced and interactive touch, you can add small pop-up elements. For example, a tiny “speech bubble” or a small character that pops up slightly when the book is closed, adding an element of surprise.
Remember to let your glue dry completely before using your bookmark to prevent any sticking to your book pages. The key is to have fun, experiment with different materials and techniques, and let your unique style shine through each design!
Gifting Your Handmade Corner Bookmarks: Thoughtful Presents for Book Lovers
Once you’ve mastered the art of making these delightful origami corner bookmarks, you’ll quickly realize their potential as incredibly thoughtful and personalized gifts. Far beyond a simple functional item, a handmade bookmark carries a personal touch that speaks volumes and shows genuine care.
- Tailor to the Recipient: The beauty of handmade gifts lies in their personalization. Before you start decorating, think about the recipient’s favorite colors, animals, book genres, hobbies, or even their personality. Do they love fantasy novels? Create a bookmark with a tiny dragon or a wizard hat. Are they a cat person? Design a bookmark with cute cat ears and whiskers. This level of personalization makes the gift truly special and shows you put significant thought and effort into selecting or creating something just for them.
- Pair with a Book: The ultimate gift for a devoted bookworm is, of course, a book! Elevate your present by pairing your handmade bookmark with a new novel, a beloved classic, or even a non-fiction book related to their hobbies or interests. Tuck the bookmark right into the first few pages for a delightful and unexpected surprise that combines two wonderful things.
- Create Themed Gift Sets: Instead of just one, why not create a themed set of bookmarks? For example, a set of four bookmarks depicting different seasons, a collection of fun monster faces, or various literary symbols. Package them nicely with a simple ribbon, in a small craft box, or a decorative envelope to create an impressive and cohesive gift.
- Perfect for Various Occasions: Handmade bookmarks are versatile and perfect for a wide range of occasions:
- Birthdays: A personalized touch that makes their special day even more memorable.
- Holidays: Excellent as Christmas stocking stuffers, Easter basket additions, or festive gifts during any holiday season.
- Teacher Appreciation: A sweet, practical, and heartfelt gift to show gratitude for their dedication and hard work.
- Book Club Gifts: A charming and thoughtful token for fellow members of a book club, perhaps matching the theme of a recent read.
- “Just Because” Gifts: Sometimes the best gifts are given without a specific reason, simply to show you care and brighten someone’s day.
- Incorporate into Greeting Cards: For a delightful bonus, attach a small, personalized bookmark to a birthday card, thank-you note, or holiday greeting as an extra little treat that adds value and charm to your message.
These handmade treasures are not just page holders; they are miniature pieces of art that enhance the reading experience and convey genuine affection. Embrace the joy of giving by sharing your beautiful and unique creations with those you cherish!
Tips for Success and Exploring Advanced Bookmark Techniques
To ensure your origami corner bookmarks are always top-notch and to help you explore more complex designs and techniques, consider these additional tips and ideas:
- Invest in Quality Paper: While standard printer paper is excellent for practice and quick projects, investing in slightly thicker paper (e.g., 100-120 gsm) or light cardstock will result in more durable, rigid, and professional-looking bookmarks. Patterned scrapbooking paper is also an excellent choice for adding immediate visual interest and texture.
- Prioritize Precision: In origami, neat folds and precise alignment are paramount for a clean, functional, and aesthetically pleasing end product. Take your time with each folding step, ensure edges meet perfectly, and press creases firmly and cleanly. Using a bone folder or even the edge of a ruler can help create very sharp, crisp edges.
- Experiment with Sizes: Don’t limit yourself to the standard 15×15 cm square. Try smaller squares for tiny paperback books or larger ones for textbooks, journals, or cookbooks. Just ensure your starting paper is perfectly square to maintain the integrity of the folds.
- Practice Makes Perfect: Your first few bookmarks might not be flawless, and that’s perfectly okay! Origami is a skill that improves with practice. Keep folding, and you’ll quickly refine your folding techniques and develop a keen eye for design.
- Involve Children in the Craft: This is a fantastic craft for children, helping them develop fine motor skills, hand-eye coordination, and creativity. Supervise them carefully, especially with scissors, and encourage them to lead on the decoration front, fostering their imagination.
- Beyond Basic Shapes: Once you’re comfortable with the basic corner structure, explore variations. You can cut the visible top edge of the bookmark into a rounded shape, a gentle wave, a jagged edge, or even intricate patterns using craft punches for unique effects.
- Laminate for Enhanced Durability: For bookmarks that will see a lot of use, or if you want to preserve an intricate design, consider laminating them after decoration. This adds a protective layer, making them waterproof, tear-resistant, and much more long-lasting.
- Utilize Double-Sided Paper: For an interesting and dynamic visual effect, use paper that has a different color or pattern on each side. When the bookmark is folded, both patterns will be visible, adding an extra layer of design complexity.
- Consider Adhesives Wisely: While a glue stick is generally sufficient, for attaching heavier embellishments or ensuring very strong bonds, a small amount of craft glue (PVA glue) can be used. Just apply sparingly to avoid wrinkling the paper.
Start Crafting Your Own Unique Collection Today!
Creating DIY origami corner bookmarks is a truly rewarding and enjoyable craft that offers endless creative possibilities. From the simple, meditative act of folding paper to the intricate details of decoration, each step allows you to infuse your personality and artistic flair into a functional and beautiful item. Whether you’re making them for yourself to brighten your daily reading, as thoughtful and personalized gifts for friends and family, or simply to enjoy a mindful crafting session, these bookmarks are a perfect and accessible project for everyone.
So, gather your materials, follow the simple yet detailed steps outlined above, and let your imagination soar. Dive into the wonderful world of paper crafts and start making your own adorable, practical, and utterly unique corner bookmarks. Happy folding and, most importantly, happy reading!