
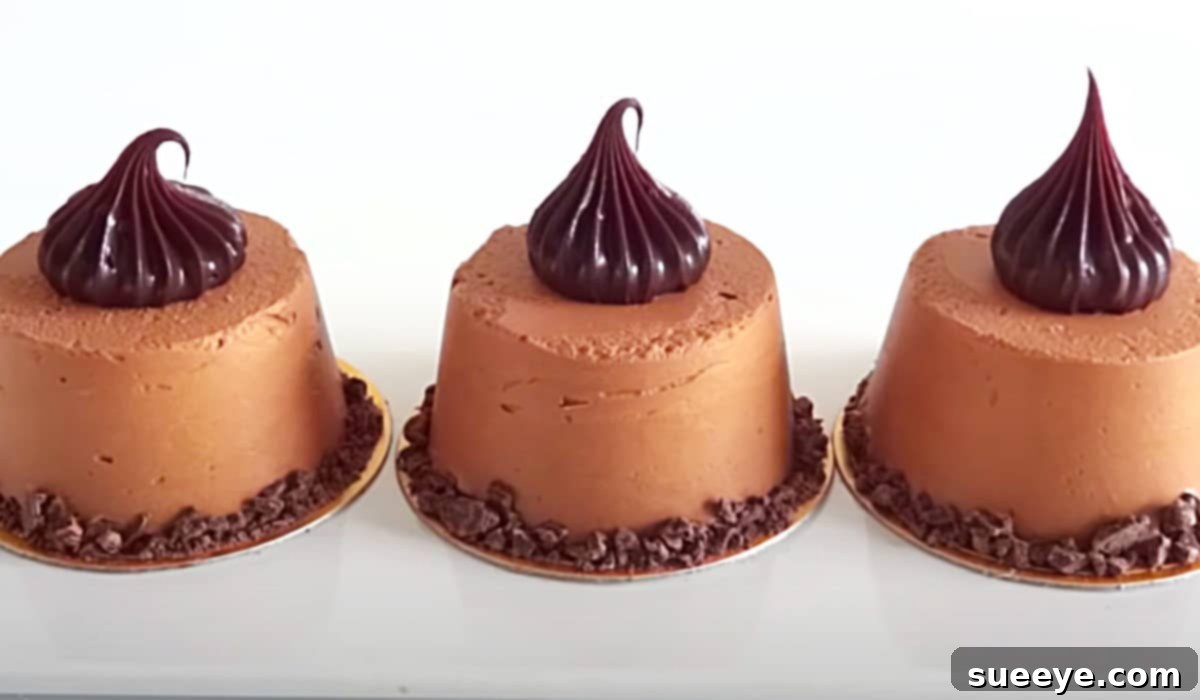
Indulge in Simplicity: The Ultimate 3-Ingredient Mini Chocolate Mousse Cakes Recipe
There are certain culinary experiences that leave an indelible mark on your memory. For me, the first encounter with a classic chocolate mousse in France years ago was one such moment. Its ethereal texture, profound chocolate flavor, and sophisticated appearance instantly captivated me. However, like many exquisite desserts, I always harbored the misconception that chocolate mousse was an incredibly complex creation, reserved only for professional patissiers or those with endless hours to dedicate in the kitchen. This belief, unfortunately, kept me from attempting to recreate that magic at home for far too long.
That all changed when I stumbled upon a game-changing video tutorial by Cupcake Savvy’s Kitchen on YouTube. The title alone, “3-Ingredient Mini Chocolate Mousse Cakes,” sounded almost too good to be true. Could something so decadent and delightful genuinely require just three simple ingredients? My skepticism quickly turned into pure astonishment as I watched the steps unfold. What I once perceived as an insurmountable culinary challenge was, in fact, remarkably easy to achieve. These mini mousse cakes aren’t just a dessert; they’re a revelation, proving that elegance doesn’t always demand complexity. They are absolutely perfect for any occasion, transforming an ordinary gathering into an extraordinary celebration, or simply elevating a quiet evening into a special treat.
The Magic Behind Just Three Ingredients: Why Simplicity Reigns Supreme
In a world where elaborate recipes often dominate, the beauty of a 3-ingredient dish cannot be overstated. It speaks to the home baker seeking delicious results without the fuss, the host looking for an impressive yet easy party dessert, and anyone who appreciates the pure, unadulterated flavor of key ingredients. This particular recipe masterfully combines simplicity with sophistication, resulting in a dessert that tastes far more intricate than its ingredient list suggests. The secret lies in the quality of those three ingredients and how they interact to create that signature light, airy, and rich chocolate mousse texture.
Using minimal ingredients not only saves time and reduces stress but also highlights the core flavors. There’s no hiding behind a multitude of components; each element must shine. This makes choosing good quality dark chocolate and fresh heavy cream paramount to the success and ultimate deliciousness of these mini cakes. When you’re only working with a few items, their individual excellence contributes significantly to the final outcome. It’s a testament to how sometimes, less truly is more, especially in the realm of irresistible desserts.
Unveiling the Essential Ingredients: Your Path to Decadence
- 200 grams of High-Quality Dark Chocolate: This is the soul of your mousse. Opt for dark chocolate with a cocoa content of 60% or higher for a rich, intense flavor that isn’t overly sweet. Bittersweet chocolate also works wonderfully, providing a balanced profile. High-quality chocolate melts smoother and offers a superior taste, making a significant difference in the final product.
- 200 grams of Hot Heavy Whipping Cream: This portion of the cream serves a crucial role: creating a luscious ganache base. When hot cream is poured over chopped chocolate, it melts the chocolate gently and evenly, forming a smooth, glossy emulsion. This ganache acts as the flavorful foundation of your mousse, providing depth and body.
- 250 grams of Cold Heavy Whipping Cream: The cold cream is where the magic of aeration happens. Whipped to soft peaks, it incorporates air into the mixture, transforming the dense ganache into a light, fluffy mousse. The cold temperature is essential for the cream to whip properly and hold its structure, giving the mousse its characteristic airy texture.
Mastering the Recipe: Step-by-Step Guide to Perfect Mini Mousse Cakes
Making these 3-ingredient mini chocolate mousse cakes is surprisingly straightforward, and the process is incredibly rewarding. The beauty lies in the clear stages of preparation, each contributing to the final luxurious texture and flavor. Follow these detailed steps to create your own batch of irresistible mini desserts.
Step 1: Crafting the Silky Chocolate Base
Begin by finely chopping your 200 grams of dark chocolate. The smaller the pieces, the faster and more evenly the chocolate will melt. Place the chopped chocolate in a heatproof bowl. In a small saucepan, gently heat the first 200 grams of heavy whipping cream until it just begins to simmer around the edges, but do not let it boil vigorously. Remove from heat and immediately pour the hot cream over the chopped chocolate. Let it sit undisturbed for about 2-3 minutes; this allows the residual heat to melt the chocolate. Then, using a spatula or whisk, gently stir from the center outwards until you achieve a smooth, glossy, and uniform ganache. Set this aside to cool slightly to room temperature.
Step 2: Achieving the Perfect Mousse Texture
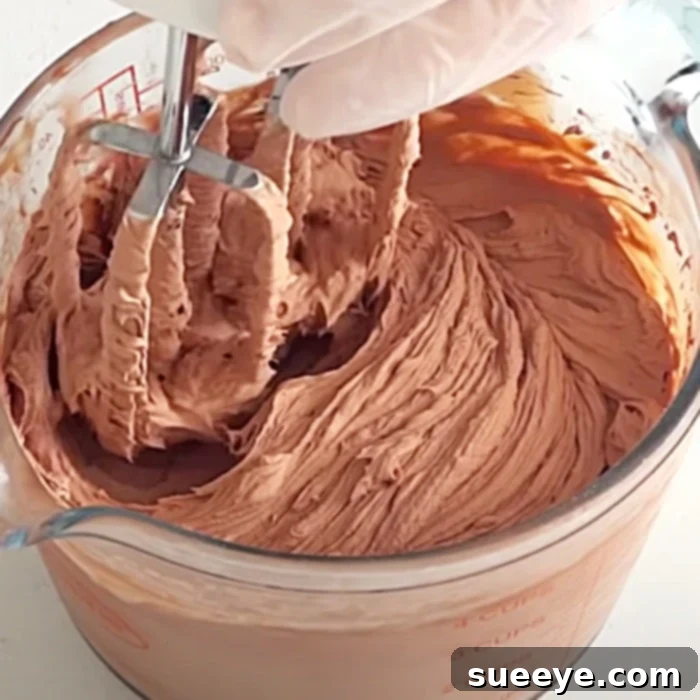
While your ganache is cooling, take your remaining 250 grams of cold heavy whipping cream. Ensure it is very cold, as this helps it whip up light and fluffy. Pour the cold cream into a large mixing bowl. Using an electric mixer (handheld or stand mixer with a whisk attachment), start whipping the cream on medium speed. Gradually increase the speed to high. Continue whipping until the cream forms soft peaks. This means when you lift the whisk, the cream holds its shape but the tip gently curls over. Be careful not to over-whip, as you don’t want stiff peaks or butter. Soft peaks are key for the light mousse texture.
Step 3: Gently Folding for Lightness
Once your ganache has cooled to room temperature (it should still be liquid but not hot), it’s time to combine the two mixtures. Take about a third of your whipped cream and add it to the ganache. Gently fold it in using a spatula. This initial addition helps to lighten the ganache and makes it easier to incorporate the remaining whipped cream without deflating it. Once partially combined, add the rest of the whipped cream to the chocolate mixture. Using a gentle folding motion, combine the two until no streaks of white cream remain. The goal is to incorporate everything without knocking out all the air you’ve just whipped into the cream. The resulting mixture should be light, airy, and uniformly chocolatey.
Step 4: Assembling Your Mini Masterpieces
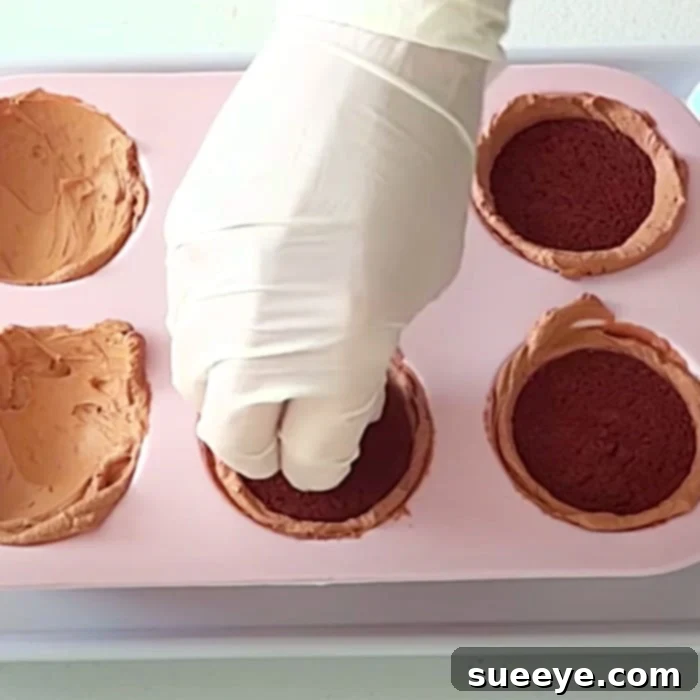
Now for the fun part – assembly! You’ll need a cupcake or muffin tin lined with paper liners, or silicone cupcake molds for easy release. Carefully spoon or pipe the chocolate mousse mixture into each liner, filling them about halfway. Then, take your chosen chocolate cookie (Oreo, chocolate digestive, shortbread, etc.) and gently press one into the center of the mousse mixture in each cup. The cookie adds a delightful textural contrast and a slight crunch that complements the smooth mousse. If desired, you can then top with a little more mousse to completely cover the cookie, creating a smooth top. Once filled, place the entire tray into the refrigerator and chill for at least 4-6 hours, or preferably overnight. Chilling is crucial for the mousse to set properly and achieve its firm yet melt-in-your-mouth consistency.
Tips for Perfection: Ensuring Your Mousse is Heavenly
- Quality Matters: Since there are only three ingredients, the quality of each is paramount. Invest in good dark chocolate and fresh heavy whipping cream for the best flavor and texture.
- Temperature Control: Ensure your ganache is cooled but still fluid before folding in the whipped cream. If it’s too hot, it will melt the cream; if it’s too cold and firm, it will be difficult to combine smoothly.
- Don’t Over-Whip the Cream: Whipped cream can go from soft peaks to grainy and over-whipped very quickly. Watch it carefully and stop as soon as soft peaks are achieved.
- Gentle Folding: This is key to maintaining the airy texture of the mousse. Use a light hand and a folding motion rather than stirring vigorously.
- Ample Chilling Time: Do not rush the chilling process. A minimum of 4 hours is necessary, but overnight will yield the best set and most stable mousse cakes.
Creative Variations and Serving Ideas
While the classic 3-ingredient chocolate mousse cake is divine on its own, don’t hesitate to get creative with variations and garnishes to suit your taste or occasion. These small touches can elevate an already fantastic dessert to an even more personalized treat.
- Chocolate Choices: Experiment with different types of chocolate. Milk chocolate will yield a sweeter, milder mousse, while extra dark chocolate will offer a more intense, less sweet experience. You could even swirl in a touch of melted white chocolate for a marbled effect.
- Cookie Companions: Beyond classic chocolate cookies, consider shortbread for a buttery crunch, a delicate wafer cookie, or even a gluten-free option. For a coffee kick, use espresso-flavored cookies.
- Flavor Infusions: Before heating the cream for the ganache, infuse it with flavor. Add a dash of vanilla extract, a hint of orange zest, a tablespoon of rum or Kahlua, or even a pinch of chili powder for a Mexican hot chocolate twist.
- Elegant Garnishes: Once chilled, these mini mousse cakes are a blank canvas. Dust with cocoa powder, grate some chocolate shavings, add a fresh raspberry or a few blueberries, a sprig of mint, or a dollop of extra whipped cream. A sprinkle of sea salt flakes can also beautifully enhance the chocolate flavor.
- Presentation Matters: Serve them individually on small plates for an elegant touch, or arrange them artfully on a dessert platter for a buffet. Their individual portions make them incredibly convenient for guests to enjoy.
Why Mini Mousse Cakes Are Party Perfect
Mini desserts are a host’s best friend, and these chocolate mousse cakes are no exception. Their individual portion size makes them incredibly easy to serve, eliminating the need for slicing and messy plates. Guests can simply grab and enjoy without the hassle. They also look stunning on a dessert table, adding a touch of sophisticated charm. Plus, preparing them in advance means less stress on the day of your event, allowing you to relax and enjoy your own party. Whether it’s a birthday, a dinner party, or a casual get-together, these mini mousse cakes are guaranteed to be a crowd-pleaser and elicit compliments from everyone who tastes them.
Conclusion: Your New Go-To Dessert
From the moment I first tasted chocolate mousse in France to my discovery of Cupcake Savvy’s brilliant 3-ingredient recipe, my perception of this classic dessert has been completely transformed. What was once an intimidating culinary feat is now a simple, joyful process that yields spectacular results every single time. These mini chocolate mousse cakes are more than just a treat; they are a testament to the power of simplicity, demonstrating that luxurious flavors and elegant presentations can be achieved with minimal effort.
I wholeheartedly encourage you to try this recipe. It’s an experience that promises to impress your guests, delight your family, and satisfy your own chocolate cravings with remarkable ease. Prepare to be amazed by how three humble ingredients can come together to create such an unforgettable dessert. Get ready to make these your new go-to party treat, because once you try them, you’ll be just as hooked as I am. Happy baking, and more importantly, happy indulging!
If you’re visual learner, remember to check out the original Cupcake Savvy’s Kitchen video on YouTube for a step-by-step demonstration!