
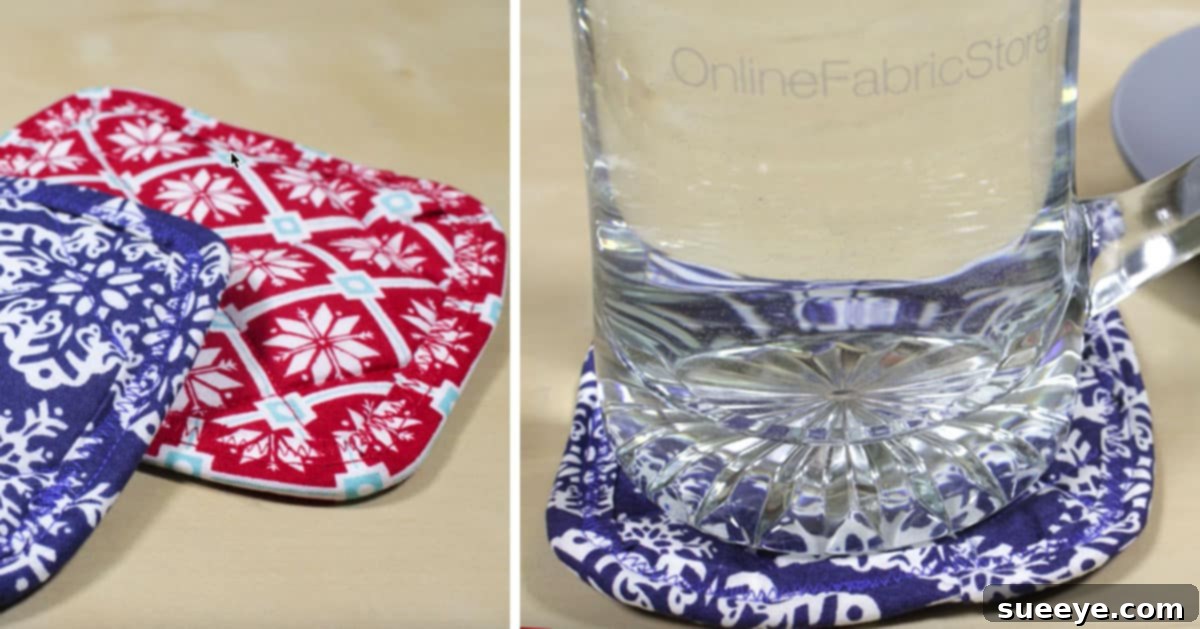
The Ultimate Guide to DIY Fabric Coasters: Easy Sewing Project for Beginners and Perfect Handmade Gifts
As the holiday season draws near, there’s a unique joy that comes from crafting gifts and decorations with your own hands. This year, I’m thrilled to embark on a festive journey with you, presenting a series of effortless handmade items perfect for adding that personal touch to your celebrations. Forget the frantic rush of crowded stores; instead, imagine the satisfaction of creating beautiful, thoughtful pieces right from your home. Our mission is to inspire you with simple, yet elegant, handmade gift ideas and charming decor that will make your holidays truly special.
To kick off this exciting series, I’m delighted to share a project that’s not only incredibly cute but also remarkably simple to make: DIY fabric coasters. These delightful little creations are an absolute dream for anyone new to sewing. If you’ve been looking for the perfect entry point into the wonderful world of needle and thread, consider this your ideal starting line. Not only do they offer quick gratification, but they also serve as a fantastic opportunity to transform those beloved fabric scraps you’ve been collecting into something both practical and aesthetically pleasing. So, gather your favorite remnants, because we’re about to dive into a project that promises fun, functionality, and a touch of handmade charm.
Why Choose Handmade Fabric Coasters? A Blend of Style, Protection, and Sustainability
In a world often dominated by mass-produced items, there’s a special appeal to things made with care and intention. Handmade fabric coasters are a prime example of this philosophy, offering a multitude of benefits that extend far beyond their simple function. Firstly, they are indispensable for protecting your precious furniture surfaces from unsightly drink rings and spills. But why settle for mundane when you can choose a solution that actively enhances your home’s aesthetic?
Fabric coasters allow for an unparalleled level of personalization, enabling you to infuse your unique style into every corner of your living space. Whether your decor leans towards rustic charm, modern minimalism, vibrant bohemian, or classic elegance, there’s a fabric combination waiting to bring your vision to life. Beyond their decorative prowess, these coasters champion sustainability. They offer an ingenious way to utilize leftover fabric scraps from past projects – those cherished pieces too beautiful to discard but too small for larger endeavors. This eco-friendly approach not only reduces waste but also breathes new life into textiles that might otherwise end up forgotten.
Furthermore, handmade items often boast a resilience that store-bought alternatives can’t match. I speak from experience: I once purchased a set of cork coasters that initially seemed like a bargain. They looked decent, but after only a handful of uses, they began to warp, fray, and lose their integrity. It was a clear demonstration that sometimes, the cheapest option isn’t the most cost-effective in the long run. Motivated by this disappointment and inspired by beautiful fabric coaster designs I discovered online, I decided to craft my own. The difference has been remarkable. My DIY fabric coasters have not only held up exceptionally well but also retained their charm and functionality, proving to be a durable and enduring addition to my home.
A Perfect Project for Sewing Beginners: Build Confidence One Stitch at a Time
The thought of starting a new craft, especially sewing, can sometimes feel daunting. Images of intricate patterns, complicated stitches, and hours spent hunched over a machine might discourage many. However, the beauty of fabric coasters lies in their simplicity, making them an ideal project for anyone just starting their sewing journey. You don’t need advanced skills or specialized equipment; basic straight-line stitching is predominantly all that’s required. This makes them perfect for familiarizing yourself with your sewing machine, understanding fabric tension, and practicing consistent seam allowances.
One of the most rewarding aspects of creating fabric coasters is the immediate gratification they offer. Unlike larger, more complex projects that can take days or even weeks to complete, a set of coasters can often be finished in an afternoon. This quick turnaround provides an enormous boost of confidence, allowing beginners to see tangible results of their efforts almost instantly. Successfully completing a project, no matter how small, fuels the desire to learn more and tackle increasingly ambitious sewing endeavors. It’s a wonderful way to build foundational skills without the pressure or commitment of a grand undertaking, proving that even simple stitches can lead to beautiful and useful creations.
Embrace Sustainability: Busting Your Fabric Scrap Stash with Style
For many crafters and sewers, the fabric scrap pile is a familiar sight – a treasure trove of beloved patterns, textures, and colors, often tucked away with the best intentions. These remnants, too small for a quilt or a garment but too precious to discard, are perfectly suited for coaster making. This project isn’t just about crafting; it’s about embracing a more sustainable approach to your hobbies. By utilizing fabric scraps, you’re actively participating in upcycling, minimizing waste, and giving new life to materials that might otherwise go unused.
Beyond the environmental benefits, working with scraps sparks immense creativity. Instead of buying new fabric, you’re challenged to innovate with what you already possess. This can lead to surprisingly charming combinations of patterns and colors that you might not have considered otherwise. Imagine a set of coasters, each a unique collage of your sewing history, telling a story with every piece of fabric. It’s a cost-effective solution too, allowing you to create beautiful, high-quality items without additional material expenses. This approach turns an often-overlooked collection of remnants into a source of inspiration and a testament to resourcefulness.
The Perfect Handmade Gift for Any Occasion: Thoughtful and Personalized
Looking for a truly thoughtful gift that speaks volumes about your care and effort? Handmade fabric coasters are an excellent choice for virtually any occasion. From holiday presents and housewarming gifts to birthday surprises and “just because” tokens, a set of beautifully crafted coasters is always appreciated. Unlike generic store-bought items, a handmade gift carries an inherent warmth and personal touch that resonates deeply with the recipient. It tells them you took the time and effort to create something unique, specifically with them in mind.
The versatility of fabric allows for endless personalization. You can tailor your coaster sets to match the recipient’s home decor, favorite colors, hobbies, or even a specific holiday theme. Think festive prints for Christmas, nautical themes for a beach house, elegant florals for a sophisticated friend, or whimsical patterns for a playful personality. You could even incorporate fabrics that hold special meaning to both you and the recipient. Gifting a set of four or six fabric coasters, tied with a pretty ribbon or presented in a small basket, creates a delightful and memorable present that’s both practical and decorative. It’s a gift that not only protects their surfaces but also serves as a constant reminder of your thoughtfulness.
Gather Your Supplies: What You’ll Need to Get Started
One of the beauties of this DIY fabric coaster project is that it requires only a few basic materials, many of which you might already have on hand. You don’t need a large investment to start creating. Here’s a rundown of the essential supplies:
- Fabric Scraps: Opt for 100% cotton fabrics. They are easy to work with, durable, and absorbent, making them ideal for coasters. Fat quarters or even smaller remnants (at least 5-6 inches square per piece) are perfect.
- Batting or Interfacing: A crucial element for structure and absorbency. Cotton batting (like Warm & Natural) or a firm fusible interfacing will add body and help soak up moisture, preventing it from seeping through to your surfaces.
- Matching Thread: Choose a good quality polyester or cotton thread that complements your fabric choices.
- Basic Sewing Machine: Any standard sewing machine capable of a straight stitch will work perfectly.
- Sharp Fabric Scissors or Rotary Cutter & Mat: For precise and clean cuts. A rotary cutter is faster, but good scissors are perfectly adequate.
- Pins or Fabric Clips: To hold your fabric layers securely in place while sewing.
- Iron and Ironing Board: Essential for pressing seams flat and achieving crisp, professional-looking results.
- Ruler or Measuring Tape: For accurate measuring and cutting.
- Fabric Marker or Chalk: To mark cutting lines if not using a rotary cutter.
Having these items ready will ensure a smooth and enjoyable crafting experience, allowing you to focus on the creative process rather than scrambling for supplies.
Understanding the Basic Steps: Crafting Your Own Fabric Coasters
While the goal here is to encourage you to follow a detailed video tutorial for visual guidance, understanding the fundamental steps involved will give you a clear overview of the process. Fabric coasters are constructed using simple techniques, primarily involving basic straight-line sewing and turning. Here’s a conceptual breakdown of what you’ll typically do:
- Prepare Your Fabrics: Start by cutting your chosen fabric scraps and batting into identical squares (or other shapes like circles or hexagons). A common size for coasters is 4.5 to 5 inches square, but you can customize this to your preference. Remember to pre-wash and press your fabrics to prevent shrinkage later.
- Layering and Pinning: You’ll typically create a “sandwich” of fabric. This often involves placing a piece of batting on the bottom, then two pieces of your main fabric right sides together on top. Sometimes, the batting is placed on the bottom, then one fabric right side up, then another fabric right side down. The exact layering depends on the tutorial’s specific method, but the goal is to enclose the batting and create a clean finish. Secure all layers with pins or fabric clips.
- Sewing the Perimeter: Using your sewing machine, stitch around the edges of your layered fabric, leaving a small opening (usually about 2-3 inches) along one side. This opening is crucial for turning the coaster right side out. Ensure you backstitch at the beginning and end of your seam to secure the stitches.
- Clipping Corners and Turning: Before turning, carefully clip the corners of your sewn square (if making square coasters) close to the seam, being careful not to cut through your stitches. This reduces bulk and helps create crisp corners when turned. Then, gently push your fabric through the opening you left, turning the coaster right side out. Use a point turner or a dull pencil to gently push out the corners for a neat finish.
- Pressing and Topstitching: Once turned, press the entire coaster flat with an iron, ensuring the seams are crisp and the opening is neatly tucked under. This pressing is vital for a professional appearance. Finally, to close the opening and add a decorative touch, topstitch all the way around the perimeter of the coaster, about 1/8 to 1/4 inch from the edge. This step not only secures the opening but also adds stability and a polished finish.
For a detailed, visual, step-by-step demonstration, I highly recommend watching the tutorial by the talented lady from OnlineFabricStore.net. Her clear instructions will guide you through each stage, making the process effortless and enjoyable. You won’t believe how quickly you’ll have a stack of beautiful, personalized coasters ready to use or gift!
Design Tips & Customization Ideas: Unleash Your Creativity
The real fun in making DIY fabric coasters lies in the endless possibilities for design and customization. Your fabric choices alone can dramatically alter the feel and style of your finished product. Don’t be afraid to experiment!
- Theme Your Fabrics: Consider the season or the recipient’s interests. For holidays, think festive patterns like snowflakes, reindeers, or traditional reds and greens. For everyday use, choose prints that complement your home decor – maybe minimalist geometrics, vibrant florals, or classic plaids.
- Mix and Match: Don’t feel limited to using just one fabric per coaster. You can use different fabrics for the top and bottom, or even piece together smaller scraps for a patchwork effect on the top. This is an excellent way to use up even the tiniest remnants and create truly unique designs.
- Experiment with Shapes: While squares are the most straightforward, don’t hesitate to try other shapes if you’re feeling adventurous. Round coasters, hexagons, or even more intricate shapes can add a unique flair. Just remember to adjust your cutting and sewing techniques accordingly, especially for curves.
- Add Embellishments: For an extra touch of charm, consider adding simple embellishments before the final topstitching. This could include a small piece of decorative ribbon, a simple embroidered initial, or even a tiny fabric appliqué. Ensure any additions are flat enough not to interfere with the coaster’s function.
- Consider the Batting: Different types of batting offer different qualities. A thicker batting provides more absorbency and structure, while a thinner one offers a more flexible coaster. Experiment to find what works best for your needs.
Each coaster is a tiny canvas waiting for your creative touch. Let your imagination guide you, and enjoy the process of bringing your unique visions to life!
Caring for Your Handmade Fabric Coasters: Keeping Them Fresh
One of the practical advantages of fabric coasters is their ease of care. Unlike cork or stone, fabric coasters are typically simple to clean, ensuring they remain fresh and functional for years to come. For most cotton fabric coasters, a gentle machine wash is perfectly suitable. Use cold water and a mild detergent, then tumble dry on low or, even better, lay flat to air dry to prevent any potential shrinkage or warping. If needed, a quick press with a warm iron will restore their crisp shape and smooth out any wrinkles. With proper care, your handmade fabric coasters will continue to protect your surfaces and add a touch of warmth and personality to your home for a very long time, truly making them an investment in durability and style.
Sewing Tutorial – DIY Fabric Coasters
As mentioned, for a fantastic visual guide, please refer to the tutorial created by the talented crafter at OnlineFabricStore.net. Her step-by-step instructions are incredibly clear and helpful, ensuring your coaster-making experience is smooth and successful. You’ll find it incredibly easy to follow along and create your own darling coasters!
Final Thoughts: Crafting Joy, One Coaster at a Time
Embarking on this DIY fabric coaster project is more than just a sewing task; it’s an invitation to rediscover the joy of creating, the satisfaction of making something with your own hands, and the warmth of giving a truly personal gift. We’ve explored why these coasters are perfect for beginners, how they champion sustainability by utilizing fabric scraps, and their immense potential as thoughtful, customizable gifts for any occasion. They are a testament to the fact that beauty and utility can emerge from simplicity and resourcefulness.
So, whether you’re looking to protect your furniture with style, find an enjoyable new sewing hobby, or create heartfelt gifts for the upcoming holidays, these fabric coasters are an excellent choice. I wholeheartedly encourage you to gather your materials, perhaps watch the linked tutorial, and start stitching. You’ll be amazed at how quickly you can transform a pile of scraps into a collection of charming, durable, and highly functional coasters. Stay tuned for more easy handmade holiday ideas in the coming weeks, and happy sewing!